码迷,mamicode.com
首页 > 数据库 > 详细

SQLite

时间:2014-07-18 15:04:55      阅读:298      评论:0      收藏:0      [点我收藏+]

标签:android   des   blog   http   使用   strong   

 每个应用程序都要使用数据,Android应用程序也不例外,Android使用开源的、与操作系统无关的SQL数据库 --大名鼎鼎的SQLite。SQLite是一款轻量级数据库,它的设计目的是嵌入式,而且它占用的资源非常少,在嵌入式设备中,可能只需要几百KB,这也是 Android 系统采用 SQLite 数据库的原因之一吧。

简介

  • 轻量级
    使用 SQLite 只需要带一个动态库,就可以享受它的全部功能,而且那个动态库的尺寸想当小。
  • 独立性
    SQLite 数据库的核心引擎不需要依赖第三方软件,也不需要所谓的“安装”。
  • 隔离性
    SQLite 数据库中所有的信息(比如表、视图、触发器等)都包含在一个文件夹内,方便管理和维护。
  • 跨平台
    SQLite 目前支持大部分操作系统,不至电脑操作系统更在众多的手机系统也是能够运行,比如:Android。
  • 多语言接口
    SQLite 数据库支持多语言编程接口。
  • 安全性
    SQLite 数据库通过数据库级上的独占性和共享锁来实现独立事务处理。这意味着多个进程可以在同一时间从同一数据库读取数据,但只能有一个可以写入数据。

SQLite使用介绍
  
首先先来看一下本篇例子继承 SQLiteOpenHelper 类实现的 dbHelper 类。

bubuko.com,布布扣
package com.terry;

import android.content.ContentValues;
import android.content.Context;
import android.database.Cursor;
import android.database.sqlite.SQLiteDatabase;
import android.database.sqlite.SQLiteOpenHelper;
import android.database.sqlite.SQLiteDatabase.CursorFactory;

public class dbHelper extends SQLiteOpenHelper {

    private final static String DATABASE_NAME="sec_db";
    private final static int DATABASE_VERSION=1;
    private final static String TABLE_NAME="sec_pwd";
    public final static String FIELD_ID="_id"; 
    public final static String FIELD_TITLE="sec_Title";
    
    
    public dbHelper(Context context)
    {
        super(context, DATABASE_NAME,null, DATABASE_VERSION);
    }


    @Override
    public void onCreate(SQLiteDatabase db) {
        // TODO Auto-generated method stub
        String sql="Create table "+TABLE_NAME+"("+FIELD_ID+" integer primary key autoincrement,"
        +FIELD_TITLE+" text );";
        db.execSQL(sql);
        
         
    }

    @Override
    public void onUpgrade(SQLiteDatabase db, int oldVersion, int newVersion) {
        // TODO Auto-generated method stub
        String sql=" DROP TABLE IF EXISTS "+TABLE_NAME;
        db.execSQL(sql);
        onCreate(db);
    }

    public Cursor select()
    {
        SQLiteDatabase db=this.getReadableDatabase();
        Cursor cursor=db.query(TABLE_NAME, null, null, null, null, null,  " _id desc");
        return cursor;
    }
    
    public long insert(String Title)
    {
        SQLiteDatabase db=this.getWritableDatabase();
        ContentValues cv=new ContentValues(); 
        cv.put(FIELD_TITLE, Title);
        long row=db.insert(TABLE_NAME, null, cv);
        return row;
    }
    
    public void delete(int id)
    {
        SQLiteDatabase db=this.getWritableDatabase();
        String where=FIELD_ID+"=?";
        String[] whereValue={Integer.toString(id)};
        db.delete(TABLE_NAME, where, whereValue);
    }
    
    public void update(int id,String Title)
    {
        SQLiteDatabase db=this.getWritableDatabase();
        String where=FIELD_ID+"=?";
        String[] whereValue={Integer.toString(id)};
        ContentValues cv=new ContentValues(); 
        cv.put(FIELD_TITLE, Title);
        db.update(TABLE_NAME, cv, where, whereValue);
    }


}
bubuko.com,布布扣


  • 创建和打开数据库
    上篇通过构造函数来创建数据库,看一下构造函数的方法
    bubuko.com,布布扣
    android.database.sqlite.SQLiteOpenHelper.SQLiteOpenHelper(Context context, String name, CursorFactory factory, int version)

    public SQLiteOpenHelper (Context context, String name, SQLiteDatabase.CursorFactory factory, int version) 
    Since: API Level 1 
    Create a helper object to create, open, and/or manage a database. The database is not actually created or opened until one of getWritableDatabase() or getReadableDatabase() is called.

    Parameters
    context  to use to open or create the database 
    name  of the database file, or null for an in-memory database 
    factory  to use for creating cursor objects, or null for the default 
    version  number of the database (starting at 1); if the database is older, onUpgrade(SQLiteDatabase, int, int) will be used to upgrade the database  

    Public Methods
    bubuko.com,布布扣


    大体可以理成如下:如果进入此函数,不存在此数据库则创建,如果存在此数据库则打开连接,只要进入此方法就可以用打开的连接获得getWritableDatabase()或getReadableDatabase()这两个方法。
  • 创建表--》Create Table
    一个数据库中可以包含多个表,每一条数据都存在指定的表中,要创建可以通过 execSQL 方法来执行一条 SQL 语句。上面的方法为
    bubuko.com,布布扣
    bubuko.com,布布扣代码
    public void onCreate(SQLiteDatabase db) {
            // TODO Auto-generated method stub
            String sql="Create table "+TABLE_NAME+"("+FIELD_ID+" integer primary key autoincrement,"
            +FIELD_TITLE+" text );";
            db.execSQL(sql);
            
             
        }
    bubuko.com,布布扣

    上面代码创建了表名为“sec_pwd” 的数据表,表内存在一个 integer 类型的主键和一个 text 类型的字段,并执行创建该表。 

  • 添加数据--》Insert
    上面的代码封装了一个使用SQLite 的 insert 方法,向表中添加数据,但是insert 方法要求把数据都打包到 ContentValues 中, ContentValue 其实可就是一个 HashTable,Key值是字段名称,Value 值是字段的值。通过 ContentValues 的put 方法就可以把数据库放到 ContentValue 对象中,然后插入到表中去。代码为:

    bubuko.com,布布扣
    bubuko.com,布布扣
    public long insert(String Title)
        {
            SQLiteDatabase db=this.getWritableDatabase();
            ContentValues cv=new ContentValues(); 
            cv.put(FIELD_TITLE, Title);
            long row=db.insert(TABLE_NAME, null, cv);
            return row;
        }
    bubuko.com,布布扣


  • 删除数据--》Delete 
    依此类推,添加数据用Insert,那么删除数据为Delete

    bubuko.com,布布扣
    bubuko.com,布布扣
    public void delete(int id)
        {
            SQLiteDatabase db=this.getWritableDatabase();
            String where=FIELD_ID+"=?";
            String[] whereValue={Integer.toString(id)};
            db.delete(TABLE_NAME, where, whereValue);
        }
    bubuko.com,布布扣


  • 修改数据--》Update
    bubuko.com,布布扣
    bubuko.com,布布扣
    public void update(int id,String Title)
        {
            SQLiteDatabase db=this.getWritableDatabase();
            String where=FIELD_ID+"=?";
            String[] whereValue={Integer.toString(id)};
            ContentValues cv=new ContentValues(); 
            cv.put(FIELD_TITLE, Title);
            db.update(TABLE_NAME, cv, where, whereValue);
        }
    bubuko.com,布布扣


    可根据自己需要修改字段自行加参数。
  • 查询数据--》Query

    public Cursor select()
        {
            SQLiteDatabase db=this.getReadableDatabase();
            Cursor cursor=db.query(TABLE_NAME, null, null, null, null, null,  " _id desc");
            return cursor;
        }


    在 Android 中查询数据是通过 Cursor 类来实现的,当我们使用SQLiteDatabase.query()方法时,会得到一个Cursor对象,Cursor指向的就是每一条数据。它提供了很多有关查询的方法,具体截图如下:bubuko.com,布布扣 bubuko.com,布布扣

  现在dbHelper己经封装完毕,接下来正式进入到我们实际例子中要操作的功能吧,项目运行效果图:bubuko.com,布布扣

  这里用到了Menu做功能按钮,实例代码如下:

bubuko.com,布布扣
bubuko.com,布布扣
package com.terry;

import android.app.Activity;
import android.database.Cursor;
import android.database.sqlite.SQLiteCursor;
import android.os.Bundle; 
import android.view.Menu;  
import android.view.MenuItem;
import android.view.View;
import android.widget.AdapterView;
import android.widget.EditText;
import android.widget.ListAdapter;
import android.widget.ListView;
import android.widget.SimpleCursorAdapter;
import android.widget.AdapterView.OnItemClickListener;
import android.widget.AdapterView.OnItemSelectedListener;


public class testDbActivity extends Activity {
    
    private dbHelper db;
    private Cursor myCursor;
    private ListView myListView;
    private EditText myEditText;
    private int _id;
    protected final static int MENU_ADD=Menu.FIRST;
    protected final static int MENU_EDIT=Menu.FIRST+1;
    protected final static int MENU_DELETE=Menu.FIRST+2;
    
       @Override
    public boolean onCreateOptionsMenu(Menu menu) {
        // TODO Auto-generated method stub
           super.onCreateOptionsMenu(menu);
        menu.add(Menu.NONE, MENU_ADD, 0, R.string.ADD);
        menu.add(Menu.NONE, MENU_EDIT, 0,R.string.EDIT);
        menu.add(Menu.NONE, MENU_DELETE, 0,R.string.DELETE);
         return true;
    }
    
       @Override
    public boolean onOptionsItemSelected(MenuItem item) {
        // TODO Auto-generated method stub
        
        super.onOptionsItemSelected(item); 
        switch (item.getItemId()) {
        case MENU_ADD:
            operation("add");
            break;
        case MENU_EDIT:
            operation("edit");
            break;
        case MENU_DELETE:
            operation("delete");
            break;
        default:
            break;
        }
        return true;
    }


    /** Called when the activity is first created. */
    @Override
    public void onCreate(Bundle savedInstanceState) {
        super.onCreate(savedInstanceState);
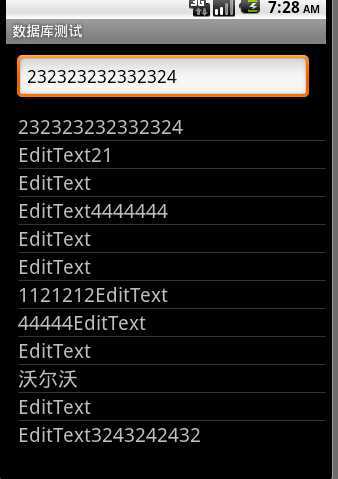
        setContentView(R.layout.main);
        myEditText=(EditText)findViewById(R.id.EditText1);
        myListView=(ListView)findViewById(R.id.ListView1);
        db=new dbHelper(testDbActivity.this);
        myCursor=db.select();
        SimpleCursorAdapter adpater=new SimpleCursorAdapter(this
                , R.layout.test, myCursor,
                new String[]{dbHelper.FIELD_TITLE},
                new int[]{R.id.topTextView});
        myListView.setAdapter(adpater);
        
        myListView.setOnItemClickListener(new OnItemClickListener() {

            @Override
            public void onItemClick(AdapterView<?> arg0, View arg1, int arg2,
                    long arg3) {
                // TODO Auto-generated method stub
                myCursor.moveToPosition(arg2);
                _id=myCursor.getInt(0);
                myEditText.setText(myCursor.getString(1));
            }
        });
        
        
        myListView.setOnItemSelectedListener(new OnItemSelectedListener() {

            @Override
            public void onItemSelected(AdapterView<?> arg0, View arg1,
                    int arg2, long arg3) {
                // TODO Auto-generated method stub
                SQLiteCursor sc=(SQLiteCursor)arg0.getSelectedItem();
                _id=sc.getInt(0);
                myEditText.setText(sc.getString(1));
            }

            @Override
            public void onNothingSelected(AdapterView<?> arg0) {
                // TODO Auto-generated method stub
                
            }
        });
    }
    private void operation(String cmd)
    {
        if(myEditText.getText().toString().equals(""))
        return;
        if(cmd=="add")
            db.insert( myEditText.getText().toString());
        if(cmd=="edit")
            db.update(_id,  myEditText.getText().toString());
        if(cmd=="delete")
            db.delete(_id);
        myCursor.requery();
        myListView.invalidateViews();
        myEditText.setText("");
        _id=0;
        
    }


}
bubuko.com,布布扣
原文  http://www.cnblogs.com/TerryBlog/archive/2010/06/12/1757166.html#2918450

SQLite,布布扣,bubuko.com

SQLite

标签:android   des   blog   http   使用   strong   

原文地址:http://www.cnblogs.com/fenfennianhua/p/3853141.html

(0)
(0)
   
举报
评论 一句话评论(0
登录后才能评论!
© 2014 mamicode.com 版权所有  联系我们:gaon5@hotmail.com
迷上了代码!