标签:
1.选择器和筛选器
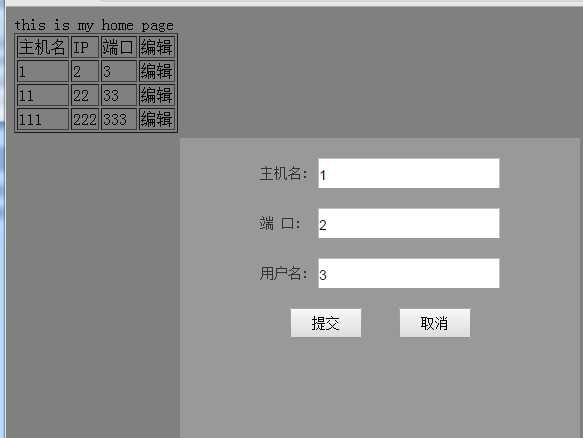
案例1

<!DOCTYPE html>
<html lang="en">
<head>
    <meta charset="UTF-8">
    <title>Title</title>
    <style>
        //定义css样式,自定义
        .hide{
            display: none;
        }
        .coating{
            z-index: 1;
            opacity: 0.5;
            position: fixed;
            background-color: black;
            top: 0;
            right: 0;
            bottom: 0;
            left: 0;
        }
        .modal{
            z-index: 2;
            position: fixed;
            left: 50%;
            top: 50%;
            background-color: #999999;
            width: 400px;
            height: 300px;
            margin-left: -200px;
            margin-top: -150px;
        }
        .filed{
            height: 30px;
            line-height: 30px;
            font-size: 14px;
            display: block;
            margin: 20px 80px;
            overflow: hidden;
        }
        .filed .lb{
            color: #333;
            height: 30px;
            width: 50px;
            float: left;
            margin: 0;
            padding: 0;
            line-height: 30px;
            text-align: left;
        }
        .filed .inp_text{
            height: 30px;
            width: 180px;
            font-size: 14px;
            float: right;
            border: 1px solid #bfbfbf;
            line-height: 30px;
        }
        .filed .buttons{
            font-size: 14px;
            height: 30px;
            line-height: 30px;
            margin-left: 30px;
            padding: 0 20px;
        }

    </style>
</head>
<body>
    //定义最底层
    <div>
        this is my home page
        <table border="1">
            <thead>
                <tr>
                    <td>主机名</td>
                    <td>IP</td>
                    <td>端口</td>
                    <td onclick="get_prev(this);">编辑</td>
                </tr>
            </thead>
            <tbody>
                <tr>
                    <td>1</td>
                    <td>2</td>
                    <td>3</td>
                    <td onclick="get_prev(this);">编辑</td>
                </tr>
                <tr>
                    <td>11</td>
                    <td>22</td>
                    <td>33</td>
                    <td onclick="get_prev(this);">编辑</td>
                </tr>
                <tr>
                    <td>111</td>
                    <td>222</td>
                    <td>333</td>
                    <td onclick="get_prev(this);">编辑</td>
                </tr>
            </tbody>
        </table>
    </div>
    //遮盖层
    <div class="coating hide"></div>
    //模态对话框
    <div class="modal hide">
        <form>
            <div class="filed">
                <label for="hostname" class="lb">主机名:</label>
                <input class="inp_text" id="hostname" name="hostname" type="text" placeholder="请输入用户名" autocomplete="off">
            </div>
            <div class="filed">
                <label for="port" class="lb">端 口:</label>
                <input class="inp_text" id="port" name="port" type="text" placeholder="端口" autocomplete="off">
            </div>
            <div class="filed">
                <label for="username" class="lb">用户名:</label>
                <input class="inp_text" id="username" name="username" type="text" placeholder="请输入用户名" autocomplete="off">
            </div>
            <div class="filed">
                <input class="buttons" type="submit" value="提交"/>
                <input class="buttons" type="button" onclick="Cancel();" value="取消"/>
            </div>
        </form>
    </div>
    <script type="text/javascript" src="jquery-2.2.3.js"></script>
    <script>
        //td编辑绑定事件,点击后 弹出对话框,将前面表单中的数据放入模态对话框input栏
        function get_prev(arg){
            /*想要取出各td的值:
            1.找到编辑标签所在层
            2.查找除他外同层标签
            3.遍历(each和map都行)取值
            */
            var li = $(arg).siblings().map(function(){
                return $(this).text();
            });
            $("[name=hostname]").val(li[0]);
            $("[name=port]").val(li[1]);
            $("[name=username]").val(li[2]);
            //显示遮盖层,显示模态对话框
            $(".coating").removeClass("hide");
            $(".modal").removeClass("hide");
        }
        //用户点击取消后,将遮盖层和模态对话框隐藏
        function Cancel(){
            $(".coating").addClass("hide");
            $(".modal").addClass("hide");
        }
    </script>
</body>
</html>
jQuery代码:
    <script type="text/javascript" src="jquery-2.2.3.js"></script>
    <script>
        //td编辑标签绑定事件执行get_prev函数
        function get_prev(arg){
           /* 当点击编辑后,弹出对话框,对话框中包含各个td中的值,无法选中出对话框外的其他内容
           1.获取各td的值,首先要获取编辑td的标签,然后获取除他外同级的标签(sibliings获取除自身外的同辈元素)
           取到的是一个数组,遍历数组text取值,将值赋给对话框通过val(val获取或设置匹配元素的当前值。)
           2.移除遮盖层的隐藏class,默认添加hideclass removeClass去掉即可
           3.显示模态对话框
            var li = $(arg).siblings().map(function(){
                return $(this).text();
            });
            $("[name=hostname]").val(li[0]);
            $("[name=port]").val(li[1]);
            $("[name=username]").val(li[2]);
            $(".coating").removeClass("hide");
            $(".modal").removeClass("hide");
        }
        //点击取消,将模态对话框和遮盖层隐藏起来
        function Cancel(){
            $(".coating").addClass("hide");
            $(".modal").addClass("hide");
        }
    </script>
效果如下:
案例2.
<!DOCTYPE html>
<html lang="en">
<head>
    <meta charset="UTF-8">
    <title>Title</title>
    <style>
        .hide{
            display: none;
        }
        .coating{
            z-index: 1;
            opacity: 0.5;
            position: fixed;
            background-color: black;
            top: 0;
            right: 0;
            bottom: 0;
            left: 0;
        }
        .load{
            z-index: 2;
            position: fixed;
            left: 50%;
            top: 50%;
            margin-left: -16px;
            margin-top: -16px;
        }
    </style>
</head>
<body>
    <div>
        <input onclick="loading();" type="button" value="加载对话框"/>
    </div>
    <div class="coating hide"></div>
    <div class="load">
         <img src="loading_32.gif"/>
    </div>
    <script type="text/javascript" src="jquery-2.2.3.js"></script>
    <script>
        //加载框同模态对话框相似,input标签加载对话框绑定事件 触发后去掉遮盖层和加载框层即可
        function loading(){
            $(".coating").removeClass("hide"); //removeClass去除匹配标签的class
            $(".load").removeClass("hide");
        }
    </script>
</body>
</html>
jQuery代码:
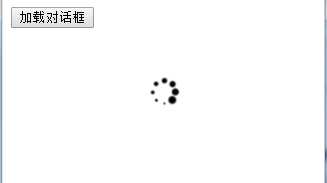
//同上,显示遮盖层和加载框即可
function loading(){
    $(".coating").removeClass("hide");
    $(".load").removeClass("hide");
}
效果如下:
案例3.
<!DOCTYPE html>
<html lang="en">
<head>
    <meta charset="UTF-8">
    <title>Title</title>
    <style>
        body{
            margin: 0 auto;
        }
        .menu{
            float: left;width: 30%;height: 500px;
        }
        .content{
            float: left;width: 70%;height: 500px;
        }
        .title{
            background-color: black;
            color: white;
            height: 40px;
            line-height: 40px;
        }
        .hide{
            display: none;
        }
        .c{
            margin-left: 10px;
        }
    </style>

</head>
<body>
    <div class="menu">
        <div>
            <div class="title" onclick="Func(this);">菜单一</div>
                <div class="c">
                    <div>1.1</div>
                    <div>1.2</div>
                    <div>1.3</div>
                </div>
        </div>
        <div>
            <div class="title" onclick="Func(this);">菜单二</div>
                <div class="c hide">
                    <div>2.1</div>
                    <div>2.2</div>
                    <div>2.3</div>
                </div>
        </div>
        <div>
            <div class="title" onclick="Func(this);">菜单三</div>
                <div class="c hide">
                    <div>3.1</div>
                    <div>3.2</div>
                    <div>3.3</div>
                </div>
        </div>
    </div>
    <div class="content"></div>

    <script type="text/javascript" src="jquery-2.2.3.js"></script>
    <script>
        function Func(ths){
            $(ths).next().removeClass("hide");
            $(ths).parent().siblings().find(".c").addClass("hide");
        }
    </script>
</body>
</html>
jQuery代码:
function Func(ths){
//$(ths) 表示当前点击的标签
//var t = $(ths).text();
//console.log(t);
//1.点击当前标签
//2.将下一级标签显示
//3.将同级标签的下一级标签隐藏
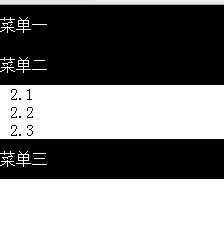
$(ths).next().removeClass("hide"); //$(ths)获取当前标签,查找下一个同辈元素(菜单下的子菜单),显示子菜单(removeclass(“hide”))
$(ths).parent().siblings().find(".c").addClass("hide"); //将当前标签的父级标签取出(即该例的菜单一),查找同级标签(菜单二,菜单三),查找同级标签下所有包含c的class(同级菜单下的子菜单),隐藏子菜单
}
效果图如下:
2.属性和css
案例1.
<!DOCTYPE html>
<html lang="en">
<head>
    <meta charset="UTF-8">
    <title></title>
    <style>
        .back{
            position: fixed;
            bottom: 0px;
            right: 0px;
        }
        .hide{
            display: none;
        }
    </style>
</head>
<body>

<div style="height: 2000px;"></div>

<div onclick="GoTop()" class="back hide">返回顶部</div>

<script src="jquery-1.8.2.js"></script>
<script type="text/javascript">

    function GoTop(){
        //返回顶部
        $(window).scrollTop(0);
    }

    $(function(){

        $(window).scroll(function(){
            //当滚动滑轮时,执行函数体

            //获取当前滑轮滚动的高度
            var top = $(window).scrollTop();

            if(top>100){
                //展示“返回顶部”
                $(‘.back‘).removeClass(‘hide‘);
            }else{
                //隐藏“返回顶部”
                $(‘.back‘).addClass(‘hide‘);
            }
        });
    });

</script>

</body>
</html>
jQuery代码:
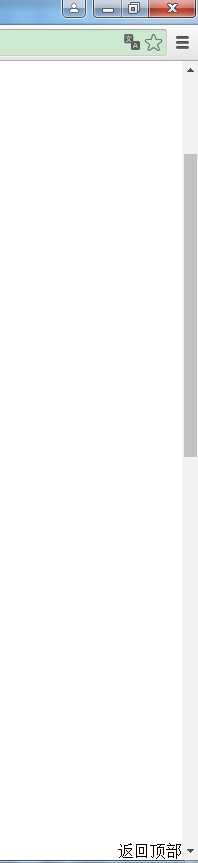
function GoTop(){
    //返回顶部( scrollTop 获取匹配元素(window窗体)相对滚动条顶部的偏移)
    $(window).scrollTop(0);
}
    //滚动条事件需在页面加载的时候就执行,定义自执行函数(function(){}())
    $(function(){
        //当用户滚动指定的元素时,会发生 scroll 事件。
        $(window).scroll(function(){
        //当滚动滑轮时,执行函数体
     //获取当前滑轮滚动的高度
        var top = $(window).scrollTop();
        //滚动高度超过100时
        if(top>100){
           //展示"返回顶部"
           $(".back").removeClass("hide");
        }else{
           //隐藏"返回顶部"
           $(".back").addClass("hide");
        }
     });

});
</script>
效果图如下:
案例2
<!DOCTYPE html>
<html>
    <head>
        <meta charset=‘utf-8‘ />
        <title></title>
        <script type="text/javascript" src=‘jquery-1.8.2.js‘></script>
        <script type="text/javascript">
            $(function(){
                $(‘#selectAll‘).click(function(){
                    $(‘#checklist :checkbox‘).prop(‘checked‘,true);
                })
                $(‘#unselectAll‘).click(function(){
                    $(‘#checklist :checkbox‘).prop(‘checked‘,false);
                })
                $(‘#reverseAll‘).click(function(){
                    $(‘#checklist :checkbox‘).each(function(){
                        $(this).prop(‘checked‘,!$(this).prop(‘checked‘))
                    })
                })

            })
        </script>
    </head>
    <body>
        <div id=‘checklist‘>
            <input type=‘checkbox‘ value=‘1‘/>篮球
            <input type=‘checkbox‘ value=‘2‘/>足球
            <input type=‘checkbox‘ value=‘3‘/>羽毛球
        </div>
        <input type=‘button‘ value=‘全选‘ id=‘selectAll‘ />
        <input type=‘button‘ value=‘不选‘ id=‘unselectAll‘ />
        <input type=‘button‘ value=‘反选‘ id=‘reverseAll‘ />
    </body>
</html>
jQuery代码:
    $(function(){
        //全选按钮绑定事件
        $(‘#selectAll‘).click(function(){
            //将id=checklist下的checkbox复选框设置checked属性为true
            $(‘#checklist :checkbox‘).prop(‘checked‘,true);
        })
        //不选按钮绑定事件
        $(‘#unselectAll‘).click(function(){
            //将id=checklist下的checkbox复选框设置checked属性为false
            $(‘#checklist :checkbox‘).prop(‘checked‘,false);
        })
        $(‘#reverseAll‘).click(function(){
            ////遍历id=checklist下的checkbox复选框
            $(‘#checklist :checkbox‘).each(function(){
                 //将获取到的checked属性设置为相反的值
                 $(this).prop(‘checked‘,!$(this).prop(‘checked‘))
            });
        });
    });
案例3
<!DOCTYPE html>
<html lang="en">
<head>
    <meta charset="UTF-8">
    <title></title>
    <style>
        .show{
            position: fixed;
            top:10px;
            right:10px;
        }
    </style>
</head>
<body>
    <div id="cp" class="show">Go</div>
    <div class="c1" style="height: 500px">
        <h1>第一章</h1>
    </div>
    <div class="c1" style="height: 1000px">
        <h1>第二章</h1>
    </div>
    <div class="c1" style="height: 30px">
        <h1>第三章</h1>
    </div>
    <script src="jquery-2.2.3.js" type="text/javascript"></script>
    <script>
        $(function() {
            $(window).scroll(function(){
                //捕获滚动条当前离顶部高度
                var scroll_top = $(window).scrollTop();
                //存放各个章节scroll高度
                var list = [];
                $.each($(".c1"), function(i){
                    //offset 获取当前标签离顶部的top和left
                    var c_top = $($(".c1")[i]).offset().top;
                    list.push(c_top);
                });
                $.each(list, function(i){
                    //滚动条高度+窗体高度 = 整个页面高度
                    if(scroll_top + $(window).height() == $(document).height()){
                        $("#cp").text($(".c1").last().text());
                        return
                    }
                    //滚动条大于标签离顶部的高度
                    if(scroll_top > list[i]){
                        $("#cp").text($($(".c1")[i]).text());
                        return
                    }
                });
            });
        });
    </script>
</body>
</html>
jQuery代码:
$(function() {
    $(window).scroll(function(){
        //捕获滚动条当前离顶部高度
        var scroll_top = $(window).scrollTop();
        //存放各个章节scroll高度
        var list = [];
        //遍历所有的c1标签,此例中的每个章节所占高度
        $.each($(".c1"), function(i){
            //offset 获取当前标签离顶部的top和left
            var c_top = $($(".c1")[i]).offset().top;  //($(".c1")[i]遍历中的每个标签
            list.push(c_top); //放入数组
        });
    //遍历数组同当前滚动条高度作比较
    $.each(list, function(i){
        //滚动条高度+窗体高度 = 整个页面高度
        if(scroll_top + $(window).height() == $(document).height()){
            $("#cp").text($(".c1").last().text());
            return
        }
        //滚动条大于标签离顶部的高度
        if(scroll_top > list[i]){
            $("#cp").text($($(".c1")[i]).text()); //将显示章节切换的内容同实际循环到的标签的文本内容进行更换
            return
        }
        });
    });
});
更多详细见:http://www.cnblogs.com/wupeiqi/articles/5369773.html
标签:
原文地址:http://www.cnblogs.com/koka24/p/5405964.html
