标签:
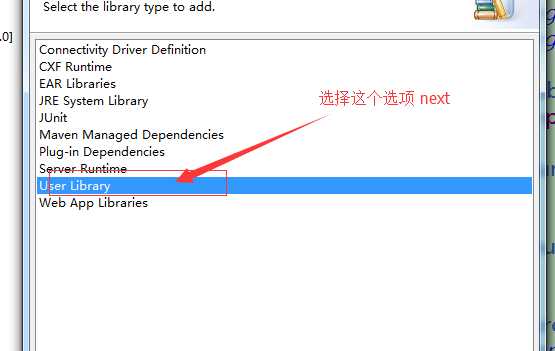
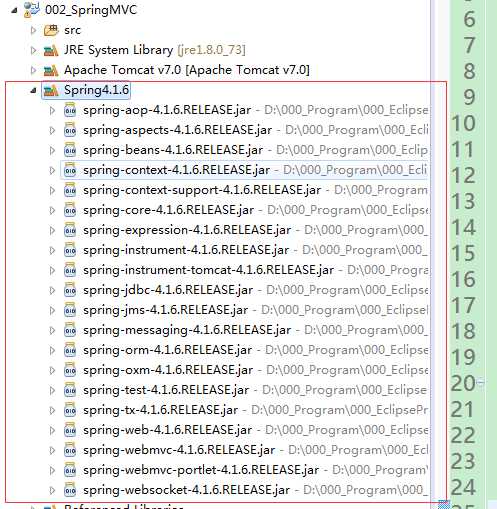
1.首先导入SpringMVC的包(为方便起见,将下载的所有Spring4.1.6的包全部导入)
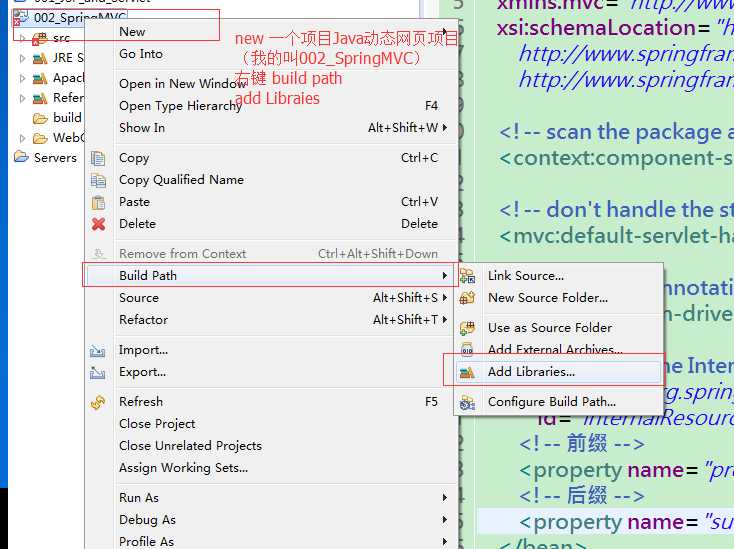

另外,SpringMVC要依赖于commons-logging-1.2.jar这个包,所以将这个包也导入(方法同上)
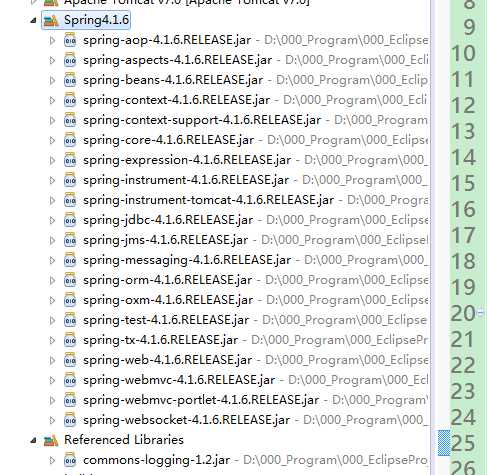
这样开发一个SpringMVC需要用到的包就导入完毕了。
2.添加wen.xml文件,用来配置前段控制器DispatcherServlet
<?xml version="1.0" encoding="UTF-8"?>
<web-app xmlns:xsi="http://www.w3.org/2001/XMLSchema-instance"
xmlns="http://java.sun.com/xml/ns/javaee"
xsi:schemaLocation="http://java.sun.com/xml/ns/javaee http://java.sun.com/xml/ns/javaee/web-app_3_0.xsd"
id="WebApp_ID" version="3.0">
<display-name>002_SpringMVC</display-name>
<welcome-file-list>
<welcome-file>index.jsp</welcome-file>
</welcome-file-list>
<!--configure the setting of springmvcDispatcherServlet and configure the
mapping -->
<servlet>
<servlet-name>springmvc</servlet-name>
<servlet-class>org.springframework.web.servlet.DispatcherServlet</servlet-class>
<init-param>
<param-name>contextConfigLocation</param-name>
<param-value>classpath:springmvc-servlet.xml</param-value>
</init-param>
<load-on-startup>1</load-on-startup>
</servlet>
<servlet-mapping>
<servlet-name>springmvc</servlet-name>
<url-pattern>/</url-pattern>
</servlet-mapping>
</web-app>
3.在src下添加springmvc-servlet.xml用来配置用到的bean
<?xml version="1.0" encoding="UTF-8"?>
<beans xmlns="http://www.springframework.org/schema/beans"
xmlns:xsi="http://www.w3.org/2001/XMLSchema-instance"
xmlns:context="http://www.springframework.org/schema/context"
xmlns:mvc="http://www.springframework.org/schema/mvc"
xsi:schemaLocation="http://www.springframework.org/schema/beans http://www.springframework.org/schema/beans/spring-beans.xsd
http://www.springframework.org/schema/context http://www.springframework.org/schema/context/spring-context-4.1.xsd
http://www.springframework.org/schema/mvc http://www.springframework.org/schema/mvc/spring-mvc-4.1.xsd">
<!-- scan the package and the sub package -->
<context:component-scan base-package="test.SpringMVC"/>
<!-- don‘t handle the static resource -->
<mvc:default-servlet-handler />
<!-- if you use annotation you must configure following setting -->
<mvc:annotation-driven />
<!-- configure the InternalResourceViewResolver -->
<bean class="org.springframework.web.servlet.view.InternalResourceViewResolver"
id="internalResourceViewResolver">
<!-- 前缀 -->
<property name="prefix" value="/WEB-INF/jsp/" />
<!-- 后缀 -->
<property name="suffix" value=".jsp" />
</bean>
</beans>
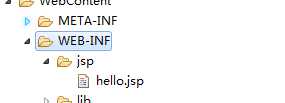
4.在/WebContent/WEB-INF目录下建立一个jsp文件夹,创建一个hello.jsp,在body中添加“Hello SpringMVC”.如下图所示:
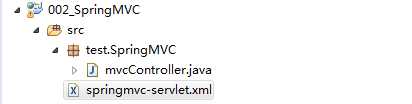
5.建立包及Controller,如下所示
6.编写Controller代码
@Controller
@RequestMapping("/mvc")
public class mvcController {
@RequestMapping("/hello")
public String hello(){
return "hello";
}
}
7.启动服务器,键入 http://localhost:8080/项目名/mvc/hello
这个时候,问题来了,你会得到一个classnotfound的异常,提示说找不到DispatcherServlet这个类。为什么呢?
我的jar包都导入了啊,怎么还找不到呢?那是因为你的相关的包没有复制到/WebContent/WEB-INF/lib这个文件下面。
这个时候就需要补充一点了:eclipse中buildPath导入的jar包是“编译”的时候用的,也就是说我们写代码import的时候要用到的包,如果没有,就会出现红叉,说识别不了这个类;
导入到lib下面是程序运行时候需要的包,即使用build导入了jar包,也只是说你在写程序“编译”程序的时候加入了这些包,但是这个build并没有把包放到容器(如tomcat)中去,这样你服务器端是没有这些包的,当然会出现classnotfound的异常。所以,一定要特别注意这个问题。
特别说明:本文前1~7几乎全文引用此篇文章http://www.cnblogs.com/sunniest/p/4555801.html.笔者也是看着这篇文章跑的第一个SpringMVC,讲的很详细。也非常感谢原作者的分享。
标签:
原文地址:http://www.cnblogs.com/apple-ldj/p/5695917.html