标签:
?
安装目录 D:\PythonWebSW\(免安装) d:\Program Files\ (安装版)
工作目录 E:/PythonWeb/code
项目名称 voith_sales
http://www.python.org/getit/releases/2.7.3/
http://www.python.org/download/
Windows x86 MSI Installer (2.7.3) (sig)
安装
安装路径: D:\Python27 (example)
Add path for python
把D:\Python27加入环境变量Path,这样Python命令可以在任意路径执行
D:\Python32\;

Open cmd, type python, if you can find above information, it means the python works.
?
?
文件路径; D:\Django-1.5.5 (example)
安装命令
cd D:\Django-1.5.5
python setup.py install
Django会在python Lib目录下面创建新的目录: d:\Python27\Lib\site-packages\django
….
byte-compiling d:\Python27\Lib\site-packages\django\views\i18n.py to i18n.pyc
byte-compiling d:\Python27\Lib\site-packages\django\views\static.py to static.py
……
byte-compiling d:\Python27\Lib\site-packages\django\views\__init__.py to __init_
_.pyc
byte-compiling d:\Python27\Lib\site-packages\django\__init__.py to __init__.pyc
running install_scripts
creating d:\Python27\Scripts
copying build\scripts-2.7\django-admin.py -> d:\Python27\Scripts
running install_egg_info
Writing d:\Python27\Lib\site-packages\Django-1.5.5-py2.7.egg-info
把D:\Python27\Lib\site-packages\加入环境变量
把d:\Python27\Script加入环境变量Path,这样django-admin.py可以在任意目录运行
?
?
Note: MySQL Installer is 32 bit, but will install both 32 bit and 64 bit binaries.
http://dev.mysql.com/downloads/mysql/
?
1) 解压到本地目录D:\PythonWebSW\mysql (example)
2) 讲D:\PythonWebSW\mysql\bin添加到环境变量Path
3) 配置my.ini
4) 安装 mysqld –install
5) 删除 mysqld –remove
6) 启动 net start mysql
7) Start SQL
?
常见问题1: Install/Remove of the Service Denied! -> Cmd should be run with "Run As Administrator"
?
你还需要从 http://www.djangoproject.com/r/python-mysql/ 下载安装 MySQLdb 。
安装源文件为:MySQL-python-1.2.3.win-amd64-py2.7.exe
安装的文件包括:
D:\PythonWebSW\Python27\Lib\site-packages\MySQL_python-1.2.3-py2.7.egg-info
D:\PythonWebSW\Python27\Lib\site-packages\MySQLdb
?
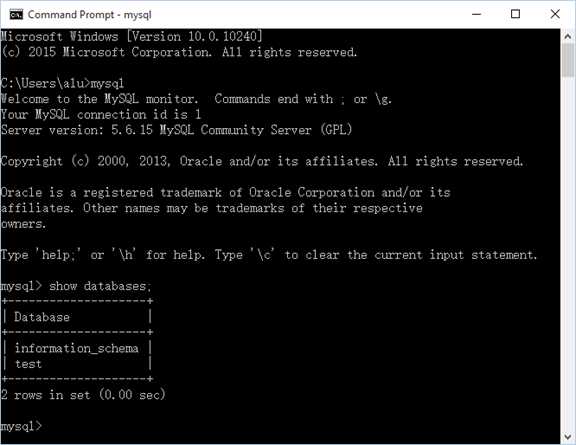
C:\WINDOWS\system32>mysql -uroot -p123
mysql> create database sales;
Import exist database
cd d:\PythonWebSW\mysql\bin
mysql -uroot -p123 sales < c:\aa.txt
Export database
mysqldump -uroot -p123 sales > D:/eclipse-workspace/voith_sales/Rail/database_sales_backup.txt
?
?
Create database, refer to setting.py file for the configuration
?
?
DATABASES = {
‘default‘: {
‘ENGINE‘: ‘django.db.backends.mysql‘, # Add ‘postgresql_psycopg2‘, ‘mysql‘, ‘sqlite3‘ or ‘oracle‘.
‘NAME‘: ‘sales‘, # Or path to database file if using sqlite3.
# The following settings are not used with sqlite3:
‘USER‘: ‘root‘,
‘PASSWORD‘: ‘123‘,
‘HOST‘: ‘‘, # Empty for localhost through domain sockets or ‘127.0.0.1‘ for localhost through TCP.
‘PORT‘: ‘‘, # Set to empty string for default.
}
}
?
Create table
Enter project directory (E:/PythonWeb/code/voith_sales/Rail/),
python manage.py syncdb
?
D:\eclipse-workspace\voith_sales>python manage.py syncdb
Creating tables ...
Creating table area
Creating table country
Creating table region
…..
Creating table django_flatpage
Creating table django_admin_log
?
You just installed Django‘s auth system, which means you don‘t have any superusers defined.
Would you like to create one now? (yes/no): y
Please enter either "yes" or "no": yes
Username (leave blank to use ‘alu‘): alu
Email address:
Password:123
Password (again):123
Superuser created successfully.
Installing custom SQL ...
Installing indexes ...
Installed 0 object(s) from 0 fixture(s)
mysql-workbench-community-6.0.8-win32
?
命令在DOS的[url=file://\\mysql\\bin]\\mysql\\bin[/url]目录下执行
?
?
导出文件默认是存在mysql\bin目录下
mysqldump -u 用户名 -p 数据库名 > 导出的文件名
e.g. mysqldump -u user_name -p123456 database_name > outfile_name.sql
?
[root@localhost bin]# pwd
/usr/local/mysql/bin
[root@localhost bin]# mysqldump -uroot -p123 lab_mgr > lab_mgr_backup_2015-01-03.txt
?
mysqldump备份:
mysqldump -u用户名 -p密码 -h主机 数据库 a -w "sql条件" --lock-all-tables > 路径
案例:
mysqldump -uroot -p1234 -hlocalhost db1 a -w "id in (select id from b)" --lock-all-tables > c:\aa.txt
?
mysql还原:
mysql -u用户名 -p密码 -h主机 数据库 < 路径
案例:
mysql -uroot -p1234 db1 < c:\aa.txt
?
connect
mysql –uroot -p
如果刚安装好MYSQL,超级用户root是没有密码的,故直接回车即可进入到MYSQL中了,MYSQL的提示符是: mysql>
?
?
Apache2.4 (Win64)
1. 安装文件httpd-2.2.19-win64.rar, 解压到"D:/PythonWebSW/httpd-2.2.19-win64
2. Configuration
conf/httpd.conf
ServerRoot "/httpd-2.2-x64"
DocumentRoot "/httpd-2.2-x64/htdocs"
<Directory "/httpd-2.2-x64/cgi-bin">
ScriptAlias /cgi-bin/ "/httpd-2.2-x64/cgi-bin/"
替换为
ServerRoot "D:/PythonWebSW/httpd-2.2.19-win64"
DocumentRoot "D:/PythonWebSW/httpd-2.2.19-win64/htdocs"
<Directory "D:/PythonWebSW/httpd-2.2.19-win64/cgi-bin">
ScriptAlias /cgi-bin/ "D:/PythonWebSW/httpd-2.2.19-win64/cgi-bin/"
?
conf/extra/httpd-vhosts.conf
<VirtualHost *:80>
ServerAdmin webmaster@dummy-host.example.com
DocumentRoot "/httpd-2.2-x64/docs/dummy-host.example.com"
ServerName dummy-host.example.com
ServerAlias www.dummy-host.example.com
ErrorLog "logs/dummy-host.example.com-error.log"
CustomLog "logs/dummy-host.example.com-access.log" common
</VirtualHost>
?
<VirtualHost *:80>
ServerAdmin webmaster@dummy-host2.example.com
DocumentRoot "/httpd-2.2-x64/docs/dummy-host2.example.com"
ServerName dummy-host2.example.com
ErrorLog "logs/dummy-host2.example.com-error.log"
CustomLog "logs/dummy-host2.example.com-access.log" common
</VirtualHost>
替换为
<VirtualHost *:80>
ServerAdmin webmaster@dummy-host.example.com
DocumentRoot "D:/PythonWebSW/httpd-2.2.19-win64/docs/dummy-host.example.com"
ServerName dummy-host.example.com
ServerAlias www.dummy-host.example.com
ErrorLog "logs/dummy-host.example.com-error.log"
CustomLog "logs/dummy-host.example.com-access.log" common
</VirtualHost>
?
<VirtualHost *:80>
ServerAdmin webmaster@dummy-host2.example.com
DocumentRoot "D:/PythonWebSW/httpd-2.2.19-win64/docs/dummy-host2.example.com"
ServerName dummy-host2.example.com
ErrorLog "logs/dummy-host2.example.com-error.log"
CustomLog "logs/dummy-host2.example.com-access.log" common
</VirtualHost>
?
3.安装
D:\PythonWebSW\httpd-2.2.19-win64\bin>httpd -k install
?
D:\httpd-2.2.19-win64\bin>httpd -k install
Installing the Apache2.2 service
The Apache2.2 service is successfully installed.
Testing httpd.conf....
Errors reported here must be corrected before the service can be started.
httpd: Could not reliably determine the server‘s fully qualified domain name, using 192.168.1.101 for ServerName
(OS 10013)An attempt was made to access a socket in a way forbidden by its access permissions. : make_sock: could not bind to address 0.0.0.0:80
no listening sockets available, shutting down
Unable to open logs
原因及解决:有可能是系统80端口默认被占用了
修改conf/httpd.conf
Listen 80 è Listen 8081
?
4.启动
D:\PythonWebSW\httpd-2.2.19-win64\bin>start httpd
5.卸载
D:\PythonWebSW\httpd-2.2.19-win64\bin>httpd -k uninstall
Issue1 (OS 5)Access is denied. : Apache2.2: OpenService failed
如果出现这个错误,用管理员权限打开cmd
?
Issue2 (OS 1072)The specified service has been marked for deletion. : Apache2.2: Failed to delete the service.
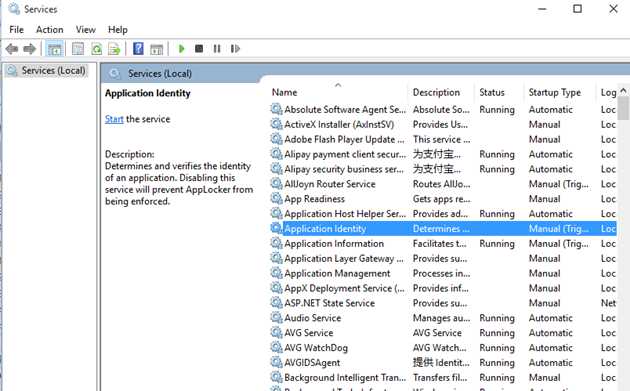
将service里面的停掉
?
Issue3 ImproperlyConfigured: Error loading MySQLdb module: No module named MySQLdb
Window 安装文件:
MySQL-python-1.2.3.win-amd64-py2.7.exe
Linux:
MySQL-python==1.2.3
生成的文件如下
MySQL_python-1.2.3-py2.7.egg-info (文件夹)
MySQLdb (文件夹)
_mysql.pyd
_mysql_exceptions.py
_mysql_exceptions.pyc
_mysql_exceptions.pyo
案例:
在系统里安装,但是virtualenv的package没安装的话,运行会出错,可以从系统安装文件里将这些文件拷过去,或者在virtualenv里安装
?
Issue4机器上可能会配置多个apache,有的时候安装新的apache时需要先把之前install的uninstall
Issue5: Django: AppRegistryNotReady()
In django.wsgi, 添加setup()
os.environ[‘DJANGO_SETTINGS_MODULE‘] = "ecommerce2.settings"
import django
django.setup()
import django.core.handlers.wsgi
application = django.core.handlers.wsgi.WSGIHandler()
?
参考 http://stackoverflow.com/questions/24793351/django-appregistrynotready
setup()
This function is called automatically:
It must be called explicitly in other cases, for instance in plain Python scripts.
?
不知道为什么,并不是所有的项目都需要这样
?
Test : http://localhost:8081
It works!
?
?
My installation location : d:\Program Files
http://httpd.apache.org/download.cgi
WIN64: http://pan.baidu.com/share/link?shareid=364454&uk=2902956560
?
Download mod_wsgi.so
Note: the version need match the python and apache version
http://code.google.com/p/modwsgi/downloads/detail?name=mod_wsgi-win32-ap22py27-3.3.so
http://www.lfd.uci.edu/~gohlke/pythonlibs/#mod_wsgi
file: mod_wsgi-3.4.ap22.win-amd64-py2.7.zip
?
mod_wsgi-3.4-Win64(apache2.4).zip: http://pan.baidu.com/share/link?shareid=364450&uk=2902956560
?
Put mod_wsgi.so in d:\Program Files\Apache Software Foundation\Apache2.2\modules\
httpd.conf
d:\Program Files\Apache Software Foundation\Apache2.2\conf
add:
LoadModule wsgi_module modules/mod_wsgi.so
?
Note : let apache load wsgi module, you can also use your self-defined name
搜索http.conf文件,把"Deny from all" 及 "Require all denied" 等语句全部注释掉:
?
<Directory />
Options FollowSymLinks
AllowOverride None
Require all denied
Order deny,allow
Deny from all
</Directory>
修改为为
<Directory />
Options Indexes FollowSymLinks
AllowOverride None
</Directory>
?
?
?
添加test.wsgi
Include "D:/eclipse-workspace/voith_sales/Rail/apache/test.wsgi "
?
?
test wsgi configuration, 只是测试脚本,正式脚本里面需要把他们注释掉
test.wsgi
def application(environ, start_response):
status = ‘200 OK‘
output = ‘Hello World!‘
?
response_headers = [(‘Content-type‘, ‘text/plain‘),
(‘Content-Length‘, str(len(output)))]
start_response(status, response_headers)
?
return [output]
?
?
Test : http://localhost:8081
?
Create a folder "apache" under your project directory to locate your apache configuration file "django.wsgi" & "apache_django_wsgi.conf", it‘s not mandatory, dedicated folder is for maintenance purpose
比起前面的test.wsgi我们也可以用这个方法
Include "E:/PythonWeb/code/voith_sales/Rail/apache/apache_django_wsgi.conf"
?
Note : let apache load configuration file, you can also configure it in httpd.conf directly, using external file will benefit your maintenance
?
apache_django_wsgi.conf
测试项目
WSGIScriptAlias / "E:/PythonWeb/code/voith_sales/Rail/apache/test.wsgi"
<Directory "E:/PythonWeb/code/voith_sales/Rail">
Options FollowSymLinks
AllowOverride None
Order deny,allow
Allow from all
</Directory>
?
实际项目
WSGIScriptAlias / "D:/eclipse-workspace/voith_sales/Rail/apache/django.wsgi"
<Directory " D:/eclipse-workspace/voith_sales/Rail">
Options FollowSymLinks
AllowOverride None
Order deny,allow
Allow from all
</Directory>
?
django.wsgi
import os
import sys
?
#Calculate the path based on the location of the WSGI script.
apache_configuration= os.path.dirname(__file__)
project = os.path.dirname(apache_configuration)
workspace = os.path.dirname(project)
sys.stdout = sys.stderr
sys.path.append(workspace)
#sys.path.append(‘E:/PythonWeb/code/voith_sales‘)
?
os.environ[‘DJANGO_SETTINGS_MODULE‘] = "Rail.settings_product"
import django.core.handlers.wsgi
application = django.core.handlers.wsgi.WSGIHandler()
?
apache_django_wsgi.conf
Alias /index/Rail/static "E:/PythonWeb/code/voith_sales/Rail/static"
<Directory "E:/PythonWeb/code/voith_sales/Rail/static">
Order allow,deny
Allow from all
</Directory>
?
Settings.py
STATIC_URL = ‘/index/Rail/static/‘
?
copy static data to D:/eclipse-workspace/voith_sales/Rail/static from django source,不要手动拷贝,用python manage.py collectstatic
?
?
?
?
python很好用,尤其是用过easy_install的朋友更是觉得它的便捷,
卸载命令也很简单 easy_install -m package-name
但是面对源码安装的怎么办呢?
setup.py 帮助你纪录安装细节方便你卸载
python setup.py install --record log
这时所有的安装细节都写到 log 里了
想要卸载的时候
就可以干净卸载了
[转]对于python setup.py install安装的包如何卸载
?
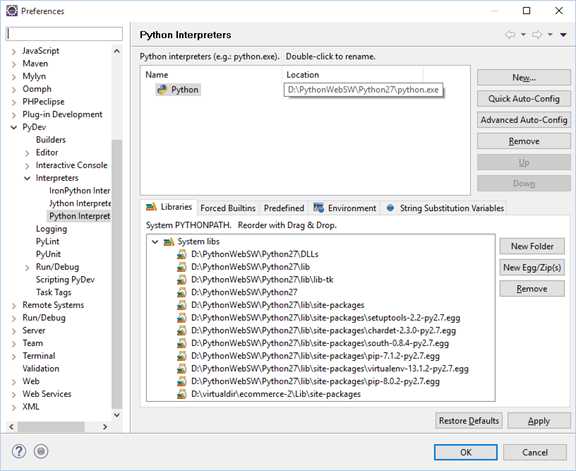
Windows->Preferences->PyDev->Interpreters->Python Interpreters
Add "Lib/site-packages" of your virtual environment to System PYTHONPATH
Deploy Django on Apache with Virtualenv and mod_wsgi
How to Run Django with mod_wsgi and Apache with a virtualenv Python environment on a Debian VPS
还没验证,好像不需要这些配置也能工作,他们是怎么找过去的?
?
SAE的配置文件主要有两个:config.yaml和index.wsgi
index.wsgi
import sys
import os.path
?
os.environ[‘DJANGO_SETTINGS_MODULE‘] = ‘YOUR_APP_NAME.settings‘
sys.path.append(os.path.join(os.path.dirname(__file__), ‘YOUR_APP_NAME‘))
?
import sae
from YOUR_APP_NAME import wsgi
?
application = sae.create_wsgi_app(wsgi.application)
注意:只需要简单地将其中的YOUR_APP_NAME替换成你的应用的名称就行了,不要加其他任何符号
?
config.yaml
name: YOUR_APP_NAME
version: 1
?
libraries:
- name: django
version: "1.5"
?
静态文件
url.py?增加配置如下
from?django.contrib.staticfiles.urls?import?staticfiles_urlpatterns
urlpatterns?+=?staticfiles_urlpatterns()
?
config.yaml改为
handlers:
-?url:?/static/
??static_dir:?./
?
数据库sql导入
-- LOCK TABLES `auth_permission` WRITE;
/*!40000 ALTER TABLE `auth_permission` DISABLE KEYS */;
INSERT INTO `auth_permission` VALUES (1,‘Can add product_class‘,1,‘add_product_class‘),(2,‘Can ………….PreCI_Request‘,32,‘delete_preci_request‘);
/*!40000 ALTER TABLE `auth_permission` ENABLE KEYS */;
-- UNLOCK TABLES;
?
LOCK/UNLOCK 需删除,否则报错
?
http://www.hi-beiyu.com/archives/141
标签:
原文地址:http://www.cnblogs.com/2dogslife/p/5843950.html