标签:
本章主要是对前面4章的小结和应用。
表单分为3个组成部分
表单可包含文本域,复选框,单选按钮等等。表单用于向指定的 URL 传递用户数据。
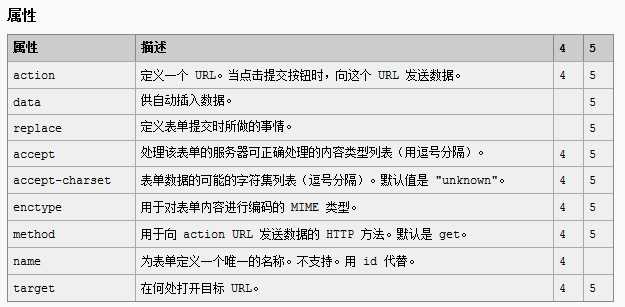
——文本框、密码框(password),隐藏域,多行文本域(textarea),复选框(checkbox),单选框(radio),下拉框(select)文件上传框
——提交按钮(submit)、复位(reset),一般按钮(button)
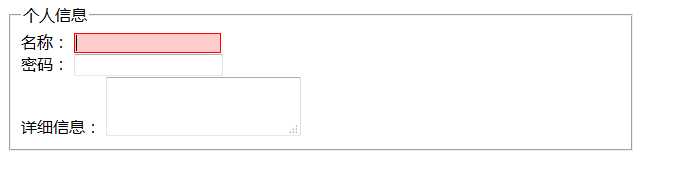
依靠纯css实现方法是:
|
1
2
3
4
5
6
7
8
9
10
11
12
13
14
15
|
<fieldset> <legend>个人信息</legend> <div> <label for="username">名称:</label> <input id="username" type="text"/> </div> <div> <label for="pass">密码:</label> <input id="pass" type="password"/> </div> <div> <label for="msg">详细信息:</label> <textarea id="msg"></textarea> </div></fieldset> |
css
|
1
2
3
4
5
6
7
|
fieldset{ width: 600px;}input:focus,textarea:focus{ border: 1px solid #f00; background: #fcc;} |
在IE6下不支持a:hover之外的伪类选择器。试用jQuery实现之。
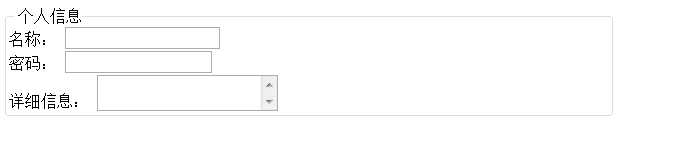
思路:IE6不支持,但是jq1.x支持。把:focus元素选出来,应用一个预设样式.focus
|
1
2
3
|
$(function(){ $(‘:focus‘).addClass(‘focus‘);}) |
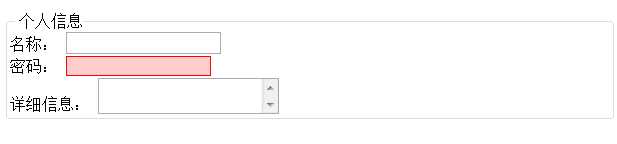
但是,当你点选窗体,连窗体都应用了。而且对象不明确,没事件。
|
1
2
3
4
5
6
7
8
9
|
$(function(){ $(‘:input‘)//注意选择器不是$(‘input‘) .focus(function(){ $(this).addClass(‘focus‘); }) .blur(function(){ $(this).removeClass(‘focus‘); })}) |
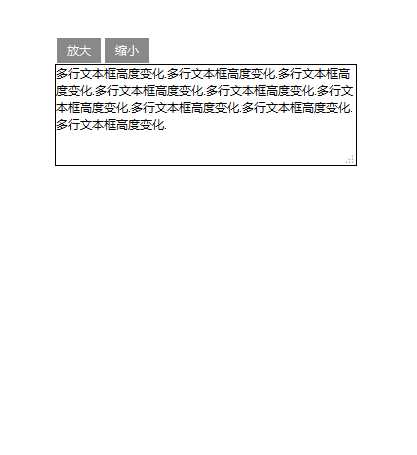
附加要求:评论框设置最值高度
html
|
1
2
3
4
5
6
7
|
<form><div class="msg"><input id="btn1" type="button" value="放大" /><input id="btn1" type="button" value="放大" /></div><textarea id="comment" rows="8" cols="20">多行文本框变化多行文本框变化多行文本框变化多行文本框变化多行文本框变化多行文本框变化多行文本框变化多行文本框变化多行文本框变化多行文本框变化</textarea></form> |
|
1
2
3
4
5
6
7
8
9
10
11
12
13
14
15
16
17
18
19
20
|
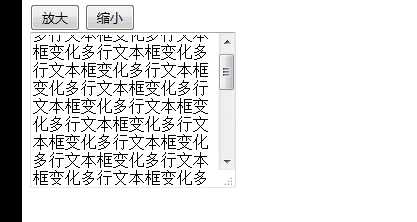
$(function(){ $(‘#btn1‘).click(function(){ if($(‘#comment‘).height()<500){ $(‘#comment‘).height($(‘#comment‘).height()+50); //注意虽然$(‘#comment‘).height()打印出是一个数字,但是 //不能使用$(‘#comment‘).height()+=50; }else{ return false; } }) $(‘#btn2‘).click(function(){ if($(‘#comment‘).height()>50){ $(‘#comment‘).height($(‘#comment‘).height()-50); }else{ return false; } })}) |
改进:
(1)使用动画方法让它变化——这需要在css中给#comment设固定宽度(假设为200px)。
(2)控制动画
|
1
2
3
4
5
6
7
8
9
10
11
12
13
14
15
16
17
18
19
20
21
22
23
24
25
|
$(function(){ $(‘#btn1‘).click(function(){ if($(‘#comment‘).is(‘:animated‘)==true){ return false; }else{ if($(‘#comment‘).height()<500){ $(‘#comment‘).animate({height:‘+=50‘},200); }else{ return false; } } }) $(‘#btn2‘).click(function(){ if($(‘#comment‘).is(‘:animated‘)==true){ return false; }else{ if($(‘#comment‘).height()>50){ $(‘#comment‘).animate({height:‘-=50‘},200); }else{ return false; } } })}) |
【进一步扩展】滚动条高度变化——这需要scrollTop属性
如果把上面的代码属性换成scrollTop——
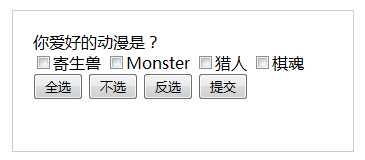
最基本的,就是全选,反选,全不选,主要应用的还是选择器功能。
如图先布局
|
1
2
3
4
5
6
7
8
9
10
11
12
|
<form> 你爱好的动漫是?<br/> <input name="items" type="checkbox" value="寄生兽" />寄生兽 <input name="items" type="checkbox" value="Monster" />Monster <input name="items" type="checkbox" value="猎人" />猎人 <input name="items" type="checkbox" value="棋魂" />棋魂<br/> <input type="button" id="checkAll" value="全选" /> <input type="button" id="checkNone" value="不选" /> <input type="button" id="checkRev" value="反选" /> <input type="submit" id="send" value="提交" /></form> |
|
1
2
3
4
5
6
|
form{ margin: 100px auto; width: 300px;height: 100px; border: 1px solid #ccc; padding: 20px;} |
反选的思路是循环取反。循环没一个对象,用的是each(function(){})
|
1
|
jq对象组.each(function(){操作}) |
另一个问题;当使用attr(‘checked‘,‘true‘)时,第二次失效。
这事应该用prop()方法替代attr。
官方给出的解释是:
获取在匹配的元素集中的第一个元素的属性值。
随着一些内置属性的DOM元素或window对象,如果试图将删除该属性,浏览器可能会产生错误。jQuery第一次分配undefined值的属性,而忽略了浏览器生成的任何错误
大概可以这样理解:比方说checked属性表示选中有checked="checked";和checked=true,在不同浏览器中解析造成混乱。
官方建议是存在布尔值的都用prop()
|
1
2
3
4
5
6
7
8
9
10
11
12
13
14
15
|
$(function(){ $(‘#checkAll‘).click(function(){ $(‘[name=items]:checkbox‘).prop(‘checked‘,true); }) $(‘#checkNone‘).click(function(){ $(‘[name=items]:checkbox‘).prop(‘checked‘,false); }) $(‘#checkRev‘).click(function(){ $(‘[name=items]:checkbox‘).each(function(){ this.checked=!this.checked; }) })}) |
基本功能算是实现了。
接下来进一步:要求输出提交按钮的值。弹出框选择的是......
|
1
2
3
4
5
6
7
8
9
|
$(‘#send‘).click(function(){ var str=‘您选中的是:‘; $(‘[name=items]:checkbox‘).each(function(){ if(this.checked){ str+=this.value+‘ ‘; } }) alert(str);}) |
根据each方法的思想来做。
进一步优化——我要用一个复选框来表示全选和全不选状态。
留意到要求中,点选(全选/全不选时与所有item同步),所以全选.全不选的状态就是所有item的状态。
再留意到,设置一个布尔值bCheckedAll,当为假时把全选/不选框取消选中——这个值绑定在item的点击事件上。
|
1
2
3
4
5
6
7
8
9
10
11
12
13
14
15
16
17
18
19
20
21
22
23
24
25
26
27
28
29
30
31
32
33
34
35
36
37
|
$(function(){ $(‘#checkAll‘).click(function(){ $(‘[name=items]:checkbox‘).prop(‘checked‘,this.checked); })//全选状态就是所有item的状态 $(‘[name=items]:checkbox‘).click(function(){ var bCheckAll=true; $(‘[name=items]:checkbox‘).each(function(){ if(!this.checked){ bCheckAll=false; } }) $(‘#checkAll‘).prop(‘checked‘,bCheckAll); })//当item有没被点选的时候,全选按钮不得为选中 $(‘#checkRev‘).click(function(){ $(‘[name=items]:checkbox‘).each(function(){ (this).checked=!this.checked; }) })//反选:遍历取反 $(‘#send‘).click(function(){ var str=‘您选中的是:‘; $(‘[name=items]:checkbox‘).each(function(){ if(this.checked){ str+=this.value+‘ ‘; } }) alert(str); })//输出}) |
ps:option的选中状态为selected。
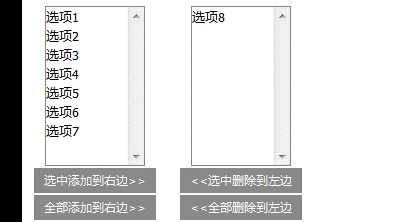
先布局(样式在HTML里)
|
1
2
3
4
5
6
7
8
9
10
11
12
13
14
15
16
17
18
19
20
21
22
23
|
<section style="width:300px;margin:100px auto"><div id="section1" style="height:200px;float:left"> <select multiple id="select1" style="width:130px;height:140px"> <option value="1">请教</option> <option value="2">先请而后教</option> <option value="3">后教而先请</option> <option value="4">先请而先教</option> <option value="5">后请而后教</option> </select> <div> <button id="add">选中添加到右边>></button><br/> <button id="addAll">全部添加到右边>></button> </div></div><div id="section2" style="height:200px;float:left"> <select multiple id="select2" style="width:130px;height:140px"> </select> <div> <button id="remove"><<选中添加到左边</button><br/> <button id="removeAll"><<全部添加到左边</button> </div></div></section> |
|
1
2
3
4
5
6
7
8
9
10
11
12
13
14
15
16
17
18
19
20
21
22
23
24
25
|
$(function(){ $(‘#add‘).click(function(){ $(‘#select1 option:selected‘).appendTo($(‘#select2‘)); }) $(‘#addAll‘).click(function(){ $(‘#select1 option‘).appendTo($(‘#select2‘)); }) $(‘#remove‘).click(function(){ $(‘#select2 option:selected‘).appendTo($(‘#select1‘)); }) $(‘#removeAll‘).click(function(){ $(‘#select2 option‘).appendTo($(‘#select1‘)); }) $(‘#select1 option‘).dblclick(function(){ $(‘#select1 option:selected‘).appendTo($(‘#select2‘)); }) $(‘#select2 option‘).dblclick(function(){ $(‘#select2 option:selected‘).appendTo($(‘#select1‘)); })}) |

(2)焦点移出(blur)时,马上判断规则。符合则显示‘输入正确‘,反之出现提示信息——追加到当前元素父级元素的最后。。
a.判断失去焦点的是用户名还是邮箱;
b.用户名要求value值不得小于6。邮箱要求符合格式。
|
1
2
3
4
5
6
7
8
9
10
11
12
13
14
15
16
17
18
|
<div class="int"> <label for="username">用户名</label><input id="username" class="required" type="text"/> </div> <div class="int"> <label for="int">邮箱</label><input id="email" class="required" type="text"/> </div> <div class="int"> <label for="personinfo">个人资料</label><input id="info" type="text"/> </div> <div class="sub"> <input type="submit" value="提交"/> <input type="reset" value="重置"/> </div> </form> |
css
|
1
2
3
4
5
6
7
8
9
10
11
12
13
14
15
16
17
18
19
20
21
22
|
body { font:12px/19px Arial, Helvetica, sans-serif; color:#666;}form div { margin:6px 0;}form{ width: 300px;height: 200px; margin: 100px auto;}.int label { float:left; width:100px; text-align:right;}.int input { padding:1px 1px; border:1px solid #ccc;height:16px;}.sub { padding-left:100px;}.sub input { margin-right:10px; }.formtips{width: 200px;margin:2px;padding:2px;}.onError{ background:#FFE0E9 url(../images/reg3.gif) no-repeat 0 center; padding-left:25px;}.onSuccess{ background:#E9FBEB url(../images/reg4.gif) no-repeat 0 center; padding-left:25px;}.high{ color:red;} |
jq
|
1
2
3
4
5
6
7
8
9
10
11
12
13
14
15
16
17
18
19
20
21
22
23
24
25
26
27
28
29
30
31
32
33
34
35
36
37
38
39
40
41
42
43
44
45
46
47
48
49
|
$(function(){ $(‘form :input.required‘).each(function(){ var $required=$(‘<strong style="color:red">*</strong>‘); //创建红色星号 $(this).parent().append($required); }) $(‘#username‘).blur(function(){ $(this).parent().find(‘.onSuccess‘).remove(); $(this).parent().find(‘.onError‘).remove(); var $tips=‘‘; if(this.value.length>=6){ $tips=$(‘<p class="onSuccess">输入正确</p>‘) $tips.appendTo($(this).parent()); }else{ $tips=$(‘<p class="onError">用户名至少应6个字符!</p>‘) $tips.appendTo($(this).parent()); } })//用户输入框 $(‘#email‘).blur(function(){ $(this).parent().find(‘.onSuccess‘).remove(); $(this).parent().find(‘.onError‘).remove(); var $tips=‘‘; if(this.value.length>=6){ $tips=$(‘<p class="onSuccess">输入正确</p>‘) $tips.appendTo($(this).parent()); }else{ $tips=$(‘<p class="onError">邮箱格式错误!</p>‘) $tips.appendTo($(this).parent()); } })//用户输入框 $(‘:submit‘).click(function(){ if($(‘.onError‘).is(‘:visible‘)){ alert(‘你有东西忘了填写‘) return false; } }) $(‘:reset‘).click(function(){ $(‘.onSuccess‘).remove(); $(‘.onError‘).remove(); })}) |
第一次的代码有很多需要大改的地方。仅仅凭鼠标移出显示提示消息还不够智能,最好是实时展现提示消息。本例是根据onError的存在来提示作为是否判断依据,但填写之后不待发生blur就直接提交,也是完全可能的。
思路:
(1)在获取焦点之后,实时使用的事件。——只执行一次。
(2)在获取按键事件后,就开始模拟blur事件。——可行,每次按键都会重新加载
那么是用哪个呢?输入完之后立马判断,所以应用keyup。
(3)还有一个问题,加载页面之后,马上点提交,就会跳转。
这时必须在点击submit按钮的同时,再执行一次keyup事件。————xxx.trigger(‘keyup‘)
|
1
2
3
4
5
6
7
8
9
10
11
12
13
14
15
16
17
18
19
20
21
22
23
24
25
26
27
28
29
30
31
32
33
34
35
36
37
38
39
40
41
42
43
44
45
46
47
48
49
50
51
52
|
$(function(){ $(‘form :input.required‘).each(function(){ var $required=$(‘<strong style="color:red">*</strong>‘); //创建红色星号 $(this).parent().append($required); }) $(‘#username‘).keyup(function(){ $(this).parent().find(‘.onSuccess‘).remove(); $(this).parent().find(‘.onError‘).remove(); var $tips=‘‘; if(this.value.length<6||this.value==‘‘){ $tips=$(‘<p class="onError formtips">用户名至少应6个字符!</p>‘) $tips.appendTo($(this).parent()); }else{ $tips=$(‘<p class="onSuccess formtips">输入正确</p>‘) $tips.appendTo($(this).parent()); } })//用户输入框 $(‘#email‘).keyup(function(){ $(this).parent().find(‘.onSuccess‘).remove(); $(this).parent().find(‘.onError‘).remove(); var $tips=‘‘; if(this.value=="" || ( this.value!="" && !/.+@.+\.[a-zA-Z]{2,4}$/.test(this.value) )){ $tips=$(‘<p class="onError formtips">邮箱格式错误!</p>‘) $tips.appendTo($(this).parent()); }else{ $tips=$(‘<p class="onSuccess formtips">输入正确</p>‘) $tips.appendTo($(this).parent()); } })//邮箱输入框 $(‘:submit‘).click(function(){ $(‘.required‘).trigger(‘keyup‘);//模拟按键事件 if($(‘.onError‘).is(‘:visible‘)){ alert(‘你有东西忘了填写‘) return false; } $(‘:reset‘).click(function(){ $(‘.onSuccess‘).remove(); $(‘.onError‘).remove(); })})}); |
注意:表单校验在js的处理仅为了提升用户体验和友好度,真正校验的是服务器。
最简单的表单
|
1
2
3
4
5
6
7
8
9
10
11
12
13
14
15
16
17
18
19
20
21
22
23
24
25
26
27
28
29
30
31
32
33
34
35
36
|
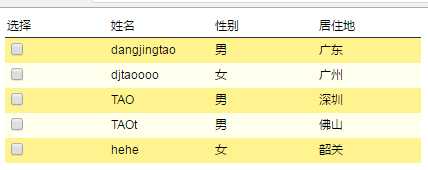
<table id="tab"> <thead> <tr> <td>姓名</td> <td>性别</td> <td>居住地</td> </tr> </thead> <tbody> <tr> <td>dangjingtao</td> <td>男</td> <td>广东</td> </tr> <tr> <td>djtaoooo</td> <td>女</td> <td>广州</td> </tr> <tr> <td>TAO</td> <td>男</td> <td>深圳</td> </tr> <tr> <td>TAOt</td> <td>男</td> <td>佛山</td> </tr> <tr> <td>hehe</td> <td>女</td> <td>韶关</td> </tr> </tbody></table> |
css
|
1
2
3
4
5
|
table{ border:0;border-collapse:collapse;}td { font:normal 12px/17px Arial;padding:2px;width:100px;}thead{ font:bold 12px/17px Arial;text-align:left;padding:4px;border-bottom:1px solid #333;} |
js-dom操作中,tbody是必不可少的,用tBodies[0]表示。
每一个tr(行)可以简写作rows,每个td(单元格)可简写作cells
比如我要获取上边表格中的dangjingtao,js写法是
|
1
|
document.getElementById(‘tab‘).tBodies[0].rows[0].cells[0].innerHTML |
thead的元素不会被获取。
以下就jq的表格进行研究。
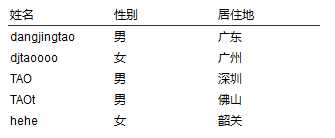
例2.1已经使用过隔行变色。现在再来回顾下。
jq中表格变色的思想来自于class样式的套用。就拿上面的例子来说,定义两个样式:
|
1
2
3
4
5
6
|
.even{ background: #fff38f;}.odd{ background: #ffffee;} |
把table标签的border属性去掉,添加如下代码
|
1
2
3
4
|
$(function(){ $(‘tbody>tr:odd‘).addClass(‘odd‘); $(‘tbody>tr:even‘).addClass(‘even‘);}) |
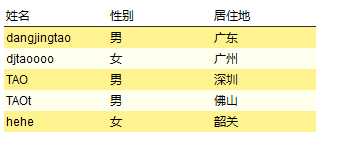
表头不需要作底色。
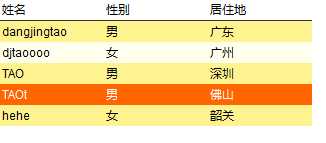
定义select的class样式。
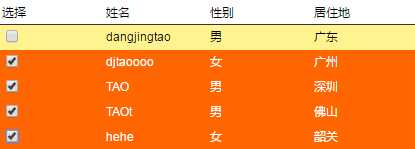
.selected{ background:#FF6500;color:#fff;}
我想让TAOt行高亮,只需使用:contain(‘内容‘)的选择器。
|
1
|
$("tr:contains(‘TAOt‘)").addClass(‘selected‘); |
|
1
|
<td><input type="radio"/></td> |
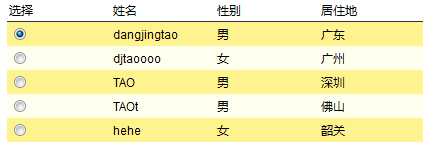
让它呈现点击单选框(radio)整行高亮的效果。
|
1
2
3
4
5
6
7
8
9
10
11
12
13
14
|
$(function(){ $(‘tbody>tr:odd‘).addClass(‘odd‘); $(‘tbody>tr:even‘).addClass(‘even‘); //定义奇偶数行的背景色 $(‘#tab input‘).click(function(){ $(‘.selected input‘).prop(‘checked‘,false); //取消其它行的选中 $(‘.selected‘).removeClass(‘selected‘); //取消其他行的背景 $(this).parent().parent().addClass(‘selected‘); }); }) |
原理一样。
|
1
2
3
4
5
6
7
8
9
10
11
12
13
14
15
|
$(function(){ $(‘tbody>tr:odd‘).addClass(‘odd‘); $(‘tbody>tr:even‘).addClass(‘even‘); //定义奇偶数行的背景色 $(‘#tab input‘).click(function(){ if(!$(this).parent().parent().hasClass(‘selected‘)){ //如果没有selected的class $(this).parent().parent().addClass(‘selected‘); }else{ $(this).parent().parent().removeClass(‘selected‘); } }); }) |
7-13行可以用三目运算符简化代码:
|
1
2
3
4
5
6
7
8
9
10
|
$(function(){ $(‘tbody>tr:odd‘).addClass(‘odd‘); $(‘tbody>tr:even‘).addClass(‘even‘); //定义奇偶数行的背景色 $(‘#tab input‘).click(function(){ var hasSelected=$(this).parent().parent().hasClass(‘selected‘); $(this).parent().parent()[hasSelected?"removeClass":"addClass"](‘selected‘); }); }) |
其实也没简化多少。
在前例的基础上重新修改html,增加人员分工,以行的形式分类。
|
1
2
3
4
5
6
7
8
9
10
11
12
13
14
15
16
17
18
19
20
21
22
23
24
25
26
27
28
29
30
31
32
33
34
35
36
37
38
39
40
41
42
43
44
45
46
|
<table id="tab"> <thead> <tr> <td>姓名</td> <td>性别</td> <td>居住地</td> </tr> </thead> <tbody> <tr class="parent" id="row1"> <td colspan="3">设计人员</td> </tr> <tr class="childrow1"> <td>dangjingtao</td> <td>男</td> <td>广东</td> </tr> <tr class="parent" id="row2"> <td colspan="3">前端人员</td> </tr> <tr class="childrow2"> <td>djtaoooo</td> <td>女</td> <td>广州</td> </tr> <tr class="childrow2"> <td>TAO</td> <td>男</td> <td>深圳</td> </tr> <tr class="parent" id="row3"> <td colspan="3">后台开发</td> </tr> <tr class="childrow3"> <td>TAOt</td> <td>男</td> <td>佛山</td> </tr> <tr class="childrow3"> <td>hehe</td> <td>女</td> <td>韶关</td> </tr> </tbody></table> |
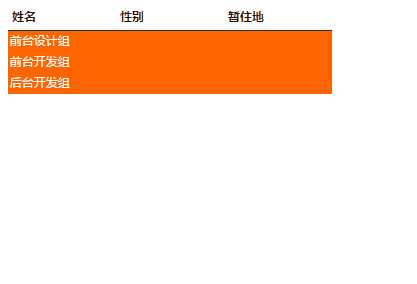
有两个难点需要注意:
(1)为了能够准确选中每个人物资料行,添加class时,由字符串child和对应parent的ID组成。
(2)使用toggleClass时,一切都正确,但是覆盖不了,原因在于toogle相对应的class在前边定义,必须放在原生class的后边才能覆盖!
|
1
2
3
4
5
|
table { border:0;border-collapse:collapse;}td { font:normal 12px/17px Arial;padding:2px;width:100px;}thead { font:bold 12px/17px Arial;text-align:left;padding:4px;border-bottom:1px solid #333;}.parent{ background:#FF6500;color:#fff;}.select{ background:#FFF38F; color: #333;} |
jq
|
1
2
3
4
5
6
7
8
9
|
$(function(){ //定义初始状态 $(‘tbody tr:not(.parent)‘).hide(); $(‘.parent‘) .click(function(){ $(this).toggleClass(‘select‘) .siblings(‘.child‘+this.id).toggle(); })}) |
结合contain:xx和filter方法实现筛选。
先把文档结构改回到表格变色时的状态。
再在body最上添加html代码:
|
1
2
|
<input id="search" type="search"/><input id="btn1" type="button" value="搜索"/> |
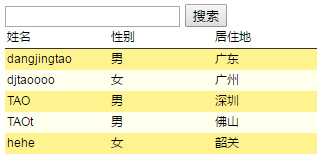
要求:在搜索框输入TAO,高亮结果。
|
1
2
3
4
5
6
7
8
9
|
$(function(){ $(‘tbody>tr:odd‘).addClass(‘odd‘); $(‘tbody>tr:even‘).addClass(‘even‘); $(‘#btn1‘).click(function(){ var $str=$(‘#search‘).val(); $(‘#tab tbody tr‘).hide().filter(‘:contains(‘+$str+‘)‘).show(); }) }) |
筛选结果如下
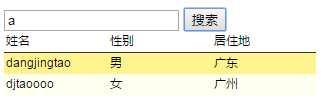
此功能还是很多缺陷,比如大写的无法选中等等。相关解决方案参见原生js笔记DOM章。
|
1
2
3
4
5
6
|
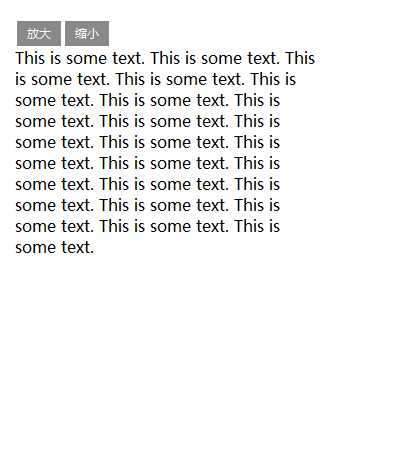
<input id="btn1" value="放大" type="button"/><input id="btn2" value="缩小" type="button"/><div id="content" style="width:300px;height:600px"> <p>字体放大缩小实例字体放大缩小实例字体放大缩小实例字体放大缩小实例字体放大缩小实例字体放大缩小实例字体放大缩小实例字体放大缩小实例字体放大缩小实例字体放大缩小实例字体放大缩小实例字体放大缩小实例字体放大缩小实例字体放大缩小实例字体放大缩小实例字体放大缩小实例</p></div> |
|
1
2
3
4
5
6
7
8
9
10
11
12
13
14
15
16
17
18
19
20
21
|
$(function(){ $(‘input‘).click(function(){ var $content=$(‘#content p‘).css(‘font-size‘); var textFontSize=parseInt($content,10); //获取字体大小的数值,parseInt的第二个参数代表10进制。 var cName=$(this).attr(‘id‘); if(cName==‘btn1‘){ if(textFontSize<=22){ textFontSize+=2; } }else{ if (textFontSize>12) { textFontSize-=2; }; } $(‘#content‘).css(‘font-size‘,textFontSize+‘px‘); })}) |
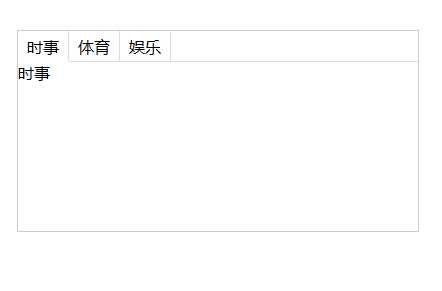
原理:通过显示和隐藏来处理不同内容。
原理很简单,但是需要一定的css认识。
(1)设置每个li的border,其中holder通过计算得出。这样无论选项卡宽度是多少,都可以自适应。
(2)索引值index()方法——搜索匹配的元素,并返回相应元素的索引值,从0开始计数:$arr.index(1)等同于js中的arr[1]。
(3)动画延迟delay()。同时进行fadeIn和fadeOut时,会有抖动。要么设置延迟,要么用hide()取代fadeOut()。
|
1
2
3
4
5
6
7
8
9
10
11
12
13
14
15
|
<div class="tab"> <div class="tab-header"> <ul> <li class="active"><a href="javascript:;">时事</a></li> <li><a href="javascript:;">体育</a></li> <li><a href="javascript:;">娱乐</a></li> <li class="holder"></li> </ul> </div> <div class="tab-box"> <div>时事</div> <div>体育</div> <div>娱乐</div> </div></div> |
css
|
1
2
3
4
5
6
7
8
9
10
11
12
13
14
15
16
17
18
19
20
21
22
23
24
25
26
27
28
29
30
31
32
33
34
35
36
37
38
39
40
41
42
43
44
45
46
|
*{ margin:0; padding:0;}ul li{ list-style: none;}a{ text-decoration: none;}.tab{ border:1px solid #ccc; width: 400px; height: 200px; margin: 100px auto;}.tab-header ul{ width: 400px;height: 30px; }.tab-header ul li{ float: left; border-bottom: 1px solid #ddd;}.tab-header ul li a{ display: block; width: 50px;height:30px; line-height: 30px;text-align: center; border-right: 1px solid #ddd; color: black;}.tab-header ul li a:hover{ color: orange;}.tab-header .active{ border-bottom:0;}.holder{ height: 30px}.tab-box div{ display: none;} |
jq
|
1
2
3
4
5
6
7
8
9
10
11
12
13
14
15
16
17
18
19
|
$(function(){ var holderWidth=$(‘.tab-header ul‘).width()-($(‘.tab-header a‘).width()+1)*($(‘.tab-header li‘).length-1); $(‘.holder‘).css(‘width‘,holderWidth+‘px‘); //设置holder的宽度,可以自适应,注意要多减去border-right的1px,因为holder本身也是li,所以length多算了1,也要减去 $(‘.tab-box div‘).eq(0).css(‘display‘,‘block‘);//设置默认第一个为呈现 $(‘.tab-header a‘).click(function(){ $(this).parent().siblings().removeClass(‘active‘); $(this).parent().addClass(‘active‘); //设置点击后每个li的下划横线。 var index=$(‘.tab-header li‘).index($(this).parent()); //获取li的索引值。 $(‘.tab-box div‘).siblings().hide().end().eq(index).fadeIn(300); //eq()表示第index个div })}) |
效果如下
原理是通过不同的样式class进行切换。并且将记录好的皮肤记录到cookie中。下次访问时可以显示自定义皮肤。
需要引入jQuery的cookie插件
head区引入代码如下:
|
1
2
3
4
5
6
|
<script type="text/javascript" src="js/jquery-1.11.3.js"></script> <script type="text/javascript" src="js/js.js"></script> <link href="css/default.css" rel="stylesheet" type="text/css" /> <link href="css/skin_0.css" rel="stylesheet" type="text/css" id="cssfile" /> <!-- 引入jQuery的cookie插件 --> <script src="js/jquery.cookie.js" type="text/javascript"></script> |
html
|
1
2
3
4
5
6
7
8
9
10
11
12
13
14
15
16
17
18
19
20
|
<ul id="skin"> <li id="skin_0" title="高冷灰" class="active">高冷灰</li> <li id="skin_1" title="基佬紫">基佬紫</li> <li id="skin_2" title="姨妈红">姨妈红</li> <li id="skin_3" title="胖次蓝">胖次蓝</li> <li id="skin_4" title="果粒橙">果粒橙</li> <li id="skin_5" title="帽子绿">帽子绿</li></ul><div id="div_side_0"> <div id="news"> <h1 class="title">时事新闻</h1> </div></div><div id="div_side_1"> <div id="game"> <h1 class="title">娱乐新闻</h1> </div></div> |
样式文件除了default.css外,准备6套颜色样式文件:skin0...skin5.css。
jq
|
1
2
3
4
5
6
7
8
9
10
11
12
13
14
15
16
|
$(function(){ var $li =$("#skin li"); $li.click(function(){ switchSkin( this.id ); }); var cookie_skin = $.cookie( "MyCssSkin"); if (cookie_skin) { switchSkin( cookie_skin ); } });function switchSkin(skinName){ $("#"+skinName).addClass("selected") //当前<li>元素选中 .siblings().removeClass("selected"); //去掉其它同辈<li>元素的选中 $("#cssfile").attr("href","css/"+ skinName +".css"); //设置不同皮肤 $.cookie( "MyCssSkin" , skinName , { path: ‘/‘, expires: 10 });//计入cookie} |

标签:
原文地址:http://www.cnblogs.com/djtao/p/5932503.html