标签:ons position ram mybatis less 项目 添加内容 white ota
上一节测试好了Mybatis3,接下来整合Spring4!
一、添加spring上下文配置
在src/main/resources/目录下的spring新建spring上下文配置文件applicationContext-dao.xml :
注:
applicationContext-dao.xml, 用于管理数据库,
applicationContext-service.xml 用于配置service,
applicationContext-mvc.xml 用于集成springmvc配置文件,以此类推
添加内容如下:
<?xml version="1.0"encoding="UTF-8"?>
<beans
xmlns="http://www.springframework.org/schema/beans"
xmlns:xsi="http://www.w3.org/2001/XMLSchema-instance"
xmlns:context="http://www.springframework.org/schema/context"
xmlns:mvc="http://www.springframework.org/schema/mvc"
xmlns:tx="http://www.springframework.org/schema/tx"
xmlns:jdbc="http://www.springframework.org/schema/jdbc"
xsi:schemaLocation="
http://www.springframework.org/schema/beans
http://www.springframework.org/schema/beans/spring-beans.xsd
http://www.springframework.org/schema/context
http://www.springframework.org/schema/context/spring-context.xsd
http://www.springframework.org/schema/mvc
http://www.springframework.org/schema/mvc/spring-mvc.xsd
http://www.springframework.org/schema/jdbc
http://www.springframework.org/schema/jdbc/spring-jdbc.xsd
http://www.springframework.org/schema/tx
http://www.springframework.org/schema/tx/spring-tx.xsd
http://directwebremoting.org/schema/spring-dwr/spring-dwr-3.0.xsd
">
<!--注解扫描器 -->
<context:annotation-config />
<context:component-scan base-package="com.ssm.demo2.controller">
</context:component-scan>
<!-- 配置dataSource 使用dbcp连接池 注释 -->
<!--
<bean id="dataSource" class="org.apache.commons.dbcp.BasicDataSource">
<property name="driverClassName" value="com.mysql.jdbc.Driver" />
<property name="url" value="jdbc:mysql://127.0.0.1:3306/mybatis? characterEncoding=utf8" />
<property name="username" value="root" />
<property name="password" value="root" />
</bean>
-->
<!-- 加载数据源配置 -->
<context:property-placeholder location="classpath:db.properties"/>
<!-- 配置dataSource 使用dbcp连接池-->
<bean id="dataSource" class="org.apache.commons.dbcp.BasicDataSource">
<property name="driverClassName" value="${jdbc.driverClass}" />
<property name="url" value="${jdbc.jdbcUrl}"/>
<property name="username" value="${jdbc.user}"/>
<property name="password" value="${jdbc.password}"/>
<!-- 设置数据库连接池的最大连接数 -->
<property name="maxActive" value="${jdbc.maxPoolSize}" />
<!-- 设置数据库连接池的初始化连接数 -->
<property name="initialSize" value="${jdbc.initPoolSize}"/>
</bean>
<bean
id="sqlSessionFactory" class="org.mybatis.spring.SqlSessionFactoryBean">
<!--dataSource属性指定要用到的连接池 -->
<property name="dataSource" ref="dataSource" />
<!--configLocation属性指定mybatis的核心配置文件 -->
<property
name="configLocation" value="mybatis/mybatis_config.xml" />
</bean>
<!--注册UserMapper映射 -->
<bean
id="userMapper" class="org.mybatis.spring.mapper.MapperFactoryBean">
<!--sqlSessionFactory属性指定要用到的SqlSessionFactory实例 -->
<property name="sqlSessionFactory" ref="sqlSessionFactory" />
<!--mapperInterface属性指定映射器接口,用于实现此接口并生成映射器对象 -->
<property name="mapperInterface" value="com.ssm.demo2.mapper.UserMapper"/>
</bean>
</beans>
二、测试
把mybatis_config.xml配置中有关数据库的配置信息注释掉!
在src/test/main 目录下新建Mybatis_Spring_Test.java进行测试:
public class Mybatis_Spring_Test {
private ApplicationContext ctx;
@Before
public void setUp() throws Exception {
String configpath="spring/applicationContext-dao.xml";
ctx=new ClassPathXmlApplicationContext(configpath);
}
@Test
public void test() throws Exception {
//测试是否能正常加载配置文件
System.out.println(ctx);
UserMapper userMapper=ctx.getBean(UserMapper.class);
List<User> users=userMapper.findUserList("王");
System.out.println(users.size());
}
}
结果:
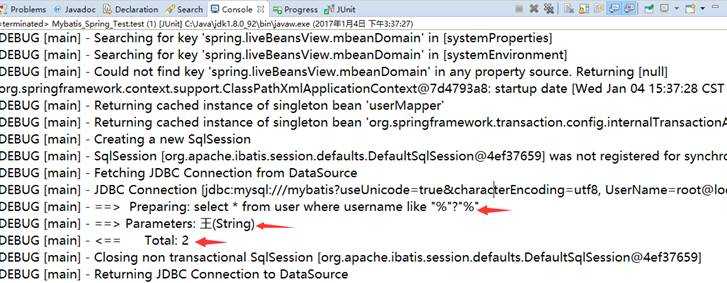
测试ok!
三、把注册mapper的方式 改为自动扫描方式
在applicationContext-dao.xml注册mapper是手动配置的,在项目中这样的配置会很多,很不方便,改成自动扫描式!
注释掉以下配置:
<!--
<bean
id="userMapper" class="org.mybatis.spring.mapper.MapperFactoryBean">
<!--sqlSessionFactory属性指定要用到的SqlSessionFactory实例 -->
<property name="sqlSessionFactory" ref="sqlSessionFactory" />
<!--mapperInterface属性指定映射器接口,用于实现此接口并生成映射器对象 -->
<property name="mapperInterface" value="com.ssm.demo2.mapper.UserMapper"/>
</bean>
-->
添加如下配置:
<!-- mybatis自动扫描包下的mapper -->
<bean class="org.mybatis.spring.mapper.MapperScannerConfigurer">
<property name="basePackage"value="com.ssm.demo2.mapper"/>
<!-- optional unless there are multiple session factories defined -->
<property name="sqlSessionFactoryBeanName"value="sqlSessionFactory"/>
</bean>
最后添加事务管理
<!-- 数据库的事务管理器配置 -->
<bean id="transactionManager"
class="org.springframework.jdbc.datasource.DataSourceTransactionManager">
<property name="dataSource" ref="dataSource" />
</bean>
<!-- 使用annotation定义数据库事务,这样可以在类或方法中直接使用@Transactional注解来声明事务 -->
<tx:annotation-driven transaction-manager="transactionManager" />
现测试通过OK
注:在src/main/resource中mybatis目录下的UserMapper.xml在前一节中改成自动扫描式后,可以去掉,同样在配置自动扫描加载mapper后,mybatis_config.xml中的功能也全部由spring进行了管理,也是可以去掉滴!!但了为结构清晰,保留这二个配置文件!
Mybatis3与Spring4整合成功!Spring4请查看相关详细文章!
最后一节整合SpringMVC!
标签:ons position ram mybatis less 项目 添加内容 white ota
原文地址:http://www.cnblogs.com/ut2016-progam/p/6254583.html