标签:vi编辑器 破解 压缩 root密码 oca 系统 合并 bios dia
作业一:
1) 将用户信息数据库文件和组信息数据库文件纵向合并为一个文件/1.txt(覆盖)
[root@localhost /]# cat /etc/passwd /etc/group > 1.txt
2) 将用户信息数据库文件和用户密码数据库文件纵向合并为一个文件/2.txt(追加)
[root@localhost /]# cat /etc/passwd /etc/group >> 2.txt
3) 将/1.txt、/2.txt两个文件打包为/1.tar
[root@localhost /]# tar cvf 1.tar 1.txt 2.txt
1.txt
2.txt
[root@localhost /]# ls 1.tar
1.tar
4) 使用gzip命令压缩1.txt文件名为1.txt.gz
[root@localhost /]# gzip 1.txt
[root@localhost /]# ls 1.txt.gz
1.txt.gz
5) 解压缩1.txt.gz
[root@localhost /]# gunzip 1.txt.gz
[root@localhost /]# ls
6) 使用bzip2压缩1.txt压缩后文件名为1.txt.bz2
[root@localhost /]# bzip2 1.txt
[root@localhost /]# ls
1.tar
1.txt.bz2
2.txt
7) 解压缩1.txt.bz2
[root@localhost /]# bunzip2 1.txt.bz2
[root@localhost /]# ls
1.tar
1.txt
2.txt
8) 解包1.tar,解包后文件存放到/tmp目录下
[root@localhost /]# tar xvf 1.tar -C /tmp
1.txt
2.txt
[root@localhost /]# cd /tmp
[root@localhost tmp]# ls
1.txt
2.txt
9) 使用tar命令打包并且压缩/1.txt、/2.txt,得到的文件名为1.tar.gz
[root@localhost /]# tar cvzf 1.tar.gz 1.txt 2.txt
1.txt
2.txt
[root@localhost /]# ls
1.tar 2.txt
1.tar.gz
10) 解包1.tar.gz,解包后文件存放到/tmp目录下
[root@localhost /]# tar xvf 1.tar.gz -C /tmp
1.txt
2.txt
[root@localhost /]# cd /tmp/
[root@localhost tmp]# ls
1.txt
2.txt
作业二:
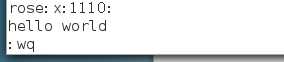
1) 使用vi编辑器编辑文件/1.txt进入编辑模式写入内容“hello world”
[root@localhost /]# vim 1.txt
在编辑模式下,按“G”
按“a”
输入“hello wold”
按“esc”
shift+:
wq
回车
2) 进入命令行模式复制改行内容,在下方粘贴80行
[root@localhost /]# vim 1.txt
在命令行模式下
按"G"跳到文末
yy
80p

3) 快速移动光标到文件的最后一行
[root@localhost /]# vim 1.txt
按“esc”
按“G”
4) 快速移动光标到当前屏幕的中间一行
[root@localhost /]# vim 1.txt
按“esc”
按“M"
5) 快速移动光标到文件的第五行
[root@localhost /]# vim 1.txt
按“esc”
输入“5G”
6) 在下方插入新的一行内容“welcome to beijing”
[root@localhost /]# vim 1.txt
esc-->5G-->enter-->welcome to beijing-->esc-->shift+:-->wq-->enter
7) 删除刚插入的一行
在输入完毕后-->esc-->dd
8) 撤销上一步的操作
dd--> u
9) 进入扩展模式,执行文件的保存退出操作
esc-->wq-->enter
作业三:
1) 单用户模式破解root密码
http://www.centoscn.com/CentOS/Intermediate/2015/0509/5395.html
2) 救援模式破解root密码
win10 64位
系统:centos7.0指令版
确保你的虚拟机的镜像还在
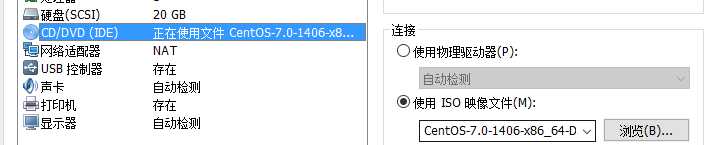
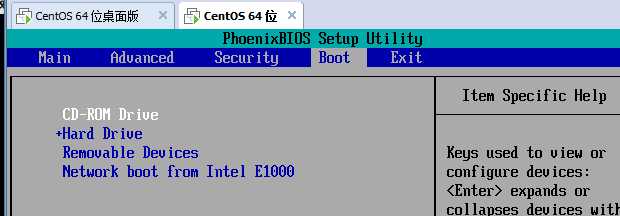
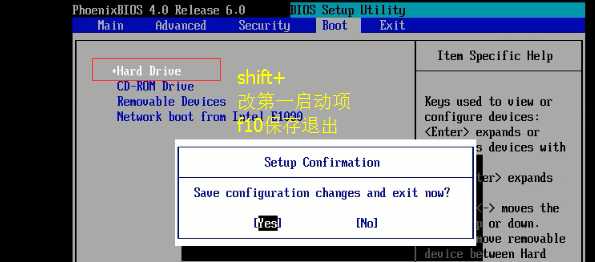
开机狂按f2-->进入BIOS设置,把启动项改为CD-rom顺位第一位,f10保存退出,进入
进入下一步,
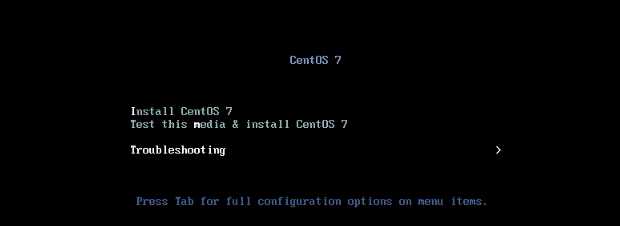
上下键切换到troubleshooting回车
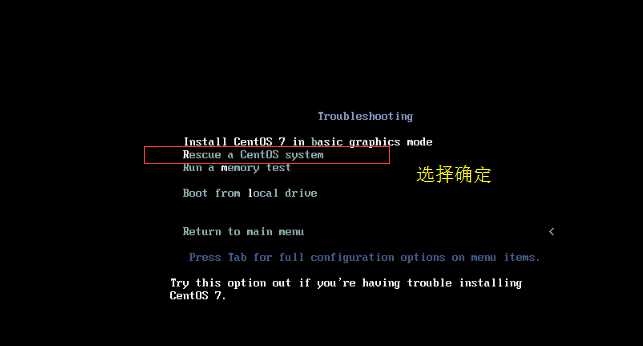
下一步点击回车

下一步,选择continue确定
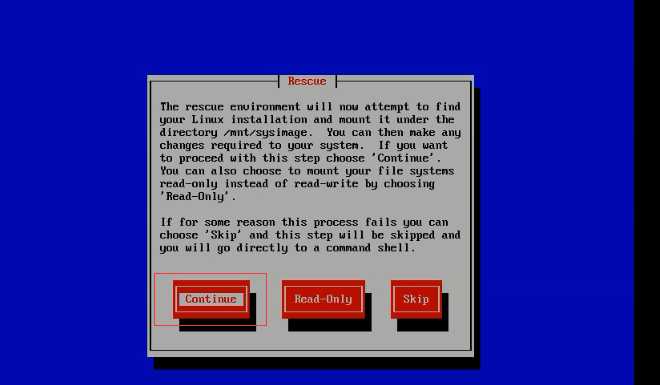
下一步 确定就好
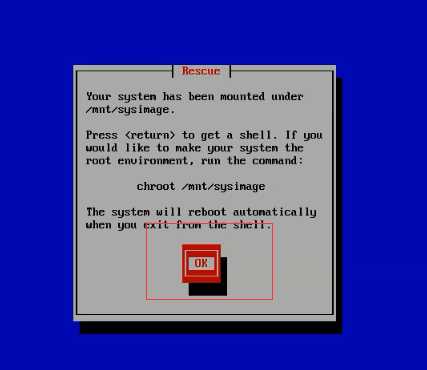
下一步,继续ok
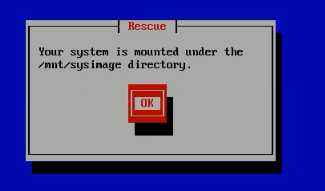
下一步,按照图片操作,记得echo后面输入新密码

下一步,重新把启动项回来
OK,更改完毕

标签:vi编辑器 破解 压缩 root密码 oca 系统 合并 bios dia
原文地址:http://www.cnblogs.com/Neeo/p/6906208.html