标签:math points line cas 示例 draw parameter move 黑白
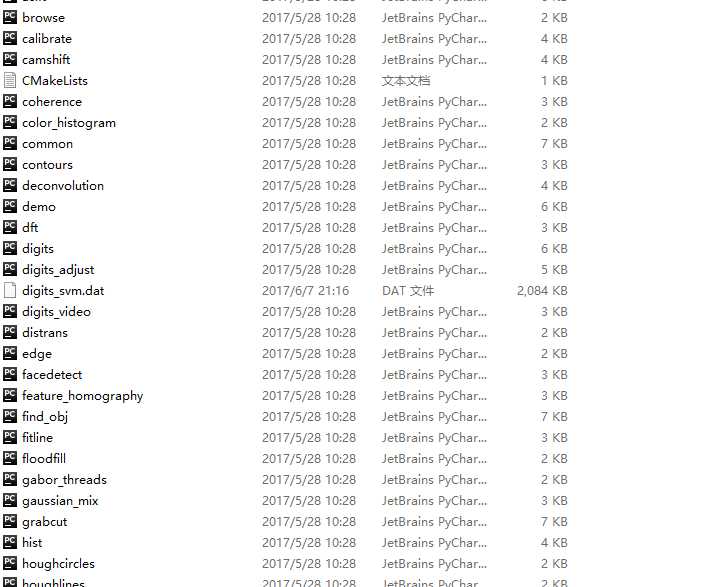
从官网下载opencv 目录结构如图

在samples中有丰富的示例
应为我的系统中已经安装好opepncv-python,可直接运行

会得到结果:

人脸检测代码如下
#!/usr/bin/env python

‘‘‘
face detection using haar cascades

USAGE:
    facedetect.py [--cascade <cascade_fn>] [--nested-cascade <cascade_fn>] [<video_source>]
‘‘‘

# Python 2/3 compatibility
from __future__ import print_function

import numpy as np
import cv2

# local modules
from video import create_capture
from common import clock, draw_str


def detect(img, cascade):
    rects = cascade.detectMultiScale(img, scaleFactor=1.3, minNeighbors=4, minSize=(30, 30),
                                     flags=cv2.CASCADE_SCALE_IMAGE)
    if len(rects) == 0:
        return []
    rects[:,2:] += rects[:,:2]
    return rects

def draw_rects(img, rects, color):
    for x1, y1, x2, y2 in rects:
        cv2.rectangle(img, (x1, y1), (x2, y2), color, 2)

if __name__ == ‘__main__‘:
    import sys, getopt
    print(__doc__)

    args, video_src = getopt.getopt(sys.argv[1:], ‘‘, [‘cascade=‘, ‘nested-cascade=‘])
    try:
        video_src = video_src[0]
    except:
        video_src = 0
    args = dict(args)
    cascade_fn = args.get(‘--cascade‘, "../../data/haarcascades/haarcascade_frontalface_alt.xml")
    nested_fn  = args.get(‘--nested-cascade‘, "../../data/haarcascades/haarcascade_eye.xml")

    cascade = cv2.CascadeClassifier(cascade_fn)
    nested = cv2.CascadeClassifier(nested_fn)

    cam = create_capture(video_src, fallback=‘synth:bg=../data/lena.jpg:noise=0.05‘)

    while True:
        ret, img = cam.read()
        gray = cv2.cvtColor(img, cv2.COLOR_BGR2GRAY)
        gray = cv2.equalizeHist(gray)

        t = clock()
        rects = detect(gray, cascade)
        vis = img.copy()
        draw_rects(vis, rects, (0, 255, 0))
        if not nested.empty():
            for x1, y1, x2, y2 in rects:
                roi = gray[y1:y2, x1:x2]
                vis_roi = vis[y1:y2, x1:x2]
                subrects = detect(roi.copy(), nested)
                draw_rects(vis_roi, subrects, (255, 0, 0))
        dt = clock() - t

        draw_str(vis, (20, 20), ‘time: %.1f ms‘ % (dt*1000))
        cv2.imshow(‘facedetect‘, vis)

        if cv2.waitKey(5) == 27:
            break
    cv2.destroyAllWindows()
其中训练好的分类器在
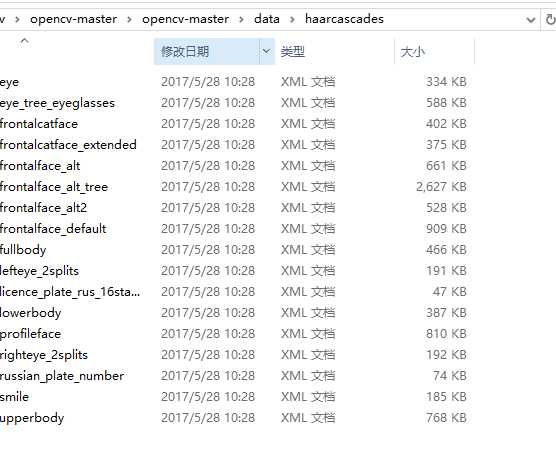
目录下
PS:在树莓派上使用时需要注意,USB接入的摄像头可使用opecv 调用,否则只能用picamera 来调起,
接着时二维码识别
这是资料地址
http://www.open-open.com/lib/view/open1464566856199.html
上面的这篇博客讲的非常详细和全面,不过没有代码,这里整理了一下方便结合视频的方式检测二维码,
def show(img, code=cv2.COLOR_BGR2RGB):
    cv_rgb = cv2.cvtColor(img, code)
    while (1):
     cv2.imshow(‘ckh‘,img)
     key = cv2.waitKey(10)
     c = chr(key & 255)
     if c in [‘B‘, ‘b‘, chr(27)]:
         break
def createLineIterator(P1, P2, img):
    """
    Produces and array that consists of the coordinates and intensities of each pixel in a line between two points

    Parameters:
        -P1: a numpy array that consists of the coordinate of the first point (x,y)
        -P2: a numpy array that consists of the coordinate of the second point (x,y)
        -img: the image being processed

    Returns:
        -it: a numpy array that consists of the coordinates and intensities of each pixel in the radii (shape: [numPixels, 3], row = [x,y,intensity])
    """
    #define local variables for readability
    imageH = img.shape[0]
    imageW = img.shape[1]
    P1X = P1[0]
    P1Y = P1[1]
    P2X = P2[0]
    P2Y = P2[1]

    #difference and absolute difference between points
    #used to calculate slope and relative location between points
    dX = P2X - P1X
    dY = P2Y - P1Y
    dXa = np.abs(dX)
    dYa = np.abs(dY)

    #predefine numpy array for output based on distance between points
    itbuffer = np.empty(shape=(np.maximum(dYa,dXa),3),dtype=np.float32)
    itbuffer.fill(np.nan)

    #Obtain coordinates along the line using a form of Bresenham‘s algorithm
    negY = P1Y > P2Y
    negX = P1X > P2X
    if P1X == P2X: #vertical line segment
        itbuffer[:,0] = P1X
        if negY:
            itbuffer[:,1] = np.arange(P1Y - 1,P1Y - dYa - 1,-1)
        else:
            itbuffer[:,1] = np.arange(P1Y+1,P1Y+dYa+1)
    elif P1Y == P2Y: #horizontal line segment
        itbuffer[:,1] = P1Y
        if negX:
            itbuffer[:,0] = np.arange(P1X-1,P1X-dXa-1,-1)
        else:
            itbuffer[:,0] = np.arange(P1X+1,P1X+dXa+1)
    else: #diagonal line segment
        steepSlope = dYa > dXa
        if steepSlope:
            slope = dX.astype(np.float32)/dY.astype(np.float32)
            if negY:
                itbuffer[:,1] = np.arange(P1Y-1,P1Y-dYa-1,-1)
            else:
                itbuffer[:,1] = np.arange(P1Y+1,P1Y+dYa+1)
            itbuffer[:,0] = (slope*(itbuffer[:,1]-P1Y)).astype(np.int) + P1X
        else:
            slope = dY.astype(np.float32)/dX.astype(np.float32)
            if negX:
                itbuffer[:,0] = np.arange(P1X-1,P1X-dXa-1,-1)
            else:
                itbuffer[:,0] = np.arange(P1X+1,P1X+dXa+1)
            itbuffer[:,1] = (slope*(itbuffer[:,0]-P1X)).astype(np.int) + P1Y

    #Remove points outside of image
    colX = itbuffer[:,0]
    colY = itbuffer[:,1]
    itbuffer = itbuffer[(colX >= 0) & (colY >=0) & (colX<imageW) & (colY<imageH)]

    #Get intensities from img ndarray
    itbuffer[:,2] = img[itbuffer[:,1].astype(np.uint),itbuffer[:,0].astype(np.uint)]

    return itbuffer
def isTimingPattern(line):
    # 除去开头结尾的白色像素点
    while line[0] != 0:
        line = line[1:]
    while line[-1] != 0:
        line = line[:-1]
    # 计数连续的黑白像素点
    c = []
    count = 1
    l = line[0]
    for p in line[1:]:
        if p == l:
            count = count + 1
        else:
            c.append(count)
            count = 1
        l = p
    c.append(count)
    # 如果黑白间隔太少,直接排除
    if len(c) < 5:
        return False
    # 计算方差,根据离散程度判断是否是 Timing Pattern
    threshold = 5
    return np.var(c) < threshold
def cv_distance(P, Q):
    return int(np.math.sqrt(pow((P[0] - Q[0]), 2) + pow((P[1] - Q[1]), 2)))
def check(a, b,path):
    # 存储 ab 数组里最短的两点的组合
    s1_ab = ()
    s2_ab = ()
    # 存储 ab 数组里最短的两点的距离,用于比较
    s1 = np.iinfo(‘i‘).max
    s2 = s1
    for ai in a:
        for bi in b:
            d = cv_distance(ai, bi)
            if d < s2:
                if d < s1:
                    s1_ab, s2_ab = (ai, bi), s1_ab
                    s1, s2 = d, s1
                else:
                    s2_ab = (ai, bi)
                    s2 = d

    a1, a2 = s1_ab[0], s2_ab[0]
    b1, b2 = s1_ab[1], s2_ab[1]

    a1 = (a1[0] + np.int0((a2[0]-a1[0])*1/14), a1[1] + np.int0((a2[1]-a1[1])*1/14))
    b1 = (b1[0] + np.int0((b2[0]-b1[0])*1/14), b1[1] + np.int0((b2[1]-b1[1])*1/14))
    a2 = (a2[0] + np.int0((a1[0]-a2[0])*1/14), a2[1] + np.int0((a1[1]-a2[1])*1/14))
    b2 = (b2[0] + np.int0((b1[0]-b2[0])*1/14), b2[1] + np.int0((b1[1]-b2[1])*1/14))
    img = cv2.imread(path)
    img_gray = cv2.cvtColor(img, cv2.COLOR_BGR2GRAY)
    th, bi_img = cv2.threshold(img_gray, 100, 255, cv2.THRESH_BINARY)
    # 将最短的两个线画出来
    #cv2.line(draw_img, a1, b1, (0,0,255), 3)
    #cv2.line(draw_img, a2, b2, (0,0,255), 3)
    lit1 = createLineIterator(a1,b1,bi_img)
    lit2 = createLineIterator(a2,b2,bi_img)
    if isTimingPattern(lit1[:,2]):
        return True
    elif isTimingPattern(lit2[:,2]):
        return True
    else:
        return False
def RunImg(path):
    img = cv2.imread(path)
    img_gray = cv2.cvtColor(img, cv2.COLOR_BGR2GRAY)
    img_gb = cv2.GaussianBlur(img_gray, (5, 5), 0)
    edges = cv2.Canny(img_gray, 100, 200)
    img_fc, contours, hierarchy = cv2.findContours(edges, cv2.RETR_TREE, cv2.CHAIN_APPROX_SIMPLE)
    hierarchy = hierarchy[0]
    found = []
    for i in range(len(contours)):
        k = i
        c = 0
        while hierarchy[k][2] != -1:
            k = hierarchy[k][2]
            c = c + 1  # count hierarchy
        if c >= 5:
            found.append(i)  # store index
            # 对图像进行二值化
    th, bi_img = cv2.threshold(img_gray, 100, 255, cv2.THRESH_BINARY)
    draw_img = img.copy()
    boxes = []
    for i in found:
        rect = cv2.minAreaRect(contours[i])
        box = np.int0(cv2.boxPoints(rect))
        #    cv2.drawContours(draw_img,[box], 0, (0,0,255), 2)
        # box = map(tuple, box)
        box = [tuple(x) for x in box]
        boxes.append(box)
        # show(draw_img)
        # print("Length of Boxes is ",len(boxes))
    valid = set()
    for i in range(len(boxes)):
        for j in range(i + 1, len(boxes)):
            if check(boxes[i], boxes[j],path):
                valid.add(i)
                valid.add(j)
    contour_all = []
    while len(valid) > 0:
        c = contours[found[valid.pop()]]
        for sublist in c:
            for p in sublist:
                contour_all.append(p)
    rect = cv2.minAreaRect(np.array(contour_all))
    box = np.array([cv2.boxPoints(rect)], dtype=np.int0)
    cv2.polylines(draw_img, box, True, (0, 0, 255), 3)
    show(draw_img)

if __name__ == ‘__main__‘:
    RunImg(‘er.jpg‘)

效果很好。
以上
标签:math points line cas 示例 draw parameter move 黑白
原文地址:http://www.cnblogs.com/Conker/p/6965106.html