标签:log images cee strong 4.0 odi 菜单 ext 相同
转http://www.cnblogs.com/nightswatch/p/4639687.html
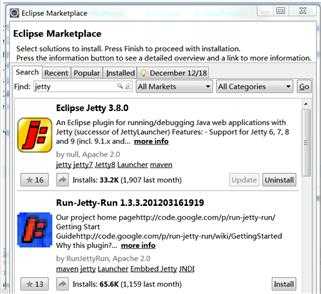
一.eclipse中jetty插件安装:
打开eclipse,依次点击菜单Help->Eclipse Marketplace,在Find后面的框中输入jetty,选择第一项进行install即可。
二.jetty插件的使用:
POM文件的配置:

<project xmlns="http://maven.apache.org/POM/4.0.0" xmlns:xsi="http://www.w3.org/2001/XMLSchema-instance"
    xsi:schemaLocation="http://maven.apache.org/POM/4.0.0 http://maven.apache.org/xsd/maven-4.0.0.xsd">
    <modelVersion>4.0.0</modelVersion>

    <groupId>com.jetty.TestNG</groupId>
    <artifactId>jetty-TestNG</artifactId>
    <version>0.0.1-SNAPSHOT</version>
    <packaging>jar</packaging>

    <name>jetty-TestNG</name>
    <url>http://maven.apache.org</url>

    <properties>
        <project.build.sourceEncoding>UTF-8</project.build.sourceEncoding>
    </properties>

    <dependencies>
        <dependency>
            <groupId>junit</groupId>
            <artifactId>junit</artifactId>
            <version>3.8.1</version>
            <scope>test</scope>
        </dependency>
    </dependencies>
    <build>
        <plugins>
            <!-- jetty插件 -->
            <plugin>
                <groupId>org.mortbay.jetty</groupId>
                <artifactId>maven-jetty-plugin</artifactId>
                <version>6.1.5</version>
                <configuration>
                    <webAppSourceDirectory>src/main/webapp</webAppSourceDirectory>
                    <scanIntervalSeconds>3</scanIntervalSeconds>
                    <contextPath>/jetty</contextPath>
                    <connectors>
                        <connector implementation="org.mortbay.jetty.nio.SelectChannelConnector">
                            <port>4000</port>
                        </connector>
                    </connectors>
                </configuration>
            </plugin>
        </plugins>
    </build>
</project>
注意上面的webAppSourceDirectory是自己的webapp文件夹或wencontent文件夹,contextPath:为端口号后面的第一个地址,可随意取,port为端口号。
代码放入/main/java后,可以在项目目录下执行:
mvn compile来做编译尝试,
也可以用mvn war直接生成打包文件,
当然最后可以用 mvn jetty:run来运行你的WEBAPP!
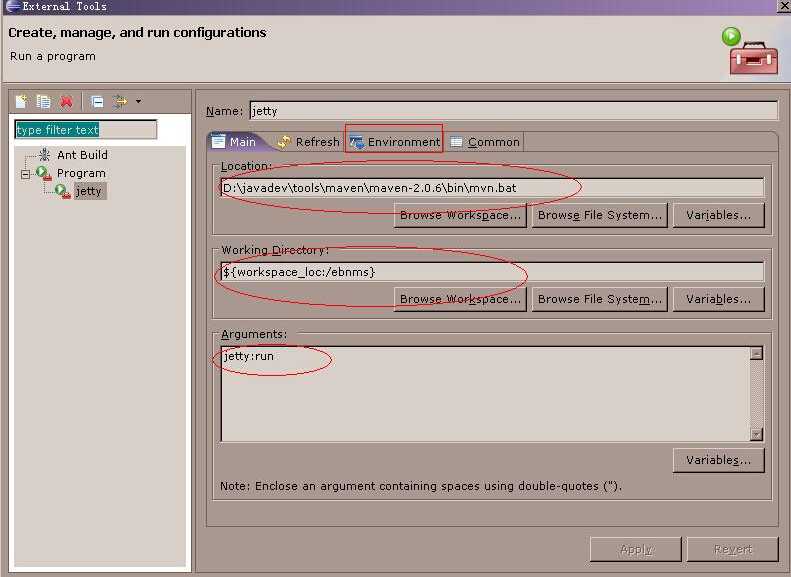
(3)在Eclipse中配置jetty进行调试:
先下配置一个外部工具,来运行JETTY:
选择菜单Run->External Tools->External Tools ...在左边选择Program,再点New:
配置Location为mvn完整命令行。
选择Working Directory为本项目。
Arguments填写:jetty:run
再点选Enviroment页:加入MAVEN_OPTS变量,值为:
-Xdebug -Xnoagent -Djava.compiler=NONE -Xrunjdwp:transport=dt_socket,address=4000,server=y,suspend=y
其中,如果suspend=n 表示不调试,直接运行。
然后,点APPLY,再关闭本对话框。
另外注意一点,好像external tool菜单项在java browering的perspective下才会出现。如果在java下看不见,可以切换下试试。
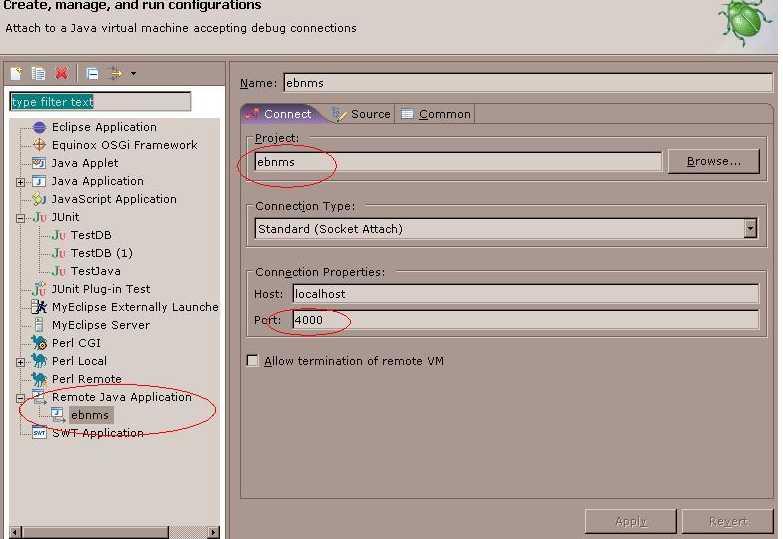
下面新建运行配置:
点选run->debug...
选中左树中的Remote Java Application,再点New。
选择你的项目,关键是要填和之前设置外部工具时相同的端口号。(其实最终端口号是以pom.xml中的port确定的,比如上面的4000,这里可以不一样)
配置就完成了,正面开始调试运行:
首先要把JETTY运行起来(有点象TOMCAT里的运行APPSERVER),从Run->External Tools中选择之前配置的外部工具运行,这时LOG里会显示:
listening at port 4000字样,
再选择Run->Debug选择我们刚建的运行配置,这时程序就RUN起来了,可以通过WEB进行访问,设置断点调试了。
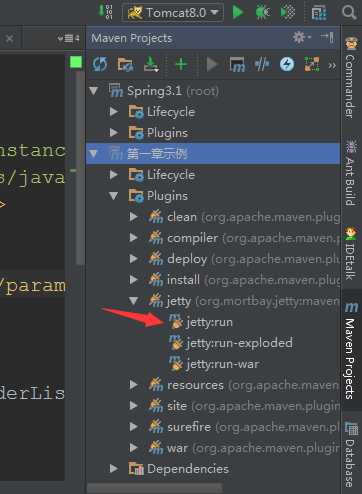
2.idea中使用maven方式使用jetty:
方法和eclipse一样,也是建一个maven项目,使用相同的pom.xml文件,配置好后可直接点击idea中右边的maven选项卡,在plugins下有jetty选项,展开随便点那个都可以启动jetty,启动好后就可以在浏览器中输入地址访问web应用了。
标签:log images cee strong 4.0 odi 菜单 ext 相同
原文地址:http://www.cnblogs.com/miye/p/7126325.html