标签:style blog http color os io 使用 java strong
目标:创建控制器和视图的代码,实现CRUD(创建,读取,更新,删除)功能
控制器为Students的Index页生成的代码排除Enrollments属性在外,因为该属性中关联着一个集合。而该集合的内容将会在Details页面 <table>标签中显示。 在控制器Controllers\StudentController.cs的代码中使用Find方法为Details视图取出单个Student实体。
public ActionResult Details(int? id)
{
    if (id == null)
    {
        return new HttpStatusCodeResult(HttpStatusCode.BadRequest);
    }
    Student student = db.Students.Find(id);
    if (student == null)
    {
        return HttpNotFound();
    }
    return View(student);
Details页面中的链接通过路由配置将值作为id参数传递给了该方法。
路由数据 路由数据是数据模型联编程序在路由表中指定的 URL 段中找到。例如,默认路由指定controller、action和id的部分: routes.MapRoute( name: “Default”, url: “{controller}/{action}/{id}”, defaults: new { controller = “Home”, action = “Index”, id = UrlParameter.Optional } ); 在下面的 URL,默认路由将Instructor映射作为controller,Index作为action和1作为id,这些都是路由的数据值。 http://localhost:1230/Instructor/Index/1?courseID=2021 “? courseID = 2021″是一个查询字符串值。加入把id作为字符串传递同样有效如下: http://localhost:1230/Instructor/Index?id=1&CourseID=2021 URL链接地址由 Razor 视图中的ActionLink对象创建。在以下代码中, id参数和默认路由匹配,所以id添加到路由数据。 @Html.ActionLink(“Select”, “Index”, new { id = item.PersonID }) 在以下代码中, courseID不匹配中的默认路由的参数,因此,它将作为查询字符串添加。 @Html.ActionLink(“Select”, “Index”, new { courseID = item.CourseID })
1.打开Views\Student\Details.cshtml。每个字段显示使用DisplayFor的帮助器,如下面的示例所示:
<dt>
    @Html.DisplayNameFor(model => model.LastName)
</dt>
<dd>
    @Html.DisplayFor(model => model.LastName)
</dd>
2.在EnrollmentDate之后和</dl>标签之前中,添加高亮代码以显示enrollments列表,如下面的示例所示:
<dt>
            @Html.DisplayNameFor(model => model.EnrollmentDate)
        </dt>

        <dd>
            @Html.DisplayFor(model => model.EnrollmentDate)
        </dd>
        <dt>
            @Html.DisplayNameFor(model => model.Enrollments)
        </dt>
        <dd>
            <table class="table">
                <tr>
                    <th>Course Title</th>
                    <th>Grade</th>
                </tr>
                @foreach (var item in Model.Enrollments)
                {
                    <tr>
                        <td>
                            @Html.DisplayFor(modelItem => item.Course.Title)
                        </td>
                        <td>
                            @Html.DisplayFor(modelItem => item.Grade)
                        </td>
                    </tr>
                }
            </table>
        </dd>
    </dl>
</div>
<p>
    @Html.ActionLink("Edit", "Edit", new { id = Model.ID }) |
    @Html.ActionLink("Back to List", "Index")
</p>
2.在你将代码粘贴后,如果代码缩进混乱了,按下 CTRL-K-D 来修正它。 此代码将遍历Enrollments导航属性中的所有实体。为每个Enrollment实体的属性中,它将显示course title和the grade。course title从存储在Enrollments实体中的Course导航属性中的Course实体中取出。所有这些数据是当需要获取时才从数据库中取出。(换句话说,您正在使用延迟加载。您没有为Courses导航属性指定预先加载(eager loading),所以在获取students没有获取enrollments注册。相反如果你使用了预先加载,您尝试访问的Enrollments导航属性时会发送到数据库以获取数据。你可以阅读更多关于延迟加载和读取相关数据教程稍后在本系列中的预先加载.)
3.通过选择Students导航选项卡,单击Details的链接为查看Alexander Carson。(如果您在Details.cshtml 文件处于打开状态时按 CTRL + F5 的 ,你就会得到 HTTP 400 错误因为 Visual Studio 会尝试运行的详细信息页面,但我们没有指定某个Students(没有获取到ID)。在这种情况下,只需从该 URL 移除”Student/Details”再试一次,或关闭浏览器、 用鼠标右键单击该项目,单击视图,然后单击在浏览器中查看)您看到选学生的课程和成绩列表: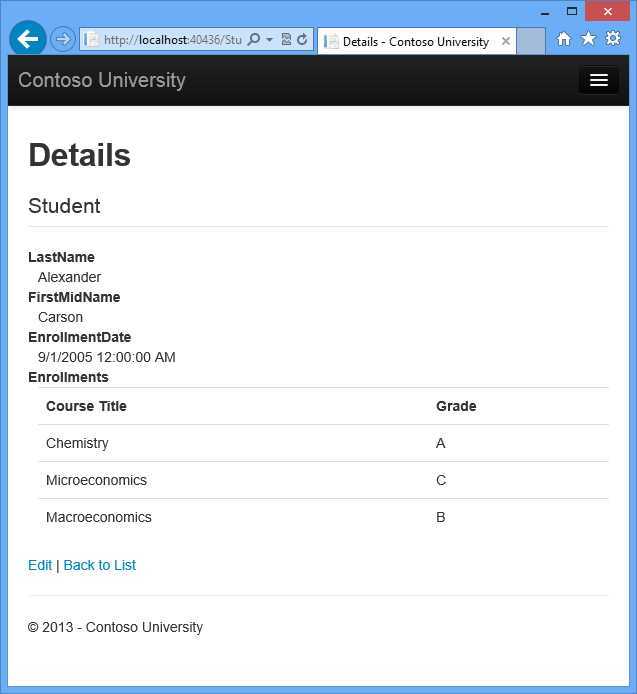
4
[HttpPost]
[ValidateAntiForgeryToken]
public ActionResult Create([Bind(Include = "LastName, FirstMidName, EnrollmentDate")]Student student)
{
    try
    {
        if (ModelState.IsValid)
        {
            db.Students.Add(student);
            db.SaveChanges();
            return RedirectToAction("Index");
        }
    }
    catch (DataException /* dex */)
    {
        //Log the error (uncomment dex variable name and add a line here to write a log.
        ModelState.AddModelError("", "Unable to save changes. Try again, and if the problem persists see your system administrator.");
    }
    return View(student);
}
此代码将通过在ASP.NET MVC模型绑定到学生实体集创建学生实体,然后将更改保存到数据库。(模型绑定指的是ASP.NET MVC的功能,使您更容易进行提交表单数据的工作;模型绑定将表单提交的数据转化为CLR类型,并将它们传递给操作方法的参数。也就是说,模型绑定实例为Form表单数据实例化为一个Student实体。)。
移除了ID的绑定是因为ID是主键值,插入数据时,SQL Server 将自动设置其值 。来自用户的输入并不设置的ID值。
安全说明:ValidateAntiForgeryToken属性有助于防止跨站点请求伪造攻击。它需要在视图中设置相应的 Html.AntiForgeryToken()语句,稍后您将会看到。
Bind属性可以防止过度提交。例如,假设Student实体包含Secret的属性,您不想让此 web 页以更新。
public class Student
   {
      public int ID { get; set; }
      public string LastName { get; set; }
      public string FirstMidName { get; set; }
      public DateTime EnrollmentDate { get; set; }
      public string Secret { get; set; }

      public virtual ICollection<Enrollment> Enrollments { get; set; }
   }
即使在 web 页上没有Secret字段的,黑客可以使用工具 如fiddler,或写一些 JavaScript来提交一个Secret表单值。没有模型绑定的Bind属性限制编程序时它将创建一个Student包含Secret值的实例。然后无论黑客为Secret指定的值将更新到您的数据库中。下面的图像显示fiddler工具添加Secret 字段 (指定Secret 的值为”OverPost“)到已提交的窗体值中。
值“OverPost”然后将成功添加到Secret属性, 虽然你从来没有打算使网页能够更新改属性。
这是一个最安全的做法是使用Bind属性指定Include参数添加字段到白名单中。它也可以使用Exclude参数来指定字段添加到黑名单。Include参数更安全因为当你为十天添加了一个新的属性时,新的属性不会自动受到Exclude列表的作用。
另一种替代方法和一个由许多,首选是使用仅查看模型与模型绑定。视图模型包含只有您要绑定的属性。MVC 模型联编程序已完成后,您将查看模型属性复制到的实体实例。
除绑定属性,我们还添加了try-catch语句块。如果一个派生自DataException的异常在更改保存时被捕获,会显示一个通用的错误讯息。 DataException异常有时候是由外部原因引起的的,而不是一个编程错误的东西引起的,所以建议用户再次尝试。信息,请参阅Scott Guthrie: Building Real World Cloud Apps with Windows Azure – Part 2
在Views\Student\Create.cshtml的代码与您在Details.cshtml看到的类似,除了把DisplayFor地方替换为EditorFor和ValidationMessageFor。下面是相关的代码:
<div class="form-group">
    @Html.LabelFor(model => model.LastName, new { @class = "control-label col-md-2" })
    <div class="col-md-10">
        @Html.EditorFor(model => model.LastName)
        @Html.ValidationMessageFor(model => model.LastName)
    </div>
</div>
Create.chstml也包含了@Html.AntiForgeryToken(),它与控制器中的ValidateAntiForgeryToken属性一起使用以帮助防止跨站点请求伪造攻击。
Create.cshtml页面不需要更改。
if (ModelState.IsValid)
{
    db.Students.Add(student);
    db.SaveChanges();
    return RedirectToAction("Index");
}
将日期更改为一个有效的值,单击创建,请参阅Index页中显示的新学生。
在Controllers\StudentController.cs,HttpGet Edit方法 中(没有HttpPost特性的) 使用Find方法获取所选的Student实体,正如你看到的Details的方法中。您不需要更改此方法。
但是,给这段代码添加一个try-catch块替换HttpPost Edit操作方法:
HttpPost]
[ValidateAntiForgeryToken]
public ActionResult Edit([Bind(Include = "ID, LastName, FirstMidName, EnrollmentDate")]Student student)
{
   try
   {
      if (ModelState.IsValid)
      {
         db.Entry(student).State = EntityState.Modified;
         db.SaveChanges();
         return RedirectToAction("Index");
      }
   }
   catch (DataException /* dex */)
   {
      //Log the error (uncomment dex variable name and add a line here to write a log.
      ModelState.AddModelError("", "Unable to save changes. Try again, and if the problem persists see your system administrator.");
   }
   return View(student);
此代码类似于您在HttpPost,Create 方法看见的。然而代码中并没有为实体机添加实体,而是设置了一个修改标记,表明它已被更改。当SaveChanges方法被调用时,Modified标志使Entity Framework来创建SQL语句并更新数据库。数据库行的所有列将被更新,包括那些用户没有修改过的数据,并发冲突被忽略。 (有关处理并发冲突该教程将在以后加入这个系列。在那之前,请参阅EF5 MVC版本4本系列的处理并发的教程。)
Mvc5+Entity Framework6 之二----在MVC中用Entity Framework实现基本的CRUD
标签:style blog http color os io 使用 java strong
原文地址:http://www.cnblogs.com/QlBsa/p/3649808.html