标签:文件名 结构 9.png .com main path logs style col
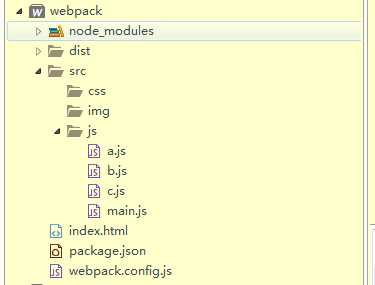
1、项目目录结构为:

2、webpack.config.js配置文件为:
var htmlWebpackPlugin = require(‘html-webpack-plugin‘);
module.exports = {
    //打包入口
    entry: {
        main: ‘./src/js/main.js‘,
        a: ‘./src/js/a.js‘,
        b: ‘./src/js/b.js‘,
        c: ‘./src/js/c.js‘
    },
    //打包后的文件
    output: {
        //不加__dirname 会报错
        path: __dirname + ‘/dist‘,
        //注意:使用[name]确保每个文件名都不重复
        filename: ‘js/[name]-[chunkhash].js‘,
        //线上地址配置
        publicPath:‘http://cdn.com/‘
    },
    plugins: [
        new htmlWebpackPlugin({
            template: ‘index.html‘,
            filename: ‘a.html‘,
            title: ‘this is a.html‘,
            //增加指定的chunks
            chunks:[‘main‘,‘a‘]
        }),
        new htmlWebpackPlugin({
            template: ‘index.html‘,
            filename: ‘b.html‘,
            title: ‘this is b.html‘,
            //增加指定的chunks
            chunks:[‘main‘,‘b‘]
        }),
        new htmlWebpackPlugin({
            template: ‘index.html‘,
            filename: ‘c.html‘,
            title: ‘this is c.html‘,
            //增加指定的chunks
            chunks:[‘main‘,‘c‘]
        })
    ]
}
3、执行命令:
npm run webpack
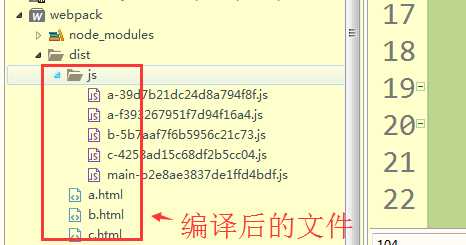
4.编译:


html-webpack-plugin插件 根据模板生成多页面
标签:文件名 结构 9.png .com main path logs style col
原文地址:http://www.cnblogs.com/mengfangui/p/7514270.html