z这里只讲ssm整合ehcache缓存,对于还不了解ssm的童鞋,请先浏览ssm整合那篇
EhCache 是一个纯Java的进程内缓存框架,具有快速、精干等特点,是Hibernate中默认的CacheProvider。Ehcache是一种广泛使用的开源Java分布式缓存。主要面向通用缓存,Java EE和轻量级容器。它具有内存和磁盘存储,缓存加载器,缓存扩展,缓存异常处理程序,一个gzip缓存servlet过滤器,支持REST和SOAP api等特点。
首先配置EhCache jar包
<!-- ehcache 相关依赖 -->
        <!-- https://mvnrepository.com/artifact/net.sf.ehcache/ehcache -->
        <dependency>
            <groupId>net.sf.ehcache</groupId>
            <artifactId>ehcache</artifactId>
            <version>2.10.4</version>
        </dependency>
        <dependency>
            <groupId>org.springframework</groupId>
            <artifactId>spring-context-support</artifactId>
        </dependency>
    </dependencies>
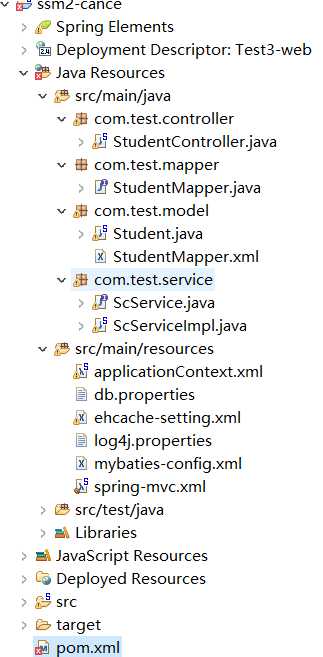
目录结构
配置ehcache-setting.xml
<?xml version="1.0" encoding="UTF-8"?>
<ehcache>
    <!-- 指定一个文件目录,当EhCache把数据写到硬盘上时,将把数据写到这个文件目录下 -->
    <diskStore path="F:\cache\java-cache"/>

    <!-- 设定缓存的默认数据过期策略 -->
    <defaultCache
            maxElementsInMemory="10000"
            eternal="false"
            overflowToDisk="true"
            timeToIdleSeconds="10"
            timeToLiveSeconds="20"
            diskPersistent="false"
            diskExpiryThreadIntervalSeconds="120"/>

    <cache name="cacheTest"
        maxElementsInMemory="1000"
        eternal="false"
        overflowToDisk="true"
        timeToIdleSeconds="100"
        timeToLiveSeconds="200"/>

</ehcache>
在applicationContext.xml里加入ehcache配置相关信息
<?xml version="1.0" encoding="UTF-8"?>
<beans xmlns="http://www.springframework.org/schema/beans"
    xmlns:context="http://www.springframework.org/schema/context"
    xmlns:xsi="http://www.w3.org/2001/XMLSchema-instance" xmlns:aop="http://www.springframework.org/schema/aop"
    xmlns:tx="http://www.springframework.org/schema/tx" xmlns:p="http://www.springframework.org/schema/p"
    xmlns:util="http://www.springframework.org/schema/util" xmlns:jdbc="http://www.springframework.org/schema/jdbc"
    xmlns:cache="http://www.springframework.org/schema/cache"
    xsi:schemaLocation="
    http://www.springframework.org/schema/context
    http://www.springframework.org/schema/context/spring-context.xsd
    http://www.springframework.org/schema/beans
    http://www.springframework.org/schema/beans/spring-beans.xsd
    http://www.springframework.org/schema/tx
    http://www.springframework.org/schema/tx/spring-tx.xsd
    http://www.springframework.org/schema/jdbc
    http://www.springframework.org/schema/jdbc/spring-jdbc-3.1.xsd
    http://www.springframework.org/schema/cache
    http://www.springframework.org/schema/cache/spring-cache-3.1.xsd
    http://www.springframework.org/schema/aop
    http://www.springframework.org/schema/aop/spring-aop.xsd
    http://www.springframework.org/schema/util
    http://www.springframework.org/schema/util/spring-util.xsd">
    <!-- 注解扫描 -->
    <context:component-scan base-package="com.test.*"></context:component-scan>
    <!-- 应用spring cache注解功能  -->
     <cache:annotation-driven cache-manager="cacheManager" />
    <!-- 加载db.properties文件内容 -->
    <context:property-placeholder location="classpath:db.properties" />
    <!-- 配置数据源,dbpc -->
    <bean id="dataSourse" class="org.apache.commons.dbcp.BasicDataSource">
        <property name="driverClassName" value="${jdbc.driver}"></property>
        <property name="url" value="${jdbc.url}"></property>
        <property name="username" value="${jdbc.username}"></property>
        <property name="password" value="${jdbc.password}"></property>
    </bean>
    <!-- sqlSessionFactory -->
    <bean id="sqlSessionFactory" class="org.mybatis.spring.SqlSessionFactoryBean">
        <!-- 数据库连接池 -->
        <property name="dataSource" ref="dataSourse"></property>
        <!-- 加载mybtis全局配置文件 -->
        <property name="configLocation" value="classpath:mybaties-config.xml"></property>
    </bean>
    <!-- mapper扫描器 -->
    <bean class="org.mybatis.spring.mapper.MapperScannerConfigurer">
        <property name="basePackage" value="com.test.mapper"></property>
        <property name="sqlSessionFactoryBeanName" value="sqlSessionFactory"></property>
    </bean>

    <!-- 事务管理 : DataSourceTransactionManager dataSource:引用上面定义的数据源 -->
    <bean id="txManager"
        class="org.springframework.jdbc.datasource.DataSourceTransactionManager">
        <property name="dataSource" ref="dataSourse"></property>
    </bean>

    <!-- 使用声明式事务 transaction-manager:引用上面定义的事务管理器 -->
    <tx:annotation-driven transaction-manager="txManager" />

    <bean
        class="org.springframework.web.servlet.mvc.annotation.AnnotationMethodHandlerAdapter">
        <property name="messageConverters">
            <list>
                <ref bean="mappingJackson2HttpMessageConverter" />
            </list>
        </property>
    </bean>
    <bean id="mappingJackson2HttpMessageConverter"
        class="org.springframework.http.converter.json.MappingJackson2HttpMessageConverter">
        <property name="supportedMediaTypes">
            <list>
                <value>text/html;charset=UTF-8</value>
                <value>text/json;charset=UTF-8</value>
                <value>application/json;charset=UTF-8</value>
            </list>
        </property>
    </bean>

    <!-- 配置ehcache管理器-->

    <bean id="cacheManager" class="org.springframework.cache.ehcache.EhCacheCacheManager">
        <property name="cacheManager" ref="ehcache"></property>
    </bean>

    <bean id="ehcache" class="org.springframework.cache.ehcache.EhCacheManagerFactoryBean">
        <property name="configLocation" value="classpath:ehcache-setting.xml"></property>
    </bean>
</beans>
在Service中加入Ehcache相关注解
package com.test.service;

import java.util.List;

import org.springframework.beans.factory.annotation.Autowired;
import org.springframework.cache.annotation.CacheEvict;
import org.springframework.cache.annotation.Cacheable;
import org.springframework.stereotype.Service;
import org.springframework.transaction.annotation.Transactional;

import com.test.mapper.StudentMapper;
import com.test.model.Student;

/**
 *
 * @author zz
 *
 */
@Service
@Transactional(rollbackFor=Exception.class)
public class ScServiceImpl implements ScService{

    @Autowired
    StudentMapper studentMapper;


    @Override
    @Cacheable(value="cacheTest")
    public Student selectStudentByID(int sid) {
        // TODO Auto-generated method stub

        return studentMapper.selectStudentByID(sid);
    }


    @Override
    @CacheEvict(value="cacheTest",allEntries=true)
    public void updateStudent(Student student) {
        // TODO Auto-generated method stub
        studentMapper.updateStudent(student);
    }


}
其中,@Cacheable(value="cacheTest"):在查询时,会先在缓存中查找数据,当缓存中数据不存在时,才会执行之后方法查找数据库
@CacheEvict(value="cacheTest",allEntries=true):在执行增删改操作时,为了保证缓存和数据库信息一致性,会将缓存信息清空。
然后启动tomcat,输入网址 http://localhost:8080/ssm/student/selectstudentbyid?id=1
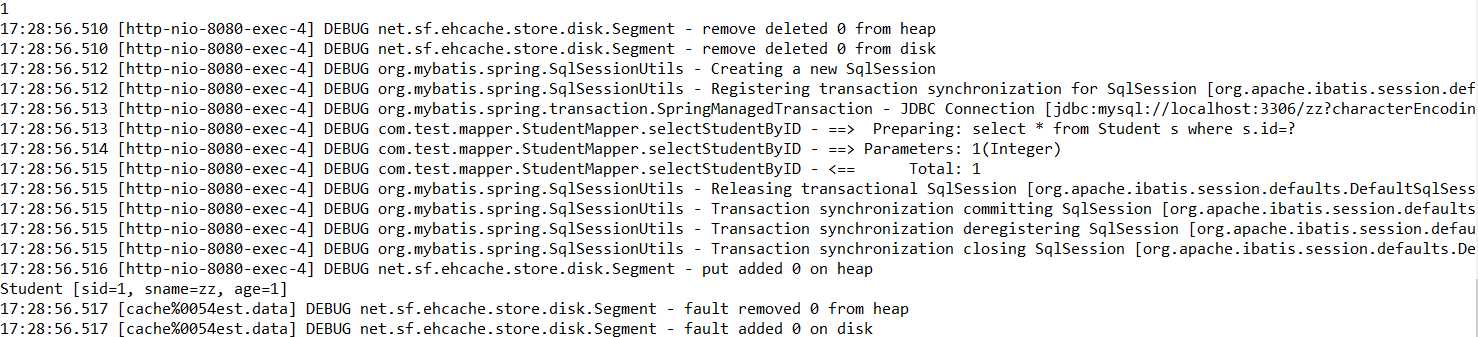
当第一次访问时,缓存没有数据,就会去数据库中查找。
我们再刷新一次刚刚的网址
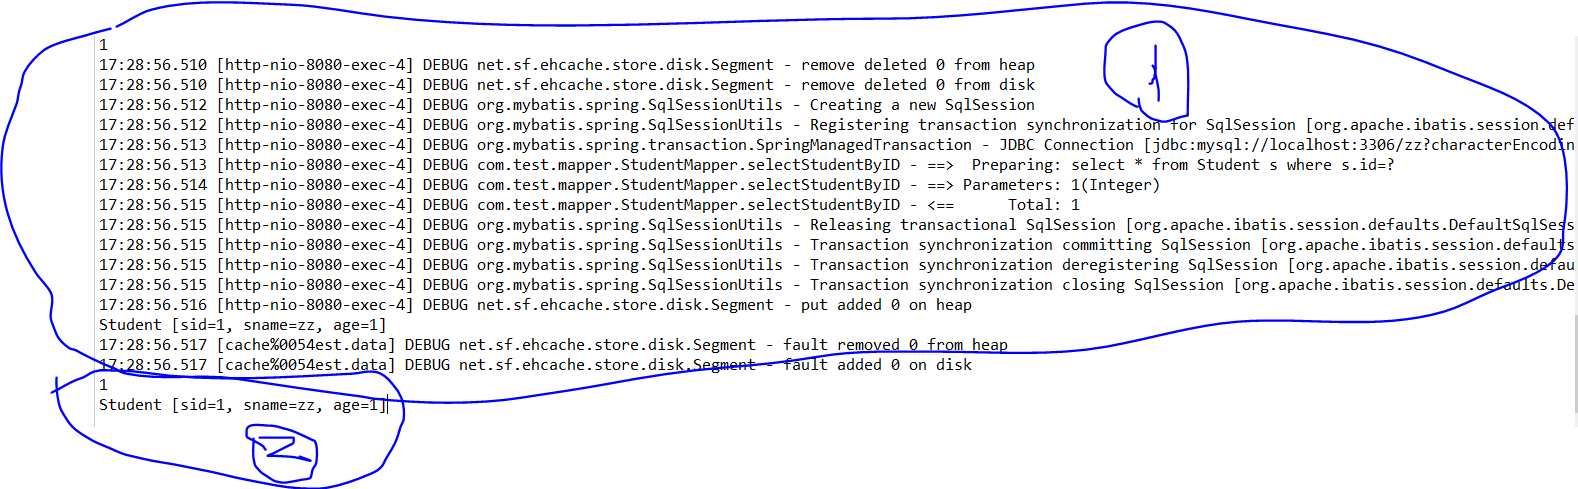
我们可以看出,第二次访问没用从数据库取数据,而是直接访问缓存(不信可以看运行时间比对)
接下来我们测试更新
这是controller代码:
package com.test.controller;

import org.springframework.web.bind.annotation.RequestMapping;
import org.springframework.beans.factory.annotation.Autowired;
import org.springframework.stereotype.Controller;
import org.springframework.ui.Model;
import org.springframework.validation.BindingResult;

import com.test.model.Student;

import com.test.service.ScService;

/**
 *
 * @author zz
 *
 */

@Controller
@RequestMapping("/student")
public class StudentController {

    @Autowired
    ScService scService;

    @RequestMapping("/selectstudentbyid")
    public String selectstudentbyid(Model model, int id) {
        System.out.println(id);
        Student student = new Student();
        student = scService.selectStudentByID(id);
        model.addAttribute("student", student);
        System.out.println(student);
        return "showstudent";
    }
    @RequestMapping("/updatestudent")
    public String updateStudent(int sid,String sname,int age) {
        Student student=new Student();
        student.setSid(sid);
        student.setSname(sname);
        student.setAge(age);
        scService.updateStudent(student);
        return "redirect:/student/selectstudentbyid?id="+sid;

    }
}
还有dao(mapper)的和mapper.xml
package com.test.mapper;


import com.test.model.Student;


/**
 *
 * @author zz
 *
 */
public interface StudentMapper {
    /**
     * select Student ByID
     * @param sid
     * @return student
     * 根据sid查询学生信息
     */
    Student selectStudentByID(int sid);
    /**
     *
     * @param student
     */
    void updateStudent(Student student);

}
<?xml version="1.0" encoding="UTF-8" ?>
<!DOCTYPE mapper PUBLIC "-//mybatis.org//DTD Mapper 3.0//EN"
"http://mybatis.org/dtd/mybatis-3-mapper.dtd">
<mapper namespace="com.test.mapper.StudentMapper">
    <resultMap type="Student" id="studentBean">
        <id column="id" property="sid" />
        <result column="name" property="sname" />
        <result column="age" property="age" />

    </resultMap>

    <select id="selectStudentByID" resultMap="studentBean">
        select *
        from
        Student s where s.id=#{sid}
    </select>

    <update id="updateStudent" parameterType="Student">
        update Student set name=#{sname},age=#{sid} where id=#{sid}
    </update>
</mapper>
输入网址:http://localhost:8080/ssm/student/updatestudent?sid=1&sname=tom&age=32

更新数据库信息并且清除缓存
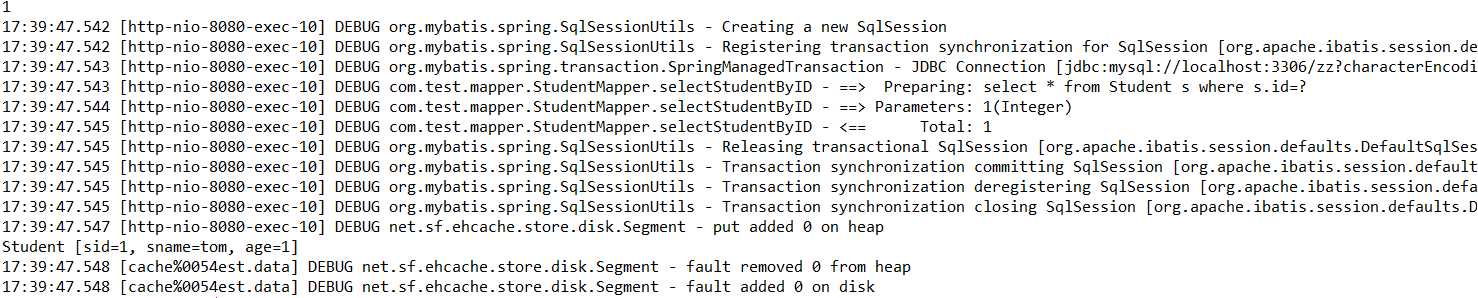
由于缓存数据被清空,所以查询时又访问数据库
再次输入网址 http://localhost:8080/ssm/student/selectstudentbyid?id=1

由于上次查询时写入缓存,所以此次直接从缓存中读取
完毕,下次再写篇利用redis作缓存数据库