上次自己搭建Quartz已经是几年前的事了,这次项目中需要定时任务,需要支持集群部署,想到比较轻量级的定时任务框架就是Quartz,于是来一波。
版本说明
通过搜索引擎很容易找到其官网,来到Document的页面,当前版本是2.2.x。
简单的搭建操作
通过Maven引入所需的包:
<dependency>
    <groupId>org.quartz-scheduler</groupId>
    <artifactId>quartz</artifactId>
    <version>2.2.3</version>
</dependency>
通过quartz.properties设置相关配置:
# 线程调度器实例名
org.quartz.scheduler.instanceName = quartzScheduler
# 线程池的线程数,即最多3个任务同时跑
org.quartz.threadPool.threadCount = 3
# 使用内存存储任务和触发器等信息
org.quartz.jobStore.class = org.quartz.simpl.RAMJobStore
定义任务,如MySimpleJob,再初始化Scheduler,最后将任务和出发器注册到Scheduler上:
package com.nicchagil.exercise.quartz.springbootquartzexercise;

import org.quartz.*;
import org.quartz.impl.StdSchedulerFactory;
import org.slf4j.Logger;
import org.slf4j.LoggerFactory;

import static org.quartz.SimpleScheduleBuilder.simpleSchedule;

public class QuartzBoot {

    private static Logger logger = LoggerFactory.getLogger(QuartzBoot.class);

    public static void main(String[] args) {

        try {
            // 获取调度器
            Scheduler scheduler = StdSchedulerFactory.getDefaultScheduler();

            // 开启调度器
            scheduler.start();

            // 注册一个示例任务和触发器
            registerJobAndTrigger(scheduler);

            // scheduler.shutdown();

        } catch (SchedulerException se) {
            logger.error("调度器初始化异常", se);
        }
    }

    /**
     * 注册一个任务和触发器
     */
    public static void registerJobAndTrigger(Scheduler scheduler) {
        JobDetail job = JobBuilder.newJob(MySimpleJob.class)
                .withIdentity("mySimpleJob", "simpleGroup")
                .build();

        Trigger trigger = org.quartz.TriggerBuilder.newTrigger()
                .withIdentity("simpleTrigger", "simpleGroup")
                .startNow()
                .withSchedule(simpleSchedule()
                        .withIntervalInSeconds(10)
                        .repeatForever())
                .build();

        try {
            scheduler.scheduleJob(job, trigger);
        } catch (SchedulerException e) {
            logger.error("注册任务和触发器失败", e);
        }
    }

    /**
     * 简单的任务
     */
    public static class MySimpleJob implements Job {
        @Override
        public void execute(JobExecutionContext jobExecutionContext) throws JobExecutionException {
            logger.info("哇真的执行了");
        }
    }

}
启动日志,你可以看到任务按照指定的触发器跑:
13:31:28.759 [main] INFO org.quartz.impl.StdSchedulerFactory - Using default implementation for ThreadExecutor
13:31:28.828 [main] INFO org.quartz.core.SchedulerSignalerImpl - Initialized Scheduler Signaller of type: class org.quartz.core.SchedulerSignalerImpl
13:31:28.828 [main] INFO org.quartz.core.QuartzScheduler - Quartz Scheduler v.2.2.3 created.
13:31:28.831 [main] INFO org.quartz.simpl.RAMJobStore - RAMJobStore initialized.
13:31:28.833 [main] INFO org.quartz.core.QuartzScheduler - Scheduler meta-data: Quartz Scheduler (v2.2.3) 'quartzScheduler' with instanceId 'NON_CLUSTERED'
  Scheduler class: 'org.quartz.core.QuartzScheduler' - running locally.
  NOT STARTED.
  Currently in standby mode.
  Number of jobs executed: 0
  Using thread pool 'org.quartz.simpl.SimpleThreadPool' - with 3 threads.
  Using job-store 'org.quartz.simpl.RAMJobStore' - which does not support persistence. and is not clustered.

13:31:28.833 [main] INFO org.quartz.impl.StdSchedulerFactory - Quartz scheduler 'quartzScheduler' initialized from default resource file in Quartz package: 'quartz.properties'
13:31:28.833 [main] INFO org.quartz.impl.StdSchedulerFactory - Quartz scheduler version: 2.2.3
13:31:28.834 [main] INFO org.quartz.core.QuartzScheduler - Scheduler quartzScheduler_$_NON_CLUSTERED started.
13:31:28.834 [quartzScheduler_QuartzSchedulerThread] DEBUG org.quartz.core.QuartzSchedulerThread - batch acquisition of 0 triggers
13:31:28.853 [quartzScheduler_QuartzSchedulerThread] DEBUG org.quartz.core.QuartzSchedulerThread - batch acquisition of 1 triggers
13:31:28.860 [quartzScheduler_QuartzSchedulerThread] DEBUG org.quartz.simpl.PropertySettingJobFactory - Producing instance of Job 'simpleGroup.mySimpleJob', class=com.nicchagil.exercise.quartz.springbootquartzexercise.QuartzBoot$MySimpleJob
13:31:28.869 [quartzScheduler_QuartzSchedulerThread] DEBUG org.quartz.core.QuartzSchedulerThread - batch acquisition of 1 triggers
13:31:28.871 [quartzScheduler_Worker-1] DEBUG org.quartz.core.JobRunShell - Calling execute on job simpleGroup.mySimpleJob
13:31:28.871 [quartzScheduler_Worker-1] INFO com.nicchagil.exercise.quartz.springbootquartzexercise.QuartzBoot - 哇真的执行了
13:31:38.842 [quartzScheduler_QuartzSchedulerThread] DEBUG org.quartz.simpl.PropertySettingJobFactory - Producing instance of Job 'simpleGroup.mySimpleJob', class=com.nicchagil.exercise.quartz.springbootquartzexercise.QuartzBoot$MySimpleJob
13:31:38.842 [quartzScheduler_Worker-2] DEBUG org.quartz.core.JobRunShell - Calling execute on job simpleGroup.mySimpleJob
13:31:38.842 [quartzScheduler_Worker-2] INFO com.nicchagil.exercise.quartz.springbootquartzexercise.QuartzBoot - 哇真的执行了
扩展
查看StdSchedulerFactory.getDefaultScheduler(),会发现用的是new StdSchedulerFactory(),在initialize()方法可以看到默认从指定配置的文件或quartz.properties读取配置:
String requestedFile = System.getProperty("org.quartz.properties");
String propFileName = requestedFile != null ? requestedFile : "quartz.properties";
调度器待机状态、关闭状态
在调用scheduler.start()启动调度器后,可以使用scheduler.standby();将调度器转为待机状态,此状态下任务和触发器不会被触发。
另外,可以使用scheduler.shutdown()关闭调度器,是不可逆的,即调用后是不可以重新开始的。
它的参数不同,意义有所不同:
scheduler.shutdown()=scheduler.shutdown(false),方法会马上返回,正在执行的任务会继续执行scheduler.shutdown(true),知道正在执行的任务执行完成才返回
在getScheduler()可以看到使用SchedulerRepository缓存了Scheduler,使用的是HashMap<String, Scheduler>:
SchedulerRepository schedRep = SchedulerRepository.getInstance();
Scheduler sched = schedRep.lookup(this.getSchedulerName());
与Spring Boot集成
首先,quartz.properties与之前的基本一致:
# 线程调度器实例名
org.quartz.scheduler.instanceName = quartzScheduler
# 线程池的线程数,即最多3个任务同时跑
org.quartz.threadPool.threadCount = 3
# 使用内存存储任务和触发器等信息
org.quartz.jobStore.class = org.quartz.simpl.RAMJobStore
因会与Spring Scheduling集成,我们按照要求定义任务,需要特别注意的是@Component和@EnableScheduling:
package com.nicchagil.exercise.quartz.springbootquartzexercise.component.quartz.job;

import org.slf4j.Logger;
import org.slf4j.LoggerFactory;
import org.springframework.scheduling.annotation.EnableScheduling;
import org.springframework.stereotype.Component;

@Component
@EnableScheduling
public class MyFirstExerciseJob {

    private Logger logger = LoggerFactory.getLogger(this.getClass());

    public void myJobBusinessMethod() {
        this.logger.info("哇被触发了哈哈哈哈哈");
    }

}类似的方式,可以定义MySecondExerciseJob。
注册任务和触发器:
package com.nicchagil.exercise.quartz.springbootquartzexercise.component.quartz;

import com.nicchagil.exercise.quartz.springbootquartzexercise.component.quartz.job.MyFirstExerciseJob;
import com.nicchagil.exercise.quartz.springbootquartzexercise.component.quartz.job.MySecondExerciseJob;
import org.springframework.beans.factory.annotation.Qualifier;
import org.springframework.context.annotation.Bean;
import org.springframework.context.annotation.Configuration;
import org.springframework.scheduling.quartz.CronTriggerFactoryBean;
import org.springframework.scheduling.quartz.MethodInvokingJobDetailFactoryBean;

@Configuration
public class QuartzJobConfig {

    /**
     * 方法调用任务明细工厂Bean
     */
    @Bean(name = "myFirstExerciseJobBean")
    public MethodInvokingJobDetailFactoryBean myFirstExerciseJobBean(MyFirstExerciseJob myFirstExerciseJob) {
        MethodInvokingJobDetailFactoryBean jobDetail = new MethodInvokingJobDetailFactoryBean();
        jobDetail.setConcurrent(false); // 是否并发
        jobDetail.setName("general-myFirstExerciseJob"); // 任务的名字
        jobDetail.setGroup("general"); // 任务的分组
        jobDetail.setTargetObject(myFirstExerciseJob); // 被执行的对象
        jobDetail.setTargetMethod("myJobBusinessMethod"); // 被执行的方法
        return jobDetail;
    }

    /**
     * 表达式触发器工厂Bean
     */
    @Bean(name = "myFirstExerciseJobTrigger")
    public CronTriggerFactoryBean myFirstExerciseJobTrigger(@Qualifier("myFirstExerciseJobBean") MethodInvokingJobDetailFactoryBean myFirstExerciseJobBean) {
        CronTriggerFactoryBean tigger = new CronTriggerFactoryBean();
        tigger.setJobDetail(myFirstExerciseJobBean.getObject());
        tigger.setCronExpression("0/10 * * * * ?"); // 什么是否触发,Spring Scheduler Cron表达式
        tigger.setName("general-myFirstExerciseJobTrigger");
        return tigger;
    }

    /**
     * 方法调用任务明细工厂Bean
     */
    @Bean(name = "mySecondExerciseJobBean")
    public MethodInvokingJobDetailFactoryBean mySecondExerciseJobBean(MySecondExerciseJob mySecondExerciseJob) {
        MethodInvokingJobDetailFactoryBean jobDetail = new MethodInvokingJobDetailFactoryBean();
        jobDetail.setConcurrent(false); // 是否并发
        jobDetail.setName("general-mySecondExerciseJob"); // 任务的名字
        jobDetail.setGroup("general"); // 任务的分组
        jobDetail.setTargetObject(mySecondExerciseJob); // 被执行的对象
        jobDetail.setTargetMethod("myJobBusinessMethod"); // 被执行的方法
        return jobDetail;
    }

    /**
     * 表达式触发器工厂Bean
     */
    @Bean(name = "mySecondExerciseJobTrigger")
    public CronTriggerFactoryBean mySecondExerciseJobTrigger(@Qualifier("mySecondExerciseJobBean") MethodInvokingJobDetailFactoryBean mySecondExerciseJobDetailFactoryBean) {
        CronTriggerFactoryBean tigger = new CronTriggerFactoryBean();
        tigger.setJobDetail(mySecondExerciseJobDetailFactoryBean.getObject());
        tigger.setCronExpression("0/10 * * * * ?"); // 什么是否触发,Spring Scheduler Cron表达式
        tigger.setName("general-mySecondExerciseJobTrigger");
        return tigger;
    }

}
将任务和触发器注册到调度器:
package com.nicchagil.exercise.quartz.springbootquartzexercise.component.quartz;

import org.quartz.Trigger;
import org.springframework.beans.factory.annotation.Qualifier;
import org.springframework.context.annotation.Bean;
import org.springframework.context.annotation.Configuration;
import org.springframework.scheduling.quartz.SchedulerFactoryBean;

@Configuration
public class QuartzConfig {

    /**
     * 调度器工厂Bean
     */
    @Bean(name = "schedulerFactory")
    public SchedulerFactoryBean schedulerFactory(@Qualifier("myFirstExerciseJobTrigger") Trigger myFirstExerciseJobTrigger,
                                                 @Qualifier("mySecondExerciseJobTrigger") Trigger mySecondExerciseJobTrigger) {
        SchedulerFactoryBean bean = new SchedulerFactoryBean();
        // 覆盖已存在的任务
        bean.setOverwriteExistingJobs(true);
        // 延时启动定时任务,避免系统未完全启动却开始执行定时任务的情况
        bean.setStartupDelay(15);
        // 注册触发器
        bean.setTriggers(myFirstExerciseJobTrigger, mySecondExerciseJobTrigger);
        return bean;
    }

}
持久化
任务持久化需要用到数据库,而初始化数据库的SQL可以从下载的发布版的文件中找到,比如,我在官网的Download页下载了当前版本的Full Distribution:Quartz 2.2.3 .tar.gz,解压后在quartz-2.2.3\docs\dbTables能找到初始化脚本,因我用的是MySQL的Innodb引擎,所以我用此脚本tables_mysql_innodb.sql。
不能持久化的问题
如果使用的是MethodInvokingJobDetailFactoryBean,持久化会有如下报错:Couldn‘t store job: Unable to serialize JobDataMap for insertion into database because the value of,我们切换使用JobDetailFactoryBean。
简单的持久化示例
quartz.properties的配置有所不同,比如会使用JobStoreTX,然后会指定数据源的信息:
# 线程调度器实例名
org.quartz.scheduler.instanceName = quartzScheduler
# 线程池的线程数,即最多3个任务同时跑
org.quartz.threadPool.threadCount = 3

# 如何存储任务和触发器等信息
org.quartz.jobStore.class = org.quartz.impl.jdbcjobstore.JobStoreTX
# 驱动代理
org.quartz.jobStore.driverDelegateClass = org.quartz.impl.jdbcjobstore.StdJDBCDelegate
# 表前缀
org.quartz.jobStore.tablePrefix = qrtz_
# 数据源
org.quartz.jobStore.dataSource = quartzDataSource
# 是否集群
org.quartz.jobStore.isClustered = false

# 数据源
# 驱动
org.quartz.dataSource.quartzDataSource.driver = com.mysql.cj.jdbc.Driver
# 连接URL
org.quartz.dataSource.quartzDataSource.URL = jdbc:mysql://localhost:3306/quartz?characterEncoding=utf-8&useSSL=true&&serverTimezone=Asia/Shanghai
# 用户名
org.quartz.dataSource.quartzDataSource.user = root
# 密码
org.quartz.dataSource.quartzDataSource.password = 123456
# 最大连接数
org.quartz.dataSource.quartzDataSource.maxConnections = 5
定义的任务有所不同:
package com.nicchagil.exercise.quartz.springbootquartzexercise.component.quartz.job;

import org.quartz.Job;
import org.quartz.JobExecutionContext;
import org.quartz.JobExecutionException;
import org.slf4j.Logger;
import org.slf4j.LoggerFactory;
import org.springframework.scheduling.annotation.EnableScheduling;
import org.springframework.stereotype.Component;

@Component
@EnableScheduling
public class MyFirstExerciseJob implements Job {

    private Logger logger = LoggerFactory.getLogger(this.getClass());

    @Override
    public void execute(JobExecutionContext jobExecutionContext) {
        this.myJobBusinessMethod();
    }

    public void myJobBusinessMethod() {
        this.logger.info("哇被触发了哈哈哈哈哈");
    }

}
注册任务和触发器的方式有所不同:
   /**
     * 方法调用任务明细工厂Bean
     */
    @Bean(name = "myFirstExerciseJobBean")
    public JobDetailFactoryBean myFirstExerciseJobBean() {
        JobDetailFactoryBean jobDetail = new JobDetailFactoryBean();
        jobDetail.setName("general-myFirstExerciseJob"); // 任务的名字
        jobDetail.setGroup("general"); // 任务的分组
        jobDetail.setJobClass(MyFirstExerciseJob.class);
        jobDetail.setDurability(true);
        return jobDetail;
    }

    /**
     * 表达式触发器工厂Bean
     */
    @Bean(name = "myFirstExerciseJobTrigger")
    public CronTriggerFactoryBean myFirstExerciseJobTrigger(@Qualifier("myFirstExerciseJobBean") JobDetailFactoryBean myFirstExerciseJobBean) {
        CronTriggerFactoryBean tigger = new CronTriggerFactoryBean();
        tigger.setJobDetail(myFirstExerciseJobBean.getObject());
        tigger.setCronExpression("0/10 * * * * ?"); // 什么是否触发,Spring Scheduler Cron表达式
        tigger.setName("general-myFirstExerciseJobTrigger");
        return tigger;
    }
注册所有任务和触发器:
package com.nicchagil.exercise.quartz.springbootquartzexercise.component.quartz;

import org.quartz.Trigger;
import org.slf4j.Logger;
import org.slf4j.LoggerFactory;
import org.springframework.beans.factory.annotation.Autowired;
import org.springframework.beans.factory.annotation.Qualifier;
import org.springframework.context.annotation.Bean;
import org.springframework.context.annotation.Configuration;
import org.springframework.scheduling.quartz.SchedulerFactoryBean;

import javax.sql.DataSource;
import java.io.IOException;
import java.util.Properties;

@Configuration
public class QuartzConfig {

    private Logger logger = LoggerFactory.getLogger(this.getClass());

    @Autowired
    @Qualifier(value = "primaryDataSource")
    private DataSource primaryDataSource;

    /**
     * 调度器工厂Bean
     */
    @Bean(name = "schedulerFactory")
    public SchedulerFactoryBean schedulerFactory( Trigger... triggers) {
        SchedulerFactoryBean bean = new SchedulerFactoryBean();

        Properties p = new Properties();
        try {
            p.load(this.getClass().getClassLoader().getResourceAsStream("quartz.properties"));
        } catch (IOException e) {
           this.logger.error("加载quartz.properties失败", e);
           throw new Error(e);
        }
        bean.setQuartzProperties(p);

        // 覆盖已存在的任务
        bean.setOverwriteExistingJobs(true);
        // 延时启动定时任务,避免系统未完全启动却开始执行定时任务的情况
        bean.setStartupDelay(15);
        // 注册触发器
        bean.setTriggers(triggers);
        return bean;
    }

}
使用应用的数据源
有时候持久化的数据源用的是应用的数据源,可以使用bean.setDataSource(dataSource)设置或覆盖数据源。
比如,应用的数据源是这样的。
POM.XML:
        <!-- 引入数据库连接池 -->
        <dependency>
            <groupId>com.alibaba</groupId>
            <artifactId>druid</artifactId>
            <version>1.1.6</version>
        </dependency>

        <!-- Spring Boot JDBC -->
        <dependency>
            <groupId>org.springframework.boot</groupId>
            <artifactId>spring-boot-starter-jdbc</artifactId>
        </dependency>
数据源配置:
spring.dataSource.primaryDataSource.type = com.alibaba.druid.pool.DruidDataSource
spring.dataSource.primaryDataSource.url = jdbc:mysql://localhost:33306/quartz?characterEncoding=utf-8&useSSL=true&&serverTimezone=Asia/Shanghai&allowMultiQueries=true&autoReconnect=true
spring.dataSource.primaryDataSource.username = root
spring.dataSource.primaryDataSource.password = 123456
spring.dataSource.primaryDataSource.driverClassName = com.mysql.jdbc.Driver
spring.dataSource.primaryDataSource.initialSize = 5
spring.dataSource.primaryDataSource.minIdle = 5
spring.dataSource.primaryDataSource.maxActive = 15
spring.dataSource.primaryDataSource.maxWait = 60000
spring.dataSource.primaryDataSource.timeBetweenEvictionRunsMillis = 60000
spring.dataSource.primaryDataSource.minEvictableIdleTimeMillis = 300000
spring.dataSource.primaryDataSource.validationQuery = SELECT 1 FROM DUAL
spring.dataSource.primaryDataSource.testWhileIdle = true
spring.dataSource.primaryDataSource.testOnBorrow = true
spring.dataSource.primaryDataSource.testOnReturn = true
配置载入类:
package com.nicchagil.exercise.quartz.springbootquartzexercise.component.datasourcepool;

import org.springframework.boot.context.properties.ConfigurationProperties;
import org.springframework.stereotype.Component;

@Component
@ConfigurationProperties(prefix = "spring.dataSource.primaryDataSource")
public class DruidPrimaryDataSourceConfigProperties {

    private String type;

    private String url;

    private String username;

    private String password;

    private String driverClassName;

    private Integer initialSize;

    private Integer minIdle;

    private Integer maxActive;

    private Integer maxWait;

    private Integer timeBetweenEvictionRunsMillis;

    private Integer minEvictableIdleTimeMillis;

    private String validationQuery;

    private Boolean testWhileIdle;

    private Boolean testOnBorrow;

    private Boolean testOnReturn;

    public String getType() {
        return type;
    }

    public void setType(String type) {
        this.type = type;
    }

    public String getUrl() {
        return url;
    }

    public void setUrl(String url) {
        this.url = url;
    }

    public String getUsername() {
        return username;
    }

    public void setUsername(String username) {
        this.username = username;
    }

    public String getPassword() {
        return password;
    }

    public void setPassword(String password) {
        this.password = password;
    }

    public String getDriverClassName() {
        return driverClassName;
    }

    public void setDriverClassName(String driverClassName) {
        this.driverClassName = driverClassName;
    }

    public Integer getInitialSize() {
        return initialSize;
    }

    public void setInitialSize(Integer initialSize) {
        this.initialSize = initialSize;
    }

    public Integer getMinIdle() {
        return minIdle;
    }

    public void setMinIdle(Integer minIdle) {
        this.minIdle = minIdle;
    }

    public Integer getMaxActive() {
        return maxActive;
    }

    public void setMaxActive(Integer maxActive) {
        this.maxActive = maxActive;
    }

    public Integer getMaxWait() {
        return maxWait;
    }

    public void setMaxWait(Integer maxWait) {
        this.maxWait = maxWait;
    }

    public Integer getTimeBetweenEvictionRunsMillis() {
        return timeBetweenEvictionRunsMillis;
    }

    public void setTimeBetweenEvictionRunsMillis(Integer timeBetweenEvictionRunsMillis) {
        this.timeBetweenEvictionRunsMillis = timeBetweenEvictionRunsMillis;
    }

    public Integer getMinEvictableIdleTimeMillis() {
        return minEvictableIdleTimeMillis;
    }

    public void setMinEvictableIdleTimeMillis(Integer minEvictableIdleTimeMillis) {
        this.minEvictableIdleTimeMillis = minEvictableIdleTimeMillis;
    }

    public String getValidationQuery() {
        return validationQuery;
    }

    public void setValidationQuery(String validationQuery) {
        this.validationQuery = validationQuery;
    }

    public Boolean getTestWhileIdle() {
        return testWhileIdle;
    }

    public void setTestWhileIdle(Boolean testWhileIdle) {
        this.testWhileIdle = testWhileIdle;
    }

    public Boolean getTestOnBorrow() {
        return testOnBorrow;
    }

    public void setTestOnBorrow(Boolean testOnBorrow) {
        this.testOnBorrow = testOnBorrow;
    }

    public Boolean getTestOnReturn() {
        return testOnReturn;
    }

    public void setTestOnReturn(Boolean testOnReturn) {
        this.testOnReturn = testOnReturn;
    }
}
初始化数据源:
package com.nicchagil.exercise.quartz.springbootquartzexercise.component.datasourcepool;

import com.alibaba.druid.pool.DruidDataSource;
import org.springframework.beans.factory.annotation.Autowired;
import org.springframework.context.annotation.Bean;
import org.springframework.context.annotation.Configuration;

import javax.sql.DataSource;

@Configuration
public class DruidPrimaryDataSourceConfig {

    @Autowired
    private DruidPrimaryDataSourceConfigProperties druidPrimaryDataSourceConfigProperties;

    @Bean
    public DataSource primaryDataSource (){
        DruidDataSource datasource = new DruidDataSource();
        /* 基础配置 */
        datasource.setUrl(this.druidPrimaryDataSourceConfigProperties.getUrl());
        datasource.setUsername(this.druidPrimaryDataSourceConfigProperties.getUsername());
        datasource.setPassword(this.druidPrimaryDataSourceConfigProperties.getPassword());
        datasource.setDriverClassName(this.druidPrimaryDataSourceConfigProperties.getDriverClassName());

        /* 其他配置 */
        datasource.setInitialSize(this.druidPrimaryDataSourceConfigProperties.getInitialSize());
        datasource.setMinIdle(this.druidPrimaryDataSourceConfigProperties.getMinIdle());
        datasource.setMaxActive(this.druidPrimaryDataSourceConfigProperties.getMaxActive());
        datasource.setMaxWait(this.druidPrimaryDataSourceConfigProperties.getMaxWait());
        datasource.setTimeBetweenEvictionRunsMillis(this.druidPrimaryDataSourceConfigProperties.getTimeBetweenEvictionRunsMillis());
        datasource.setMinEvictableIdleTimeMillis(this.druidPrimaryDataSourceConfigProperties.getMinEvictableIdleTimeMillis());
        datasource.setValidationQuery(this.druidPrimaryDataSourceConfigProperties.getValidationQuery());
        datasource.setTestWhileIdle(this.druidPrimaryDataSourceConfigProperties.getTestWhileIdle());
        datasource.setTestOnBorrow(this.druidPrimaryDataSourceConfigProperties.getTestOnBorrow());
        datasource.setTestOnReturn(this.druidPrimaryDataSourceConfigProperties.getTestOnReturn());

        return datasource;
    }

}可以使用bean.setDataSource(dataSource)设置或覆盖数据源:
package com.nicchagil.exercise.quartz.springbootquartzexercise.component.quartz;
import org.quartz.Trigger;
import org.slf4j.Logger;
import org.slf4j.LoggerFactory;
import org.springframework.beans.factory.annotation.Autowired;
import org.springframework.beans.factory.annotation.Qualifier;
import org.springframework.context.annotation.Bean;
import org.springframework.context.annotation.Configuration;
import org.springframework.scheduling.quartz.SchedulerFactoryBean;
import javax.sql.DataSource;
import java.io.IOException;
import java.util.Properties;
@Configuration
public class QuartzConfig {
private Logger logger = LoggerFactory.getLogger(this.getClass());
@Autowired
@Qualifier(value = "primaryDataSource")
private DataSource primaryDataSource;
/**
* 调度器工厂Bean
*/
@Bean(name = "schedulerFactory")
public SchedulerFactoryBean schedulerFactory( Trigger... triggers) {
SchedulerFactoryBean bean = new SchedulerFactoryBean();
Properties p = new Properties();
try {
p.load(this.getClass().getClassLoader().getResourceAsStream("quartz.properties"));
} catch (IOException e) {
this.logger.error("加载quartz.properties失败", e);
throw new Error(e);
}
bean.setQuartzProperties(p);
/* 使用应用的数据源 */
bean.setDataSource(this.primaryDataSource);
// 覆盖已存在的任务
bean.setOverwriteExistingJobs(true);
// 延时启动定时任务,避免系统未完全启动却开始执行定时任务的情况
bean.setStartupDelay(15);
// 注册触发器
bean.setTriggers(triggers);
return bean;
}
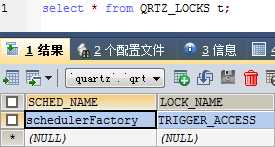
}数据表查询
QRTZ_CRON_TRIGGERS,触发器表
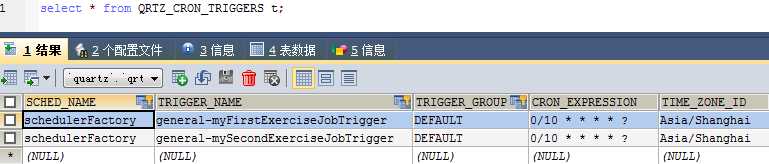
QRTZ_FIRED_TRIGGERS,已触发的触发表

QRTZ_JOB_DETAILS,任务明细表

QRTZ_TRIGGERS,触发器表

QRTZ_LOCKS,锁表
并发执行
保证上一次任务执行完毕,再执行下一次任务
在任务类上注解@DisallowConcurrentExecution,比如此任务需耗时7秒,却配置5秒执行一次,注解后将会7秒才运行一次:
@Component
@EnableScheduling
@DisallowConcurrentExecution // 保证上一次任务执行完毕再执行下一任务
public class MyFirstExerciseJob implements Job {
日志:
2018-02-21 12:09:04.479  INFO 9496 --- [actory_Worker-3] c.n.e.q.s.c.q.job.MyFirstExerciseJob     : 哇被触发了哈哈哈哈哈 x 5
2018-02-21 12:09:11.629  INFO 9496 --- [actory_Worker-2] c.n.e.q.s.c.q.job.MyFirstExerciseJob     : 哇被触发了哈哈哈哈哈 x 6
2018-02-21 12:09:18.796  INFO 9496 --- [actory_Worker-1] c.n.e.q.s.c.q.job.MyFirstExerciseJob     : 哇被触发了哈哈哈哈哈 x 7
2018-02-21 12:09:26.016  INFO 9496 --- [actory_Worker-3] c.n.e.q.s.c.q.job.MyFirstExerciseJob     : 哇被触发了哈哈哈哈哈 x 8
2018-02-21 12:09:33.268  INFO 9496 --- [actory_Worker-2] c.n.e.q.s.c.q.job.MyFirstExerciseJob     : 哇被触发了哈哈哈哈哈 x 9
2018-02-21 12:09:40.518  INFO 9496 --- [actory_Worker-1] c.n.e.q.s.c.q.job.MyFirstExerciseJob     : 哇被触发了哈哈哈哈哈 x 10
2018-02-21 12:09:47.668  INFO 9496 --- [actory_Worker-3] c.n.e.q.s.c.q.job.MyFirstExerciseJob     : 哇被触发了哈哈哈哈哈 x 11
2018-02-21 12:09:54.869  INFO 9496 --- [actory_Worker-2] c.n.e.q.s.c.q.job.MyFirstExerciseJob     : 哇被触发了哈哈哈哈哈 x 12
集群
下面配置展示了Quartz的必要配置:
- instanceName,实例名,集群各节点的实例名相同
- instanceId,实例ID,设为AUTO则由Quartz自动根据主机名、时间戳生成实例ID
- org.quartz.jobStore.class = org.quartz.impl.jdbcjobstore.JobStoreTX,存储任务为数据库存储,不能使用内存,即
RAMJobStore - isClustered,告诉Quartz是否为集群模式
# 线程调度器实例名
org.quartz.scheduler.instanceName = QuartzScheduler
# 线程池的线程数,即最多3个任务同时跑
org.quartz.threadPool.threadCount = 3
# 实例ID
org.quartz.scheduler.instanceId = AUTO

# 如何存储任务和触发器等信息
org.quartz.jobStore.class = org.quartz.impl.jdbcjobstore.JobStoreTX
# 驱动代理
org.quartz.jobStore.driverDelegateClass = org.quartz.impl.jdbcjobstore.StdJDBCDelegate
# 表前缀
org.quartz.jobStore.tablePrefix = qrtz_
# 是否集群
org.quartz.jobStore.isClustered = true
配置后,启动多个节点,你会发现:
- 一个任务只有一个节点触发,不会多节点都被触发
- 当一个节点宕机,其它节点会接手任务的触发