今天我学习了自定义一个简单的MVC框架,这个我们首先要知道什么是MVC框架!
MVC框架: MVC全名是Model View Controller,是模型(model)-视图(view)-控制器(controller)的缩写,一种软件设计典范,用一种业务逻辑、数据、界面显示分离的方法组织代码,将业务逻辑聚集到一个部件里面,在改进和个性化定制界面及用户交互的同时,不需要重新编写业务逻辑。MVC被独特的发展起来用于映射传统的输入、处理和输出功能在一个逻辑的图形化用户界面的结构中。
我们今天自己定义的MVC框架是简单模仿struts2的
然后我们会用到两个常用的技能点,一个是使用dom4j解析xml文件,还有一个是java反射机制。
我们先看一下整体架构
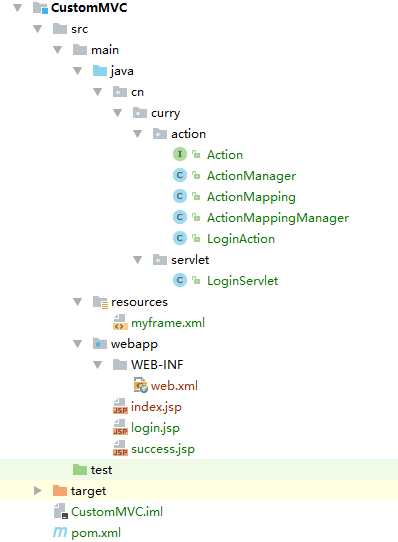
我们用的是intellij idea这个工具。我们会创建一个maven项目,然后在pom文件导入我们需要的两个jar包,一个是dom4j的,一个是javaee的
下面是两个节点
<project xmlns="http://maven.apache.org/POM/4.0.0" xmlns:xsi="http://www.w3.org/2001/XMLSchema-instance"
         xsi:schemaLocation="http://maven.apache.org/POM/4.0.0 http://maven.apache.org/maven-v4_0_0.xsd">
    <parent>
        <artifactId>Y2166</artifactId>
        <groupId>cn.happy</groupId>
        <version>1.0-SNAPSHOT</version>
    </parent>
    <modelVersion>4.0.0</modelVersion>
    <artifactId>CustomMVC</artifactId>
    <packaging>war</packaging>
    <name>CustomMVC Maven Webapp</name>
    <url>http://maven.apache.org</url>
    <dependencies>
        <dependency>
            <groupId>junit</groupId>
            <artifactId>junit</artifactId>
            <version>3.8.1</version>
            <scope>test</scope>
        </dependency>
        <dependency>
            <groupId>dom4j</groupId>
            <artifactId>dom4j</artifactId>
            <version>1.6.1</version>
        </dependency>
        <!--ServletAPI-->
        <dependency>
            <groupId>javax</groupId>
            <artifactId>javaee-api</artifactId>
            <version>7.0</version>
            <scope>provided</scope>
        </dependency>
    </dependencies>
    <build>
        <resources>
            <resource>
                <directory>src/main/java</directory>
                <includes>
                    <include>**/*.*</include>
                </includes>
            </resource>
        </resources>
    </build>
</project>
我们要定义自己的配置文件myframe.xml.我们要定义自己的dtd文件约束和配置信息
<?xml version=‘1.0‘ encoding=‘UTF-8‘?>
<!DOCTYPE myframe[
        <!ELEMENT myframe (actions)>
        <!ELEMENT actions (action*)>
        <!ELEMENT action (result*)>
        <!ATTLIST action
                name CDATA #REQUIRED
                class CDATA #REQUIRED>
        <!ELEMENT result (#PCDATA)>
        <!ATTLIST result
                name CDATA #IMPLIED
                redirect (true|false) "false">
        ]>
<myframe>
    <actions>
        <action name="login" class="cn.curry.action.LoginAction">
            <result name="success">/success.jsp</result>
            <result name="login">/login.jsp</result>
        </action>
    </actions>
</myframe>
然后建好包开始创建我们需要的类和接口。
首先我们定义自己的Action接口,在这个接口里我们简单定义了两个字符串常量,还有一个抽象的execute方法,我们最后看实现。
package cn.curry.action;

import javax.servlet.http.HttpServletRequest;
import javax.servlet.http.HttpServletResponse;
/**
 * @Auther: Xiao Yu
 * @Date: Created in 17:53 2018/3/3
 */
public interface Action {
    public static final String SUCCESS="success";
    public static final String LOGIN="login";
    public String execute(HttpServletRequest request, HttpServletResponse response) throws Exception;
}
然后我们定义一个ActionManager管理类,我们通过类名用反射机制获取对象。
package cn.curry.action;

/**
 * @Auther: Xiao Yu
 * @Date: Created in 17:53 2018/3/3
 */
public class ActionManager {
    public static Action getActionClass(String className) throws Exception{
        Class clazz=null;
        Action action=null;
        clazz=Thread.currentThread().getContextClassLoader().loadClass(className);
        if (clazz==null){
            clazz=Class.forName(className);
        }
        if (action==null){
            action=(Action) clazz.newInstance();
        }
        return action;
    }
}
然后我们再定义一个ActionMapping类,这个类定义了几个属性,类似于实体类的作用。
package cn.curry.action;

/**
 * @Auther: Xiao Yu
 * @Date: Created in 17:54 2018/3/3
 */
import java.util.HashMap;
import java.util.Map;
public class ActionMapping {
    private String name;
    private String className;
    private Map<String,String> map=new HashMap<String, String>();

    public String getName() {
        return name;
    }

    public void setName(String name) {
        this.name = name;
    }

    public String getClassName() {
        return className;
    }

    public void setClassName(String className) {
        this.className = className;
    }

    public String getValue(String key) {
        return map.get(key);
    }

    public void addToMap(String key,String value) {
        map.put(key,value);
    }
}
然后我们要做解析XML的类,我们的类ActionMappingManager ,我们通过读取用jdom4j读取xml,然后把数据添加到集合中。
package cn.curry.action;
import org.dom4j.Document;
import org.dom4j.Element;
import org.dom4j.io.SAXReader;
import java.io.InputStream;
import java.util.HashMap;
import java.util.Iterator;
import java.util.Map;

/**
 * @Auther: Xiao Yu
 * @Date: Created in 17:54 2018/3/3
 */
public class ActionMappingManager {
    private Map<String,ActionMapping> map=new HashMap<String, ActionMapping>();

    public  ActionMapping getValue(String key) {
        return map.get(key);
    }

    public void addToMaps(String key,ActionMapping value) {
        map.put(key,value);
    }

    public ActionMappingManager(String [] files)throws Exception{
        for (String item:files){
            init(item);
        }
    }
    public void init(String path)throws Exception{
        InputStream is=this.getClass().getResourceAsStream("/"+path);
        Document doc=new SAXReader().read(is);
        Element root=doc.getRootElement();
        Element actions=(Element)root.elements("actions").iterator().next();
        for (Iterator<Element> action=actions.elementIterator("action");action.hasNext();){
            Element actionnext=action.next();
            ActionMapping am=new ActionMapping();
            am.setName(actionnext.attributeValue("name"));
            am.setClassName(actionnext.attributeValue("class"));
            for (Iterator<Element> result=actionnext.elementIterator("result");result.hasNext();){
                Element resultnext=result.next();
                String name=resultnext.attributeValue("name");
                String value=resultnext.getText();
                if (name==null||"".equals(name)){
                    name="success";
                }
                am.addToMap(name,value);
            }
            map.put(am.getName(),am);
        }
    }
}
定义自己的LoginAction封装业务逻辑
package cn.curry.action;

import javax.servlet.http.HttpServletRequest;
import javax.servlet.http.HttpServletResponse;

/**
 * @Auther: Xiao Yu
 * @Date: Created in 17:54 2018/3/3
 */
public class LoginAction implements Action{
    public String execute(HttpServletRequest request, HttpServletResponse response) throws Exception {
        String name = request.getParameter("name");
        if(name.equals("1")){
            return "success";
        }else {
            return "login";
        }

    }
}
接下来我们要定义一个servlet来获取请求,LoginServlet.主要通过获取的请求来找到myframe.xml.
package cn.curry.servlet;

import cn.curry.action.Action;
import cn.curry.action.ActionManager;
import cn.curry.action.ActionMapping;
import cn.curry.action.ActionMappingManager;
import org.omg.PortableInterceptor.ACTIVE;

import javax.servlet.ServletConfig;
import javax.servlet.ServletException;
import javax.servlet.http.HttpServlet;
import javax.servlet.http.HttpServletRequest;
import javax.servlet.http.HttpServletResponse;
import java.io.IOException;

/**
 * @Auther: Xiao Yu
 * @Date: Created in 17:54 2018/3/3
 */
public class LoginServlet extends HttpServlet {
    private ActionMappingManager manager=null;
    private String getClassName(HttpServletRequest request){
        String uri=request.getRequestURI();
        System.out.println(uri+"        uri");
        String context=request.getContextPath();
        System.out.println(context+"             context");
        String result=uri.substring(context.length());
        System.out.println(result+"              result");
        return result.substring(1,result.lastIndexOf("."));
    }


    protected void doPost(HttpServletRequest request, HttpServletResponse response) throws ServletException, IOException {
        String key=getClassName(request);
        System.out.println(key+"           key");
        try {
            ActionMapping actionMapping=manager.getValue(key);
            System.out.println(actionMapping.getClassName()+"            classname");
            Action action= ActionManager.getActionClass(actionMapping.getClassName());
            String result=action.execute(request,response);
            System.out.println(result+"                   result");
            String path=actionMapping.getValue(result);
            System.out.println(path+"                path");
            request.getRequestDispatcher(path).forward(request,response);
        } catch (Exception e) {
            e.printStackTrace();
        }
    }

    protected void doGet(HttpServletRequest request, HttpServletResponse response) throws ServletException, IOException {
        doPost(request,response);
    }

    @Override
    public void init(ServletConfig config) throws ServletException {
        String fileName=config.getInitParameter("config");
        String file[]=null;
        if(fileName==null){
            file=new String[]{"myframe.xml"};
        }else {
            fileName.split(",");
        }
        try {
            manager=new ActionMappingManager(file);
        } catch (Exception e) {
            e.printStackTrace();
        }
    }
}
最后我们配置一下web.xml,然后就书写页面
<!DOCTYPE web-app PUBLIC
        "-//Sun Microsystems, Inc.//DTD Web Application 2.3//EN"
        "http://java.sun.com/dtd/web-app_2_3.dtd" >

<web-app>
  <display-name>Archetype Created Web Application</display-name>
  <servlet>
    <servlet-name>LoginServlet</servlet-name>
    <servlet-class>cn.curry.servlet.LoginServlet</servlet-class>
  </servlet>
  <servlet-mapping>
    <servlet-name>LoginServlet</servlet-name>
    <url-pattern>*.action</url-pattern>
  </servlet-mapping>
  <welcome-file-list>
    <welcome-file>login.jsp</welcome-file>
  </welcome-file-list>
</web-app>
书写页面,我们准备了两个页面,一个login.jsp。一个success.jsp。
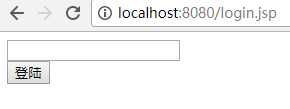
首先看login.jsp
<%@ page language="java" import="java.util.*" pageEncoding="UTF-8"%>
<%
String path = request.getContextPath();
String basePath = request.getScheme()+"://"+request.getServerName()+":"+request.getServerPort()+path+"/";
%>
<!DOCTYPE HTML PUBLIC "-//W3C//DTD HTML 4.01 Transitional//EN">
<html>
  <head>
    <base href="<%=basePath%>">
    <title>登陆页面</title>
    <meta http-equiv="pragma" content="no-cache">
    <meta http-equiv="cache-control" content="no-cache">
    <meta http-equiv="expires" content="0">
    <meta http-equiv="keywords" content="keyword1,keyword2,keyword3">
    <meta http-equiv="description" content="This is my page">
    <!--
    <link rel="stylesheet" type="text/css" href="styles.css">
    -->
  </head>
  <body>
  <form action="login.action" method="POST">
      <input name="name"><br>
      <input type="submit" value="登陆"/>
  </form>
  </body>
</html>
然后看success.jsp
<%@ page language="java" import="java.util.*" pageEncoding="UTF-8"%>
<%
String path = request.getContextPath();
String basePath = request.getScheme()+"://"+request.getServerName()+":"+request.getServerPort()+path+"/";
%>
<!DOCTYPE HTML PUBLIC "-//W3C//DTD HTML 4.01 Transitional//EN">
<html>
  <head>
    <base href="<%=basePath%>">
    <title>SUCCESS</title>
    <meta http-equiv="pragma" content="no-cache">
    <meta http-equiv="cache-control" content="no-cache">
    <meta http-equiv="expires" content="0">
    <meta http-equiv="keywords" content="keyword1,keyword2,keyword3">
    <meta http-equiv="description" content="This is my page">
    <!--
    <link rel="stylesheet" type="text/css" href="styles.css">
    -->
  </head>
  <body>
  <h2>登录成功</h2>
  </body>
</html>
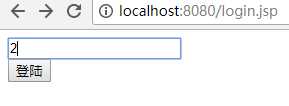
最后我们看一下运行效果
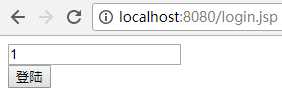
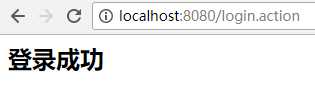
登陆成功跳到success.jsp页面
看一下登陆失败
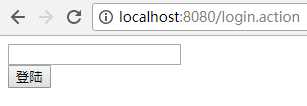
登陆失败重新跳到登陆页面