标签:tar file 添加 phpstorm pst 文件中 oca 浏览器 inf
1、开启XAMPP,使用ThinkPHP创建项目,添加PHP文件phpinfo.php, 写上phpinfo();
2、使用Google浏览器地址栏输入:localhost/项目名称/public/phpinfo.php,可以看见php的信息,右键点击查看网页源码,CMD+A / CMD+C全部复制
3、在这个网址下 https://xdebug.org/wizard.php 粘贴刚刚复制到信息,点击下方按钮,得到如下图PHP信息:
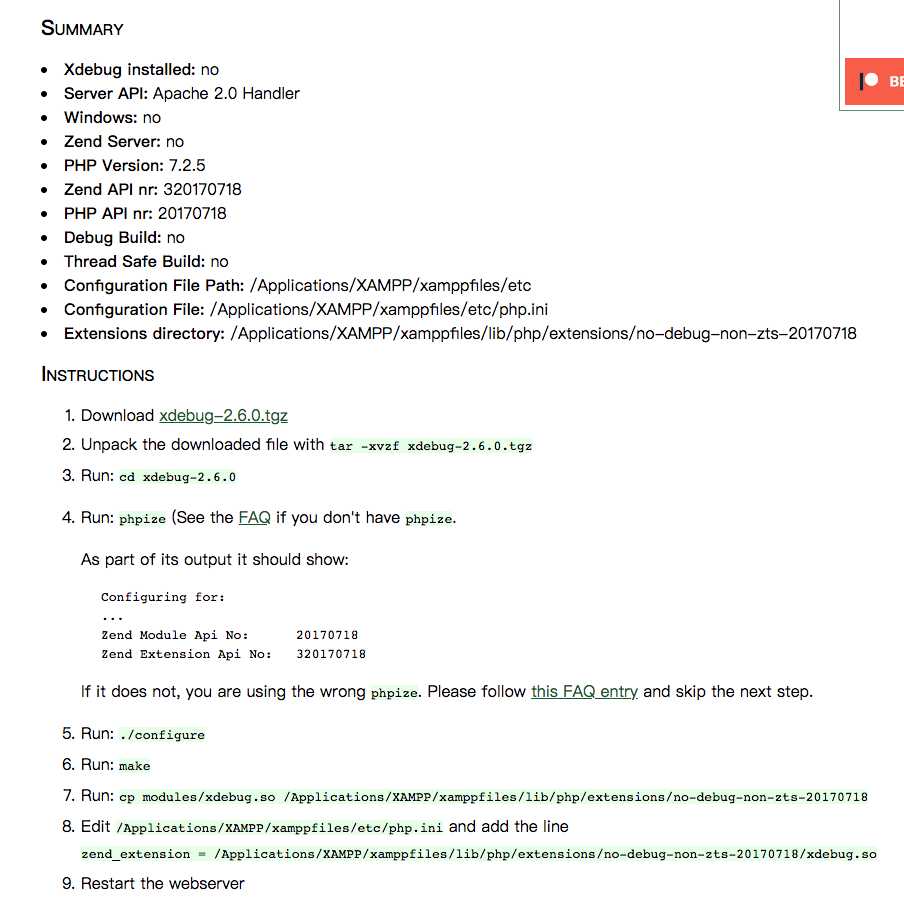
4、按照官方提供 Instructions 中的步骤执行即可实现按照
5、在/Applications/XAMPP/xamppfiles/etc/php.ini 文件中添加信息如下:
CMD + S 保存退出
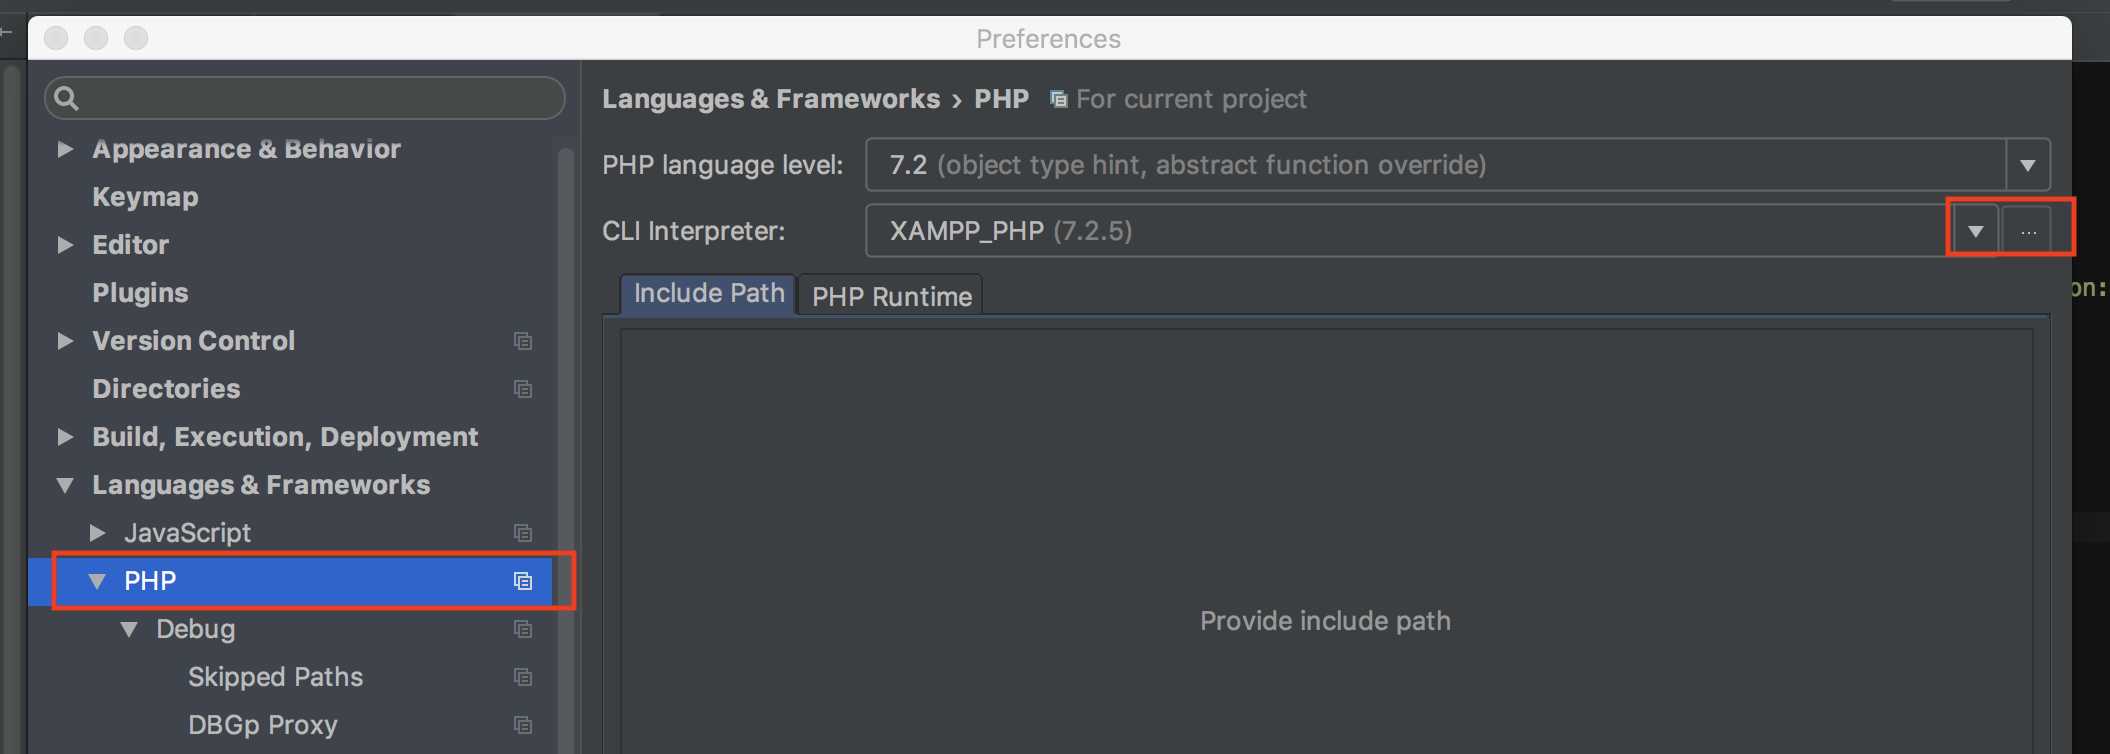
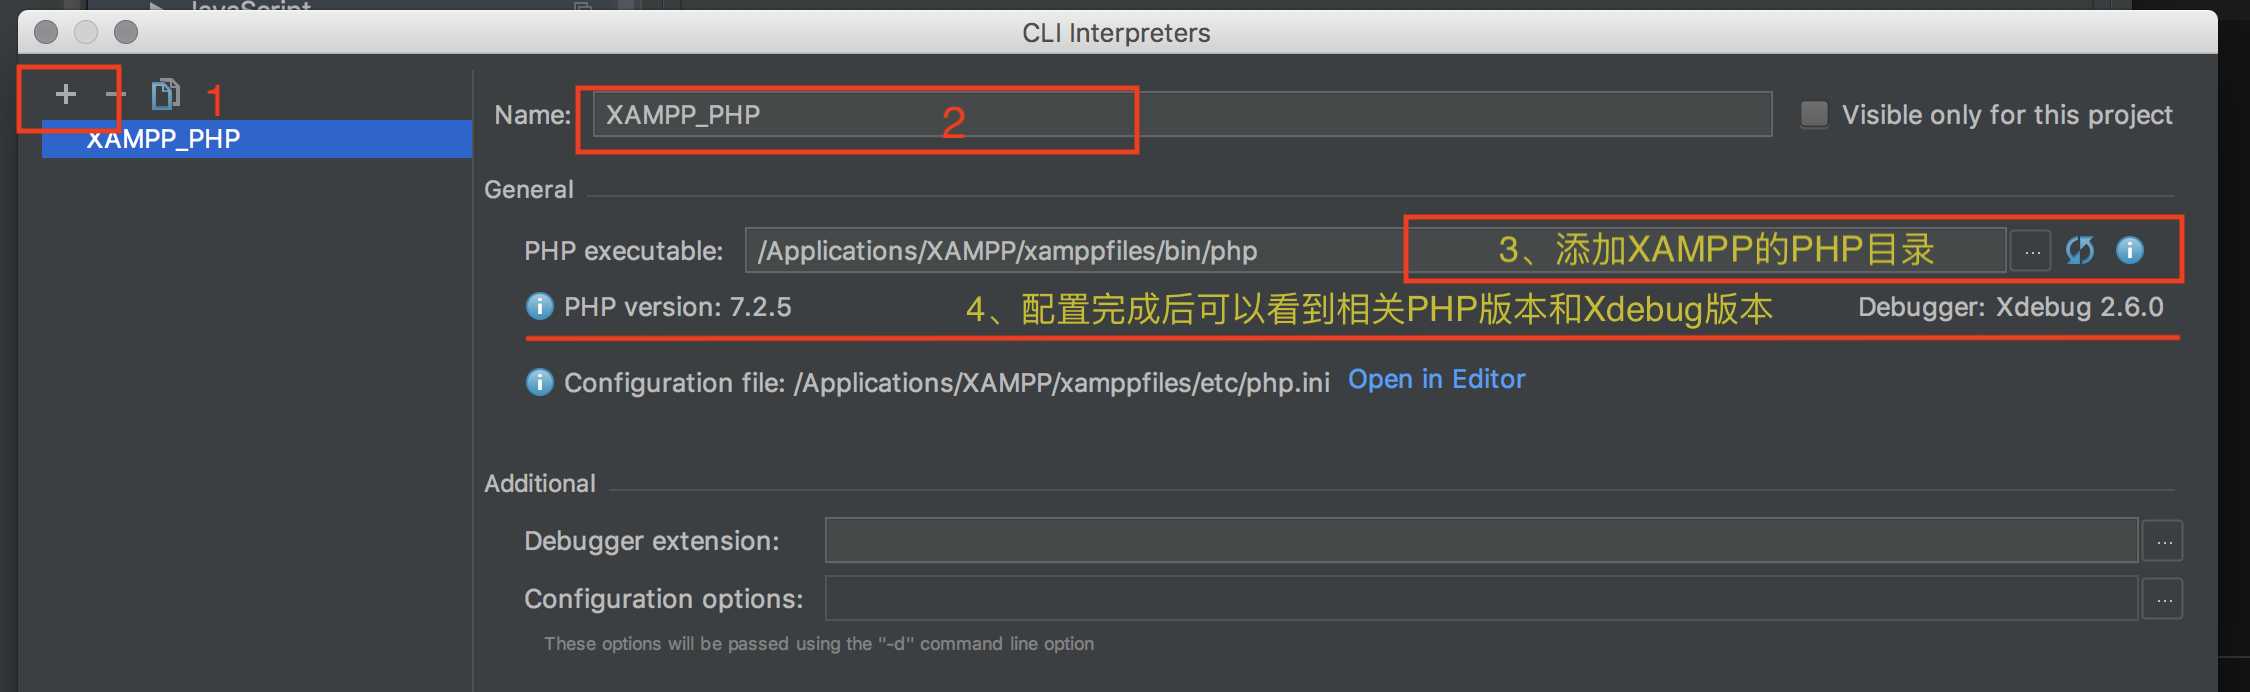
6、在Phpstorm配置如下:
A、配置php
B、配置Debug

C、添加Services

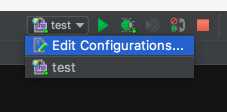
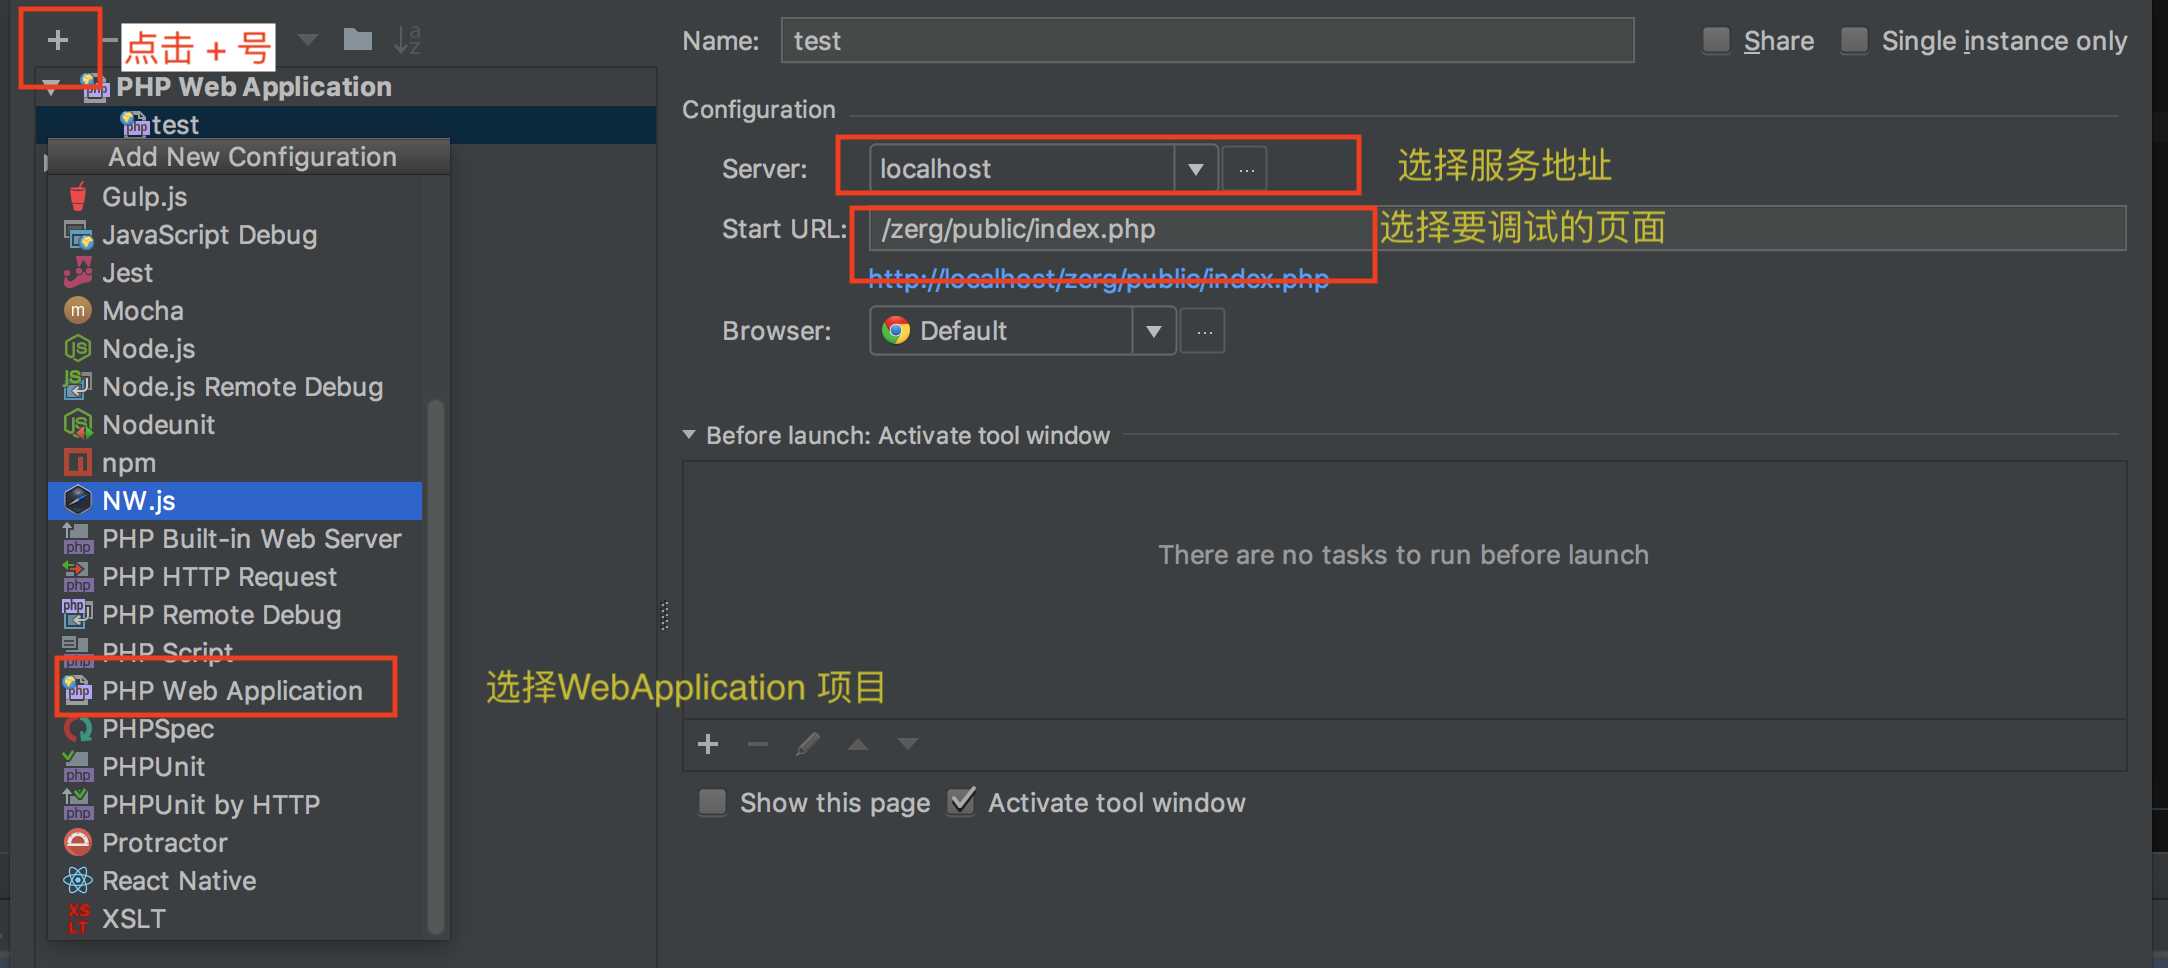
D、添加调试项目
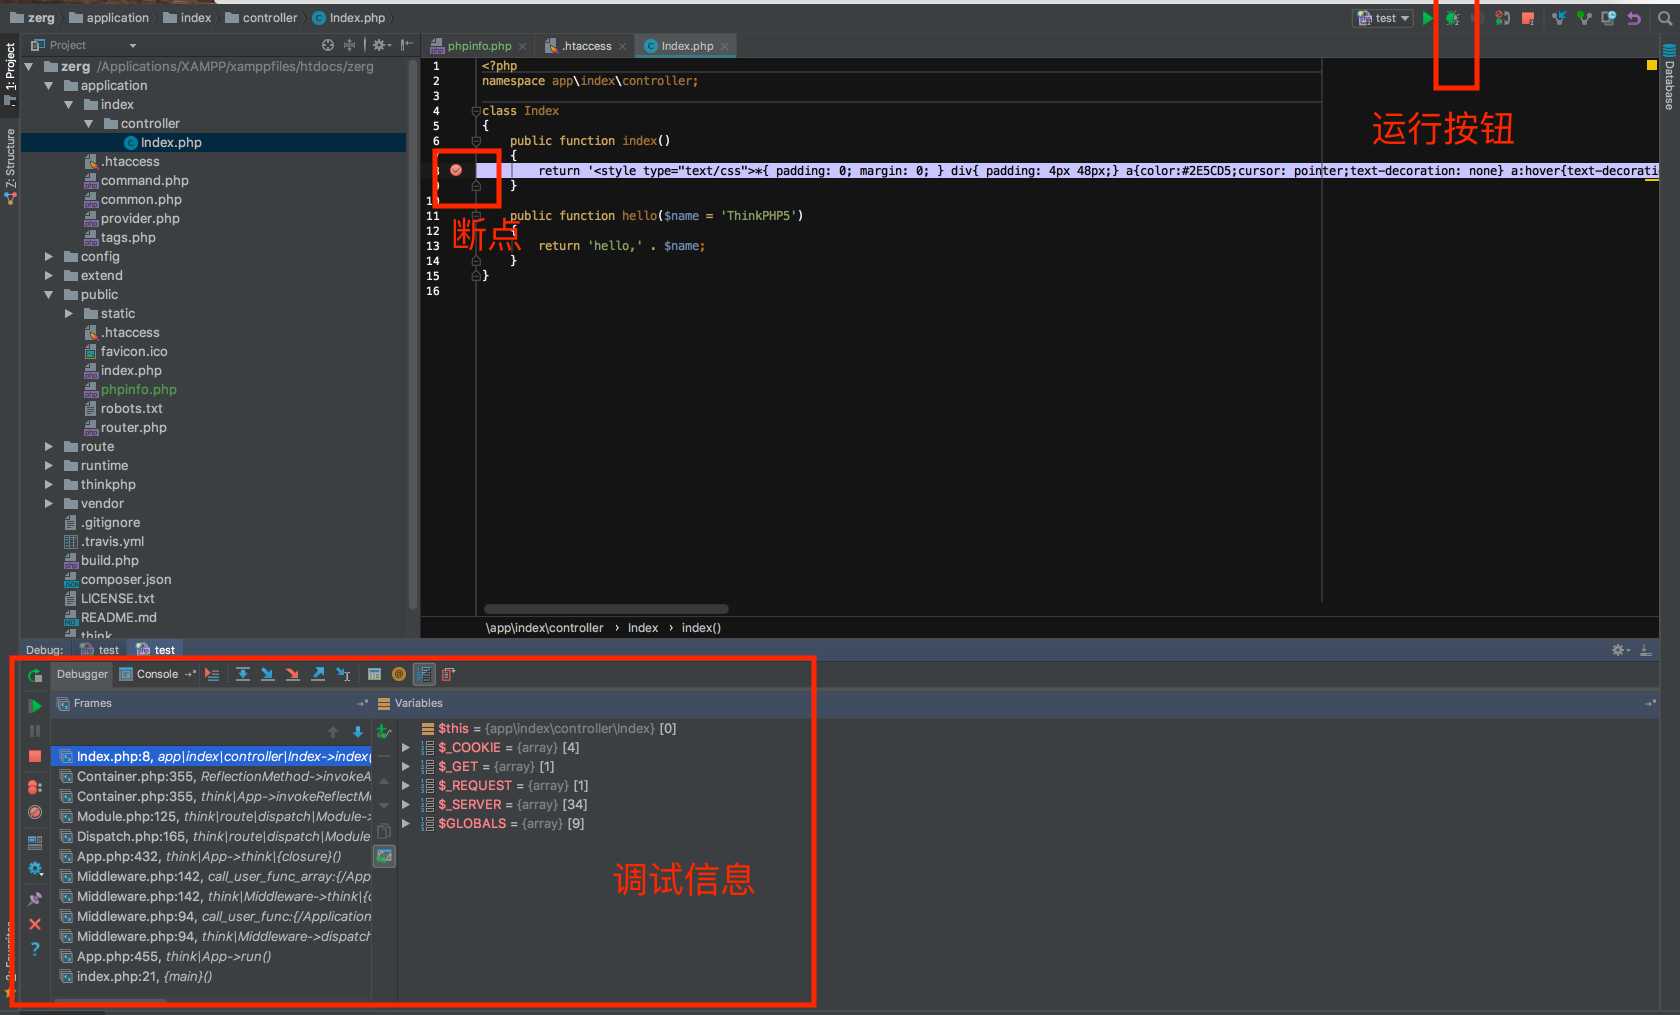
E、运行
XAMPP + Phpstorm + Xdebug 实现断点调试
标签:tar file 添加 phpstorm pst 文件中 oca 浏览器 inf
原文地址:https://www.cnblogs.com/PLA-Artillery/p/9131505.html