码迷,mamicode.com
首页 > Windows程序 > 详细

Building a Keras + deep learning REST API(三部曲之一)

时间:2018-06-20 23:58:22      阅读:381      评论:0      收藏:0      [点我收藏+]

标签:ssi   art   rop   post   www.   分享   __name__   convert   curl   

一、基本环境
$ pip install flask gevent requests pillow
其中 flask不需要解释
gevent 是用于自动切换进程的;
pillow 是用来进行python下的图像处理的;
requests 是用来进行python下request处理的。

二、核心代码解释
# import the necessary packages
from keras.applications import ResNet50
from keras.preprocessing.image import img_to_array
from keras.applications import imagenet_utils
from PIL import Image
import numpy as np
import flask
import io
引入所需的头文件。其中注意keras的几个类库是很有通用性的;
# initialize our Flask application and the Keras model
app = flask.Flask(__name__)
model = None
类库的初始化
def load_model():
    # load the pre-trained Keras model (here we are using a model
    # pre-trained on ImageNet and provided by Keras, but you can
    # substitute in your own networks just as easily)
    global model
    model = ResNet50(weights="imagenet")
引入model模型,如果想引入自己的模型(CBIR)的话,就在这里引入。
def prepare_image(image, target):
    # if the image mode is not RGB, convert it
    if image.mode != "RGB":
        image = image.convert("RGB")

    # resize the input image and preprocess it
    image = image.resize(target)
    image = img_to_array(image)
    image = np.expand_dims(image, axis=0)
    image = imagenet_utils.preprocess_input(image)

    # return the processed image
    return image
image的预处理,这里使用的是keras+PIL,和opencv之间的比较,需要有时间来做。
@app.route("/predict", methods=["POST"])
def predict():
    # initialize the data dictionary that will be returned from the
    # view
    data = {"success": False}

    # ensure an image was properly uploaded to our endpoint
    if flask.request.method == "POST":
        if flask.request.files.get("image"):
            # read the image in PIL format
            image = flask.request.files["image"].read()
            image = Image.open(io.BytesIO(image))

            # preprocess the image and prepare it for classification
            image = prepare_image(image, target=(224, 224))

            # classify the input image and then initialize the list
            # of predictions to return to the client
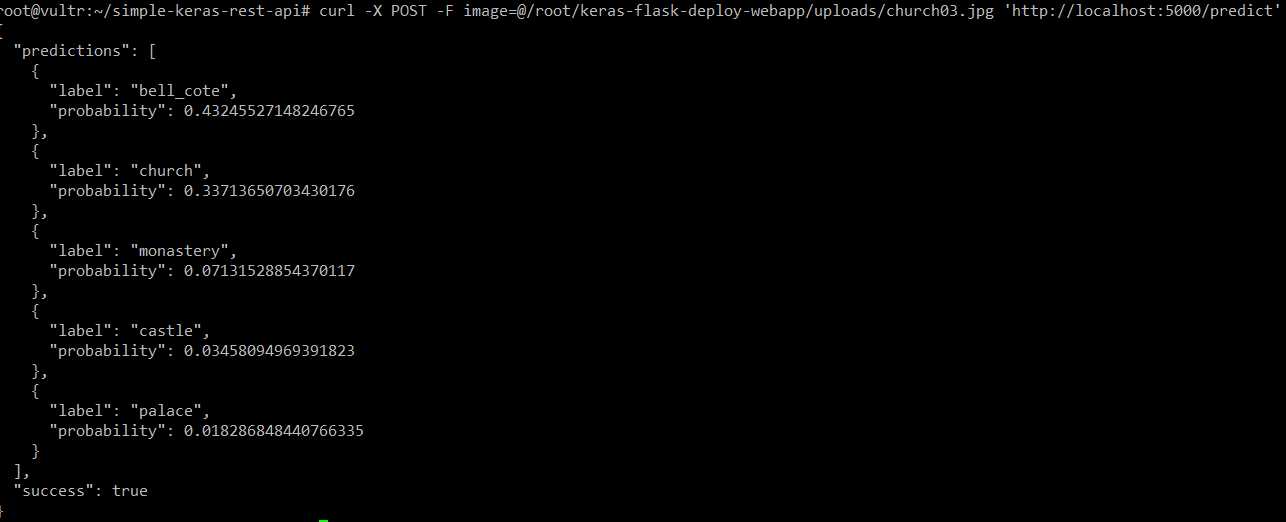
            preds = model.predict(image)
            results = imagenet_utils.decode_predictions(preds)
            data["predictions"] = []

            # loop over the results and add them to the list of
            # returned predictions
            for (imagenetID, label, prob) in results[0]:
                r = {"label": label, "probability": float(prob)}
                data["predictions"].append(r)

            # indicate that the request was a success
            data["success"] = True

    # return the data dictionary as a JSON response
    return flask.jsonify(data)
虽然是核心部分,但是其实非常容易被复用。就是读取数据,然后进行处理的过程。    
# if this is the main thread of execution first load the model and
# then start the server
if __name__ == "__main__":
    print(("* Loading Keras model and Flask starting server..."
        "please wait until server has fully started"))
    load_model()
    app.run()

比不可少的main过程。缺少不可运行。
三、运行效果
使用VPS能够更快地得到效果,至少你不需要下载resnet*.h5,一个链路不是太好的大物件。

技术分享图片

flask的运行效果,使用curl进行处理的效果

技术分享图片

技术分享图片

从结果上来看,curch排在了第2,而将这张图片识别为钟楼或者修道院、城堡,宫殿
,似乎也没有什么不妥。
四、小结反思

真的仅仅是通过了几行代码,就实现了flask部署的核心问题。不过光是跑这个简单的过程,机器就已经发出巨大的热量了;另一方面,整个的结构是什么,也需要进一步去研究清楚才对。


Building a Keras + deep learning REST API(三部曲之一)

标签:ssi   art   rop   post   www.   分享   __name__   convert   curl   

原文地址:https://www.cnblogs.com/jsxyhelu/p/9206440.html

(0)
(0)
   
举报
评论 一句话评论(0
登录后才能评论!
© 2014 mamicode.com 版权所有  联系我们:gaon5@hotmail.com
迷上了代码!