标签:简单的 config 完整 request att 分层架构 映射 ring 需要
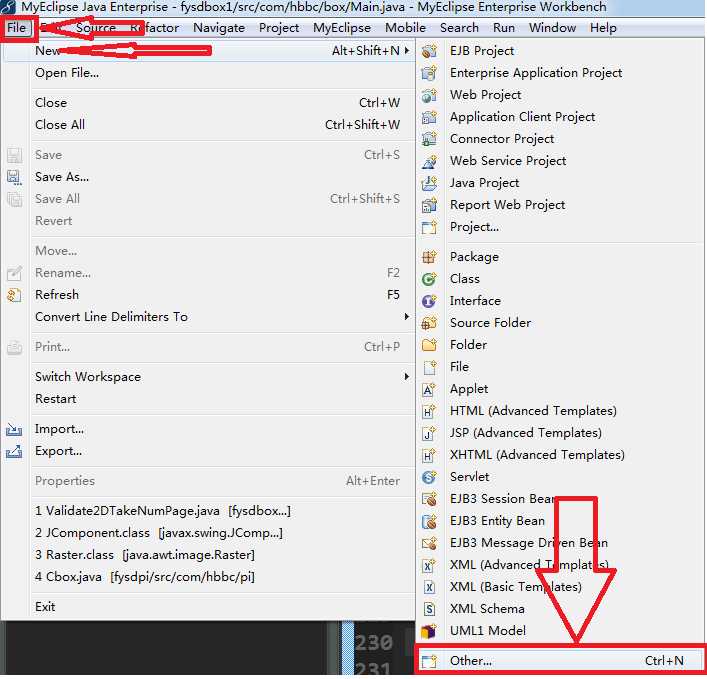
1.新建一个 Java Web 项目
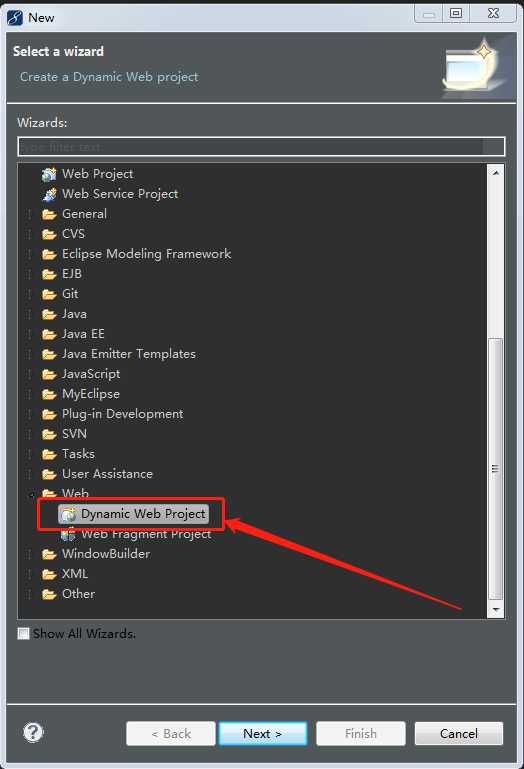
1-1 File > New >other
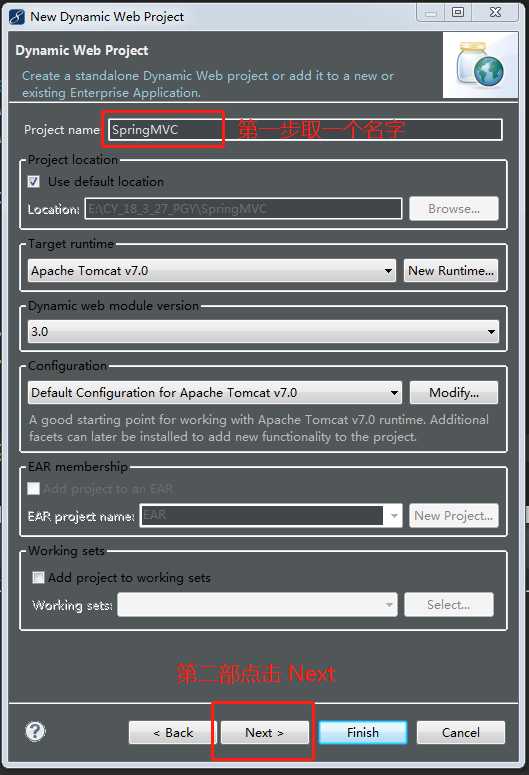
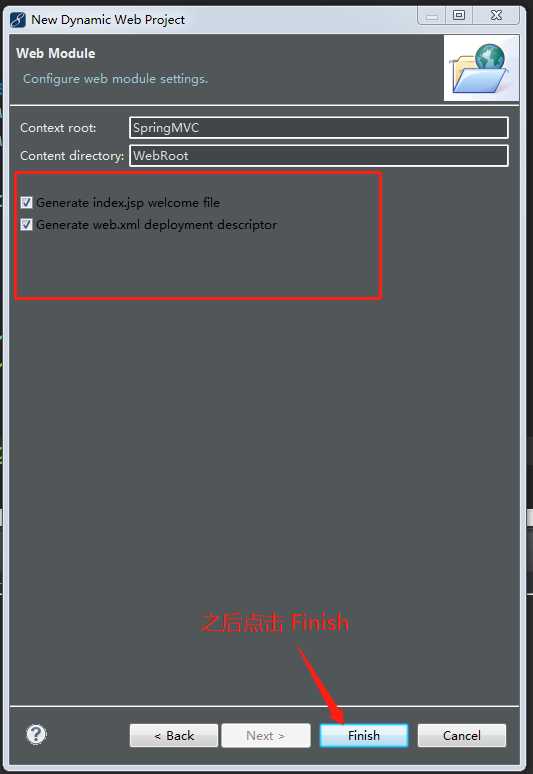
1.2 再 点击 Next 之后把 两个都勾选上 如下图
2 点击项目 > 鼠标右键 > MyEclise > Project Facets > Install Spring Facet
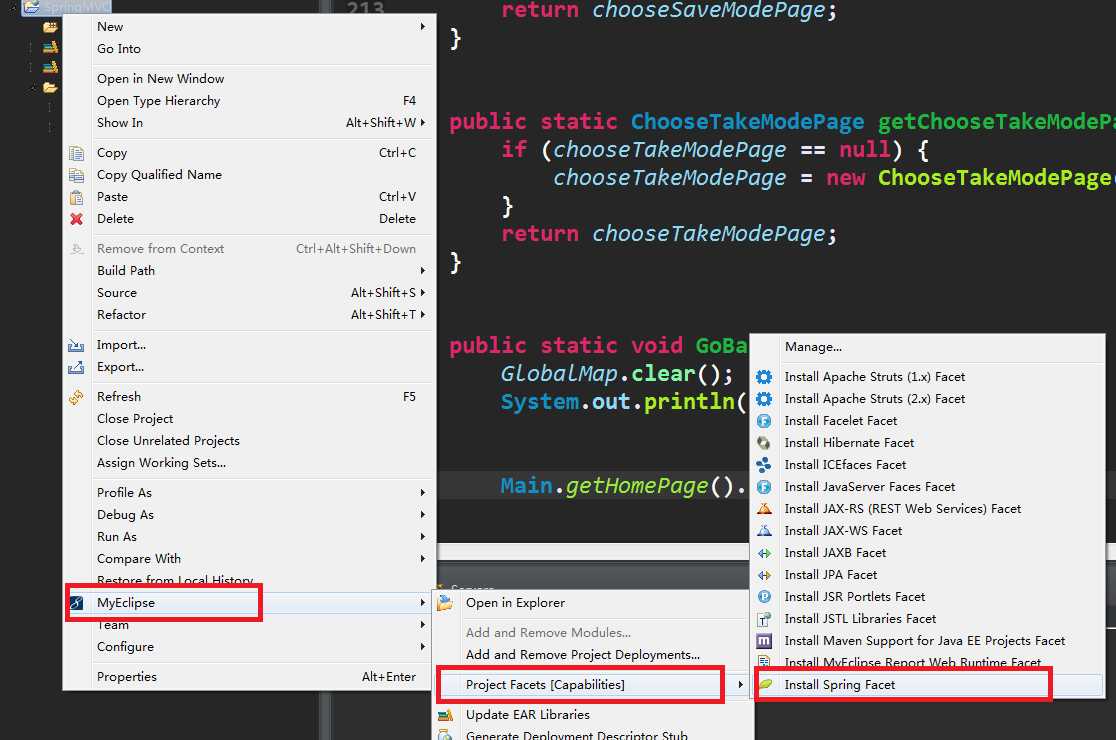
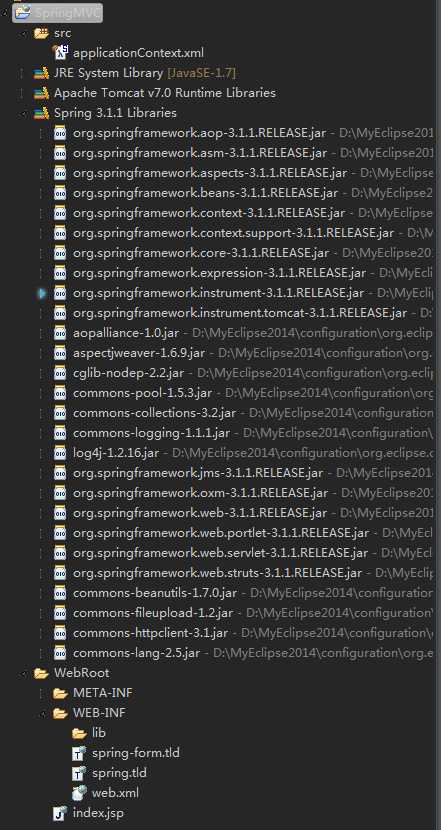
2.1 直接点击 Finish 完成之后 效果 如下图
3 搭建 Spring 框架最重要的步骤应该就是配置了。官网对框架的解释说明如下:
Spring MVC 框架是围绕一个 DispatcherServlet 来设计的,这个 Servlet 会把请求分发给各个处理器,并支持可配置的处理器映射、视图渲染、本地化、时区与主题渲染等,甚至还能支持文件上传。处理器是你的应用中注解了 @Controller 和 @RequestMapping 的类和方法,Spring 为处理器方法提供了极其多样灵活的配置。
所以,首先我们应该在/WebContent/WEB-INF/web.xml文件,接下来在这个文件中配置 DispatcherServlet。
<servlet>
    <servlet-name>springMVC</servlet-name>
    <servlet-class>org.springframework.web.servlet.DispatcherServlet</servlet-class>
    <load-on-startup>1</load-on-startup>
</servlet>
<servlet-mapping>
    <servlet-name>springMVC</servlet-name>
    <url-pattern>/</url-pattern>
</servlet-mapping>
<context-param>
    <param-name>contextConfigLocation</param-name>
    <param-value>/WEB-INF/applicationContext.xml</param-value>
</context-param>
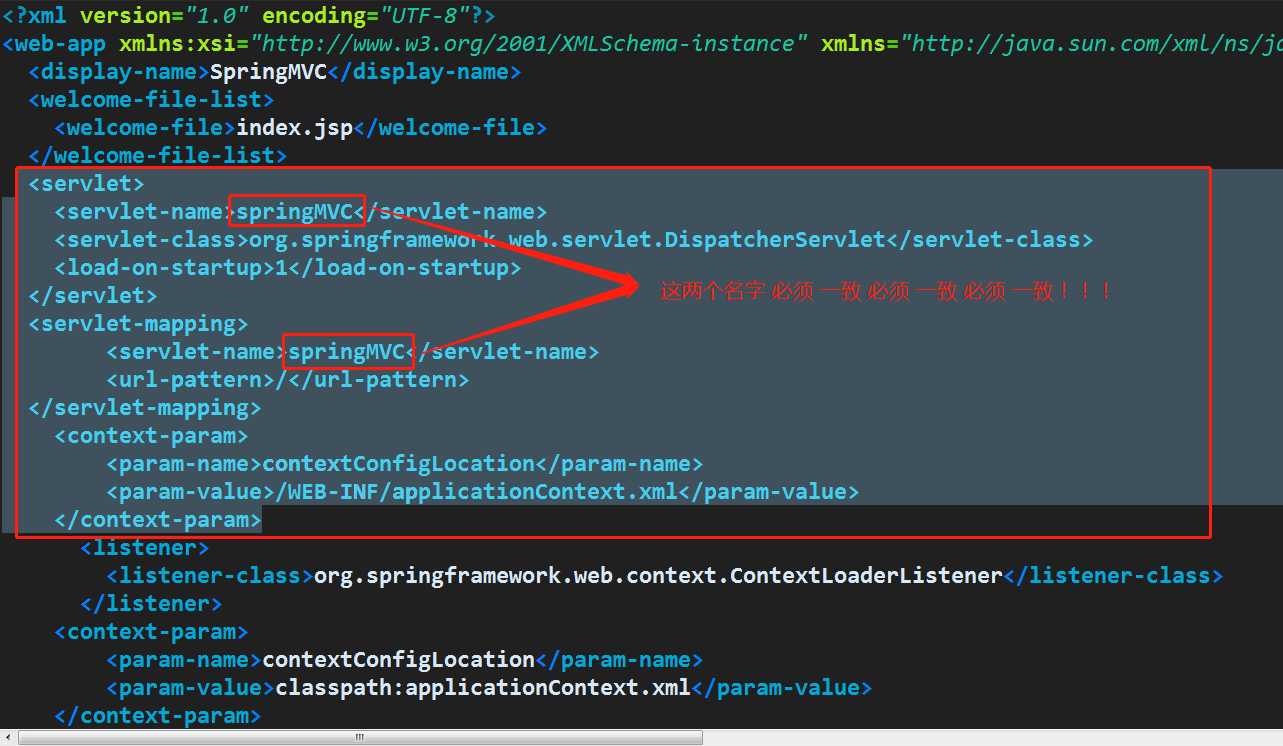
因为这里是把 DispatcherServlet 命名为 springMVC,并且让它在 Web 项目一启动就加载。
接下来我们需要在/WebContent/WEB-INF/目录下创建一个 springMVC-servlet.xml的Spring配置文件。
创建好之后 插入一下代码 :
<beans xmlns="http://www.springframework.org/schema/beans"
xmlns:xsi="http://www.w3.org/2001/XMLSchema-instance"
xmlns:p="http://www.springframework.org/schema/p"
xmlns:context="http://www.springframework.org/schema/context"
xmlns:util="http://www.springframework.org/schema/util"
xmlns:mvc="http://www.springframework.org/schema/mvc"
xsi:schemaLocation="
http://www.springframework.org/schema/beans
http://www.springframework.org/schema/beans/spring-beans-4.2.xsd
http://www.springframework.org/schema/util
http://www.springframework.org/schema/util/spring-util-4.2.xsd
http://www.springframework.org/schema/context
http://www.springframework.org/schema/context/spring-context-4.2.xsd
http://www.springframework.org/schema/mvc
http://www.springframework.org/schema/mvc/spring-mvc-4.2.xsd">
<!-- 使用默认的注解映射 -->
<mvc:annotation-driven />
<mvc:resources location="/" mapping="/index.html" />
<!-- 自动扫描controller包中的控制器 -->
<context:component-scan base-package="cn.mayongfa.api.controller" />
<context:component-scan base-package="cn.mayongfa.controller" />
<!-- 上传文件拦截,设置最大上传文件大小 30M=30*1024*1024(B)=31457280 bytes -->
<bean id="multipartResolver"
class="org.springframework.web.multipart.commons.CommonsMultipartResolver">
<property name="maxUploadSize" value="31457280" />
</bean>
</beans>
接下来就是配置 项目下的/src/applicationContext.xml文件啦 插入一下代码
<beans xmlns="http://www.springframework.org/schema/beans"
xmlns:xsi="http://www.w3.org/2001/XMLSchema-instance"
xmlns:p="http://www.springframework.org/schema/p"
xmlns:context="http://www.springframework.org/schema/context"
xmlns:aop="http://www.springframework.org/schema/aop"
xmlns:tx="http://www.springframework.org/schema/tx"
xsi:schemaLocation="http://www.springframework.org/schema/beans
http://www.springframework.org/schema/beans/spring-beans.xsd
http://www.springframework.org/schema/context
http://www.springframework.org/schema/context/spring-context.xsd
http://www.springframework.org/schema/tx
http://www.springframework.org/schema/tx/spring-tx.xsd
http://www.springframework.org/schema/aop
http://www.springframework.org/schema/aop/spring-aop.xsd">
<!-- 将多个配置文件读取到容器中,交给Spring管理 --> <bean id="propertyConfigurer" class="org.springframework.beans.factory.config.PropertyPlaceholderConfigurer">
<property name="locations"> <list> <value>classpath:global.properties</value>
<value>classpath:jdbc.properties</value> </list> </property>
</bean>
<!-- 扫描类包,将标注Spring注解的类自动转化Bean,同时完成Bean的注入 -->
<context:component-scan base-package="cn.mayongfa.common" />
<context:component-scan base-package="cn.mayongfa.service" />
<context:component-scan base-package="cn.mayongfa.dao" />
<!--master 配置数据源 -->
<bean id="masterDataSource" class="com.alibaba.druid.pool.DruidDataSource" init-method="init" destroy-method="close">
<property name="driverClassName">
<value>${master.jdbc.driverClassName}</value>
</property> <property name="url">
<value>${master.jdbc.url}</value>
</property>
<property name="username">
<value>${master.jdbc.username}</value>
</property>
<property name="password">
<value>${master.jdbc.password}</value>
</property>
... </bean>
<!--slave 配置数据源 -->
<bean id="slaveDataSource" class="com.alibaba.druid.pool.DruidDataSource" init-method="init" destroy-method="close"> ... </bean>
<bean id="dataSource" class="cn.mayongfa.service.imp.DynamicDataSource">
<property name="targetDataSources">
<map> <entry key="slave" value-ref="slaveDataSource" /> </map>
</property>
<property name="defaultTargetDataSource" ref="masterDataSource" />
</bean>
<!-- 配置Jdbc模板 -->
<bean id="jdbcTemplate" class="org.springframework.jdbc.core.JdbcTemplate">
<property name="dataSource" ref="dataSource">
</property>
</bean>
<!-- 配置事务管理器 -->
...
<!-- 通过AOP配置提供事务增强,让service包下所有Bean的所有方法拥有事务 -->
...
-------------------------------------------------------------------------------------------------------------------------------------------------------------------------------------
上面只是简单的配置,文件并不完整,到这里,其实我们已经配置完成了,接下来就是新建我们需要的 Package 包,来实现不同包来完成不同的事儿的。
按照正常的分层架构一般都会分为 View 层(视图层)、Action 层、Service 层(业务层)、Dao 层(持久层),这里我们也是这样做的,下面就开始新建包

到这里,搭建 Spring MVC 框架的工作算是完成了。
最后 附上 spring 框架 所需 jar 包 下载地址 :http://projects.spring.io/spring-framework/
祝你好运 (∩_∩) ~~~~~~~~~~
标签:简单的 config 完整 request att 分层架构 映射 ring 需要
原文地址:https://www.cnblogs.com/chenyan-/p/9342874.html