标签:auto 虚拟机 configure htm strip sch output install shu
springboot的打包方式有很多种。有打成war的,有打成jar的,也有直接提交到github,通过jekins进行打包部署的。这里主要介绍如何打成jar进行部署。不推荐用war,因为springboot适合前后端分离,打成jar进行部署更合适。
首先需要在application.properties当中配置端口
server.port=8080
# http://localhost:8088/swagger-ui.html
marven的配置文件
<?xml version="1.0" encoding="UTF-8"?>
<project xmlns="http://maven.apache.org/POM/4.0.0" xmlns:xsi="http://www.w3.org/2001/XMLSchema-instance"
    xsi:schemaLocation="http://maven.apache.org/POM/4.0.0 http://maven.apache.org/xsd/maven-4.0.0.xsd">
    <modelVersion>4.0.0</modelVersion>

    <groupId>com.weixin</groupId>
    <artifactId>smallsystem</artifactId>
    <version>0.0.1-SNAPSHOT</version>
    <packaging>jar</packaging>

    <name>smallsystem</name>
    <description>smallsystem</description>

    <parent>
        <groupId>org.springframework.boot</groupId>
        <artifactId>spring-boot-starter-parent</artifactId>
        <version>2.0.0.RELEASE</version>
        <relativePath/> <!-- lookup parent from repository -->
    </parent>

    <properties>
        <project.build.sourceEncoding>UTF-8</project.build.sourceEncoding>
        <project.reporting.outputEncoding>UTF-8</project.reporting.outputEncoding>
        <java.version>1.8</java.version>
    </properties>

    <dependencies>
        <dependency>
            <groupId>org.springframework.boot</groupId>
            <artifactId>spring-boot-starter-web</artifactId>
        </dependency>

        <dependency>
            <groupId>org.springframework.boot</groupId>
            <artifactId>spring-boot-starter-test</artifactId>
            <scope>test</scope>
        </dependency>

        <dependency>
            <groupId>io.springfox</groupId>
            <artifactId>springfox-swagger2</artifactId>
            <version>2.2.2</version>
        </dependency>
        <dependency>
            <groupId>io.springfox</groupId>
            <artifactId>springfox-swagger-ui</artifactId>
            <version>2.2.2</version>
        </dependency>

        <dependency>
            <groupId>org.springframework.boot</groupId>
            <artifactId>spring-boot-devtools</artifactId>
            <optional>true</optional>
        </dependency>

    </dependencies>

    <build>
        <plugins>
            <plugin>
                <groupId>org.springframework.boot</groupId>
                <artifactId>spring-boot-maven-plugin</artifactId>
                <configuration>
                    <mainClass>com.weixin.SmallsystemApplication</mainClass>
                </configuration>
            </plugin>
        </plugins>
    </build>


</project>
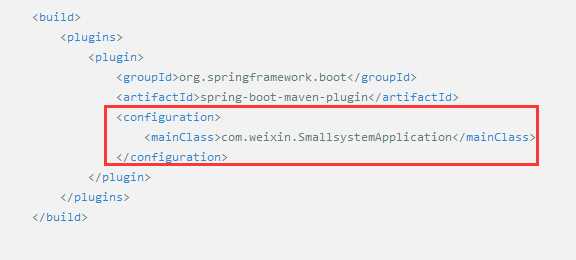
注意最下面的build这块一定要配置否则打jar的时候会说找不 到主类

image.png
在启动类当中加上extends SpringBootServletInitializer并重写configure方法,这是为了打包springboot项目用的。
package com.weixin;

import org.springframework.boot.SpringApplication;
import org.springframework.boot.autoconfigure.SpringBootApplication;
import org.springframework.boot.builder.SpringApplicationBuilder;
import org.springframework.boot.web.servlet.support.SpringBootServletInitializer;

@SpringBootApplication
public class SmallsystemApplication extends SpringBootServletInitializer{

    public static void main(String[] args) {
        SpringApplication.run(SmallsystemApplication.class, args);
    }

    @Override//为了打包springboot项目
    protected SpringApplicationBuilder configure(
            SpringApplicationBuilder builder) {
        return builder.sources(this.getClass());
    }
}
然后按照顺序运行mvn clean再mvn install,我是用idea执行的

然后就会出来我们需要的jar

然后到这个jar的根目录下执行java -jar smallsystem-0.0.1-SNAPSHOT.jar
这个执行方式windows和linux上都一样

如果是阿里云上的,需要通过阿里云把你指定的端口开放,如果是虚拟机上的,需要把防火墙什么的关掉,开放端口即可。
标签:auto 虚拟机 configure htm strip sch output install shu
原文地址:https://www.cnblogs.com/zhujiabin/p/9831432.html