标签:路径 免密登录 add The linux 7 gen directory -- linu
本文Linux系统为CentOS Linux 7。?ssh-keygen命令生成公钥和私钥,名字分别是“id_rsa.pub”和“id_rsa”,公钥发送到服务器上,私钥本地使用。
远程是在“~/.ssh/authrized_key”文件中,本地是在“%usersprofile%/.ssh/”目录
密钥生成命令
#ssh-keygen -t rsa
操作记录
[root@learnshell ~]# ssh-keygen -t rsa
Generating public/private rsa key pair.
Enter file in which to save the key (/root/.ssh/id_rsa): ??密钥文件存储路径,直接回车使用默认
Created directory ‘/root/.ssh‘.
Enter passphrase (empty for no passphrase): ??密钥文件密码,直接回车使用不设置
Enter same passphrase again:
[root@learnshell ~]# cd /root/.ssh/
[root@learnshell .ssh]# ls
?id_rsa ? id_rsa.pub
密钥上传
使用“ssh-copy-id”命令上传
[root@learnshell .ssh]# ssh-copy-id -i ~/.ssh/id_rsa.pub root@192.168.2.106
/usr/bin/ssh-copy-id: INFO: Source of key(s) to be installed: "/root/.ssh/id_rsa.pub"
/usr/bin/ssh-copy-id: INFO: attempting to log in with the new key(s), to filter out any that are already installed
/usr/bin/ssh-copy-id: INFO: 1 key(s) remain to be installed -- if you are prompted now it is to install the new keys
root@192.168.2.106‘s password:Number of key(s) added: 1
Now try logging into the machine, with: "ssh ‘root@127.0.0.1‘"
and check to make sure that only the key(s) you wanted were added.
使用其他工具将文件添加至authorized_keys文件末尾
上传 id_rsa.pub文件后,使用重定向符追加至authorized_keys文件末尾
[root@learnshell .ssh]$ cat id_rsa.pub >> authorized_keys
[root@learnshell .ssh]# cat ~/.ssh/authorized_keys
ssh-rsaAAAAB3NzaC1yc2EAAAADAQABAAABAxxxxxAwmvid5q8naRwUohZTHYa/BVP0vxhdcav2TI0b4YRFIPdhd/kNprqV1HgQQQdbOdHwqMXepM68B+n8ukt7JFyfEF1IHML8hQy27hoJHwUo2fNJI8N8w5mO6glG+GxQciPP4dAJ+UAdd1qxtj3QKhYvRxxxxxoqDKOvkkvTp0brHz0vYDNV8Fx6MELMz4rSdcQPFZhSeZ9P5dJCcW6hdPBcUnKKMY8RtadPAPw+AGINexxxxxXbwEcqLxNRpW/DHG5E14Voxp4lgndeWOt8CJNWgWrp3mAYhf9sXvtICTdnhZA8Hjs0ckUV6tabfUlKsyj1gKEgSymP root@learnshell.local
命令行使用
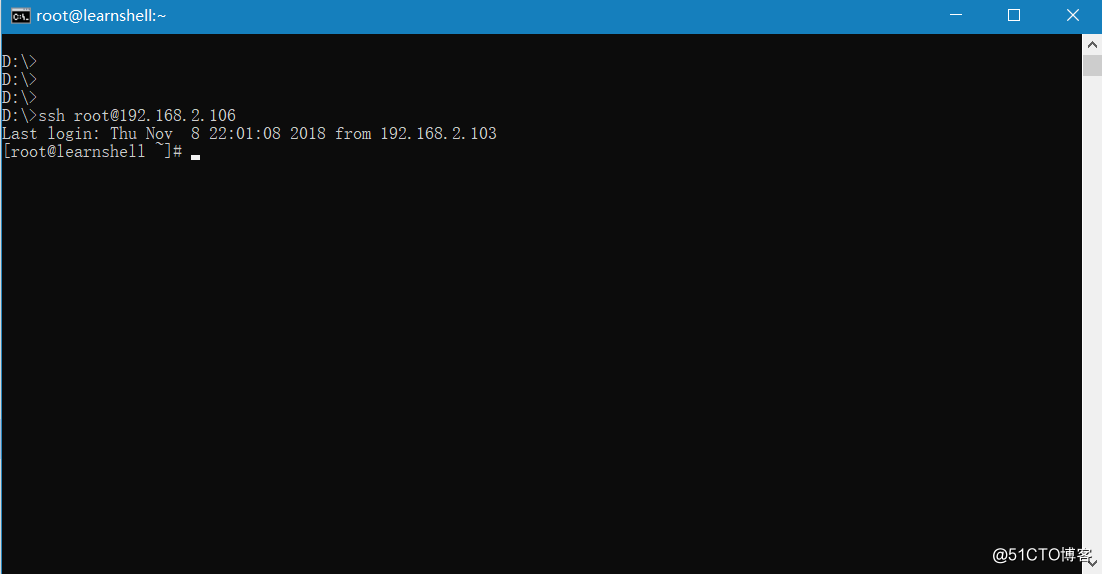
将id_rsa拷贝至“%usersprofile%/.ssh/”目录,直接使用“ssh root@192.168.2.106”登录
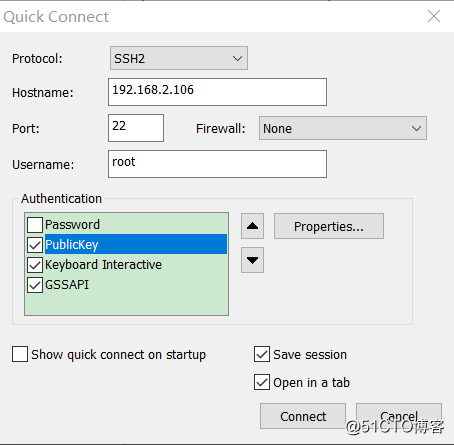
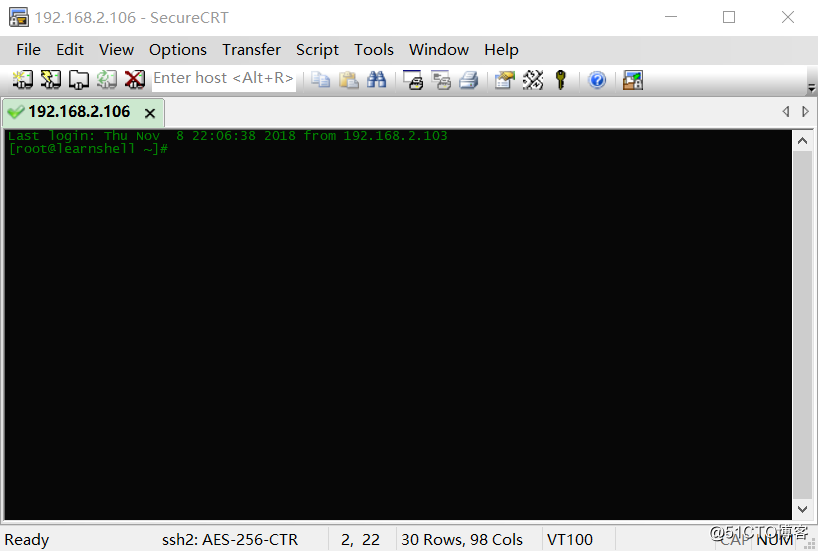
SecureCRT使用
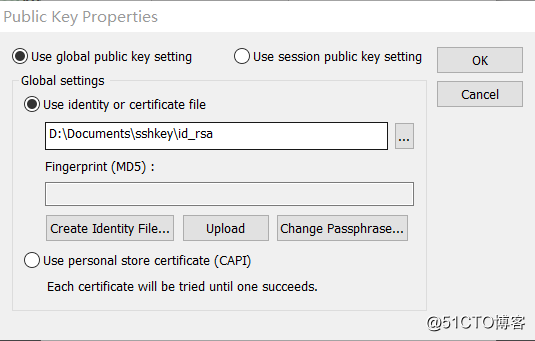
?SecureCRT,新建会话,协议选择“ssh2”,其他根据实际情况填写,选中“PublicKey”,点击左侧的“Properties”,浏览生成的私钥保存。
?注意,使用私钥登录需要去掉“Password”前的勾。
标签:路径 免密登录 add The linux 7 gen directory -- linu
原文地址:http://blog.51cto.com/3chou/2337560