标签:src reference rabl ace enc vat alignment 删除 png
之前时间一直在使用Caliburn.Micro这种应用了MVVM模式的WPF框架做开发,是时候总结一下了。
Caliburn.Micro(Caliburn.Micro框架概述 - https://blog.csdn.net/lzuacm/article/details/78886436) 是一个轻量级的WPF框架,简化了WPF中的不少用法,推荐做WPF开发时优先使用。
真正快速而熟练地掌握一门技术就可以尝试着用最快的速度去构建一个玩具项目(Toy project),然后不断地优化、重构之。比如本文将介绍如何使用Caliburn.Micro v3.2开发出一个简单的计算器,里面用到了C#中的async异步技术,Caliburn.Micro中的Conductor等等~
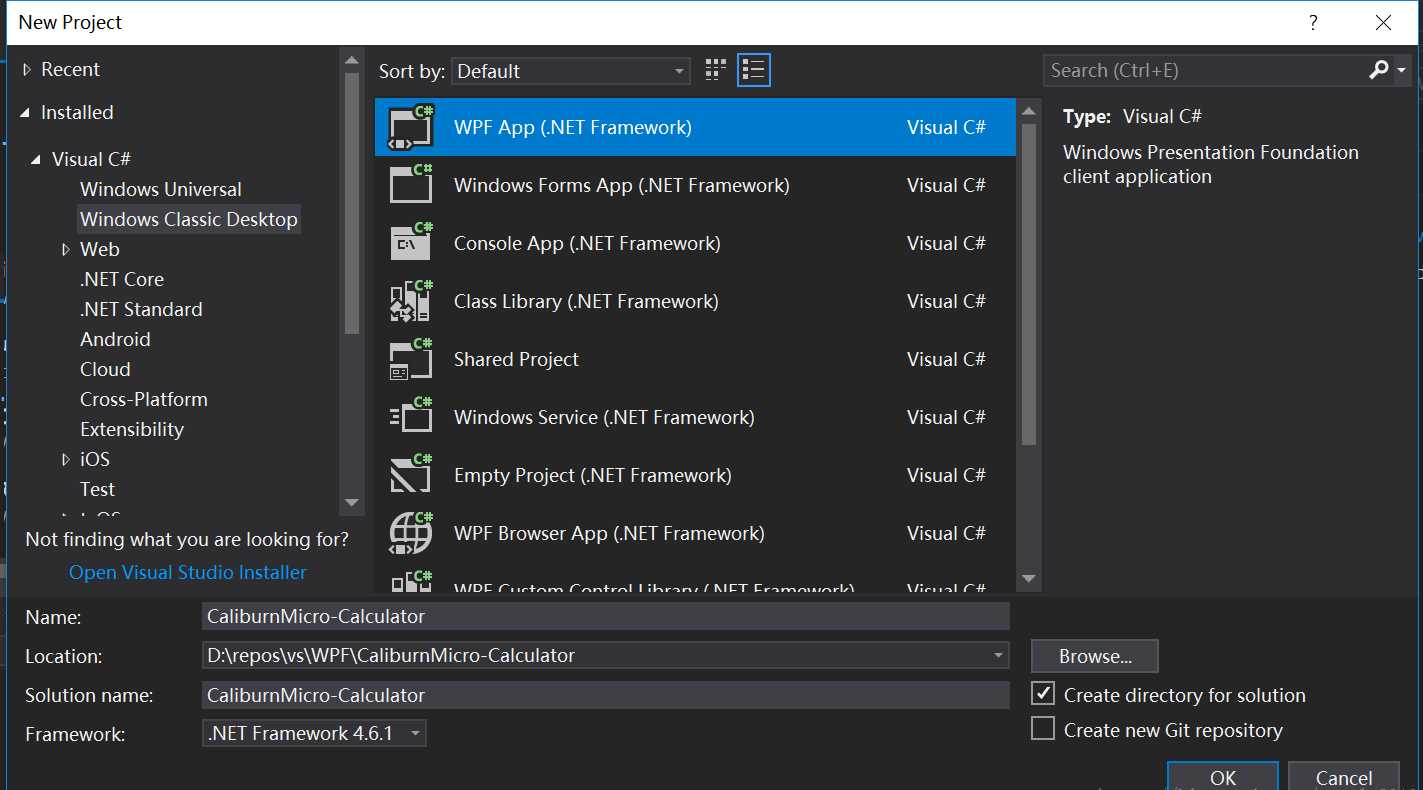
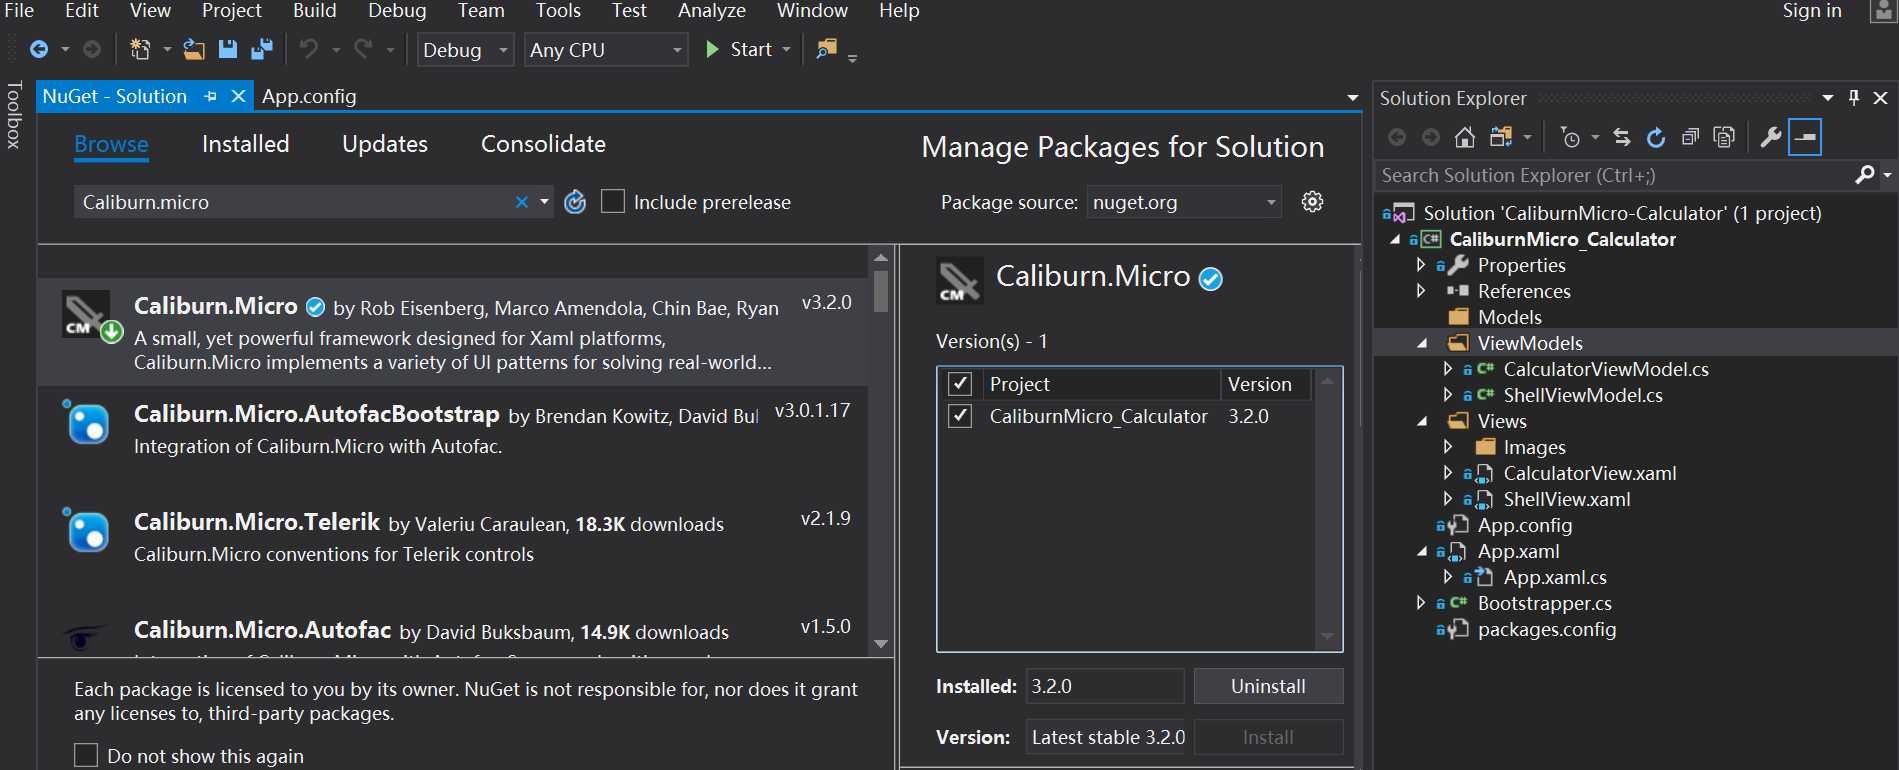
对于Caliburn.Micro 1.x和2.x版,只能使用.dll,需手动给项目加Reference。而3.0以后的版本可使用NuGet包管理工具来管理,安装和卸载既方便又彻底,推荐使用。(ps: NuGet之于Visual Studio(C++, C#等), 犹pip之于Python, npm之于node, maven之于Java, gem之于Ruby等等)
按下图调整App.xaml
删除语句StartupUri="MainWindow.xmal"。
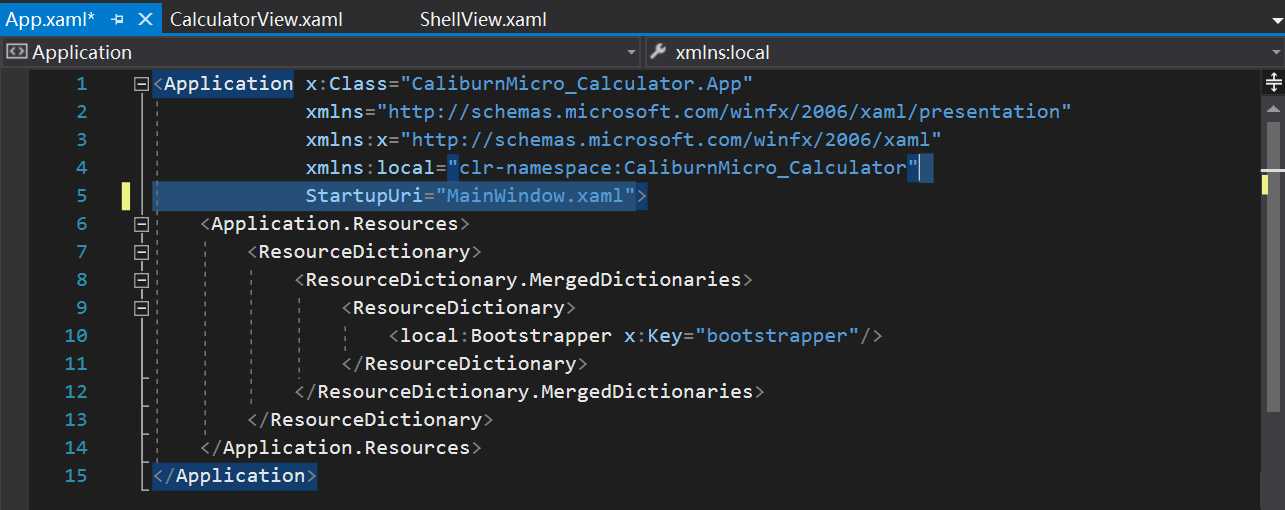
    <Application.Resources>
         <ResourceDictionary>
             <ResourceDictionary.MergedDictionaries>
                 <ResourceDictionary>
                     <local:Bootstrapper x:Key="bootstrapper"/>
                 </ResourceDictionary>
             </ResourceDictionary.MergedDictionaries>
         </ResourceDictionary>
    </Application.Resources>
?? 4 . 创建Bootstrapper类
然后让其继承自BootstrapperBase类,并加上构造函数,另外再重写函数OnStartup即可。
using System.Windows;
using Caliburn.Micro;
using CaliburnMicro_Calculator.ViewModels;

namespace CaliburnMicro_Calculator
{
    public class Bootstrapper : BootstrapperBase
    {
        public Bootstrapper()
        {
            Initialize();
        }

        protected override void OnStartup(object obj, StartupEventArgs e)
        {
            DisplayRootViewFor<ShellViewModel>();
        }
    }
}
?? 5 . 在项目目录下新建Models, ViewModels, Views这3个文件夹
在ViewModel文件夹中添加ShellViewModel.cs,并创建Left, Right和Result这3个属性。
需要注意的是 ShellViewModel.cs需要继承类 Screen 和 INotifyPropertyChanged (用于感知并同步所绑定属性的变化),ShellViewModel具体代码为:
using System.ComponentModel;
using System.Threading;
using System.Windows;
using System.Windows.Controls;
using Caliburn.Micro;

namespace CaliburnMicro_Calculator.ViewModels
{
    public class ShellViewModel : Screen, INotifyPropertyChanged
    {
        private double _left;
        private double _right;
        private double _result;

        public double Left
        {
            get { return _left; }
            set
            {
                _left = value;
                NotifyOfPropertyChange();
            }
        }

        public double Right
        {
            get { return _right; }
            set
            {
                _right = value;
                NotifyOfPropertyChange();
            }
        }

        public double Result
        {
            get { return _result; }
            set
            {
                _result = value;
                NotifyOfPropertyChange();
            }
        }
}
说明: 最开始布局xaml时,设计位置时采用的是左(operand 1), 中(operand 2), 右(result),于是属性值使用了Left, Right和Result。
在Views文件夹中创建Window,命名为ShellView.xaml,在Views文件夹下创建子文件夹Images,用于存放+,-,*,/这4种操作对应的小图标,其具体代码如下:
<Window x:Class="CaliburnMicro_Calculator.Views.ShellView"
        xmlns="http://schemas.microsoft.com/winfx/2006/xaml/presentation"
        xmlns:x="http://schemas.microsoft.com/winfx/2006/xaml"
        xmlns:d="http://schemas.microsoft.com/expression/blend/2008"
        xmlns:mc="http://schemas.openxmlformats.org/markup-compatibility/2006"
        xmlns:local="clr-namespace:CaliburnMicro_Calculator.Views"
        xmlns:cal="http://www.caliburnproject.org"
        mc:Ignorable="d"
        Title="Calculator" SizeToContent="Height" Width="240">

    <StackPanel Background="Beige">
        <StackPanel Orientation="Horizontal">
            <Label Margin="10"
                   Target="{Binding ElementName=left}">
                Operand _1:
            </Label>
            <TextBox Margin="10"
                     Width="72"
                     x:Name="left"/>
        </StackPanel>
        <StackPanel Orientation="Horizontal">
            <Label Margin="10"
                   Target="{Binding ElementName=right}">
                Operand _2:
            </Label>
            <TextBox Margin="10"
                     Width="72"
                     x:Name="right"/>
        </StackPanel>
        <StackPanel Orientation="Horizontal">
            <Button Margin="10"
                    x:Name="btnPlus"
                    cal:Message.Attach="[Event Click]=[Action Plus(left.Text, right.Text):result.Text]">
                <Image Source="Images/op1.ICO"/>
            </Button>

            <Button Margin="10"
                    x:Name="btnMinus"
                    cal:Message.Attach="[Event Click]=[Action Minus(left.Text, right.Text):result.Text]">
                <Image Source="Images/op2.ICO"/>
            </Button>

            <Button Margin="10"
                    x:Name="btnMultiply"
                    cal:Message.Attach="[Event Click]=[Action Multipy(left.Text, right.Text):result.Text]">
                <Image Source="Images/op3.ICO"/>
            </Button>

            <Button Margin="10"
                    x:Name="btnDivide" IsEnabled="{Binding Path=CanDivide}"
                    cal:Message.Attach="[Event Click]=[Action Divide(left.Text, right.Text):result.Text]">
                <Image Source="Images/op4.ICO"/>
            </Button>

        </StackPanel>
        <StackPanel Orientation="Horizontal">
            <Label Margin="10">
                Answer:
            </Label>
            <TextBox Margin="10"
                     Width="72"
                     Text ="{Binding Path=Result, StringFormat={}{0:F4}}" IsReadOnly="True" />
        </StackPanel>
    </StackPanel>
</Window>说明:对操作数Operand _1和Operand _2,按Alt键+数字可以选中该处,这是WPF的一个特殊用法。由于计算结果不希望被修改,于是加上了属性IsReadOnly="True"。
由于暂时只打算实现+, -, *, /四种操作,于是我们只需创建相应的4个函数即可,由于除数是0这个操作不允许,于是需再加个判断函数CanDivide。
Caliburn.Micro中绑定事件的写法是:
cal:Message.Attach="[Event E]=[Action A]"(E是操作,比如Click, MouseDown, KeyDown等等,A是ViewModel中具体的函数。)
向ShellViewModel中加入事件中要做的事,此时ShellViewModel为:
using System.ComponentModel;
using System.Threading;
using System.Windows;
using System.Windows.Controls;
using Caliburn.Micro;
namespace CaliburnMicro_Calculator.ViewModels
{
public class ShellViewModel : Screen, INotifyPropertyChanged
{
private double _left;
private double _right;
private double _result;
public double Left
{
get { return _left; }
set
{
_left = value;
NotifyOfPropertyChange();
}
}
public double Right
{
get { return _right; }
set
{
_right = value;
NotifyOfPropertyChange();
}
}
public double Result
{
get { return _result; }
set
{
_result = value;
NotifyOfPropertyChange();
}
}
public bool CanDivide(double left, double right)
{
return right != 0;
}
public async void Divide(double left, double right)
{
Thread.Sleep(600);
if (CanDivide(left, right) == true)
Result = left / right;
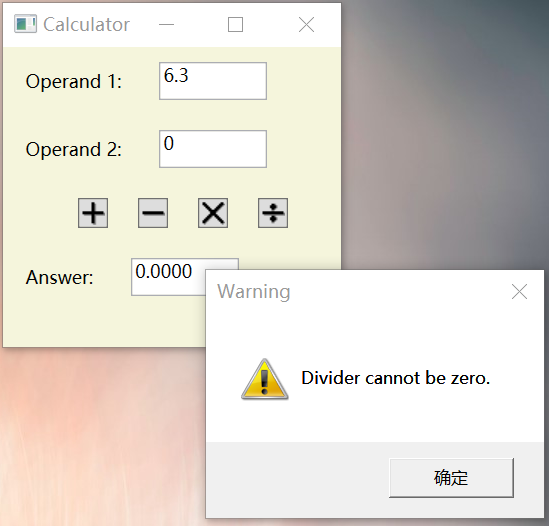
else MessageBox.Show("Divider cannot be zero.", "Warning", MessageBoxButton.OK, MessageBoxImage.Warning);
}
public async void Plus(double left, double right)
{
Result = left + right;
}
public async void Minus(double left, double right)
{
Result = left - right;
}
public async void Multipy(double left, double right)
{
Result = left * right;
}
}
}此时计算器的功能已基本完成,但我们可以对ViewModel进行适当的调整:
1.创建新的ViewModel - CalculatorViewModel,将原来的ShellViewModel中具体的计算逻辑移入到CalculatorViewModel中;
2.此时让ShellViewModel继承Conductor<Object>,于是ShellViewModel拥有了管理Screen实例的功能(ViewModel中使用ActivateItem函数,而View中使用X:Name="ActivateItem"标签),其具体代码为:
using System.ComponentModel;
using System.Threading;
using System.Windows;
using System.Windows.Controls;
using Caliburn.Micro;

namespace CaliburnMicro_Calculator.ViewModels
{
    public class ShellViewModel : Conductor<object>
    {
        public ShellViewModel()
        {
        }
        public void ShowCalculator()
        {
            ActivateItem(new CalculatorViewModel());
        }
    }
}
此时,CalculatorViewModel的具体代码为:
using System.ComponentModel;
using System.Threading;
using System.Windows;
using Caliburn.Micro;

namespace CaliburnMicro_Calculator.ViewModels
{
    public class CalculatorViewModel: Screen, INotifyPropertyChanged
    {
        private double _left;
        private double _right;
        private double _result;

        public double Left
        {
            get { return _left; }
            set
            {
                _left = value;
                NotifyOfPropertyChange();
            }
        }

        public double Right
        {
            get { return _right; }
            set
            {
                _right = value;
                NotifyOfPropertyChange();
            }
        }

        public double Result
        {
            get { return _result; }
            set
            {
                _result = value;
                NotifyOfPropertyChange();
            }
        }

        public CalculatorViewModel()
        {
        }

        public bool CanDivide(double left, double right)
        {
            return right != 0;
        }

        public async void Divide(double left, double right)
        {
            Thread.Sleep(600);
            if (CanDivide(left, right) == true)
                Result = left / right;
            else MessageBox.Show("Divider cannot be zero.", "Warning", MessageBoxButton.OK, MessageBoxImage.Warning);
        }

        public async void Plus(double left, double right)
        {
            Result = left + right;
        }

        public async void Minus(double left, double right)
        {
            Result = left - right;
        }

        public async void Multipy(double left, double right)
        {
            Result = left * right;
        }
    }
}
??3 . 对于View,只需把CalculatorViewModel对应的CalculatorView作为ContentControl控件嵌入ShellView即可。此时ShellView的代码调整为:
<Window x:Class="CaliburnMicro_Calculator.Views.ShellView"
        xmlns="http://schemas.microsoft.com/winfx/2006/xaml/presentation"
        xmlns:x="http://schemas.microsoft.com/winfx/2006/xaml"
        xmlns:d="http://schemas.microsoft.com/expression/blend/2008"
        xmlns:mc="http://schemas.openxmlformats.org/markup-compatibility/2006"
        xmlns:local="clr-namespace:CaliburnMicro_Calculator.Views"
        xmlns:cal="http://www.caliburnproject.org"
        mc:Ignorable="d"
        Title="Calculator" SizeToContent="Height" Width="240">

    <Grid MinHeight="200">
        <Button Content="Show Calculator" x:Name="ShowCalculator" Grid.Row="0"></Button>
        <ContentControl x:Name="ActiveItem"></ContentControl>
    </Grid>
</Window>另外提一点,向ViewModel A中嵌入ViewModel B,一般来说需要做的操作是:
在A的view中使用ContentControl,绑定B的ViewModel只需使用语句cal:View.Model="{Binding BViewModel}"即可,而B的view是UserControl就可以啦。
此时CalculatorView是一个UserControl,其代码为:
<UserControl x:Class="CaliburnMicro_Calculator.Views.CalculatorView"
             xmlns="http://schemas.microsoft.com/winfx/2006/xaml/presentation"
             xmlns:x="http://schemas.microsoft.com/winfx/2006/xaml"
             xmlns:mc="http://schemas.openxmlformats.org/markup-compatibility/2006"
             xmlns:d="http://schemas.microsoft.com/expression/blend/2008"
             xmlns:local="clr-namespace:CaliburnMicro_Calculator.Views"
             xmlns:cal="http://www.caliburnproject.org"
             mc:Ignorable="d"
             Width="240">

    <StackPanel Background="Beige">
        <StackPanel Orientation="Horizontal">
            <Label Margin="10"
                   Target="{Binding ElementName=left}">
                Operand _1:
            </Label>
            <TextBox Margin="10"
                     Width="72"
                     x:Name="left"/>
        </StackPanel>
        <StackPanel Orientation="Horizontal">
            <Label Margin="10"
                   Target="{Binding ElementName=right}">
                Operand _2:
            </Label>
            <TextBox Margin="10"
                     Width="72"
                     x:Name="right"/>
        </StackPanel>
        <StackPanel Orientation="Horizontal" HorizontalAlignment="Center">
            <Button Margin="10"
                    x:Name="btnPlus"
                    cal:Message.Attach="[Event Click]=[Action Plus(left.Text, right.Text):result.Text]">
                <Image Source="Images/op1.ICO"/>
            </Button>

            <Button Margin="10"
                    x:Name="btnMinus"
                    cal:Message.Attach="[Event Click]=[Action Minus(left.Text, right.Text):result.Text]">
                <Image Source="Images/op2.ICO"/>
            </Button>

            <Button Margin="10"
                    x:Name="btnMultiply"
                    cal:Message.Attach="[Event Click]=[Action Multipy(left.Text, right.Text):result.Text]">
                <Image Source="Images/op3.ICO"/>
            </Button>

            <Button Margin="10"
                    x:Name="btnDivide" IsEnabled="{Binding Path=CanDivide}"
                    cal:Message.Attach="[Event Click]=[Action Divide(left.Text, right.Text):result.Text]">
                <Image Source="Images/op4.ICO"/>
            </Button>

        </StackPanel>
        <StackPanel Orientation="Horizontal">
            <Label Margin="10">
                Answer:
            </Label>
            <TextBox Margin="10"
                     Width="72"
                     Text ="{Binding Path=Result, StringFormat={}{0:F4}, UpdateSourceTrigger=PropertyChanged}" IsReadOnly="True" />
        </StackPanel>
    </StackPanel>
</UserControl>
好啦,就酱,由于本例中逻辑并不复杂,Model暂时用不上,对于复杂一点的项目,Model主要负责数据的读取,如文件操作、数据库操作、service调用等,以后有机会举例具体来说。
如果需要持久化(persistent),则还需给给每对M-VM(Model和ViewModel)加入State,这个实际工程中也用得特别多。
Calculator主页:
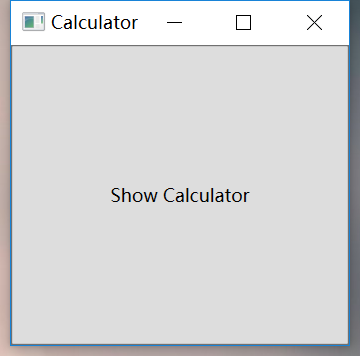
点击按钮“ShowCalculator”即可看到具体的计算器~
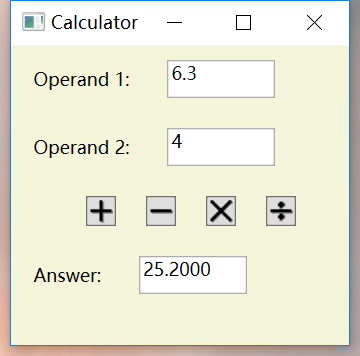
乘法举例:
除法举例:
最后附上代码:
CaliburnMicro-Calculator: A simple Calculator using Caliburn.Micro
https://github.com/yanglr/CaliburnMicro-Calculator,
欢迎fork和star,如有改进意见欢迎提交pull request~
从0到1:使用Caliburn.Micro(WPF和MVVM)开发简单的计算器
标签:src reference rabl ace enc vat alignment 删除 png
原文地址:https://www.cnblogs.com/enjoy233/p/10586651.html