标签:new 查找 鼓励 stack 开启 gets out ati 通知
一、spring概述
1.1 什么是spring
spring就是把每个bean(实体类)与bean的关系全部交给第三方容器进行管理,这个容器就是spring,管理bean的生命周期。且可以和其他框架一起使用;Spring与Struts, Spring与hibernate(起到整合(粘合)作用的一个框架)。
1.2 spring提供了一站式解决方案:
1) Spring Core spring的核心功能: IOC容器, 解决对象创建及依赖关系。
2) Spring Web Spring对web模块的支持。【可以与struts整合,让struts的action创建交给spring】;【spring mvc模式】
3) Spring DAO Spring 对jdbc操作的支持【JdbcTemplate模板工具类】
4) Spring ORM spring对orm的支持。既可以与hibernate整合,【session】;也可以使用spring的对hibernate操作的封装
5)Spring AOP 切面编程
6)SpringEE spring 对javaEE其他模块的支持
二、spring的环境搭建
2.1 pom.xml文件引入maven坐标
<!-- 引入Spring-AOP等相关Jar -->
        <dependency>
            <groupId>org.springframework</groupId>
            <artifactId>spring-core</artifactId>
            <version>3.0.6.RELEASE</version>
        </dependency>
        <dependency>
            <groupId>org.springframework</groupId>
            <artifactId>spring-context</artifactId>
            <version>3.0.6.RELEASE</version>
        </dependency>
        <dependency>
            <groupId>org.springframework</groupId>
            <artifactId>spring-aop</artifactId>
            <version>3.0.6.RELEASE</version>
        </dependency>
        <dependency>
            <groupId>org.springframework</groupId>
            <artifactId>spring-orm</artifactId>
            <version>3.0.6.RELEASE</version>
        </dependency>
        <dependency>
            <groupId>org.aspectj</groupId>
            <artifactId>aspectjrt</artifactId>
            <version>1.6.1</version>
        </dependency>
        <dependency>
            <groupId>aspectj</groupId>
            <artifactId>aspectjweaver</artifactId>
            <version>1.5.3</version>
        </dependency>
<dependency>
            <groupId>cglib</groupId>
            <artifactId>cglib</artifactId>
            <version>2.1_2</version>
        </dependency>
2.2 需要交给spring管理的bean类
public class UserEntity {
    private String name;
    private Integer age;
    //set / get
}
2.3 spring配置文件
<?xmlversion="1.0"encoding="UTF-8"?>
<beansxmlns="http://www.springframework.org/schema/beans"
    xmlns:xsi="http://www.w3.org/2001/XMLSchema-instance"xmlns:p="http://www.springframework.org/schema/p"
    xmlns:context="http://www.springframework.org/schema/context"
    xmlns:aop="http://www.springframework.org/schema/aop"
    xsi:schemaLocation="
        http://www.springframework.org/schema/beans
        http://www.springframework.org/schema/beans/spring-beans.xsd
        http://www.springframework.org/schema/context
        http://www.springframework.org/schema/context/spring-context.xsd
        http://www.springframework.org/schema/aop
        http://www.springframework.org/schema/aop/spring-aop.xsd">
<beanid="userEntity"class="com.stu.entity.UserEntity"/>
</beans>
2.4 测试类
public class SpringTest {
    public static void main(String[] args) {
        ClassPathXmlApplicationContext applicationContext = new ClassPathXmlApplicationContext("applicationContext.xml");
        UserEntity userEntity = (UserEntity) applicationContext.getBean("userEntity");
        System.out.println(userEntity);
    }
}
三、spring的加载过程
3.1 spring是单例还是多例
spring默认单例的,可通过构造函数证明,也可多次获取该对象比较内存地址。线程不安全,使用共享数据注意安全问题(尽量少使用共享数据)。
3.2 spring的作用域
3.2.1 singleton作用域
当一个bean的 作用域设置为singleton, 那么Spring IOC容器中只会存在一个共享的bean实例,并且所有对bean的请求,只要id与该bean定义相匹配,则只会返回bean的同一实例。换言之,当把一个bean定义设置为singleton作用域时,Spring IOC容器只会创建该bean定义的唯一实例。这个单一实例会被存储到单例缓存(singleton cache)中,并且所有针对该bean的后续请求和引用都将返回被缓存的对象实例,这里要注意的是singleton作用域和GOF设计模式中的单例是完全不同的,单例设计模式表示一个ClassLoader中只有一个class存在,而这里的singleton则表示一个容器对应一个bean,也就是说当一个bean被标识为singleton时候,spring的IOC容器中只会存在一个该bean。
3.2.2 prototype作用域
prototype作用域部署的bean,每一次请求(将其注入到另一个bean中,或者以程序的方式调用容器的 getBean()方法)都会产生一个新的bean实例,相当与一个new的操作,对于prototype作用域的bean,有一点非常重要,那就是Spring不能对一个prototype bean的整个生命周期负责,容器在初始化、配置、装饰或者是装配完一个prototype实例后,将它交给客户端,随后就对该prototype实例不闻不问了。不管何种作用域,容器都会调用所有对象的初始化生命周期回调方法,而对prototype而言,任何配置好的析构生命周期回调方法都将不会被调用。清除prototype作用域的对象并释放任何prototype bean所持有的昂贵资源,都是客户端代码的职责。(让Spring容器释放被singleton作用域bean占用资源的一种可行方式是,通过使用 bean的后置处理器,该处理器持有要被清除的bean的引用。)
总结:spring的生命周期:<bean id="userEntity" class="com.stu.entity.UserEntity" scope="prototype"></bean>
在这个spring中 有四种生命周期:
prototype 多例 当你调用getbean方法才会初始化
singleton 单例,加载spring时实例化
request http请求request作用里面使用
session http请求session作用里面使用
四、SpringIOC容器
SpringIOC容器,是spring核心内容。作用:创建对象&处理对象的依赖关系
SpringIOC原理:解析xml配置,获取配置的bean的class地址,通过反射实例化,返回对象。
4.1 创建对象
1)调用无参数构造器 默认
2)带参数构造器
3)工厂创建对象:工厂类,静态方法创建对象;工厂类,非静态方法创建对象
<!-- 无参构造函数 -->
    <beanid="user1"class="com.stu.entity.UserEntity"scope="prototype"/>
    <!-- 有参构造函数 -->
    <beanid="user2"class="com.stu.entity.UserEntity">
        <constructor-argname="name"type="java.lang.String" value="张三"></constructor-arg>
        <constructor-argname="age"type="java.lang.Integer" value="18"></constructor-arg>
    </bean>

    <beanid="factory"class="com.stu.entity.ObjectFactory"></bean>
    <!-- 通过实例工厂方法创建 -->
    <beanid="user3"factory-bean="factory"factory-method="getInstance"></bean>
    <!-- 通过静态工厂方法创建 -->
    <beanid="user4"class="com.stu.entity.ObjectFactory" factory-method="getStaticInstance"></bean>
4.2 依赖注入
1) 通过构造函数
2) 通过set方法给属性注入值
3) p名称空间
4) 注解
#Set方法注入值
<!-- dao instance -->
    <beanid="userDao" class="cn.stu.UserDao"></bean>

    <!-- service instance -->
    <beanid="userService" class="cn.stu.UserService">
        <property name="userDao"ref="userDao"></property>
    </bean>

    <!-- action instance -->
    <beanid="userAction" class="cn.stu.UserAction">
        <property name="userService" ref="userService"></property>
    </bean>
使用set方法注入,必须要有setXXX方法。因为是通过反射原理来实现的。
#p名称空间注入属性值
<?xmlversion="1.0"encoding="UTF-8"?>
<beansxmlns="http://www.springframework.org/schema/beans"
xmlns:xsi="http://www.w3.org/2001/XMLSchema-instance"
xmlns:p="http://www.springframework.org/schema/p"
xmlns:context="http://www.springframework.org/schema/context"
xsi:schemaLocation="
        http://www.springframework.org/schema/beans
        http://www.springframework.org/schema/beans/spring-beans.xsd
        http://www.springframework.org/schema/context
        http://www.springframework.org/schema/context/spring-context.xsd">

    <!-- ###############对象属性赋值############### -->

    <!--
        给对象属性注入值:
            # p 名称空间给对象的属性注入值
             (spring3.0以上版本才支持)
     -->
    <beanid="userDao" class="cn.stu.UserDao"></bean>
    <beanid="userService" class="cn.stu.UserService" p:userDao-ref="userDao"></bean>
    <beanid="userAction" class="cn.stu.UserAction" p:userService-ref="userService"></bean>

    <!-- 传统的注入:
    <bean id="user" class="cn.itmayiedu.User" >
        <property name="name" value="xxx"></property>
    </bean>
    -->
    <!-- p名称空间优化后 -->
    <beanid="user" class="cn.stu.User" p:name="Jack0001"></bean>
</beans>
#注解版本使用
@Repository //标识注解dao层,默认以 <bean id=”userDao” class=”com.stu.dao.UserDao”></bean>
@Service 注解service层,以<bean id=”userService” class=”com.stu.service.UserService”></bean>
使用注解步骤:
1)先引入context名称空间
xmlns:context="http://www.springframework.org/schema/context"
2)开启注解扫描
<context:component-scan base-package="cn.itcast.e_anno2"></context:component-scan>
3)使用注解
通过注解的方式,把对象加入ioc容器。
创建对象以及处理对象依赖关系,相关的注解:
@Component 指定把一个对象加入IOC容器
@Repository 作用同@Component;在持久层使用
@Service 作用同@Component;在业务逻辑层使用
@Controller 作用同@Component;在控制层使用
@Resource 属性注入 属于java的,jdk1.6,默认以名称查找,再以类型查找
@Autowired 属性注入 属于spring框架自带,默认以类型查找
总结:
1)使用注解,可以简化配置,且可以把对象加入IOC容器,及处理依赖关系(DI)
2)注解可以和XML配置一起使用。
beanID重复:XML冲重复,文件包错;XML和注解重复,优先XML。
五、代理模式
5.1 概述
代理(Proxy)是一种设计模式,提供了对目标对象另外的访问方式;即通过代理访问目标对象。这样好处:可以在目标对象实现的基础上,增强额外的功能操作。(扩展目标对象的功能)。
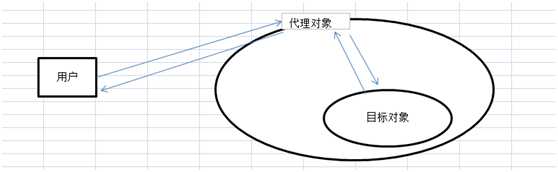
代理模式的关键:代理对象、目标对象
5.2 静态代理
代理对象,要实现与目标对象一样的接口。
总结静态代理:
1)可以做到在不修改目标对象的功能前提下,对目标对象功能扩展。
2)缺点:
因为代理对象,需要与目标对象实现一样的接口。所以会有很多代理类,类太多。
一旦接口增加方法,目标对象与代理对象都要维护。
解决:
代理工厂?可以使用动态代理。
5.3 动态代理(JDK)
动态代理:
1)代理对象,不需要实现接口;
2)代理对象的生成,是利用JDKAPI,动态的在内存中构建代理对象(需要我们指定创建代理对象/目标对象实现的接口的类型);
3) 动态代理, JDK代理,接口代理
JDK中生成代理对象的API:
|-- Proxy
static Object newProxyInstance(
ClassLoader loader, //指定当前目标对象使用类加载器
Class<?>[] interfaces, //目标对象实现的接口的类型
InvocationHandler h //事件处理器
)
动态代理总结:
代理对象不需要实现接口,但是目标对象一定要实现接口;否则不能用动态代理!
思考:有一个目标对象,想要功能扩展,但目标对象没有实现接口,怎样功能扩展?
Class UserDao{}
// 子类的方式
Class subclass extends UserDao{}
//以子类的方式实现(cglib代理)
5.4 Cglib代理(ASM)
Cglib代理,也叫做子类代理。在内存中构建一个子类对象从而实现对目标对象功能的扩展
1)JDK的动态代理有一个限制,就是使用动态代理的对象必须实现一个或多个接口。如果想代理没有实现接口的类,就可以使用CGLIB实现。
2)CGLIB是一个强大的高性能的代码生成包,它可以在运行期扩展Java类与实现Java接口。它广泛的被许多AOP的框架使用,例如Spring AOP和dynaop,为他们提供方法的interception(拦截)。
3)CGLIB包的底层是通过使用一个小而快的字节码处理框架ASM,来转换字节码并生成新的类。不鼓励直接使用ASM,因为它要求你必须对JVM内部结构包括class文件的格式和指令集都很熟悉。
Cglib子类代理:
1) 需要引入cglib – jar文件,但是spring的核心包中已经包括了cglib功能,所以直接引入spring-core-3.2.5.jar即可。
2)引入功能包后,就可以在内存中动态构建子类
3)代理的类不能为final,否则报错。
4)目标对象的方法如果为final/static, 那么就不会被拦截,即不会执行目标对象额外的业务方法。
在Spring的AOP编程中,
如果加入容器的目标对象有实现接口,用JDK代理;
如果目标对象没有实现接口,用Cglib代。
六、AOP编程
AOP,aspect object programming,面向切面的编程,AOP可以实现“业务代码”“与“关注点代码”分离。
关注点:重复代码就叫做关注点;
切面:关注点形成的类,就叫切面(类)!
面向切面编程,就是指对很多功能都有的重复的代码抽取,再在运行的时候网业务方法上动态植入“切面类代码”。
切入点:执行目标对象方法,动态植入切面代码。
可以通过切入点表达式,指定拦截哪些类的哪些方法;给指定的类在运行的时候植入切面类代码。
场景:权限、日志、控制、事物原理
// 保存一个用户
public void add(User user) {
        Session session = null;
        Transaction trans = null;
        try {
            session = HibernateSessionFactoryUtils.getSession();   // 【关注点代码】
            trans = session.beginTransaction();    // 【关注点代码】

            session.save(user);     // 核心业务代码

            trans.commit();     //…【关注点代码】

        } catch (Exception e) {
            e.printStackTrace();
            if(trans != null){
                trans.rollback();   //..【关注点代码】

            }
        } finally{
            HibernateSessionFactoryUtils.closeSession(session);   ////..【关注点代码】

        }
   }
分析总结:
关注点代码,就是指重复执行的代码。
业务代码与关注点代码分离,好处?
1)关注点代码写一次即可;
2)开发者只需要关注核心业务;
3)运行时期,执行核心业务代码时候动态植入关注点代码;【代理】
如何分离?
过程式/对象式/代理模式分离
七、注解方式AOP编程
步骤:
1)先引入aop相关jar文件 (aspectj aop优秀组件)
spring-aop-3.2.5.RELEASE.jar【spring3.2源码】
aopalliance.jar 【spring2.5源码/lib/aopalliance】
aspectjweaver.jar 【spring2.5源码/lib/aspectj】或【aspectj-1.8.2\lib】
aspectjrt.jar 【spring2.5源码/lib/aspectj】或【aspectj-1.8.2\lib】
注意:用到spring2.5版本的jar文件,如果用jdk1.7可能会有问题。
需要升级aspectj组件,即使用aspectj-1.8.2版本中提供jar文件提供。
2) bean.xml中引入aop名称空间
<?xml version="1.0" encoding="UTF-8"?>
<beans xmlns="http://www.springframework.org/schema/beans"
       xmlns:xsi="http://www.w3.org/2001/XMLSchema-instance" xmlns:p="http://www.springframework.org/schema/p"
       xmlns:context="http://www.springframework.org/schema/context"
       xmlns:aop="http://www.springframework.org/schema/aop"
       xsi:schemaLocation="
        http://www.springframework.org/schema/beans
        http://www.springframework.org/schema/beans/spring-beans.xsd
        http://www.springframework.org/schema/context
        http://www.springframework.org/schema/context/spring-context.xsd
        http://www.springframework.org/schema/aop
        http://www.springframework.org/schema/aop/spring-aop.xsd">
3)开启aop注解
<aop:aspectj-autoproxy proxy-target-class="true"></aop:aspectj-autoproxy>
4) 使用注解
@Aspect 指定一个类为切面类
@Pointcut("execution(* com.itmayiedu.service.UserService.add(..))")指定切入点表达式
@Before("pointCut_()") 前置通知: 目标方法之前执行
@After("pointCut_()") 后置通知:目标方法之后执行(始终执行)
@AfterReturning("pointCut_()") 返回后通知:执行方法结束前执行(异常不执行)
@AfterThrowing("pointCut_()") 异常通知: 出现异常时候执行
@Around("pointCut_()") 环绕通知:环绕目标方法执行
public class UserAop {
    @Before("execution(* com.stu.service.UserEntityService.addUser(..))")
    public void begin() {
        System.out.println("前置通知");
    }
    @After("execution(* com.stu.service.UserEntityService.addUser(..))")
    public void commit() {
        System.out.println("后置通知");
    }
    @AfterReturning("execution(* com.stu.service.UserEntityService.addUser(..))")
    public void afterReturning() {
        System.out.println("运行通知");
    }
    @AfterThrowing("execution(* com.stu.service.UserEntityService.addUser(..))")
    public void afterThrowing() {
        System.out.println("异常通知");
    }
    @Around("execution(* com.stu.service.UserEntityService.addUser(..))")
    public void around(ProceedingJoinPoint proceedingJoinPoint) throws Throwable {
        System.out.println("我是环绕通知-前");
        proceedingJoinPoint.proceed();
        System.out.println("我是环绕通知-后");
    }
}

@Service
public class UserEntityService {
    @Autowired
    private UserEntityDao userEntityDao;public void addUser(){
        userEntityDao.addUser();
    }
}
八、XML方式实现AOP编程
Xml实现aop编程:
1)引入jar文件【aop 相关jar, 4个】
2)引入aop名称空间
3)aop 配置
* 配置切面类(重复执行代码形成的类)
* aop配置
拦截哪些方法 / 拦截到方法后应用通知代码
<?xmlversion="1.0"encoding="UTF-8"?>
<beansxmlns="http://www.springframework.org/schema/beans"
xmlns:xsi="http://www.w3.org/2001/XMLSchema-instance"
xmlns:p="http://www.springframework.org/schema/p"
xmlns:context="http://www.springframework.org/schema/context"
xmlns:aop="http://www.springframework.org/schema/aop"
xsi:schemaLocation="
        http://www.springframework.org/schema/beans
        http://www.springframework.org/schema/beans/spring-beans.xsd
        http://www.springframework.org/schema/context
        http://www.springframework.org/schema/context/spring-context.xsd
        http://www.springframework.org/schema/aop
        http://www.springframework.org/schema/aop/spring-aop.xsd">

    <!-- dao实例 -->
    <beanid="userDao" class="com.stu.UserDao"></bean>
    <beanid="orderDao" class="com.stu.OrderDao"></bean>

    <!-- 切面类 -->
    <beanid="aop" class="com.stu.Aop"></bean>

    <!-- Aop配置 -->
    <aop:config>
        <!-- 定义一个切入点表达式:拦截哪些方法 -->
        <aop:pointcut expression="execution(* com.stu.*.*(..))" id="pt"/>
        <!-- 切面 -->
        <aop:aspect ref="aop">
            <!-- 环绕通知 -->
            <aop:around method="around" pointcut-ref="pt"/>
            <!-- 前置通知:在目标方法调用前执行 -->
            <aop:before method="begin" pointcut-ref="pt"/>
            <!-- 后置通知: -->
            <aop:after method="after" pointcut-ref="pt"/>
            <!-- 返回后通知 -->
            <aop:after-returning method="afterReturning" pointcut-ref="pt"/>
            <!-- 异常通知 -->
            <aop:after-throwing method="afterThrowing" pointcut-ref="pt"/>
        </aop:aspect>
    </aop:config>
</beans>
标签:new 查找 鼓励 stack 开启 gets out ati 通知
原文地址:https://www.cnblogs.com/woniusky/p/10729252.html