标签:tip tun sed none software apach key exe org
适合范围:storm自由开源的分布式实时计算系统,擅长处理海量数据。适合处理实时数据而不是批处理。
安装前的准备
1.安装zookeeper
①下载zookeeperhttps://zookeeper.apache.org/,点击download进入新页面之后,--->download,选择一个镜像文件下载到本地;
②下面是我选择的文件http://mirrors.tuna.tsinghua.edu.cn/apache/zookeeper/ ,下载的版本是zookeeper-3.4.14;
③解压后复制D:\******\zookeeper-3.4.14\conf\zoo_sample.cfg,并将其命名为zoo.cfg,打开zoo.cfg,将dataDir=/tmp/zookeeper修改为
dataDir=D:\\***\\zookeeper-3.4.14\\data
dataLogDir=D:\\***\\zookeeper-3.4.14\\log
其中,***为省略的路径。
④配置环境变量(可省略,在指定目录下⑤,启动即可)
⑤进入D:\******\zookeeper-3.4.14\bin\,启动zookeeper。
zkServer.cmd
2.安装python
①下载https://www.python.org/,选择download,进入新页面--->Files--->Windows x86-64 web-based installer,下载到本地;
②点击安装包,安装到指定目录D:\***\python-3.7.3;
3.安装storm
①点击http://storm.apache.org/downloads.html,点击右上角download,选择apache-storm-1.2.2.tar.gz下载到本地;
②解压
③配置环境变量(可省略,在指定文件夹下启动即可。)
④D:\***\apache-storm-1.2.2\bin\storm-config.cmd
⑤修改配置文件D:\***\apache-storm-1.2.2\conf\storm.yaml
# Licensed to the Apache Software Foundation (ASF) under one
# or more contributor license agreements.  See the NOTICE file
# distributed with this work for additional information
# regarding copyright ownership.  The ASF licenses this file
# to you under the Apache License, Version 2.0 (the
# "License"); you may not use this file except in compliance
# with the License.  You may obtain a copy of the License at
#
# http://www.apache.org/licenses/LICENSE-2.0
#
# Unless required by applicable law or agreed to in writing, software
# distributed under the License is distributed on an "AS IS" BASIS,
# WITHOUT WARRANTIES OR CONDITIONS OF ANY KIND, either express or implied.
# See the License for the specific language governing permissions and
# limitations under the License.

########### These MUST be filled in for a storm configuration
 storm.zookeeper.servers:
     - "127.0.0.1"
#     - "server2"
#
# nimbus.seeds: ["host1", "host2", "host3"]
 nimbus.seeds: ["127.0.0.1"]
#
#
# ##### These may optionally be filled in:
#
## List of custom serializations
# topology.kryo.register:
#     - org.mycompany.MyType
#     - org.mycompany.MyType2: org.mycompany.MyType2Serializer
#
## List of custom kryo decorators
# topology.kryo.decorators:
#     - org.mycompany.MyDecorator
#
## Locations of the drpc servers
# drpc.servers:
#     - "server1"
#     - "server2"

## Metrics Consumers
## max.retain.metric.tuples
## - task queue will be unbounded when max.retain.metric.tuples is equal or less than 0.
## whitelist / blacklist
## - when none of configuration for metric filter are specified, it‘ll be treated as ‘pass all‘.
## - you need to specify either whitelist or blacklist, or none of them. You can‘t specify both of them.
## - you can specify multiple whitelist / blacklist with regular expression
## expandMapType: expand metric with map type as value to multiple metrics
## - set to true when you would like to apply filter to expanded metrics
## - default value is false which is backward compatible value
## metricNameSeparator: separator between origin metric name and key of entry from map
## - only effective when expandMapType is set to true
# topology.metrics.consumer.register:
#   - class: "org.apache.storm.metric.LoggingMetricsConsumer"
#     max.retain.metric.tuples: 100
#     parallelism.hint: 1
#   - class: "org.mycompany.MyMetricsConsumer"
#     max.retain.metric.tuples: 100
#     whitelist:
#       - "execute.*"
#       - "^__complete-latency$"
#     parallelism.hint: 1
#     argument:
#       - endpoint: "metrics-collector.mycompany.org"
#     expandMapType: true
#     metricNameSeparator: "."

## Cluster Metrics Consumers
# storm.cluster.metrics.consumer.register:
#   - class: "org.apache.storm.metric.LoggingClusterMetricsConsumer"
#   - class: "org.mycompany.MyMetricsConsumer"
#     argument:
#       - endpoint: "metrics-collector.mycompany.org"
#
# storm.cluster.metrics.consumer.publish.interval.secs: 60

# Event Logger
# topology.event.logger.register:
#   - class: "org.apache.storm.metric.FileBasedEventLogger"
#   - class: "org.mycompany.MyEventLogger"
#     arguments:
#       endpoint: "event-logger.mycompany.org"

# Metrics v2 configuration (optional)
#storm.metrics.reporters:
#  # Graphite Reporter
#  - class: "org.apache.storm.metrics2.reporters.GraphiteStormReporter"
#    daemons:
#        - "supervisor"
#        - "nimbus"
#        - "worker"
#    report.period: 60
#    report.period.units: "SECONDS"
#    graphite.host: "localhost"
#    graphite.port: 2003
#
 supervisor.slots.ports:
    - 9700
    - 9701
    - 9702
    - 9703
 storm.local.dir: "D:\\****\\storm"
 ui.port: 6066
#  # Console Reporter
#  - class: "org.apache.storm.metrics2.reporters.ConsoleStormReporter"
#    daemons:
#        - "worker"
#    report.period: 10
#    report.period.units: "SECONDS"
#    filter:
#        class: "org.apache.storm.metrics2.filters.RegexFilter"
#        expression: ".*my_component.*emitted.*"
⑥启动storm,分别启动nimbus,supervisor,ui【需要打开三个窗口输入命令】
进入D:\***\apache-storm-1.2.2\bin
storm.py nimbus
storm.py supervisor
storm.py ui
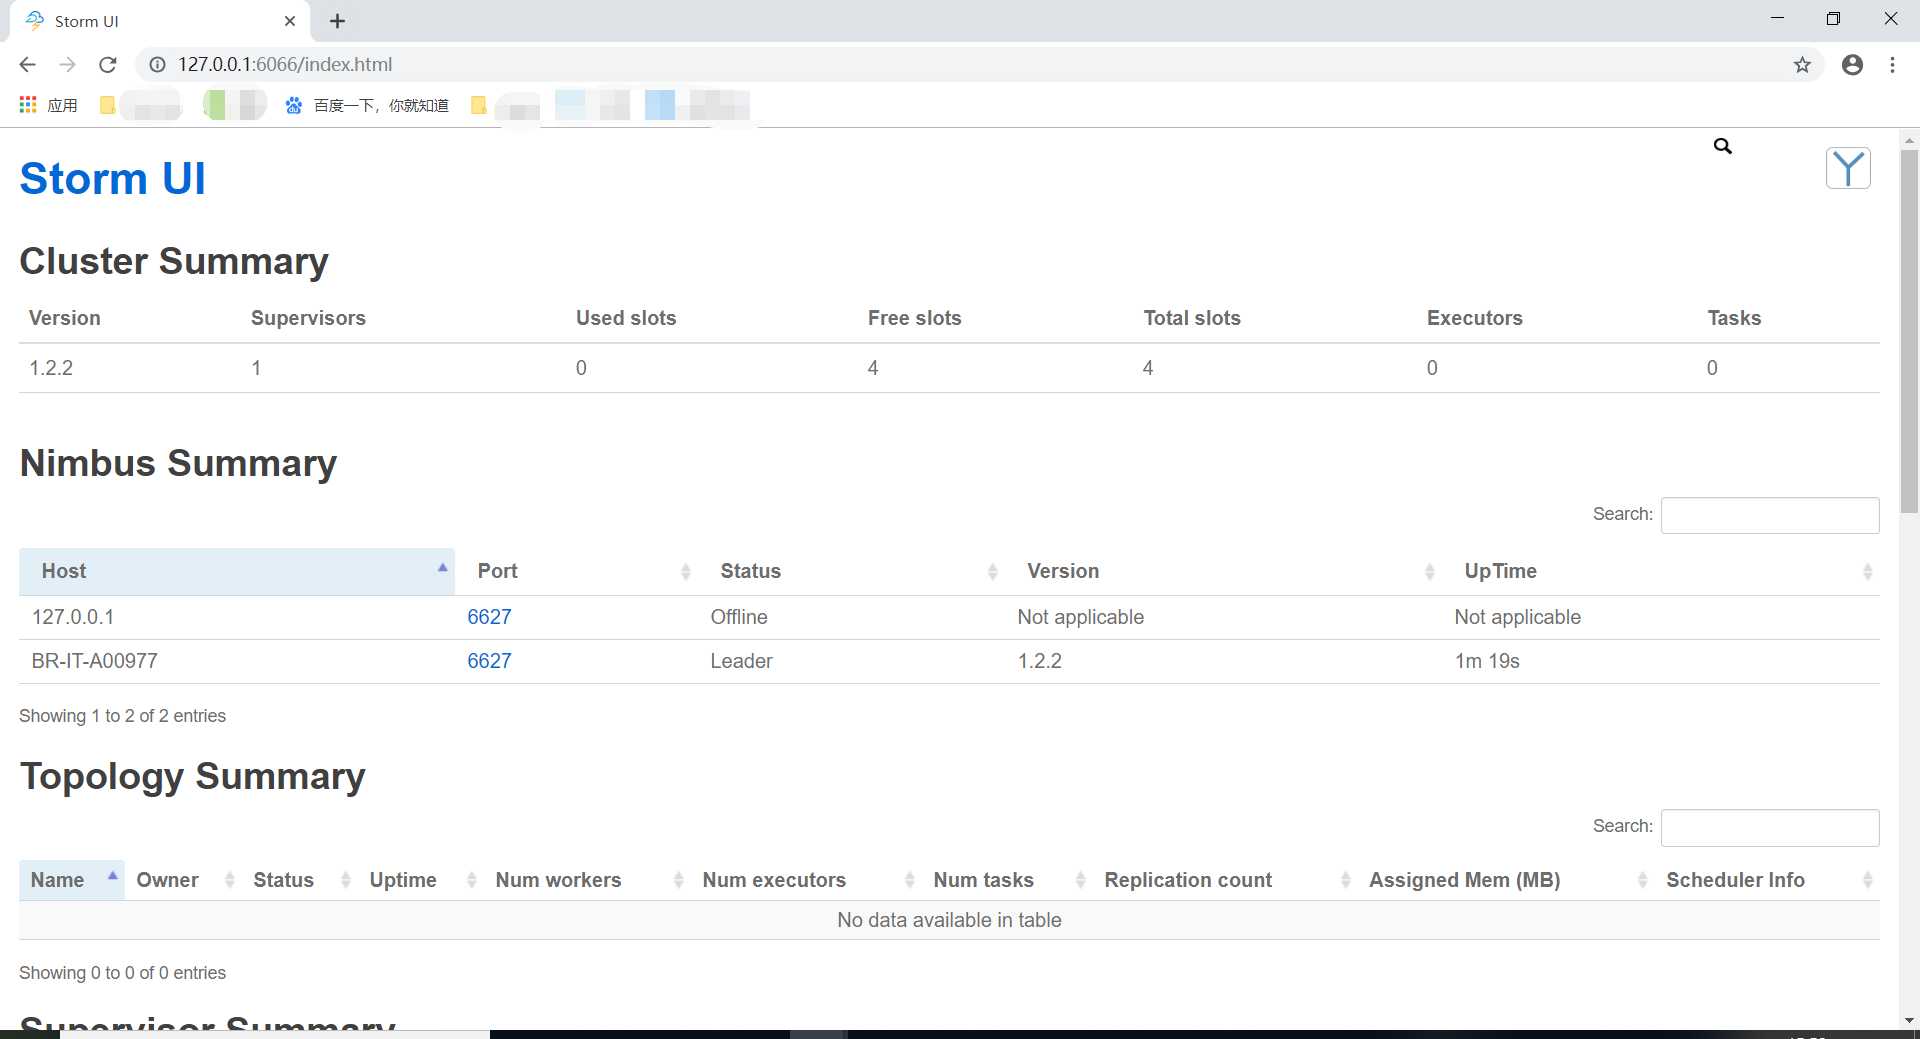
⑦依次启动完毕之后,在浏览器输入http://127.0.0.1:6066/访问【访问UI的端口号可自定义,在上述文件中修改即可】
ui.port: 6066
⑧启动页面
标签:tip tun sed none software apach key exe org
原文地址:https://www.cnblogs.com/sugar-6847/p/10774782.html