标签:rest har navigate ane OWIN show second center note
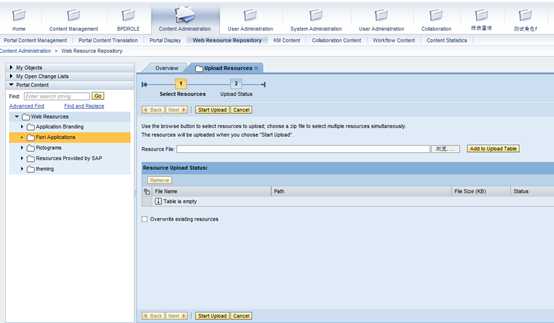
Uploading Resources to the Web Resource Repository
You have been assigned the Content Administrator role.
You can upload Web resources to the Web Resource Repository, so that they can be used by different portal components and applications. When you upload resources, they are saved as objects in the Portal Content Directory (PCD) and are also copied to the file system of the portal server (in the same folder hierarchy, and synchronized with any changes that you make). This allows the consumption of resources at runtime using relative paths. For example, a .css file that is saved in the Web Resource Repository can use a resource that is also saved in the Web Resource Repository, by specifying the following in one of its classes: background: url(‘../images/logo.png‘) .
Following are some guidelines for selecting resource files to upload:
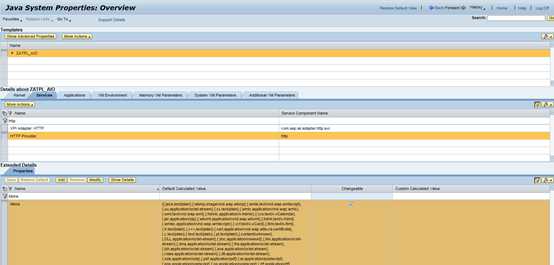
In SAP NetWeaver Administrator, navigate to Configuration Infrastructure Java System Properties Services HTTP Provider. To the Mime property, add the following value: \{.ico,image/x-icon\} .
Note
To upload multiple resources simultaneously, add them to a compressed (.zip) file and then upload the compressed file.
If you have configured the Virus Scan Interface on your AS Java, all resource files are automatically scanned during the upload process.
In the list of files to be uploaded, each file has a status that indicates whether it can be uploaded. If a file cannot be uploaded, the reason is given (for example, a file may contain invalid characters or it may exceed the maximum file size allowed). For information about changing the maximum file size, see Modifying the Uploadable File Size . Use the Filter by Status field to more easily see the problematic files. A summary of the number of files with each status is displayed at the top of the table.
Note
To remove a resource or folder from the list of files to be uploaded, select it in the upload table and choose Remove . If you select a folder, all resources and folders located below that folder are removed from the list.
Note
This option applies to all the duplicate files in the upload table.
Checks for duplicate resource names are not case-sensitive, meaning that My.png and my.png are treated as duplicate files.
When the upload process is complete, the second page of the Upload Resources wizard appears. This page shows a list of all the files that were uploaded, and those that were not uploaded. A summary of the number of files that were and were not uploaded is displayed at the top of the table. If a file was not uploaded, the reason is given. Use the Filter by Status field to more easily see the files that were not uploaded.
You can now see the added resource files in the Portal Catalog, in the folder to which you uploaded them.
标签:rest har navigate ane OWIN show second center note
原文地址:https://www.cnblogs.com/robinNing/p/10880028.html