标签:完成 disco prope 配置管理 host 技术 出现 分布式配置 inf
一、废话不多说,直接进入正题:
①获取github代码,地址:https://github.com/knightliao/disconf
②搭建基础服务(redis,zookeeper,mysql),搭建过程略,配置文件在disconf-web的profile/rd/*.properties中,切记将application-demo.properties重命名为application.properties
③通过disconf-web/sql下脚本建库,顺序参照readme.md,数据库中应该有6个表:app,env,user,role,role_resources,config
④修改jQuery-1.11.0.js文件8950,添加“url.url="/disconf-web"+url.url”,其中disconf-web工程为tomcat发布应用时的上下文根
⑤使用nginx运行前端页面,关键配置如下:
server {
        listen       80;
        server_name  localhost;
        location / {
            root   D:\xd\codes\disconf\disconf-web\html;
            index  index.html index.htm;
        }
        location /disconf-web {
            proxy_pass_header Server;
            proxy_set_header Host $http_host;
            proxy_redirect off;
            proxy_set_header X-Real-IP $remote_addr;
            proxy_set_header X-Scheme $scheme;
            proxy_pass http://127.0.0.1:8085/disconf-web;
        }
        error_page   500 502 503 504  /50x.html;
        location = /50x.html {
            root   html;
        }
    }
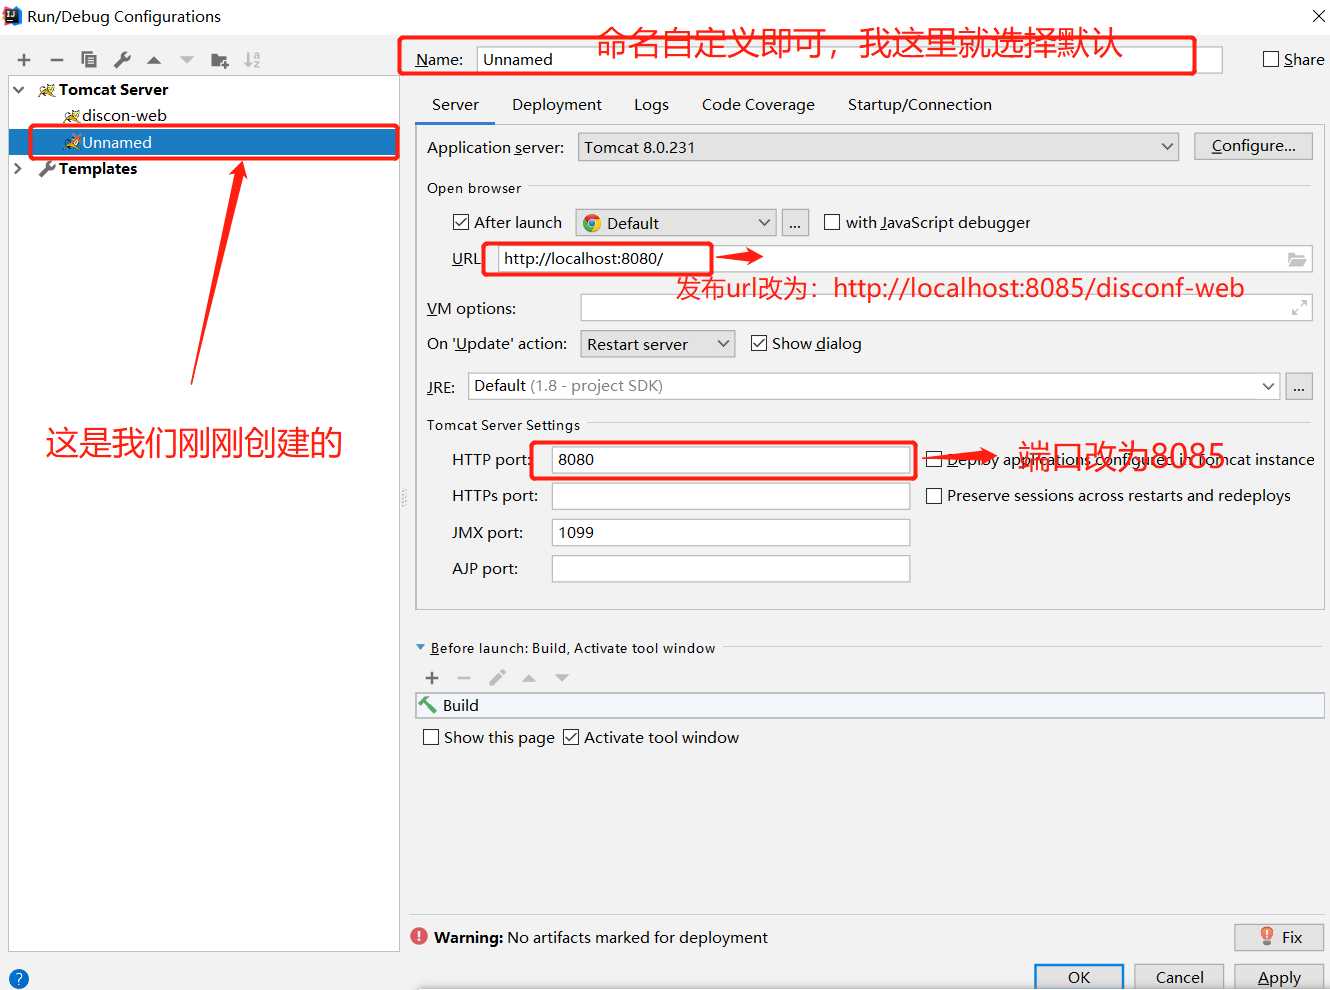
⑥使用IDEA2018.2打包disconf工程,并修改tomcat的端口为8085,上下文根为disconf-web,操作步骤如下:
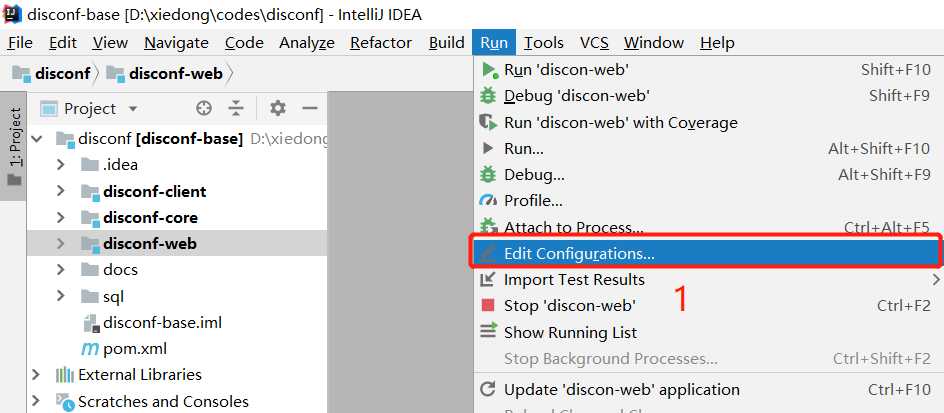
第一步:找到菜单栏,选择run-->Edit Configurations
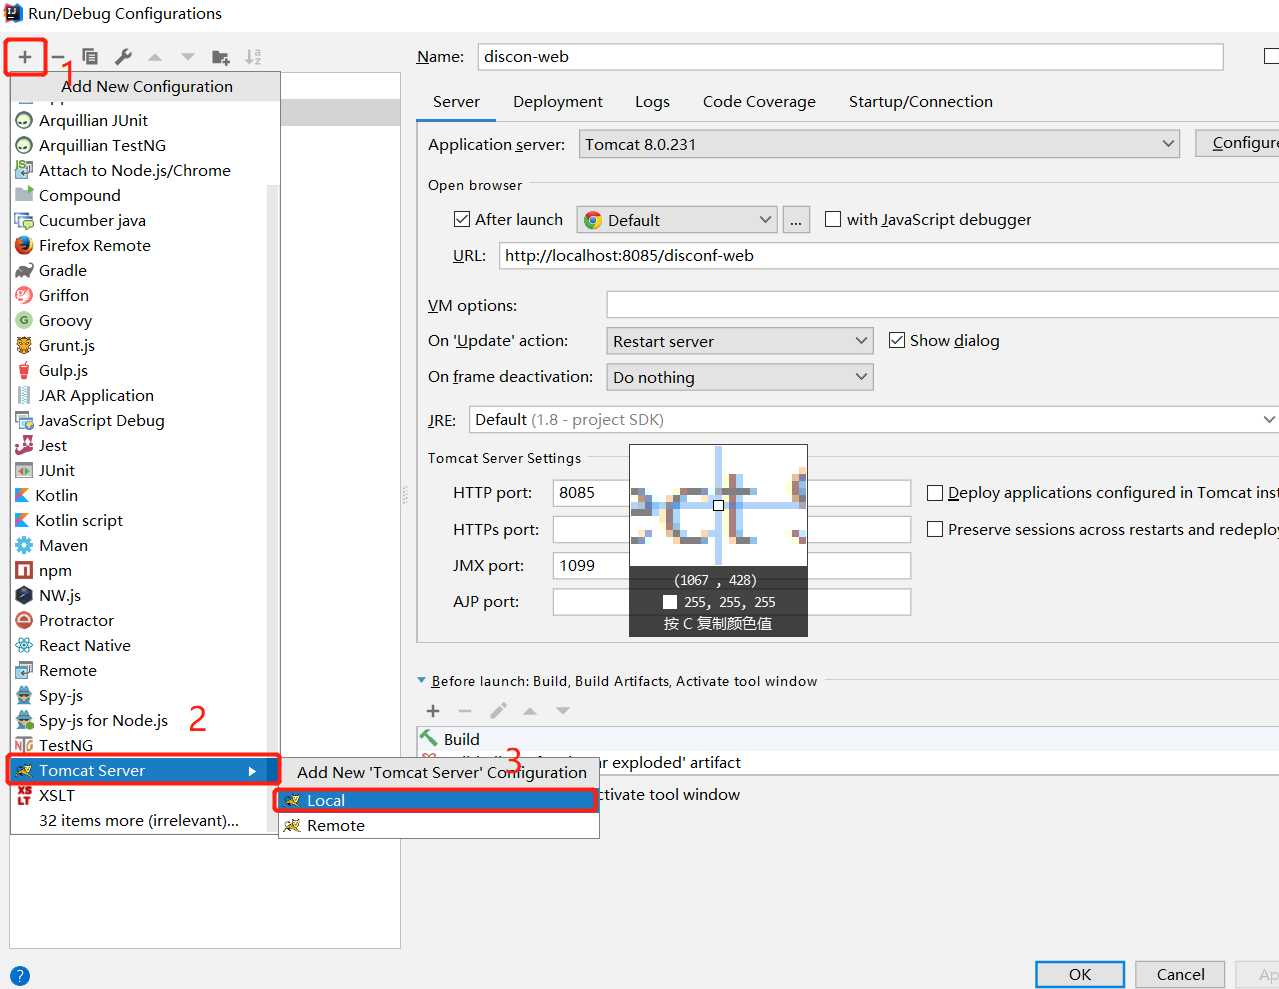
第二步:依次按照图中标注选择
第三步:按照图中依次修改以下内容。
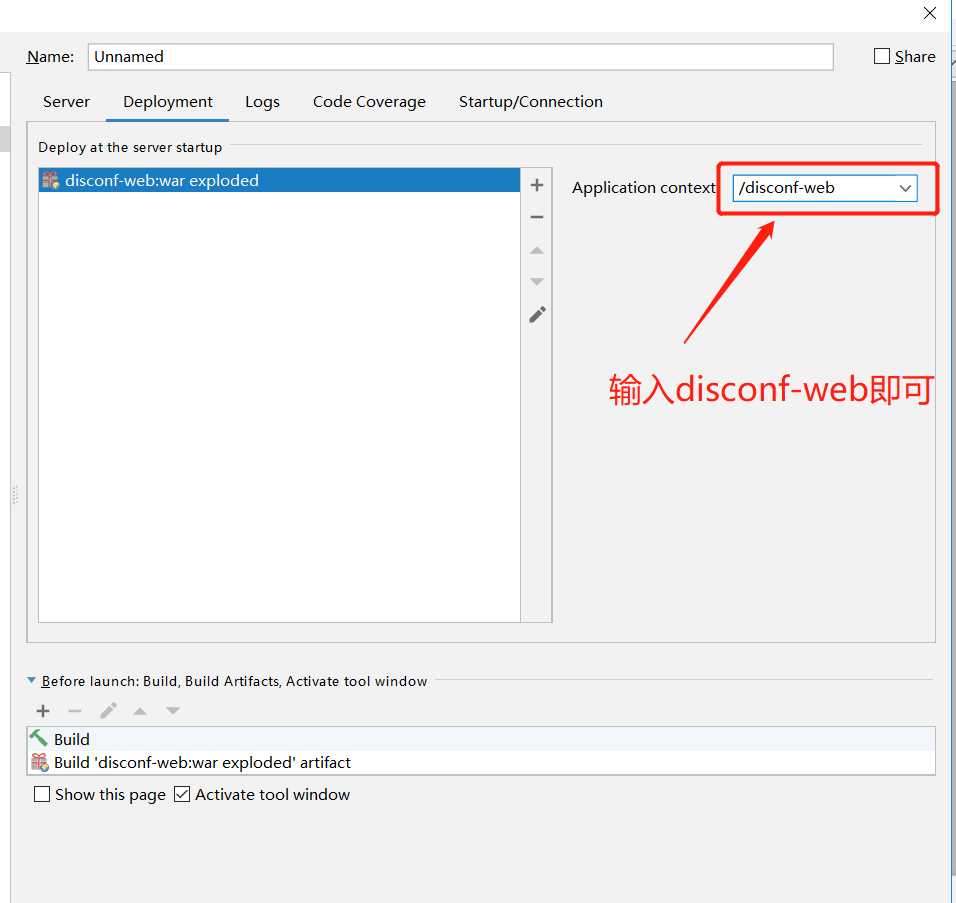
最后一步:选择deployment,按照如何所示配置即可。
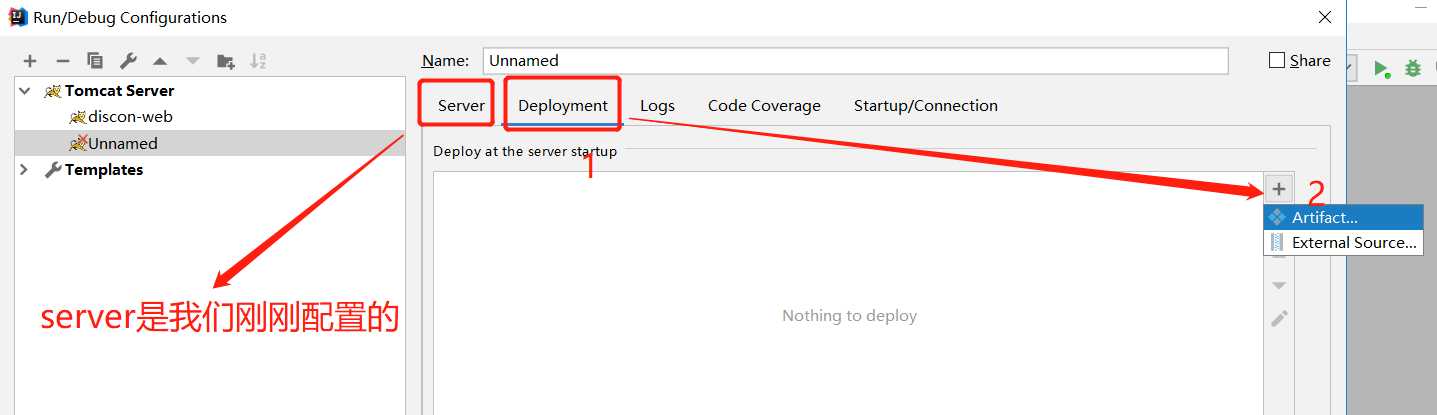
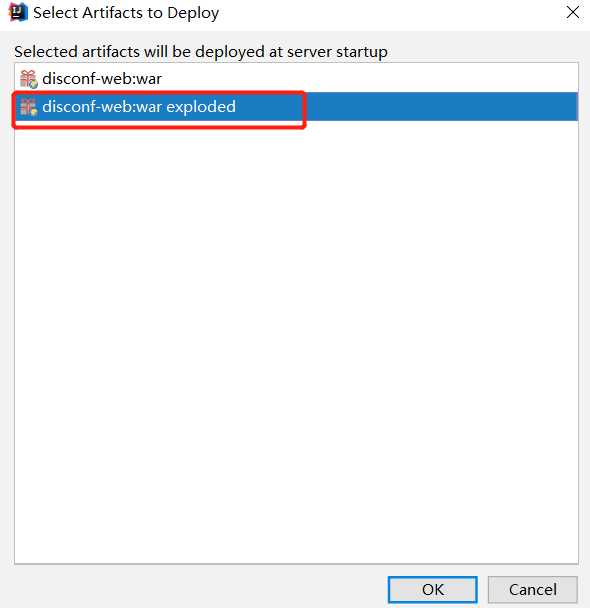
在弹出的页面中,选择exploded,点击ok
在此配置中,右侧application context:输入:disconf-web,至此我们已经完成所有配置。
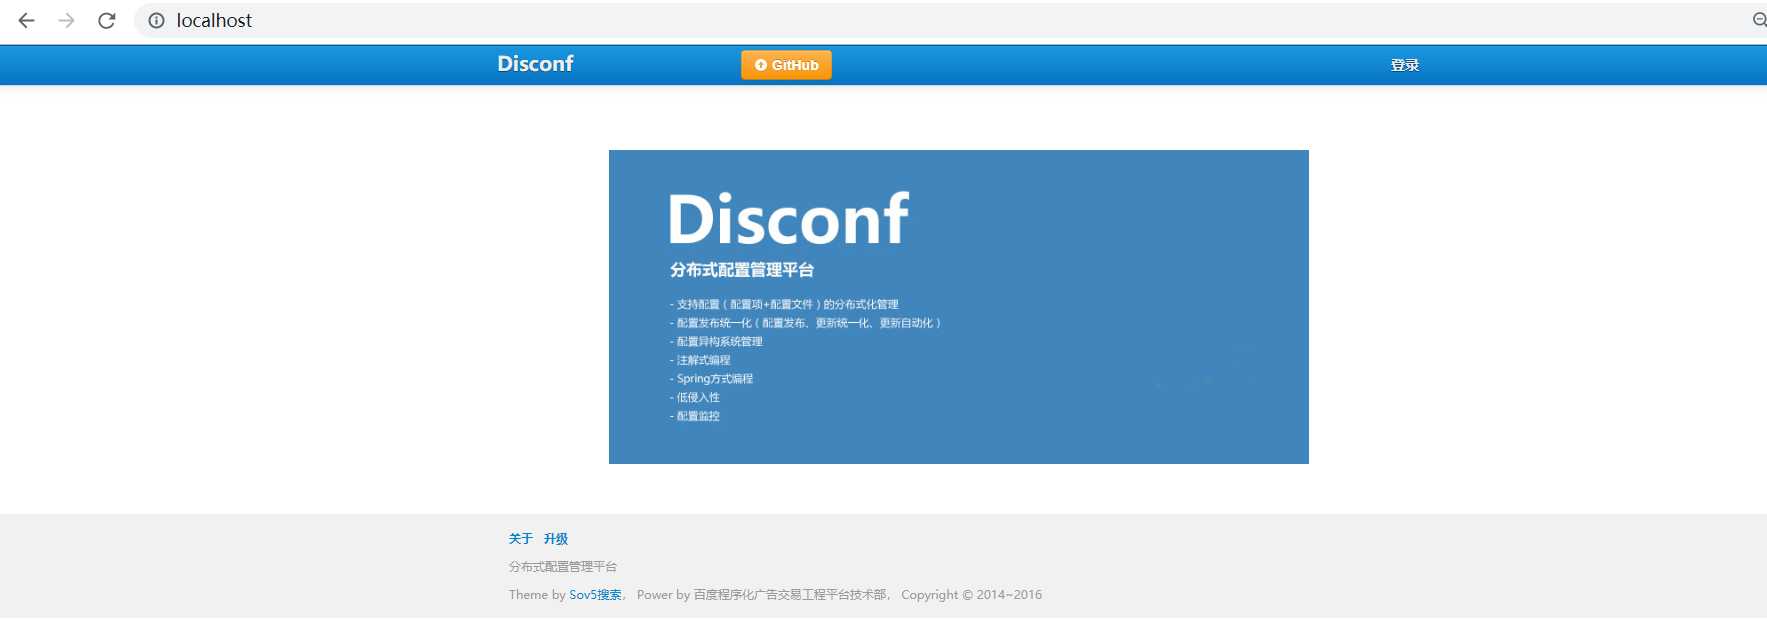
⑦依次启动nginx,在idea选择刚刚配置发布run。最终在浏览器中输入:localhost出现以下界面:点击右上角的登录即可完成登录,管理员用户名和密码都是admin,就可以管理配置文件了。
disconf---分布式配置管理平台的搭建(windows版本)
标签:完成 disco prope 配置管理 host 技术 出现 分布式配置 inf
原文地址:https://www.cnblogs.com/rmxd/p/11231073.html