标签:img ref tar pen nta repo 使用 浏览器 sites
GitHub官网:https://github.com/pyenv/pyenv-installer
This tool installs pyenv and friends. It is inspired by rbenv-installer.
In general, compiling your own Python interpreter requires the installation of the appropriate libraries and packages. The installation wiki provides a list of these for common operating systems.
Install:
$ curl https://pyenv.run | bashpyenv.run redirects to the install script in this repository and the invocation above is equivalent to:
$ curl -L https://github.com/pyenv/pyenv-installer/raw/master/bin/pyenv-installer | bashRestart your shell so the path changes take effect:
You can now begin using pyenv.
Update:
$ pyenv updateUninstall: pyenv is installed within $PYENV_ROOT (default: ~/.pyenv). To uninstall, just remove it:
$ rm -fr ~/.pyenvand remove these three lines from .bashrc:
export PATH="$HOME/.pyenv/bin:$PATH"
eval "$(pyenv init -)"
eval "$(pyenv virtualenv-init -)"
If you need, export USE_GIT_URI to use git:// instead of https:// for git clone.
Travis itself uses pyenv and therefore PYENV_ROOT is set already. To make it work anyway the installation for pyenv-installer needs to look like this:
[...]
- unset PYENV_ROOT
- curl -L https://github.com/pyenv/pyenv-installer/raw/master/bin/pyenv-installer | bash
- export PATH="$HOME/.pyenv/bin:$PATH"
- pyenv install 3.5.2
The project on github contains a setup for vagrant to test the installer inside a vagrant managed virtual image.
If you don‘t know vagrant yet: just install the latest package, open a shell in this project directory and say
$ vagrant up
$ vagrant ssh
Now you are inside the vagrant container and your prompt should like something like vagrant@vagrant-ubuntu-trusty-64:~$
The project (this repository) is mapped into the vagrant image at /vagrant
$ cd /vagrant
$ python setup.py install
$ echo 'export PATH="$HOME/.pyenv/bin:$PATH"' >> ~/.bashrc
$ echo 'eval "$(pyenv init -)"' >> ~/.bashrc
$ echo 'eval "$(pyenv virtualenv-init -)"' >> ~/.bashrc
$ source ~/.bashrc
Pyenv should be installed and responding now.
Remove experimental PyPi support and replace with a dummy package.
Initial release on PyPi.
Initial public release.
MIT - see License file.
pyenv install -l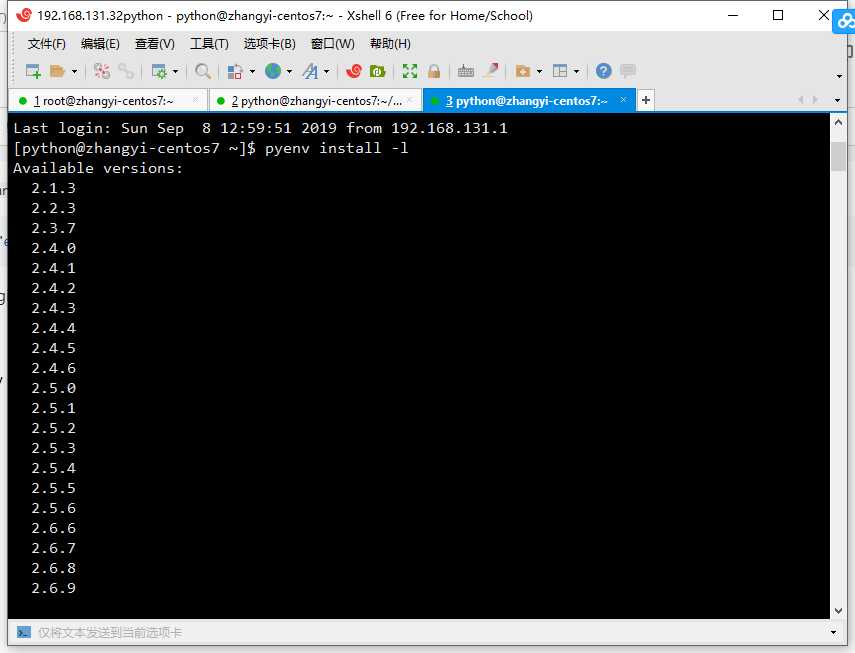
[python@zhangyi-centos7 ~]$ pyenv install 3.5.4
Downloading Python-3.5.4.tar.xz...-> https://www.python.org/ftp/python/3.5.4/Python-3.5.4.tar.xz
到官网下载 对应版本源码
https://www.python.org/downloads/source/
Python-x.x.x.tar.xz
Python-x.x.x.tgz
放入用户目录下的~/.pyenv/cache文件夹
makedir -r ~/.pyenv/cache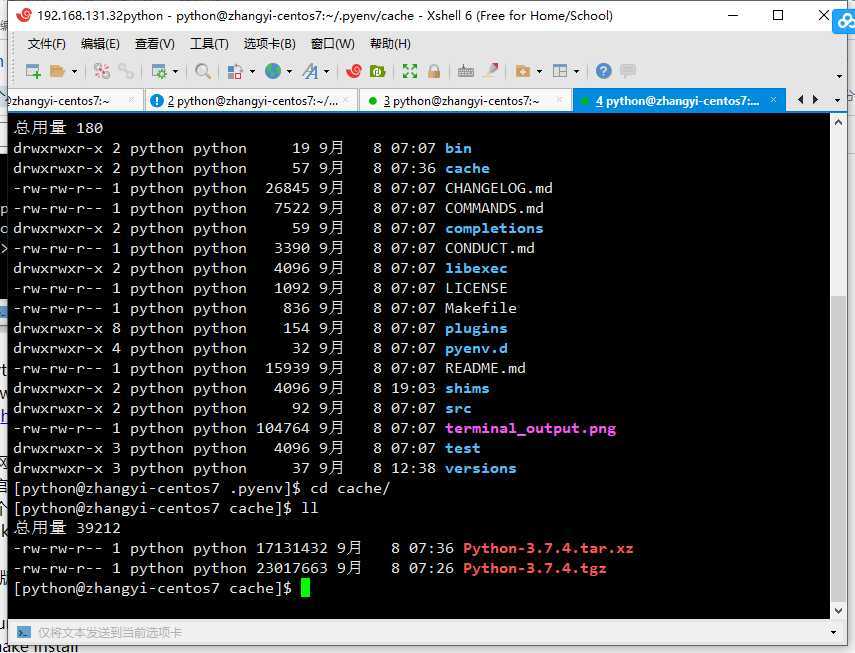
#yum install libffi-devel -y
#make install#wget http://mirror.centos.org/centos/7/os/x86_64/Packages/libffi-devel-3.0.13-18.el7.x86_64.rpm
#rpm -ivh libffi-devel-3.0.13-18.el7.x86_64.rpm
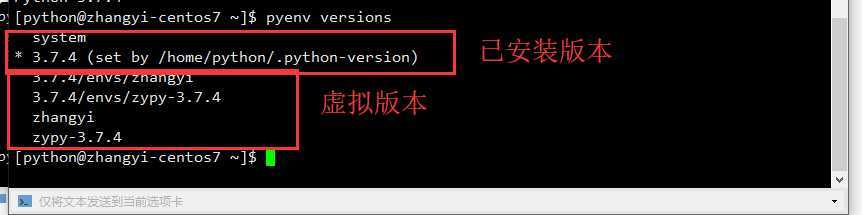
pyenv local 3.7.4
pyenv virtualenv zhangyi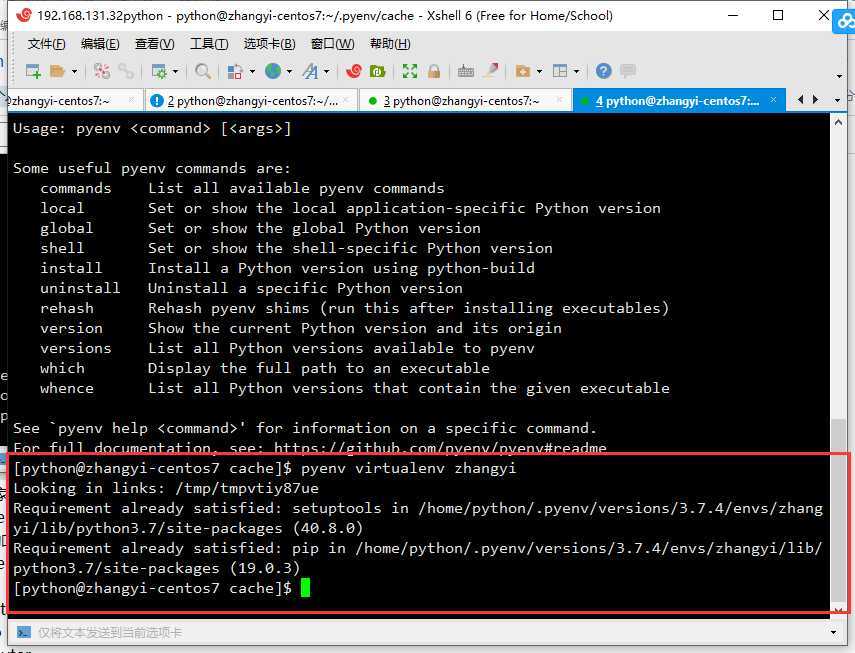
.png)
参考博客:https://blog.csdn.net/u011220960/article/details/81512435
mkdir ~/.pip
cat > ~/.pip/pip.conf << EOF
[global]trusted-host=[mirrors.aliyun.com](http://mirrors.aliyun.com/)index-url=https://mirrors.aliyun.com/pypi/simple/
EOF
pip install ipythonpip install jupyterjupyter notebook passwd
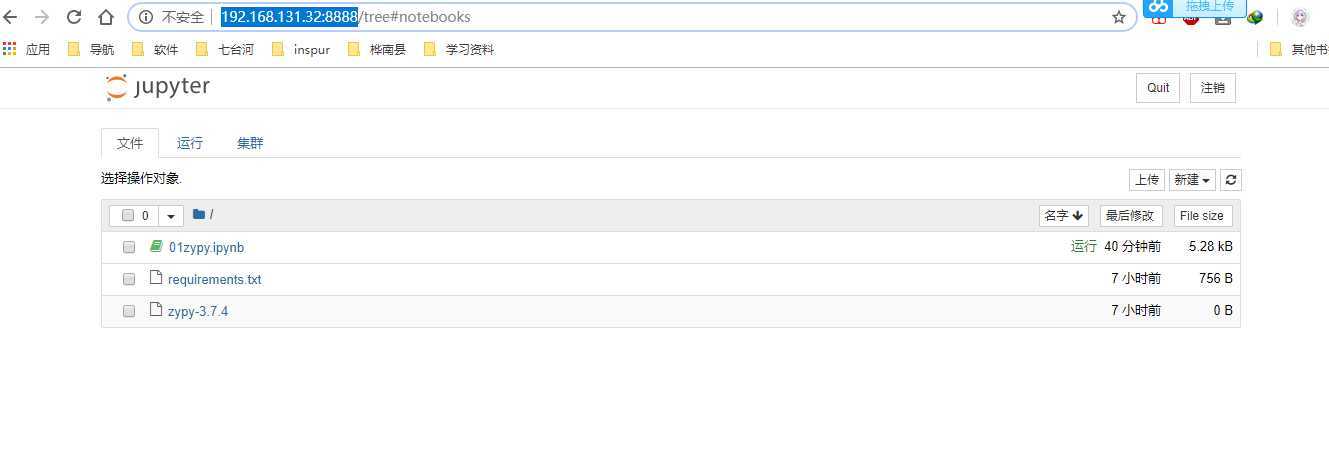
jupyter notebook --ip=0.0.0.0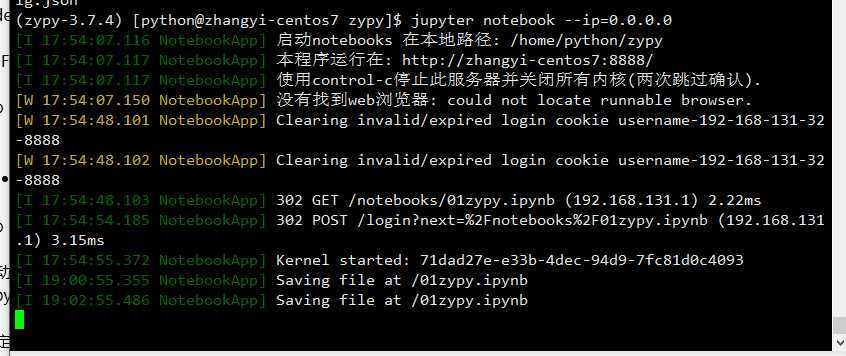
pip freeze > requirement
pip -r requirement
标签:img ref tar pen nta repo 使用 浏览器 sites
原文地址:https://www.cnblogs.com/lscool66/p/11548248.html