标签:tag imu time dem issue app pru headers http
HttpRunner 的 yaml 脚本文件,可以结合locust做性能测试
安装完成 HttpRunner 后,系统中会新增locusts命令,但不会同时安装 Locust。
使用locusts -V查看时,会提示需要先安装locustio
C:\Users\dell>locusts -V
WARNING  Locust is not installed, install first and try again.
install command: pip install locustio
使用 pip 安装 locustio 包
pip install locustio
查看locustio相关信息
C:\Users\dell>pip show locustio
Name: locustio
Version: 0.11.0
Summary: Website load testing framework
Home-page: https://locust.io/
Author: Jonatan Heyman, Carl Bystrom, Joakim Hamrén, Hugo Heyman
Author-email: UNKNOWN
License: MIT
Location: e:\python36\lib\site-packages
Requires: pyzmq, flask, gevent, requests, six, msgpack
Required-by:关于locust相关的教程,可以查看前面写的系列https://www.cnblogs.com/yoyoketang/tag/locust/
在做压测之前,我们得保证单个脚本是可以正常运行的,比如我在本地搭建一个接口环境,信息如下
接口访问地址:/api/test/demo
请求方式:get

接口返回:
{
    "code": 0,
    "msg": "success!",
    "datas": [{
        "age": 20,
        "create_time": "2019-09-15",
        "id": 1,
        "mail": "283340479@qq.com",
        "name": "yoyo",
        "sex": "M"
    }, {
        "age": 21,
        "create_time": "2019-09-16",
        "id": 2,
        "mail": "123445@qq.com",
        "name": "yoyo111",
        "sex": "M"
    }]
}
test_get_demo.yml脚本内容如下
- config:
    name: logincase
    variables: {}

# 上海悠悠,QQ交流群:750815713
- test:
    name: get user info case1
    request:
        url: http://127.0.0.1:8000/api/test/demo
        method: GET
        headers:
            Content-Type: application/json
            User-Agent: python-requests/2.18.4
    validate:
        - eq: [status_code, 200]
        - eq: [headers.Content-Type, application/json]
        - eq: [content.datas.0.age, 20]
        - eq: [content.datas.0.name, yoyo]
        - eq: [content.datas.0.mail, 283340479@qq.com]
使用hrun 运行上面脚本,保证是可以正常运行的
使用locusts -f 启动脚本文件
locusts -f test_get_demo.yml
D:\soft\untitled\projectdemo>locusts -f test_get_demo.yml
e:\python36\lib\site-packages\locust\core.py:17: MonkeyPatchWarning: Monkey-patching ssl after ssl has already been imported may lead to errors, including RecursionError on Python 3.6. It may also silently lead to incorrect behaviour on Python 3.7. Please monkey-patch earlier. See https://github.com/gevent/gevent/issues/1016. Modules that had direct imports (NOT patched): ['urllib3.contrib.pyopenssl (e:\\python36\\lib\\site-packages\\urllib3\\contrib\\pyopenssl.py)', 'urllib3.util (e:\\python36\\lib\\site-packages\\urllib3\\util\\__init__.py)'].
  monkey.patch_all()
INFO     Starting web monitor at *:8089
INFO Starting Locust 0.11.0运行完成之后,可以看到locust的web页面在8089端口启动,接着在浏览器输入:http://localhost:8089/ 即可访问
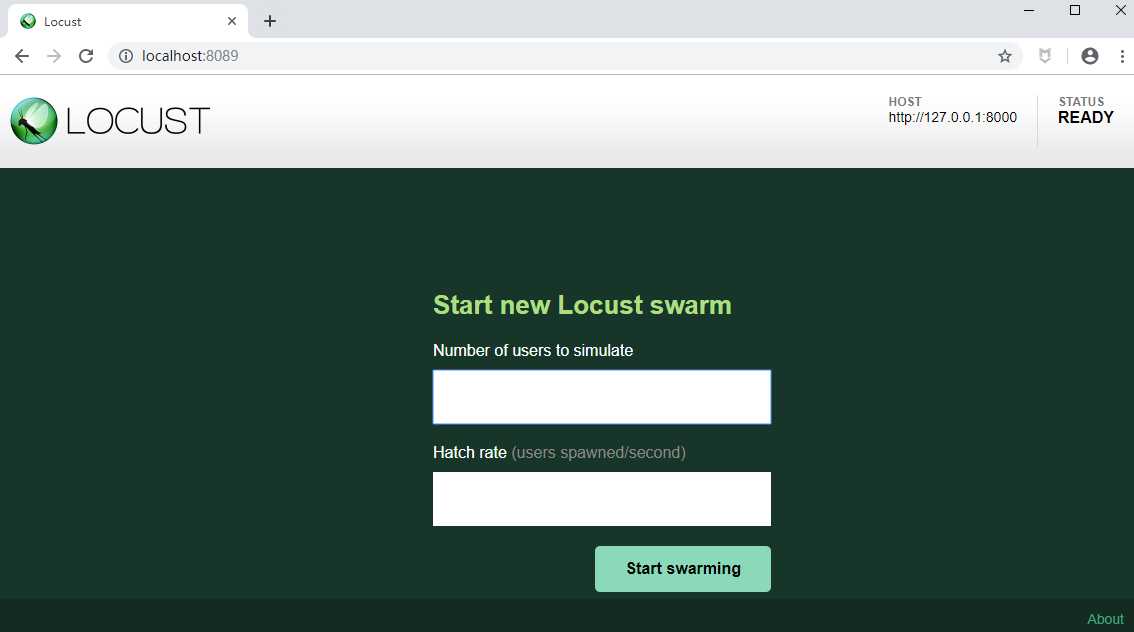
locust界面有2个输入框,Number of users to simulate 是用户并发数,Hatch rate (users spawned/second)是每秒启动用户数
比如我设置10个并发,每秒启动10个用户,测试结果如下
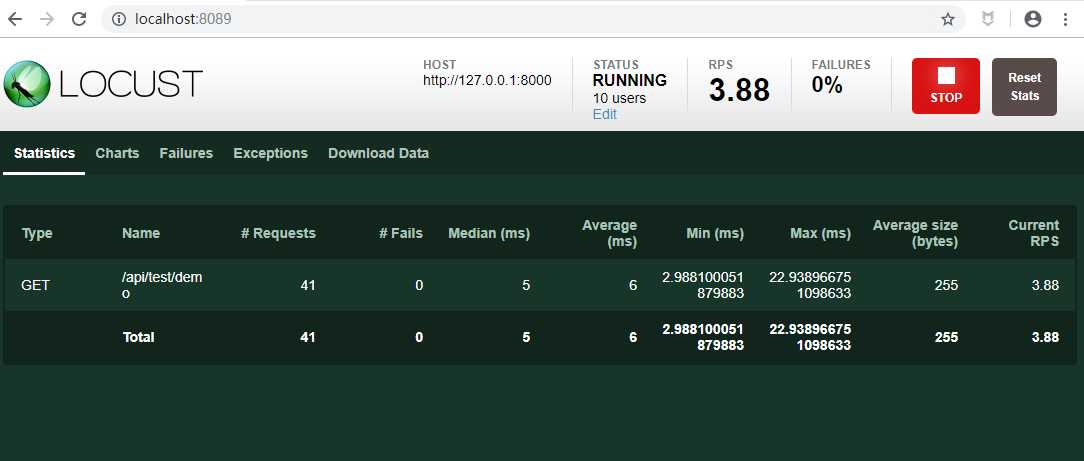
从测试结果可以看出,实际上每秒并没有触发10个请求(RPS值不到10),因为在locustfile.py文件里面有个等待机制
当启动locusts的时候,会在当前目录自动生成一个locustfile.py文件。这个才是locust的脚本文件
#coding: utf-8
import zmq
from locust import HttpLocust, TaskSet, task
from httprunner.task import LocustTask

class WebPageTasks(TaskSet):
    def on_start(self):
        self.test_runner = LocustTask(self.locust.file_path, self.client)

    @task
    def test_specified_scenario(self):
        self.test_runner.run()

class WebPageUser(HttpLocust):
    host = "http://127.0.0.1:8000"
    task_set = WebPageTasks
    min_wait = 1000
    max_wait = 1000    #    max_wait改成 1000了

    file_path = "test_get_demo.yml"
使用locust执行locustfile.py脚本文件
locust -f locustfile.py
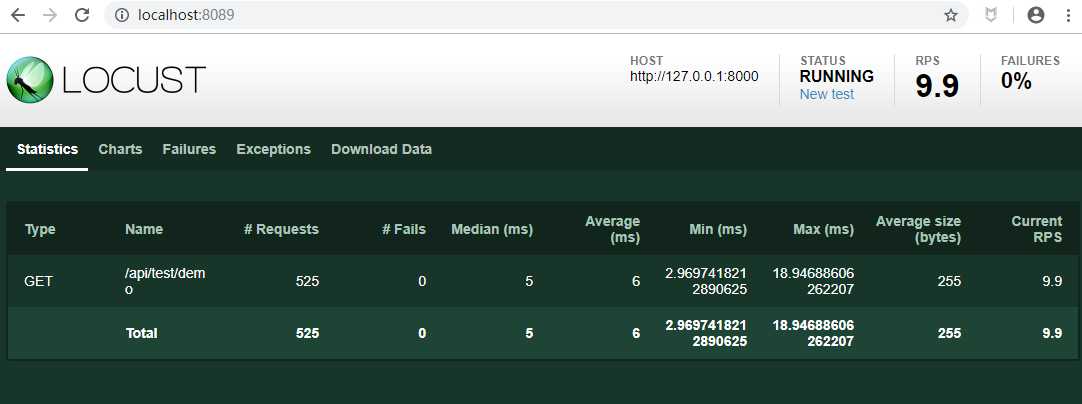
测试结果 RPS=9.9 接近10
标签:tag imu time dem issue app pru headers http
原文地址:https://www.cnblogs.com/yoyoketang/p/11644998.html