标签:快速 运维 amqp 现在 bre hand head int beans
今天公司有一个需求,是实现多个服务器中的运维信息的集中管理。由于需要实现运维信息的收集不影响各服务器上服务的开销,并且能快速开发,所以选择了消息队列这种技术方式。 消息队列有一个好处,是可以将消息异步传递,不对主服务造成开销,运维信息,是可以异步的在运维服务器中处理,并不影响到主服务。 现在java中,使用spring boot开发,方便高效,所以,选择了spring boot支持的rabbit MQ。
搞开发,学技术,最好的方式是从最简单的例子出发,就是常说的hello world,所以有了以下实现最简单例子的笔记.
一,安装 rabbitMQ 服务
由于rabbitMQ需要Erlang的虑拟机,所以需要先安装Erlang,安装完Erlang,再安装rabbitMQ 服务,两个服务都是安装在windows server 2106上面
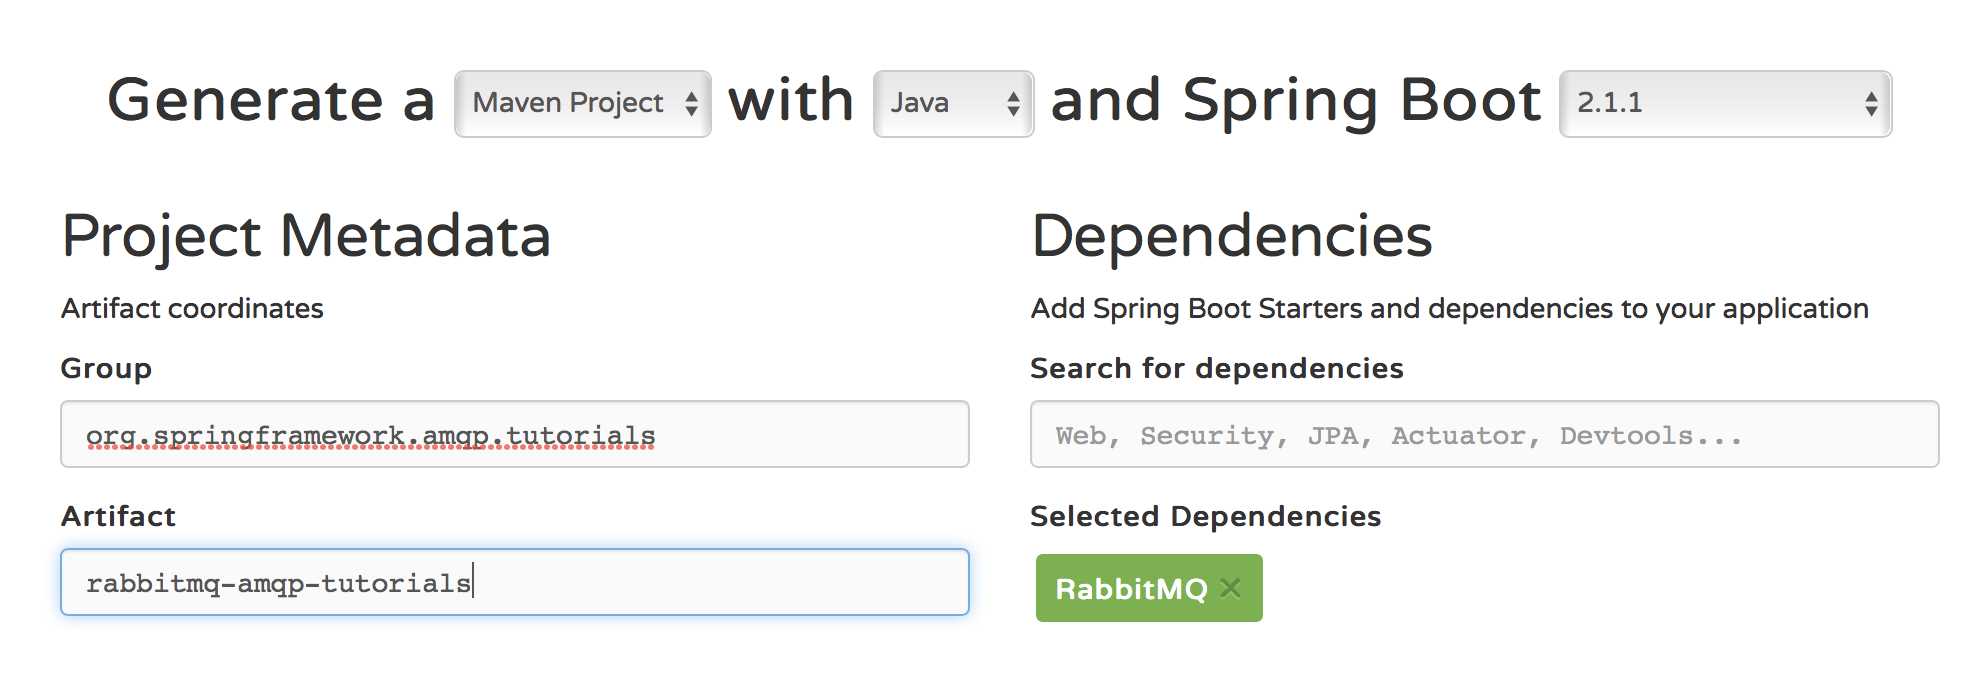
二,开始进行编码
2. 将项目导入 Eclipse,以下是代码结构

3. RabbitAmqpTutorialsApplication.java
package org.springframework.amqp;

import org.springframework.boot.CommandLineRunner;
import org.springframework.boot.SpringApplication;
import org.springframework.boot.autoconfigure.SpringBootApplication;
import org.springframework.context.annotation.Bean;
import org.springframework.context.annotation.Profile;
import org.springframework.scheduling.annotation.EnableScheduling;
import org.springframework.amqp.tutorials.RabbitAmqpTutorialsRunner;

@SpringBootApplication
@EnableScheduling
public class RabbitAmqpTutorialsApplication {

    @Profile("usage_message")
    @Bean
    public CommandLineRunner usage() {
        return args -> {
            System.out.println("This app uses Spring Profiles to control its behavior.\n");
            System.out.println("Sample usage: java -jar rabbit-tutorials.jar --spring.profiles.active=hello-world,sender");
        };
    }

    @Profile("!usage_message")
    @Bean
    public CommandLineRunner tutorial() {
        return new RabbitAmqpTutorialsRunner();
    }

    public static void main(String[] args) throws Exception {
        SpringApplication.run(RabbitAmqpTutorialsApplication.class, args);
    }
}
4. RabbitAmqpTutorialsRunner.java
package org.springframework.amqp.tutorials;

import java.util.Scanner;

import org.springframework.amqp.core.Queue;
import org.springframework.amqp.rabbit.core.RabbitTemplate;
import org.springframework.beans.factory.annotation.Autowired;
import org.springframework.beans.factory.annotation.Value;
import org.springframework.boot.CommandLineRunner;
import org.springframework.context.ConfigurableApplicationContext;


public class RabbitAmqpTutorialsRunner implements CommandLineRunner {

    @Value("${tutorial.client.duration:0}")
    private int duration;

    @Autowired
    private ConfigurableApplicationContext ctx;

    @Autowired
    private RabbitTemplate template;

    @Autowired
    private Queue queue;

    @Override
    public void run(String... arg0) throws Exception {
        Scanner scan = new Scanner(System.in);
        while(true) {
        //    System.out.println("Ready ... running for " + duration + "ms");
            String threadId = String.valueOf(Thread.currentThread().getId());
            System.out.println("Thead["+threadId+"] is running");

            //Thread.sleep(duration);
            String cmd = scan.nextLine();
            if(cmd.equals("exit")) {
                scan.close();
                break;
            }else {

                this.template.convertAndSend(queue.getName(), cmd);
                System.out.println(" [x] Sent ‘" + cmd + "‘");

            }
        }
        ctx.close();
    }
}
5. Tut1Config.java
package org.springframework.amqp.tutorials.tut1;

import org.springframework.amqp.core.Queue;
import org.springframework.context.annotation.Bean;
import org.springframework.context.annotation.Configuration;
import org.springframework.context.annotation.Profile;

@Profile({"tut1","hello-world"})
@Configuration
public class Tut1Config {

    @Bean
    public Queue hello() {
        System.out.println("hello queue created");
        return new Queue("hello");
    }

    @Profile("receiver")
    @Bean
    public Tut1Receiver receiver() {
        System.out.println("receiver created");
        return new Tut1Receiver();
    }
/**
    @Profile("sender")
    @Bean
    public Tut1Sender sender() {
        System.out.println("sender created");
        return new Tut1Sender();
    }**/
}
6.Tut1Receiver
package org.springframework.amqp.tutorials.tut1;

import org.springframework.amqp.rabbit.annotation.RabbitHandler;
import org.springframework.amqp.rabbit.annotation.RabbitListener;

@RabbitListener(queues = "hello")
public class Tut1Receiver {

    @RabbitHandler
    public void receive(String in) {

        String threadId = String.valueOf(Thread.currentThread().getId());
        System.out.println("Thead["+threadId+"] is running");


        System.out.println(" [x] Received ‘" + in + "‘");
    }
}
7.Tut1Sender.java
// Sender
package org.springframework.amqp.tutorials.tut1;

import java.text.SimpleDateFormat;
import java.util.Date;

import org.springframework.amqp.core.Queue;
import org.springframework.amqp.rabbit.core.RabbitTemplate;
import org.springframework.beans.factory.annotation.Autowired;
import org.springframework.scheduling.annotation.Scheduled;

public class Tut1Sender {

    @Autowired
    private RabbitTemplate template;

    @Autowired
    private Queue queue;

    @Scheduled(fixedDelay = 1000, initialDelay = 500)
    public void send() {
        Date now = new Date();
        SimpleDateFormat f = new SimpleDateFormat("yyyy-MM-dd HH:mm:ss");
        String message = f.format(now);
        this.template.convertAndSend(queue.getName(), message);
        System.out.println(" [x] Sent ‘" + message + "‘");

        String threadId = String.valueOf(Thread.currentThread().getId());
        System.out.println("Thead["+threadId+"] is running");

    }
}
8. application.peroperties
spring.profiles.active = usage_message
logging.level.org = ERROR
tutorial.client.duration = 1000
spring.rabbitmq.host=127.0.0.1
spring.rabbitmq.port=5672
spring.rabbitmq.username=test
spring.rabbitmq.password=test1234
spring boot rabbitMQ 的 hello world
标签:快速 运维 amqp 现在 bre hand head int beans
原文地址:https://www.cnblogs.com/kennyshao/p/rabbitMQ.html