标签:std chown line 源码 pcs test github png tput
环境:Centos8最小化安装[root@Oracle2 ~]# cat /etc/redhat-release
CentOS Linux release 8.0.1905 (Core) 注意:不要用8以下的系统编译MySQL8,会存在各个工具版本不够高的各种报错,非常麻烦
Mysql版本
mysql-8.0.18
第一步:安装依赖包
安装rpcgen,从这里下载
https://github.com/thkukuk/rpcsvc-proto/releases
[root@test3 mysql]# wget https://github.com/thkukuk/rpcsvc-proto/releases/download/v1.4/rpcsvc-proto-1.4.tar.gz
[root@test3 mysql]# tar -xzf rpcsvc-proto-1.4.tar.gz
[root@test3 mysql]# cd rpcsvc-proto-1.4/
[root@test3 rpcsvc-proto-1.4]# ./configure
[root@test3 rpcsvc-proto-1.4]# make && make install
安装其他依赖
yum install -y ncurses-devel cmake gcc perl-Data-Dumper gcc-c++ git openssl-devel make第二步:下载MySQL到boots源码包
下载地址:https://dev.mysql.com/downloads/mysql/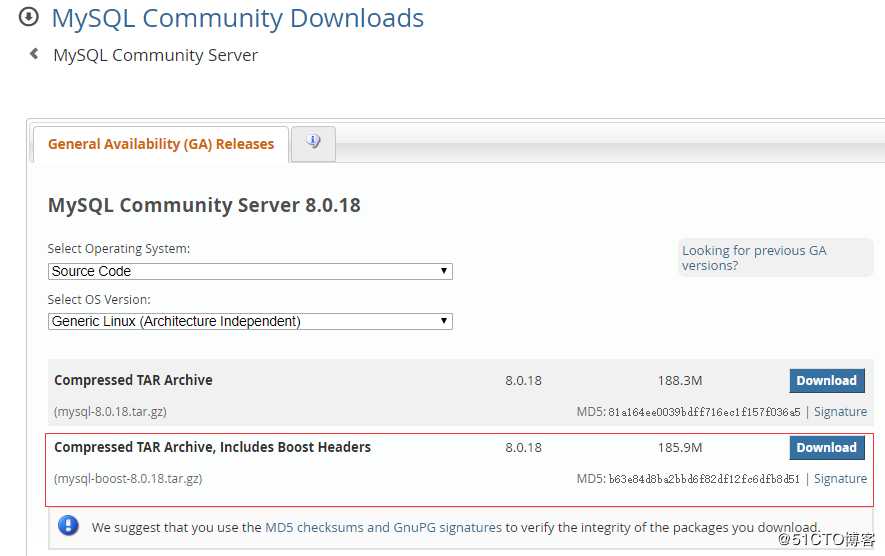
解压
tar -xzf mysql-boost-8.0.18.tar.gz
cd mysql-8.0.18/
第三步:编译安装
检查
[root@test3 mysql-8.0.18]# cmake  -DCMAKE_INSTALL_PREFIX=/usr/local/mysql -DMYSQL_DATADIR=/data/mysql -DFORCE_INSOURCE_BUILD=1 -DWITH_BOOST=boost/

开始编译安装
[root@test3 mysql-8.0.18]# make -j 4 && make install
可能会存在的报错:
-- Running cmake version 3.11.4
-- Found Git: /usr/bin/git (found version "2.18.1")
-- MySQL 8.0.18
CMake Error: CMake was unable to find a build program corresponding to "Unix Makefiles".  CMAKE_MAKE_PROGRAM is not set.  You probably need to select a different build tool.
CMake Error: CMAKE_C_COMPILER not set, after EnableLanguage
CMake Error: CMAKE_CXX_COMPILER not set, after EnableLanguage
-- Configuring incomplete, errors occurred!
See also "/root/mysql/mysql-8.0.18/CMakeFiles/CMakeOutput.log".
解决办法:
[root@test3 mysql-8.0.18]# yum install -y make报错:
Cannot find appropriate system libraries for WITH_SSL=system.
Make sure you have specified a supported SSL version.
Valid options are :
system (use the OS openssl library),
yes (synonym for system),
</path/to/custom/openssl/installation>**
解决办法:
[root@test3 mysql-8.0.18]# yum install -y openssl-devel报错:
-- Checking for module ‘libtirpc‘
--   Package ‘libtirpc‘, required by ‘virtual:world‘, not found
CMake Error at cmake/rpc.cmake:65 (MESSAGE):
  Could not find rpc/rpc.h in /usr/include or /usr/include/tirpc
Call Stack (most recent call first):
  plugin/group_replication/libmysqlgcs/configure.cmake:57 (MYSQL_CHECK_RPC)
  plugin/group_replication/libmysqlgcs/CMakeLists.txt:28 (INCLUDE)
解决办法:
[root@test3 mysql-8.0.18]# yum install -y libtirpc-devel第四步:配置
新建数据存放目录
[root@test3 mysql-8.0.18]# mkdir /data/mysql -p
[root@test3 mysql-8.0.18]# chown mysql:mysql /data/mysql/
[root@test3 mysql-8.0.18]# chown mysql:mysql -R /usr/local/mysql/
[root@test3 mysql-8.0.18]# cp  support-files/mysql.server /usr/local/sbin/
[root@test3 mysql-8.0.18]# chmod 755 /usr/local/sbin/mysql.server
到这里生成一份配置文件放到/etc/my.cnf
https://imysql.com/my-cnf-wizard.html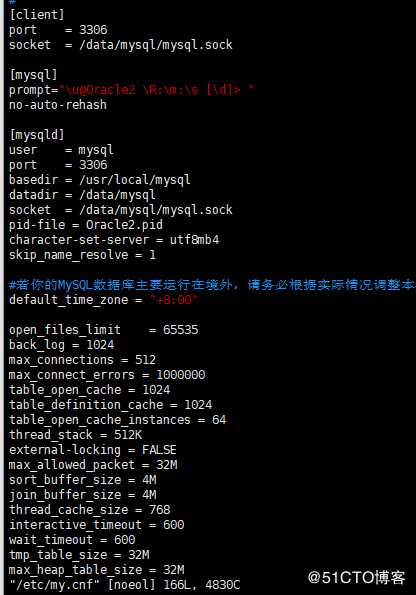
初始化数据库
[root@test3 mysql-8.0.18]# /usr/local/mysql/bin/mysqld --initialize --user=mysql
启动数据库
[root@test3 mysql-8.0.18]# mysql.server start
Starting MySQL... SUCCESS!
配置环境变量
[root@test3 mysql-8.0.18]# echo ‘PATH=/usr/local/mysql/bin:$PATH‘ >> /etc/profile
[root@test3 mysql-8.0.18]# source /etc/profile
第五步:登录
找到临时密码
[root@test3 mysql-8.0.18]# grep password /data/mysql/error.log | grep root
2020-01-09T22:18:59.395962+08:00 5 [Note] [MY-010454] [Server] A temporary password is generated for root@localhost: MYtoDe(>o6i&
修改临时root密码
[root@test3 mysql-8.0.18]# mysqladmin -u root -p password "Re@1dh6at"
Enter password:
mysqladmin: [Warning] Using a password on the command line interface can be insecure.
Warning: Since password will be sent to server in plain text, use ssl connection to ensure password safety.
用root登录
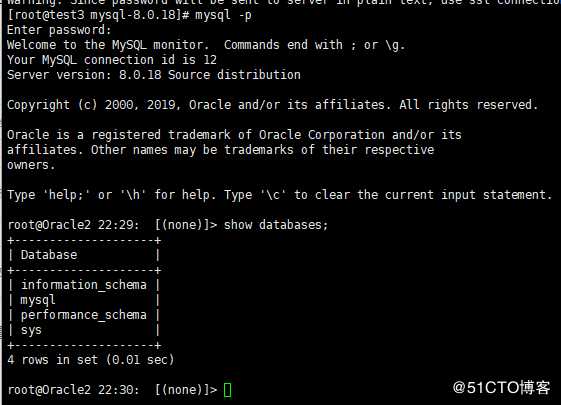
[root@test3 mysql-8.0.18]# mysql -p
Enter password:
第六步:新建数据库并授权用户
注:Mysql 从8.0起就不能把授权数据库和新建用户放到一条命令了
新建testdb数据库
root@Oracle2 22:30:  [(none)]> create database testdb;
Query OK, 1 row affected (0.01 sec)
新建testuser用户并设置密码
root@Oracle2 22:35:  [(none)]> create user testuser@127.0.0.1 identified by ‘huH345sfrfs‘;
Query OK, 0 rows affected (0.01 sec)
授权
root@Oracle2 22:36:  [(none)]> grant all privileges on testdb.* to testuser@127.0.0.1;
Query OK, 0 rows affected (0.00 sec)
标签:std chown line 源码 pcs test github png tput
原文地址:https://blog.51cto.com/niubdada/2465698