标签:yml ota rest uri tco start enabled pre group
config server 可以从本地或git仓库里读取配置,配置可以放置在一个module里进行管理。
把config-server 配置到eureka-server服务里统一管理,可以把config-server配置成集群:
a)引入依赖
        <dependency>
            <groupId>org.springframework.cloud</groupId>
            <artifactId>spring-cloud-config-server</artifactId>
        </dependency>
b)配置文件 application.yml
spring:
  cloud:
    config:
      server:
        native:
          search-locations: classpath:/shared
#          search-locations: file:E://Java/本地磁盘
  profiles:
     active: native
  application:
    name: config-server

#把实例注册到eureka server服务里管理
eureka:
  client:
    serviceUrl:
      defaultZone: http://localhost:8761/eureka/
在项目resource里建shared文件夹,并新建文件config-client-dev.yml,添加如下内容
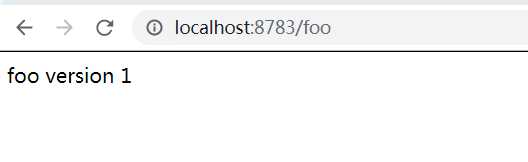
server:
  port: 8783

foo: foo version 1
c)启动类添加注解
@EnableConfigServer
a)引入依赖
        <dependency>
            <groupId>org.springframework.cloud</groupId>
            <artifactId>spring-cloud-starter-config</artifactId>
        </dependency>
b)配置文件,bootstrap.yml
spring:
  application:
    name: config-client
  cloud:
    config:
      fail-fast: true
      discovery:
        enabled: true
        serviceId: config-server
  profiles:
    active: dev

eureka:
  client:
    serviceUrl:
      defaultZone: http://localhost:8761/eureka/
根据{spring.application.name}-{profiles.active}名称到config-server 模块shared目录下查询配置文件
c)启动类不用添加其它注解
d)使用,和本地配置使用一样
@SpringBootApplication
@RestController
@EnableEurekaClient
public class ConfigClientApplication {

    public static void main(String[] args) {
        SpringApplication.run(ConfigClientApplication.class, args);
    }

    @Value("${foo}")
    String foo;
    @RequestMapping(value = "/foo")
    public String hi(){
        return foo;
    }
}
在浏览器输入地址:http://localhost:8783/foo
如果我们想修改配置文件,又不用重启项目立即生效,则需要用到spring cloud bus刷新配置。
只需求修改config-client模块,即可实现动态刷新
a)引入依赖
<dependency>
    <groupId>org.springframework.cloud</groupId>
        <artifactId>spring-cloud-starter-bus-amqp</artifactId>
</dependency>
b)修改配置文件,添加如下内容,要先安装RabbitMQ ,
  rabbitmq:
    host: localhost
    port: 15672
    username: guest
    password: guest
    publisher-confirms: true
    virtual-host: /

#先把安全策略设置为false
management:
  security:
   enabled: false
c)在使用配置的类上添加 @RefreshScope注解
@RestController
@RefreshScope
public class ConfigClientApplication {
    @Value("${foo}")
    String foo;
    @RequestMapping(value = "/foo")
    public String hi(){
        return foo;
    }
}
修改config-server项目 目录shared下的config-client-dev.yml配置文件内容,然后 发送 post请求 http://localhost:8781/bus/refresh,再http://localhost:8783/foo,你会发现配置文件修改内容已生效
标签:yml ota rest uri tco start enabled pre group
原文地址:https://www.cnblogs.com/tanouou/p/12329434.html