标签:group mic 密码 util 必须 nec 连接 ref 对象

运行环境:
Win 7
JDK 8 +
Redis 3.0.504
Spring Boot 2.2.2.RELEASE
速度快,完全基于内存,使用C语言实现,网络层使用epoll解决高并发问题,单线程模型避免了不必要的上下文切换及竞争条件;
丰富的数据类型,Redis有8种数据类型,当然常用的主要是 String、Hash、List、Set、 SortSet 这5种类型,他们都是基于键值的方式组织数据。每一种数据类型提供了非常丰富的操作命令,可以满足绝大部分需求,如果有特殊需求还能自己通过 lua 脚本自己创建新的命令(具备原子性);
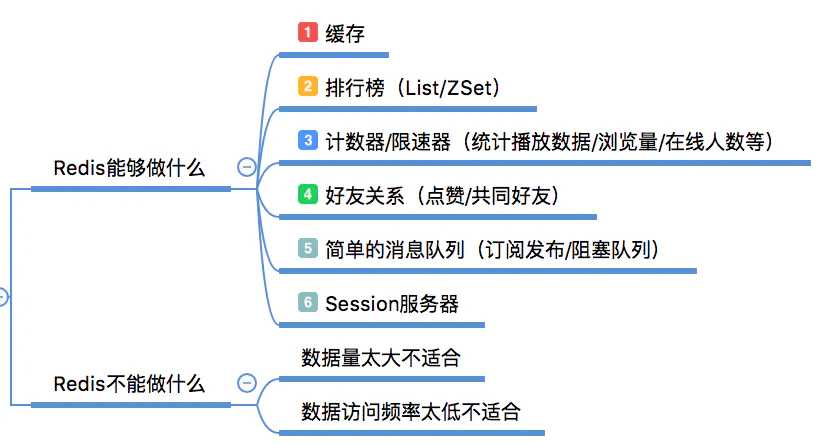
缓存常见的应用场景有哪些呢?
比如常见的电商常见,根据商品 ID 获取商品信息时,店铺信息和商品详情信息就可以缓存在 Redis,直接从 Redis 获取。减少了去数据库查询的次数。减轻数据库压力。
git clone 下载工程 springboot-learning-example ,项目地址见 GitHub – https://github.com/zyuQ/springboot-learning-example.git
1. 本地安装 Redis
详情跳转文章 -> Redis 安装
2. springboot-redis 工程项目结构介绍
org.springboot.controller - Controller 层
org.springboot.config - 配置类
org.springboot.pojo - 实体类
org.springboot.utils - 工具类
Application - 应用启动类
application.yml - 应用配置类
1. 工程项目Maven依赖
<dependencies>
    <dependency>
        <groupId>org.springframework.boot</groupId>
        <artifactId>spring-boot-starter-web</artifactId>
    </dependency>

    <!-- Redis配置 -->
    <dependency>
        <groupId>org.springframework.boot</groupId>
        <artifactId>spring-boot-starter-data-redis</artifactId>
    </dependency>

    <dependency>
        <groupId>org.springframework.boot</groupId>
        <artifactId>spring-boot-starter-test</artifactId>
        <scope>test</scope>
        <exclusions>
            <exclusion>
                <groupId>org.junit.vintage</groupId>
                <artifactId>junit-vintage-engine</artifactId>
            </exclusion>
        </exclusions>
    </dependency>
</dependencies>
2. application.yml 加入redis相关配置
server:
  port: 8080
spring:
  redis:
    host: 127.0.0.1
    port: 6379
    jedis:
      pool:
        max-idle: 8     # 连接池中的最小空闲连接
        min-idle: 0     # 连接池中的最大空闲连接
        max-active: 40  # 连接池最大连接数(使用负值表示没有限制)
        max-wait: -1    # 连接池最大阻塞等待时间(使用负值表示没有限制)
    timeout: 5000       # 连接超时时间
    password:           # Redis服务器连接密码
User.java 用户对象:
package springboot.pojo;

import java.io.Serializable;

/**
 * 用户实体类
 * 注意:要缓存的Java对象必须实现 Serializable 接口,因为Spring会将对象先序列化再存入Redis
 */
public class User implements Serializable {

    /**
     * 用户编号
     */
    private Long id;

    /**
     * 用户名称
     */
    private String userName;

    /**
     * 用户年龄
     */
    private int age;

    /**
     * 用户描述
     */
    private String desc;

    public Long getId() {
        return id;
    }

    public void setId(Long id) {
        this.id = id;
    }

    public String getUserName() {
        return userName;
    }

    public void setUserName(String userName) {
        this.userName = userName;
    }

    public int getAge() {
        return age;
    }

    public void setAge(int age) {
        this.age = age;
    }

    public String getDesc() {
        return desc;
    }

    public void setDesc(String desc) {
        this.desc = desc;
    }
}
Controller 层:
package springboot.controller;

import org.springframework.beans.factory.annotation.Autowired;
import org.springframework.data.redis.core.RedisTemplate;
import org.springframework.data.redis.core.ValueOperations;
import org.springframework.stereotype.Controller;
import org.springframework.web.bind.annotation.*;
import springboot.pojo.User;

/**
 * @Description:
 * @Author: zyu
 */
@RestController
@RequestMapping("/user")
public class HomeController {

    @Autowired
    private RedisTemplate redisTemplate;

    @PostMapping("/save")
    public String saveUser(User user) {
        String key = "User_" + user.getId();
        ValueOperations operations = redisTemplate.opsForValue();
        operations.set(key, user);
        return "Success";
    }

    @GetMapping("/find/{id}")
    public User findUserById(@PathVariable("id") Long id) {
        String key = "User_" + id;
        ValueOperations operations = redisTemplate.opsForValue();
        User user = (User) operations.get(key);
        return user;
    }


}
运作项目,通过postman工具发送post请求将数据保存至redis缓存中。
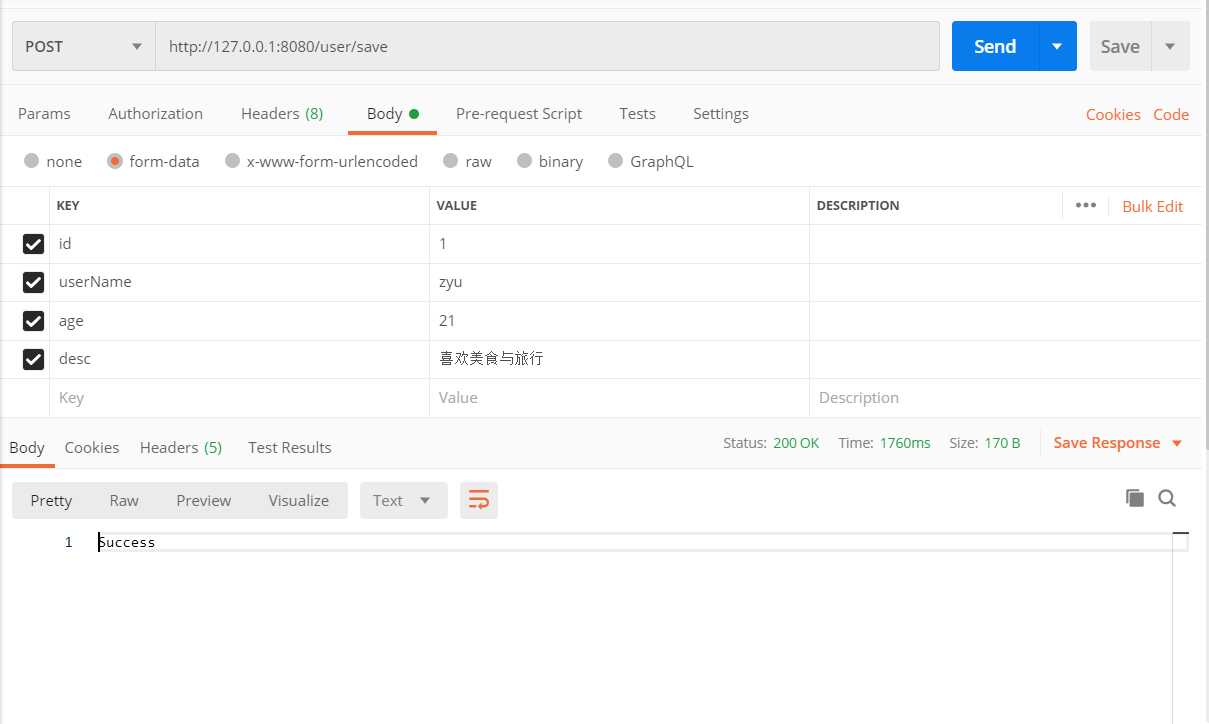
保存成功Success 调用GET 请求访问 http://127.0.0.1:8080/user/find/1
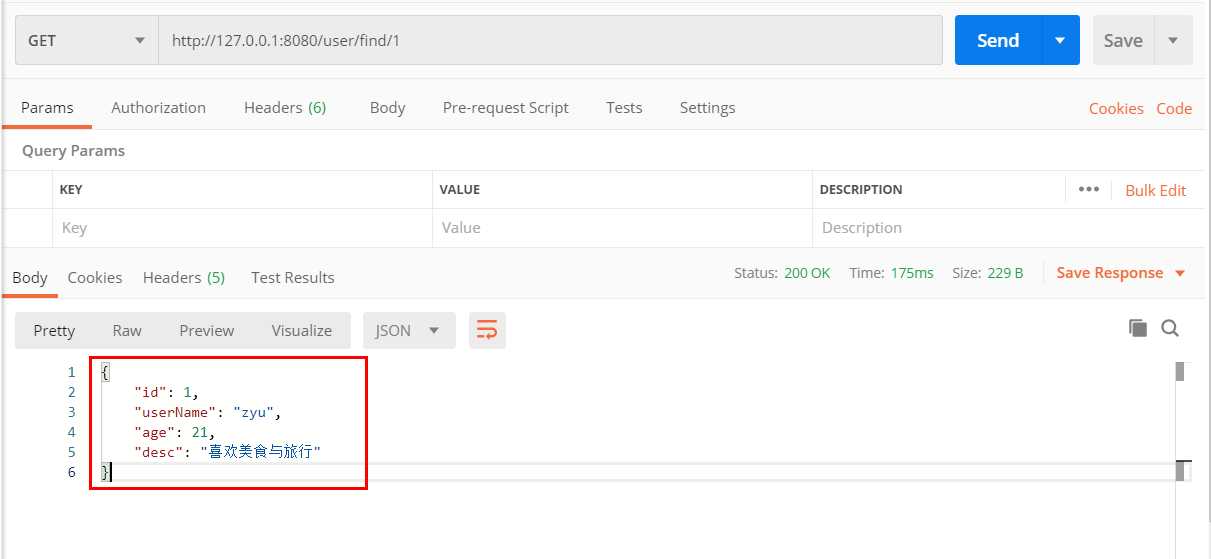
调用成功,说明数据已经保存至redis 缓存中。
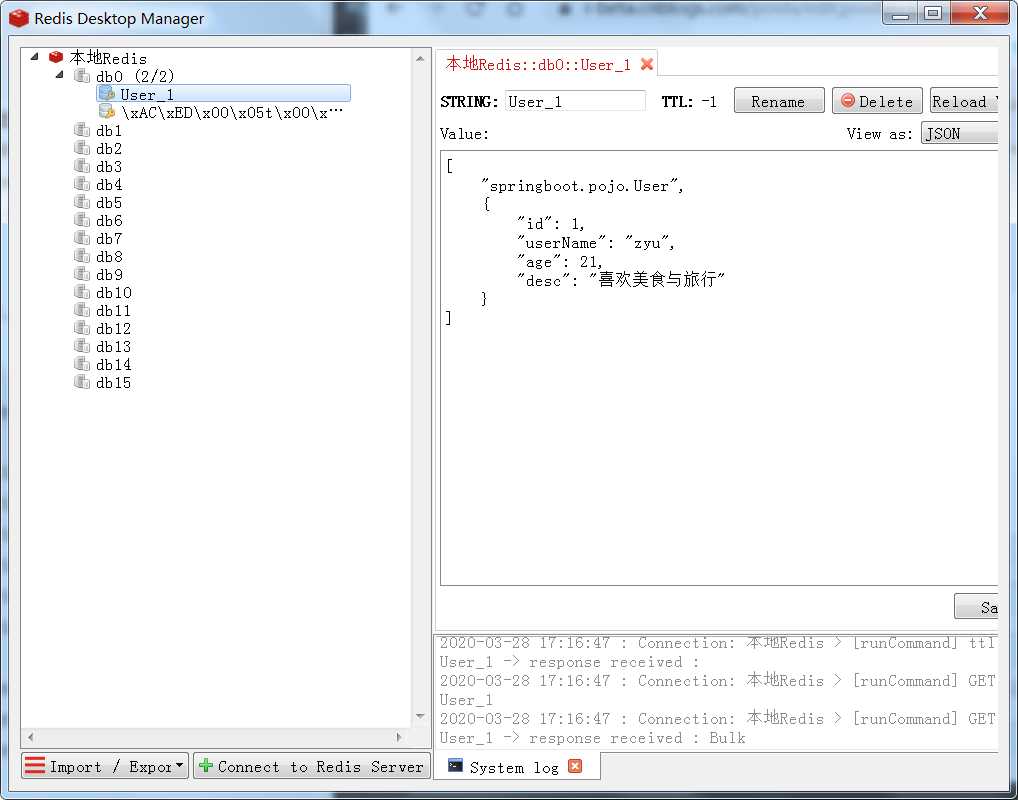
但是我们通过Redis管理工具可以看到,对象存储会被序列化
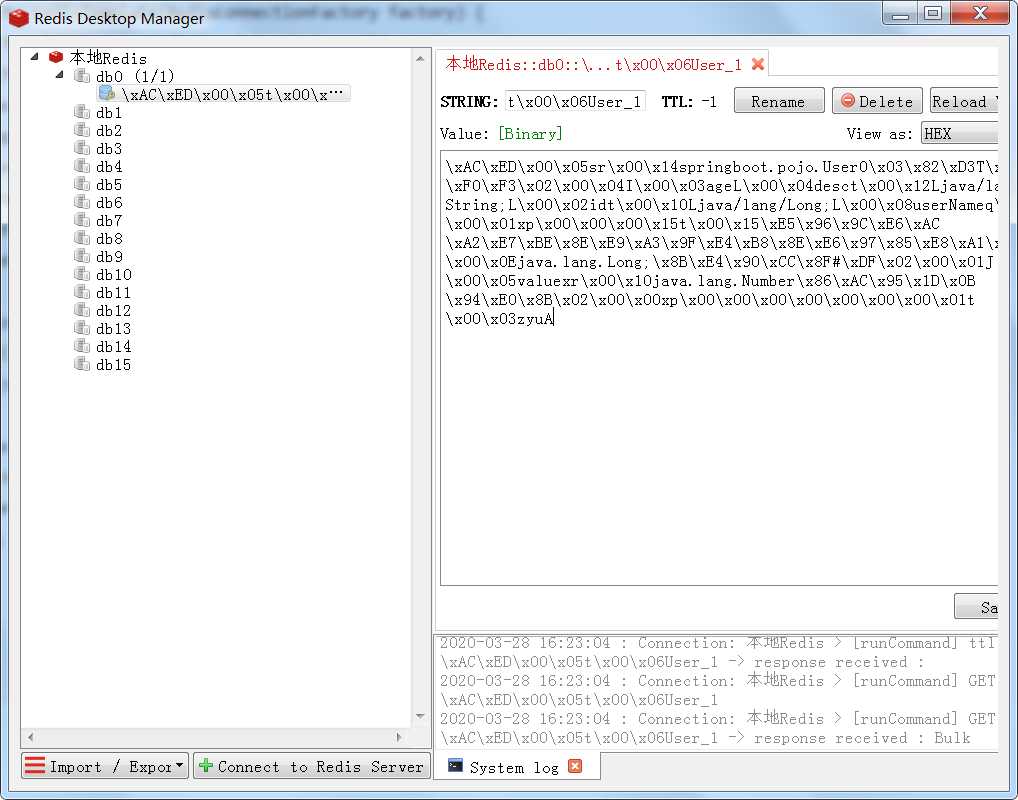
所以我们就重新配置一个RedisTemplate,代码如下:
package springboot.config;

import com.fasterxml.jackson.annotation.JsonAutoDetect;
import com.fasterxml.jackson.annotation.PropertyAccessor;
import com.fasterxml.jackson.databind.ObjectMapper;
import org.springframework.context.annotation.Bean;
import org.springframework.context.annotation.Configuration;
import org.springframework.data.redis.connection.RedisConnectionFactory;
import org.springframework.data.redis.core.RedisTemplate;
import org.springframework.data.redis.serializer.Jackson2JsonRedisSerializer;
import org.springframework.data.redis.serializer.StringRedisSerializer;

/**
 * @Description:
 * @Author: zyu
 */
@Configuration
public class RedisConfig {

    @Bean
    @SuppressWarnings("all")
    public RedisTemplate<String, Object> redisTemplate(RedisConnectionFactory factory) {
        RedisTemplate<String, Object> template = new RedisTemplate<String, Object>();
        template.setConnectionFactory(factory);
        Jackson2JsonRedisSerializer jackson2JsonRedisSerializer = new Jackson2JsonRedisSerializer(Object.class);
        ObjectMapper om = new ObjectMapper();
        om.setVisibility(PropertyAccessor.ALL, JsonAutoDetect.Visibility.ANY);
        om.enableDefaultTyping(ObjectMapper.DefaultTyping.NON_FINAL);
        jackson2JsonRedisSerializer.setObjectMapper(om);
        StringRedisSerializer stringRedisSerializer = new StringRedisSerializer();
        // key采用String的序列化方式
        template.setKeySerializer(stringRedisSerializer);
        // hash的key也采用String的序列化方式
        template.setHashKeySerializer(stringRedisSerializer);
        // value序列化方式采用jackson
        template.setValueSerializer(jackson2JsonRedisSerializer);
        // hash的value序列化方式采用jackson
        template.setHashValueSerializer(jackson2JsonRedisSerializer);
        template.afterPropertiesSet();
        return template;
    }

}
重启项目,调用 /user/save 接口,可以看到存储的数据结构已经变成我们自定义序列化的方式
本文示例读者可以通过查看下面仓库中代码:
标签:group mic 密码 util 必须 nec 连接 ref 对象
原文地址:https://www.cnblogs.com/zyulike/p/12588226.html