标签:comment 电脑 ide amp logs 帮助文档 win32 依赖 process
原文:.NET 程序下锐浪报表 (Grid++ Report) 的绿色发布指南
.NET 程序下锐浪报表 (Grid++ Report) 的绿色发布指南
在锐浪报表官方为 CSharp 编写的开发文档:“在C#与VB.NET中开始使用说明.txt” 中,关于发布项目是这么描述的:
★发布你的项目,用VS.NET制作安装程序:
C:\Grid++Report 6\Samples\CSharp\在C#与VB.NET中开始使用说明.txt
1、先创建安装项目:在解决方案资源管理器的根节点上点右键,在弹出的菜单里执行“添加->新建项目…”,创建一个“安装项目”。
2、加入项目发布文件:在解决方案资源管理器的新创建的安装项目节点上点右键,在弹出的菜单里执行“添加->项目输出…”,在打开的窗口里选择“主输出”,这样可以把程序的发布文件自动加入到安装项目中。
3、设置Grid++Report的DLL文件为COM自注册:分别设置“gregn6.dll”与“grdes6.dll”的“Register”属性为“vsdrfCOMSelfReg”。
这种方式需要我们在运行程序之前将 Grid++Report 依赖的 COM 组件注册到操作系统中。有没有办法可以做到绿色发布呢?
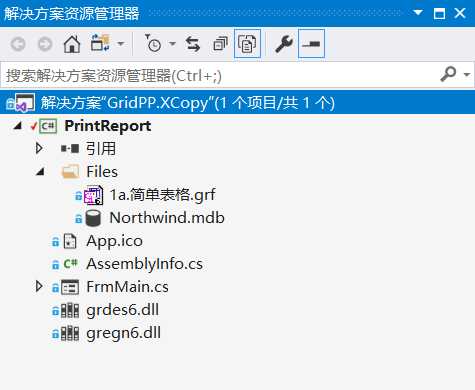
以 C:\Grid++Report 6\Samples\CSharp\1.Tutorial\PrintReport\PrintReport.sln 项目为例,我们对项目进行改造,使其支持绿色发布( xcopy-deploy):
Files 文件夹1a.简单表格.grf 和 Northwind.mdb 复制到 Files 文件夹,并设置文件属性 “复制到输出目录” 为 “始终复制”。C:\Grid++Report 6\ 目录下的 “gregn6.dll”与“grdes6.dll” 复制到项目中,并设置文件属性 “复制到输出目录” 为 “始终复制”。做完以上三步,解决方案管理器看上去应该是这个样子:(笔者对源文件进行了一些改动,并将 Form1 重命名为了 FrmMain 。)
接着,对代码进行改造,使其从程序所在目录读取数据,而不是 Grid++Report 的安装目录:
        public FrmMain()
        {
            //
            // Windows 窗体设计器支持所必需的
            //
            InitializeComponent();

            //
            // TODO: 在 InitializeComponent 调用后添加任何构造函数代码
            //

            //载入报表模板文件,必须保证 Grid++Report 的安装目录在‘C:\Grid++Report 6’下,
            //关于动态设置报表路径与数据绑定参数请参考其它例子程序
            var dir = Path.Combine(AppDomain.CurrentDomain.BaseDirectory, "Files");
            Report.LoadFromFile(Path.Combine(dir, "1a.简单表格.grf"));
            Report.DetailGrid.Recordset.ConnectionString = @"Provider=Microsoft.Jet.OLEDB.4.0;" +
                @"User ID=Admin;Data Source=" + Path.Combine(dir, "Northwind.mdb");
        }
如果你在电脑中安装了最新版的 Grid++Report ,那么你会有以下目录:C:\Grid++Report 6\manifest
本目录下的两个 .manifest 文件为Grid++Report的发布DLL的清单模板文件,利用这两个文件并适当调整可以实现免DLL注册发布用Grid++Report开发的软件,实现绿色发布。
C:\Grid++Report 6\manifest\readme.txt
更详细说明请参考帮助文档的“报表组件(C/S报表)->发布软件->免注册发布(推荐方式)”部分。
YourX86.exe.manifest:32位程序清单文件模板
YourX64.exe.manifest:64位程序清单文件模板
在项目中添加一个新建项 “应用程序清单文件”:
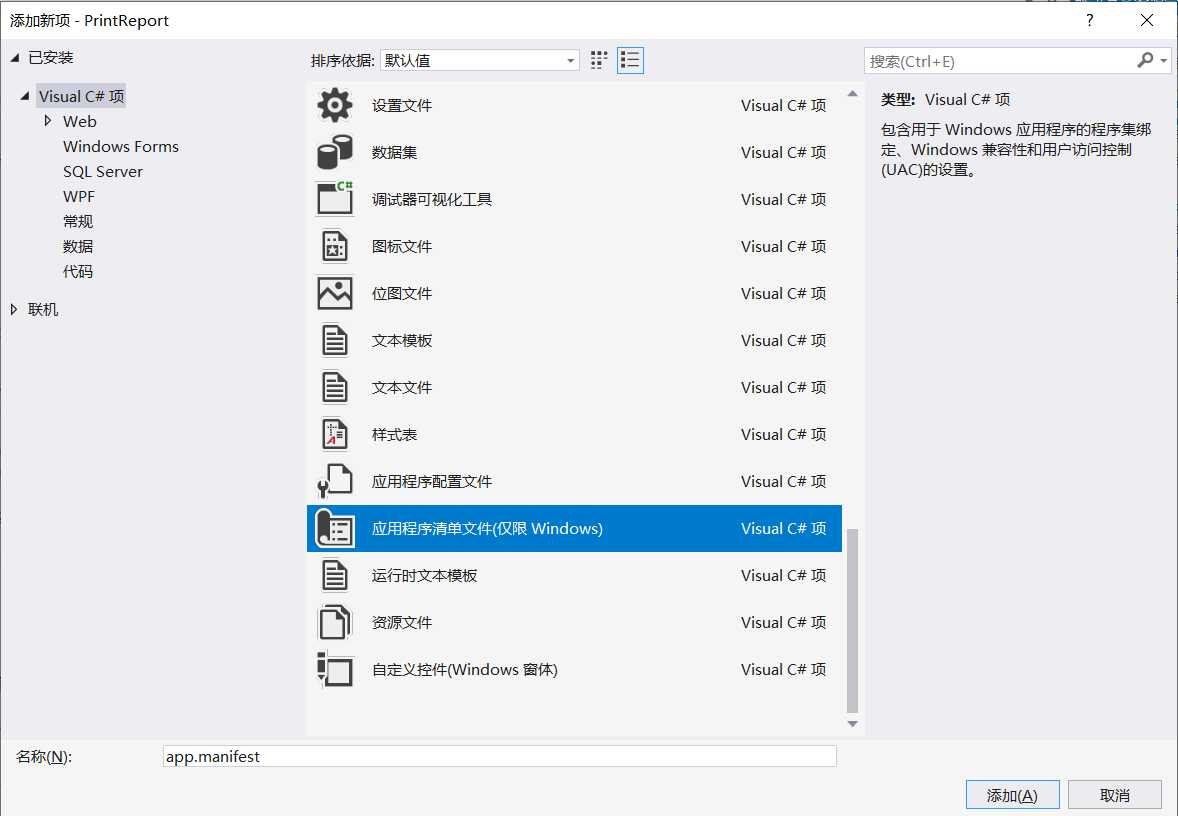
之后需要打开 YourX86.exe.manifest 文件,并将两个 file 标签的内容复制到项目的 app.manifest 文件中。这个操作完成后,app.manifest 的代码如下:
<?xml version="1.0" encoding="utf-8"?>
<assembly manifestVersion="1.0" xmlns="urn:schemas-microsoft-com:asm.v1">
	<assemblyIdentity version="1.0.0.0" name="MyApplication.app"/>
	<trustInfo xmlns="urn:schemas-microsoft-com:asm.v2">
		<security>
			<requestedPrivileges xmlns="urn:schemas-microsoft-com:asm.v3">
				<!-- UAC 清单选项
             如果想要更改 Windows 用户帐户控制级别,请使用
             以下节点之一替换 requestedExecutionLevel 节点。n
        <requestedExecutionLevel  level="asInvoker" uiAccess="false" />
        <requestedExecutionLevel  level="requireAdministrator" uiAccess="false" />
        <requestedExecutionLevel  level="highestAvailable" uiAccess="false" />

            指定 requestedExecutionLevel 元素将禁用文件和注册表虚拟化。
            如果你的应用程序需要此虚拟化来实现向后兼容性,则删除此
            元素。
        -->
				<requestedExecutionLevel level="asInvoker" uiAccess="false" />
			</requestedPrivileges>
		</security>
	</trustInfo>

	<compatibility xmlns="urn:schemas-microsoft-com:compatibility.v1">
		<application>
			<!-- 设计此应用程序与其一起工作且已针对此应用程序进行测试的
           Windows 版本的列表。取消评论适当的元素,
           Windows 将自动选择最兼容的环境。 -->

			<!-- Windows Vista -->
			<!--<supportedOS Id="{e2011457-1546-43c5-a5fe-008deee3d3f0}" />-->

			<!-- Windows 7 -->
			<!--<supportedOS Id="{35138b9a-5d96-4fbd-8e2d-a2440225f93a}" />-->

			<!-- Windows 8 -->
			<!--<supportedOS Id="{4a2f28e3-53b9-4441-ba9c-d69d4a4a6e38}" />-->

			<!-- Windows 8.1 -->
			<!--<supportedOS Id="{1f676c76-80e1-4239-95bb-83d0f6d0da78}" />-->

			<!-- Windows 10 -->
			<!--<supportedOS Id="{8e0f7a12-bfb3-4fe8-b9a5-48fd50a15a9a}" />-->

		</application>
	</compatibility>

	<!-- 指示该应用程序可以感知 DPI 且 Windows 在 DPI 较高时将不会对其进行
       自动缩放。Windows Presentation Foundation (WPF)应用程序自动感知 DPI,无需
       选择加入。选择加入此设置的 Windows 窗体应用程序(目标设定为 .NET Framework 4.6 )还应
       在其 app.config 中将 "EnableWindowsFormsHighDpiAutoResizing" 设置设置为 "true"。-->
	<!--
  <application xmlns="urn:schemas-microsoft-com:asm.v3">
    <windowsSettings>
      <dpiAware xmlns="http://schemas.microsoft.com/SMI/2005/WindowsSettings">true</dpiAware>
    </windowsSettings>
  </application>
  -->

	<!-- 启用 Windows 公共控件和对话框的主题(Windows XP 和更高版本) -->
	<!--
  <dependency>
    <dependentAssembly>
      <assemblyIdentity
          type="win32"
          name="Microsoft.Windows.Common-Controls"
          version="6.0.0.0"
          processorArchitecture="*"
          publicKeyToken="6595b64144ccf1df"
          language="*"
        />
    </dependentAssembly>
  </dependency>
  -->
	<file name="grdes6.dll">
		<typelib tlbid="{c5a16330-a084-48c9-bc0f-0d0b37a14123}" version="6.0" helpdir="" resourceid="0" flags="HASDISKIMAGE" />
		<comClass clsid="{6edd80cb-9f08-4c71-b406-479e5cb80fce}" threadingModel="Apartment" tlbid="{c5a16330-a084-48c9-bc0f-0d0b37a14123}" progid="grdes.GRDesigner.6" description="Grid++Report Designer 6" />
	</file>
	<file name="gregn6.dll">
		<typelib tlbid="{4018f953-1bfe-441e-8a04-dc8ba1ff060e}" version="6.0" helpdir="" resourceid="0" flags="HASDISKIMAGE" />
		<comClass clsid="{f9364159-6aed-4f9c-8baf-d7c7ed6160a8}" threadingModel="Apartment" tlbid="{4018f953-1bfe-441e-8a04-dc8ba1ff060e}" progid="gregn.GridppReport.6" description="GridppReport Class" />
		<comClass clsid="{1b5ea181-a38d-4f42-88b2-6af74cf6d6c0}" threadingModel="Apartment" tlbid="{4018f953-1bfe-441e-8a04-dc8ba1ff060e}" progid="gregn.GRDisplayViewer.6" description="Grid++Report DisplayViewer 6" />