标签:autoconf download remove emd 多进程 ima types c++ and
企业实战LNMP高性能服务器_wordpress、discuz双网站部署LNMP WEB架构中,Nginx为一款高性能WEB服务器,本身是不能处理PHP的,当接收到客户端浏览器发送HTTP Request请求时,Nginx服务器响应并处理WEB请求,静态资源CSS、图片、视频、TXT等静态文件请求,Nginx服务器可以直接处理并回应。
但是PHP动态页面请求Nginx不能直接处理,Nginx服务器会将PHP网页脚本通过接口传输协议(网关协议)PHP-FCGI(Fast-CGI)传输给PHP-FPM(进程管理程序),PHP-FPM不做处理,然后PHP-FPM调用PHP解析器进程,PHP解析器解析PHP脚本信息。PHP解析器进程可以启动多个,可以实现多进程并发执行。
PHP解释器将解析后的脚本返回到PHP-FPM,PHP-FPM再通过Fast-CGI的形式将脚本信息传送给Nginx,Nginx服务器再通过Http Response的形式传送给浏览器,浏览器再进行解析与渲染然后进行呈现。
[root@node01 ~]# rpm -qa|grep mariadb
mariadb-server-5.5.60-1.el7_5.x86_64
mariadb-libs-5.5.60-1.el7_5.x86_64
mariadb-5.5.60-1.el7_5.x86_64
[root@node01 ~]#
[root@node01 ~]# yum -y remove mariadb mariadb-server mariadb-libs[root@node01 ~]# useradd -s /sbin/nologin -M mysql #提示mysql已存在可以忽略此步骤[root@node01 ~]# mkdir -p /data/mysql
[root@node01 ~]# chown -R mysql.mysql /data[root@node01 ~]# yum install -y gcc gcc-devel gcc-c++ gcc-c++-devel libaio* autoconf* automake* zlib* libxml* ncurses-devel ncurses libgcrypt* libtool* cmake openssl openssl-devel bison bison-devel perl-Data_Dumper boost boost-doc boost-devel[root@node01 ~]# cd /usr/src/
[root@node01 src]# wget http://mirrors.163.com/mysql/Downloads/MySQL-5.7/mysql-5.7.30.tar.gz
[root@node01 src]# ls
debug kernels mysql-5.7.30.tar.gz
[root@node01 src]# tar xf mysql-5.7.30.tar.gz
[root@node01 src]# cd mysql-5.7.30/
[root@node01 mysql-5.7.30]# [root@node01 mysql-5.7.30]# mkdir ./boost
[root@node01 mysql-5.7.30]# cd ./boost
[root@node01 boost]# wget http://nchc.dl.sourceforge.net/project/boost/boost/1.59.0/boost_1_59_0.tar.gz说明:解压等操作编译的时候程序会做,这里只需把包下载或者拷贝到这里即可
[root@node01 boost]# cd ../
[root@node01 mysql-5.7.30]# cmake -DBUILD_CONFIG=mysql_release -DCMAKE_BUILD_TYPE=RelWithDebInfo -DCMAKE_INSTALL_PREFIX=/usr/local/mysql -DMYSQL_DATADIR=/data/mysql -DSYSCONFDIR=/etc -DMYSQL_UNIX_ADDR=/tmp/mysql.sock -DSYSTEMD_PID_DIR=/data/mysql -DMYSQL_USER=mysql -DWITH_SYSTEMD=1 -DWITH_MYISAM_STORAGE_ENGINE=1 -DWITH_INNOBASE_STORAGE_ENGINE=1 -DWITH_ARCHIVE_STORAGE_ENGINE=1 -DWITH_MEMORY_STORAGE_ENGINE=1 -DWITH_READLINE=1 -DMYSQL_TCP_PORT=3306 -DENABLED_LOCAL_INFILE=1 -DENABLE_DOWNLOADS=1 -DWITH_PARTITION_STORAGE_ENGINE=1 -DEXTRA_CHARSETS=all -DDEFAULT_CHARSET=utf8 -DDEFAULT_COLLATION=utf8_general_ci -DWITH_DEBUG=0 -DMYSQL_MAINTAINER_MODE=0 -DWITH_SSL:STRING=system -DWITH_ZLIB:STRING=bundled -DDOWNLOAD_BOOST=1 -DWITH_BOOST=./boostcmake -DBUILD_CONFIG=mysql_release \ #此选项使用Oracle使用的相同构建选项配置源分发,以生成官方MySQL版本的二进制分发。
-DCMAKE_BUILD_TYPE=RelWithDebInfo \ #要生成的构建类型 = 启用优化并生成调试信息。这是默认的MySQL构建类型。
-DCMAKE_INSTALL_PREFIX=/usr/local/mysql \ #选项表示基本安装目录。
-DMYSQL_DATADIR=/data/mysql \ #MySQL数据目录的位置。
-DSYSCONFDIR=/etc \ #默认my.cnf选项文件目录。
-DMYSQL_UNIX_ADDR=/tmp/mysql.sock \ #服务器侦听套接字连接的Unix套接字文件路径。这必须是绝对路径名。默认是/tmp/mysql.sock。
-DSYSTEMD_PID_DIR=/usr/local/mysql \ #当MySQL由systemd管理时,在其中创建PID文件的目录的名称。默认是 /var/run/mysqld; 这可能会根据INSTALL_LAYOUT值隐式更改 。
-DMYSQL_USER=mysql \ #指定MySQL的启动用户
-DWITH_SYSTEMD=1 \ #安装systemd支持文件
-DWITH_MYISAM_STORAGE_ENGINE=1 -DWITH_INNOBASE_STORAGE_ENGINE=1 -DWITH_ARCHIVE_STORAGE_ENGINE=1 -DWITH_MEMORY_STORAGE_ENGINE=1 -DWITH_READLINE=1 -DMYSQL_TCP_PORT=3306 \ #配置 MySQL 监听的端口号
-DENABLED_LOCAL_INFILE=1 \ #使mysql客户端具有load data infile的功能,该功能具有安全隐患 load data infile语句从一个文本文件中以很高的速度读入一个表
-DENABLE_DOWNLOADS=1 \ #googlemock发行版的路径,用于基于Google Test的单元测试。=1,CMake将从GitHub下载发行版。
-DWITH_PARTITION_STORAGE_ENGINE=1 \
-DEXTRA_CHARSETS=all -DDEFAULT_CHARSET=utf8 \ #服务器字符集
-DDEFAULT_COLLATION=utf8_general_ci \ #服务器排序规则
-DWITH_DEBUG=0 \ #不包含调试支持。
-DMYSQL_MAINTAINER_MODE=0 \ #是否启用MySQL维护者特定的开发环境。如果启用,此选项会导致编译器警告变为错误。
-DWITH_SSL:STRING=system -DWITH_ZLIB:STRING=bundled -DDOWNLOAD_BOOST=1 \ #是否下载Boost库。默认是OFF。
-DWITH_BOOST=./boost #指定Boost库目录位置。[root@node01 mysql-5.7.30]# echo $? #返回结果为0说明编译无异常[root@node01 mysql-5.7.30]# make && make install这个过程比较漫长,耐心等待一下
[root@node01 mysql-5.7.30]# echo $? #返回结果为0说明编译无异常[root@node01 mysql-5.7.30]# cp ./scripts/mysqld.service /usr/lib/systemd/system[root@node01 mysql-5.7.30]# cat > /etc/profile.d/mysql.sh << EOF
PATH=/usr/local/mysql/bin:$PATH
export PATH
EOF
[root@node01 mysql-5.7.30]# source /etc/profile[root@node01 mysql-5.7.30]# /usr/local/mysql/bin/mysqld --initialize-insecure --user=mysql --basedir=/usr/local/mysql --datadir=/data/mysql[root@node01 mysql-5.7.30]# systemctl enable mysqld.service
[root@node01 mysql-5.7.30]# systemctl daemon-reload
[root@node01 mysql-5.7.30]# systemctl start mysqld.service
[root@node01 mysql-5.7.30]# systemctl status mysqld.service[root@node01 src]# yum install -y gcc gcc-c++ pcre pcre-devel zlib zlib-devel openssl openssl-devel依赖包说明:
编译依赖 gcc 环境,所以需要:gcc gcc-c++;
[root@node01 src]# wget http://nginx.org/download/nginx-1.19.0.tar.gz[root@node01 src]# tar xf nginx-1.19.0.tar.gz
[root@node01 src]# cd nginx-1.19.0/
[root@node01 nginx-1.19.0]# ./configure --prefix=/usr/local/nginx --with-http_stub_status_module
[root@node01 nginx-1.19.0]# echo $?
0
[root@node01 nginx-1.19.0]#
[root@node01 nginx-1.19.0]# make && make install
[root@node01 nginx-1.19.0]# echo $?
0
[root@node01 nginx-1.19.0]# [root@node01 nginx-1.19.0]# cat > /etc/profile.d/nginx.sh << EOF
PATH=/usr/local/nginx/sbin:$PATH
export PATH
EOF
[root@node01 nginx-1.19.0]# source /etc/profile[root@node01 nginx-1.19.0]# nginx -V
nginx version: nginx/1.19.0
built by gcc 4.8.5 20150623 (Red Hat 4.8.5-39) (GCC)
configure arguments: --prefix=/usr/local/nginx --with-http_stub_status_module
[root@node01 nginx-1.19.0]# [root@node01 nginx-1.19.0]# nginx
[root@node01 nginx-1.19.0]# [root@node01 nginx-1.19.0]# netstat -ntlp | grep 80
tcp 0 0 0.0.0.0:80 0.0.0.0:* LISTEN 23434/nginx: master
[root@node01 nginx-1.19.0]# [root@node01 nginx-1.19.0]# vi /lib/systemd/system/nginx.service添加以下内容:
[Unit]
Description=nginx
After=network.target

[Service]
Type=forking
ExecStart=/usr/local/nginx/sbin/nginx
ExecReload=/usr/local/nginx/sbin/nginx -s reload
ExecStop=/usr/local/nginx/sbin/nginx -s quit
PrivateTmp=true

[Install]
WantedBy=multi-user.target[root@node01 nginx-1.19.0]# pkill nginx
[root@node01 nginx-1.19.0]#
[root@node01 nginx-1.19.0]# systemctl start nginx[root@node01 nginx-1.19.0]# systemctl status nginx
● nginx.service - nginx
Loaded: loaded (/usr/lib/systemd/system/nginx.service; disabled; vendor preset: disabled)
Active: active (running) since Thu 2020-06-11 03:56:27 CST; 6s ago
Process: 23763 ExecStart=/usr/local/nginx/sbin/nginx (code=exited, status=0/SUCCESS)
Main PID: 23764 (nginx)
Tasks: 2
CGroup: /system.slice/nginx.service
├─23764 nginx: master process /usr/local/nginx/sbin/nginx
└─23765 nginx: worker process
Jun 11 03:56:27 node01 systemd[1]: Starting nginx...
Jun 11 03:56:27 node01 systemd[1]: Started nginx.
[root@node01 nginx-1.19.0]#
[root@node01 nginx-1.19.0]# netstat -ntlp | grep nginx
tcp 0 0 0.0.0.0:80 0.0.0.0:* LISTEN 23764/nginx: master
[root@node01 nginx-1.19.0]# [root@node01 nginx-1.19.0]# systemctl enable nginx
Created symlink from /etc/systemd/system/multi-user.target.wants/nginx.service to /usr/lib/systemd/system/nginx.service.
[root@node01 nginx-1.19.0]#
[root@node01 nginx-1.19.0]# systemctl status nginx
● nginx.service - nginx
Loaded: loaded (/usr/lib/systemd/system/nginx.service; enabled; vendor preset: disabled)
Active: active (running) since Thu 2020-06-11 03:56:27 CST; 2min 6s ago
Main PID: 23764 (nginx)
CGroup: /system.slice/nginx.service
├─23764 nginx: master process /usr/local/nginx/sbin/nginx
└─23765 nginx: worker process
Jun 11 03:56:27 node01 systemd[1]: Starting nginx...
Jun 11 03:56:27 node01 systemd[1]: Started nginx.
[root@node01 nginx-1.19.0]# [root@node01 nginx-1.19.0]# systemctl start nginx #启动服务
[root@node01 nginx-1.19.0]# systemctl status nginx #查看状态
[root@node01 nginx-1.19.0]# systemctl stop nginx #停止服务
[root@node01 nginx-1.19.0]# systemctl restart nginx #重启服务
[root@node01 nginx-1.19.0]# systemctl reload nginx #修改配置文件后重载
[root@node01 nginx-1.19.0]# systemctl enable nginx #开机自启动
[root@node01 nginx-1.19.0]# systemctl didable nginx #禁止开机自启动 [root@node01 ~]# yum -y install gd curl curl-devel libjpeg libjpeg-devel libpng libpng-devel freetype freetype-devel libxml2 libxml2-devel[root@node01 src]# wget https://www.php.net/distributions/php-5.6.40.tar.gz[root@node01 src]# tar xf php-5.6.40.tar.gz
[root@node01 src]# cd php-5.6.40/
[root@node01 php-5.6.40]# ./configure --prefix=/usr/local/php --enable-fpm --enable-debug --with-gd --with-jpeg-dir --with-png-dir --with-freetype-dir --enable-mbstring --with-curl --with-mysql=mysqlnd --with-mysqli=mysqlnd --with-pdo-mysql=mysqlnd --with-config-file-path=/usr/local/php/etc --with-zlib-dir
[root@node01 php-5.6.40]#
[root@node01 php-5.6.40]# echo $?
0
[root@node01 php-5.6.40]#
[root@node01 php-5.6.40]# make && make install
[root@node01 php-5.6.40]# echo $?
0
[root@node01 php-5.6.40]#[root@node01 php-5.6.40]# cat > /etc/profile.d/php.sh << EOF
PATH=/usr/local/php/bin/:$PATH
export PATH
EOF
[root@node01 php-5.6.40]# source /etc/profile[root@node01 php-5.6.40]# php -v
PHP 5.6.40 (cli) (built: Jun 11 2020 07:29:14) (DEBUG)
Copyright (c) 1997-2016 The PHP Group
Zend Engine v2.6.0, Copyright (c) 1998-2016 Zend Technologies
[root@node01 php-5.6.40]# [root@node01 php-5.6.40]# cp php.ini-development /usr/local/php/etc/php.ini
[root@node01 php-5.6.40]# cp /usr/local/php/etc/php-fpm.conf.default /usr/local/php/etc/php-fpm.conf
[root@node01 php-5.6.40]# cp sapi/fpm/init.d.php-fpm /etc/init.d/php-fpm
[root@node01 php-5.6.40]# chmod +x /etc/init.d/php-fpm[root@node01 php-5.6.40]# useradd -s /sbin/nologin -m nginx
[root@node01 php-5.6.40]# cp /usr/local/php/etc/php-fpm.conf{,.bak}
[root@node01 php-5.6.40]#
[root@node01 php-5.6.40]# vi /usr/local/php/etc/php-fpm.conf
[root@node01 php-5.6.40]#
[root@node01 php-5.6.40]# egrep "^(user|group)" /usr/local/php/etc/php-fpm.conf
user = nginx
group = nginx
[root@node01 php-5.6.40]# 打开php-fpm.conf
[root@node01 php-5.6.40]# vi /usr/local/php/etc/php-fpm.conf找到以下内容并修改:
; Pid file
; Note: the default prefix is /usr/local/php/var
; Default Value: none
pid = /var/run/php-fpm.pidvi /usr/lib/systemd/system/php-fpm.service添加如下内容:
[Unit]
Description=The PHP FastCGI Process Manager
After=syslog.target network.target

[Service]
Type=forking
PIDFile=/var/run/php-fpm.pid
ExecStart=/usr/local/php/sbin/php-fpm
ExecReload=/bin/kill -USR2 $MAINPID
PrivateTmp=true

[Install]
WantedBy=multi-user.target[root@node01 php-5.6.40]# systemctl daemon-reload
[root@node01 php-5.6.40]# systemctl start php-fpm
[root@node01 php-5.6.40]# [root@node01 php-5.6.40]# systemctl status php-fpm
● php-fpm.service - The PHP FastCGI Process Manager
Loaded: loaded (/usr/lib/systemd/system/php-fpm.service; disabled; vendor preset: disabled)
Active: active (running) since Thu 2020-06-11 08:02:38 CST; 4min 47s ago
Process: 21478 ExecStart=/usr/local/php/sbin/php-fpm (code=exited, status=0/SUCCESS)
Main PID: 21481 (php-fpm)
Tasks: 3
CGroup: /system.slice/php-fpm.service
├─21481 php-fpm: master process (/usr/local/php/etc/php-fpm.conf)
├─21482 php-fpm: pool www
└─21483 php-fpm: pool www
Jun 11 08:02:38 node01 systemd[1]: Starting The PHP FastCGI Process Manager...
Jun 11 08:02:38 node01 systemd[1]: Started The PHP FastCGI Process Manager.
[root@node01 php-5.6.40]#
[root@node01 php-5.6.40]# netstat -ntlp | grep 9000
tcp 0 0 127.0.0.1:9000 0.0.0.0:* LISTEN 21481/php-fpm: mast
[root@node01 php-5.6.40]#[root@node01 php-5.6.40]# systemctl enable php-fpm
Created symlink from /etc/systemd/system/multi-user.target.wants/php-fpm.service to /usr/lib/systemd/system/php-fpm.service.
[root@node01 php-5.6.40]#
[root@node01 php-5.6.40]# systemctl status php-fpm
● php-fpm.service - The PHP FastCGI Process Manager
Loaded: loaded (/usr/lib/systemd/system/php-fpm.service; enabled; vendor preset: disabled)
Active: active (running) since Thu 2020-06-11 08:02:38 CST; 7min ago
Main PID: 21481 (php-fpm)
CGroup: /system.slice/php-fpm.service
├─21481 php-fpm: master process (/usr/local/php/etc/php-fpm.conf)
├─21482 php-fpm: pool www
└─21483 php-fpm: pool www
Jun 11 08:02:38 node01 systemd[1]: Starting The PHP FastCGI Process Manager...
Jun 11 08:02:38 node01 systemd[1]: Started The PHP FastCGI Process Manager.
[root@node01 php-5.6.40]# ```<span style=‘color:文字颜色;‘>文字</span>bash
[root@node01 php-5.6.40]# systemctl start php-fpm #启动服务
[root@node01 php-5.6.40]# systemctl status php-fpm #查看状态
[root@node01 php-5.6.40]# systemctl stop php-fpm #停止服务
[root@node01 php-5.6.40]# systemctl restart php-fpm #重启服务
[root@node01 php-5.6.40]# systemctl reload php-fpm #修改配置文件后重载
[root@node01 php-5.6.40]# systemctl enable php-fpm #开机自启动
[root@node01 php-5.6.40]# systemctl didable php-fpm #禁止开机自启动
### 4. 部署wordpress网站

#### 4.1 上传wordpress网站代码
[root@node01 src]# tar xf wordpress-4.9.4-zh_CN.tar.gz -C /usr/local/nginx/html/
[root@node01 src]#
[root@node01 src]# chown -R nginx:nginx /usr/local/nginx/html/wordpress/
[root@node01 src]#
#### 4.2. 创建wordpress虚拟主机
include vhost/*.conf;
[root@node01 src]# vi /usr/local/nginx/conf/nginx.conf
#user nobody;
user nginx;
worker_processes 2;
#error_log logs/error.log;
#error_log logs/error.log notice;
#error_log logs/error.log info;
#pid logs/nginx.pid;
pid /var/run/nginx.pid;
events {
worker_connections 1024;
}
http {
include mime.types;
default_type application/octet-stream;
log_format  main  ‘$remote_addr - $remote_user [$time_local] "$request" ‘
                  ‘$status $body_bytes_sent "$http_referer" ‘
                  ‘"$http_user_agent" "$http_x_forwarded_for"‘;

access_log  logs/access.log  main;

sendfile        on;
#tcp_nopush     on;

#keepalive_timeout  0;
keepalive_timeout  65;

#配置虚拟主机目录
include       vhost/*.conf;
}
[root@node01 src]# mkdir -p /usr/local/nginx/conf/vhost
[root@node01 src]# vim /usr/local/nginx/conf/vhost/blog.wordpress.com.conf
server {
listen 80;
server_name blog.wordpress.com;
#charset koi8-r;
access_log logs/wordpress.access.log main;
location / {
root html/wordpress;
index index.php index.html index.htm;
}
#error_page 404 /404.html;
    #
    error_page   500 502 503 504  /50x.html;
    location = /50x.html {
            root   html;
    }
    location ~ \.php$ {
        root           html/wordpress;
        fastcgi_pass   127.0.0.1:9000;
        fastcgi_index  index.php;
        fastcgi_param  SCRIPT_FILENAME  $document_root$fastcgi_script_name;
        include        fastcgi_params;
    }
}
#### 4.3. 创建wordpress数据库
[root@node01 src]# systemctl start mysqld
[root@node01 src]#
[root@node01 src]# mysql
Welcome to the MySQL monitor. Commands end with ; or \g.
Your MySQL connection id is 3
Server version: 5.7.30 MySQL Community Server (GPL)
Copyright (c) 2000, 2020, Oracle and/or its affiliates. All rights reserved.
Oracle is a registered trademark of Oracle Corporation and/or its
affiliates. Other names may be trademarks of their respective
owners.
Type ‘help;‘ or ‘\h‘ for help. Type ‘\c‘ to clear the current input statement.
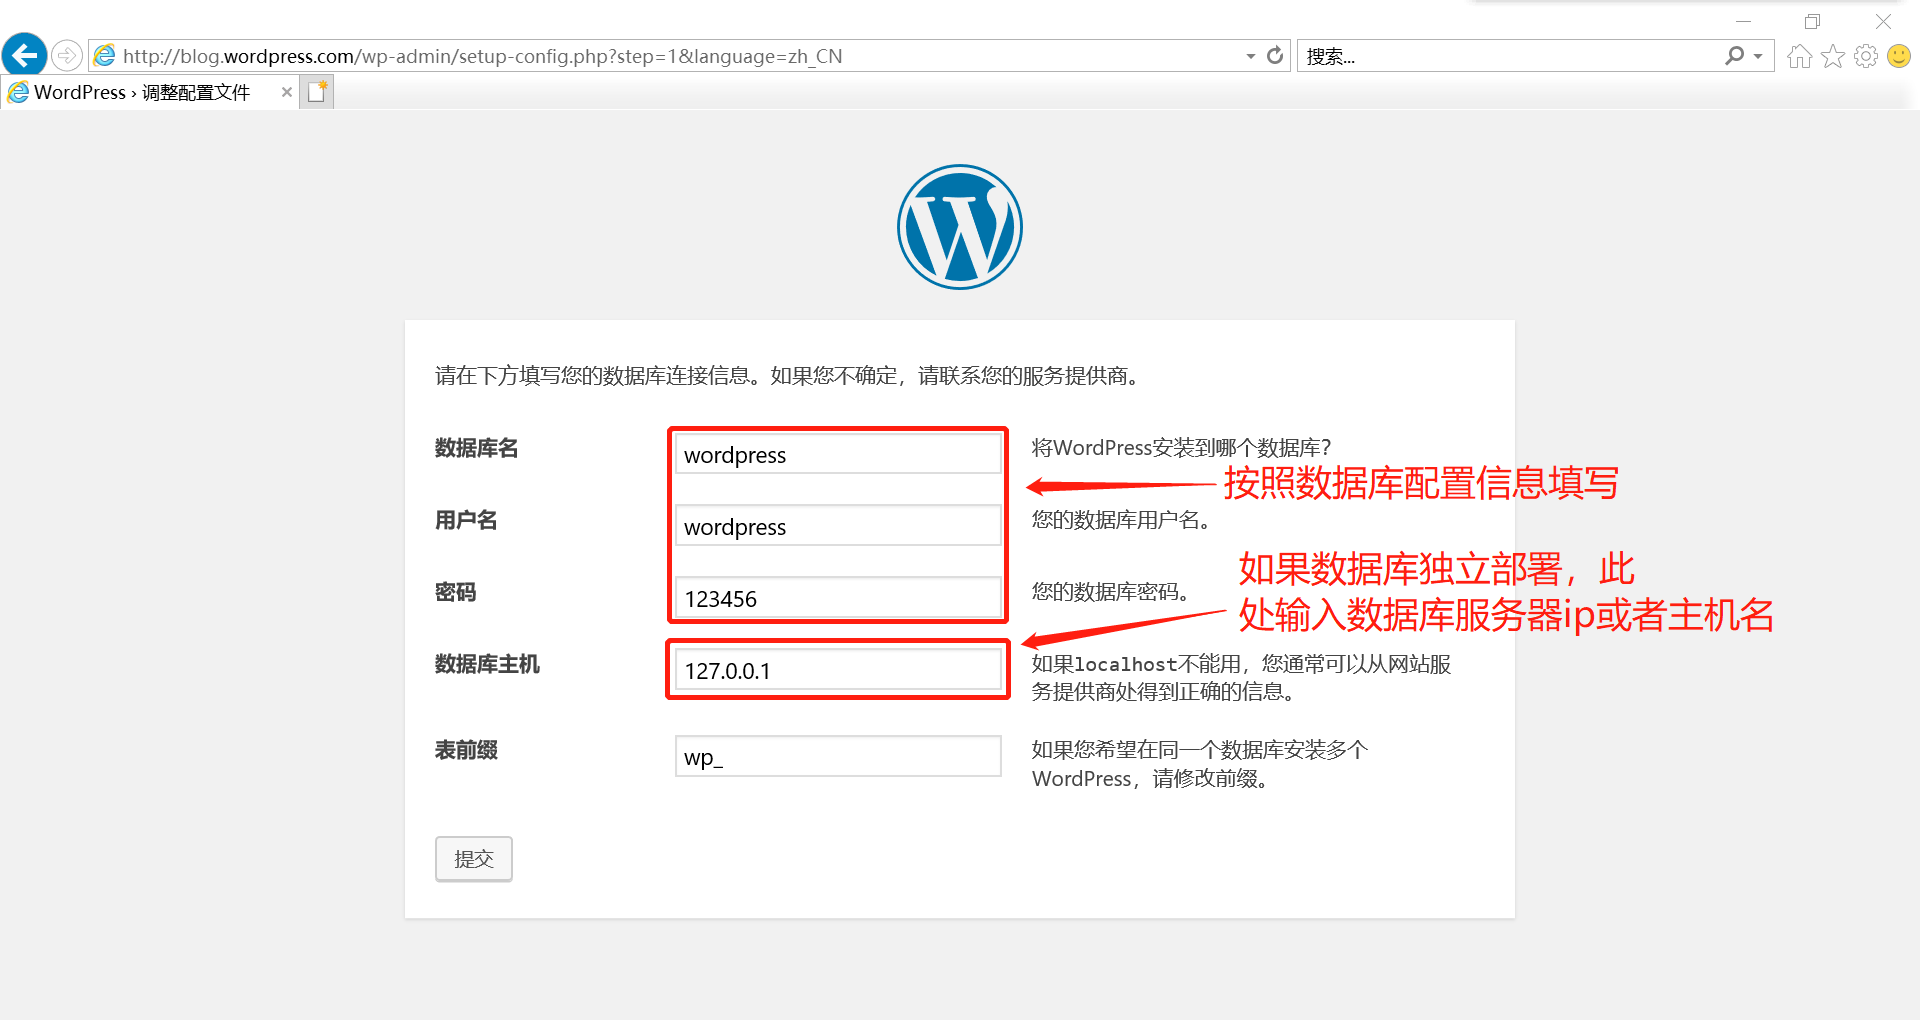
mysql> create database wordpress charset utf8;
Query OK, 1 row affected (0.00 sec)
mysql> grant all on wordpress.* to "wordpress"@"localhost" identified by "123456";
Query OK, 0 rows affected, 1 warning (0.01 sec)
mysql> flush privileges;
Query OK, 0 rows affected (0.00 sec)
mysql>
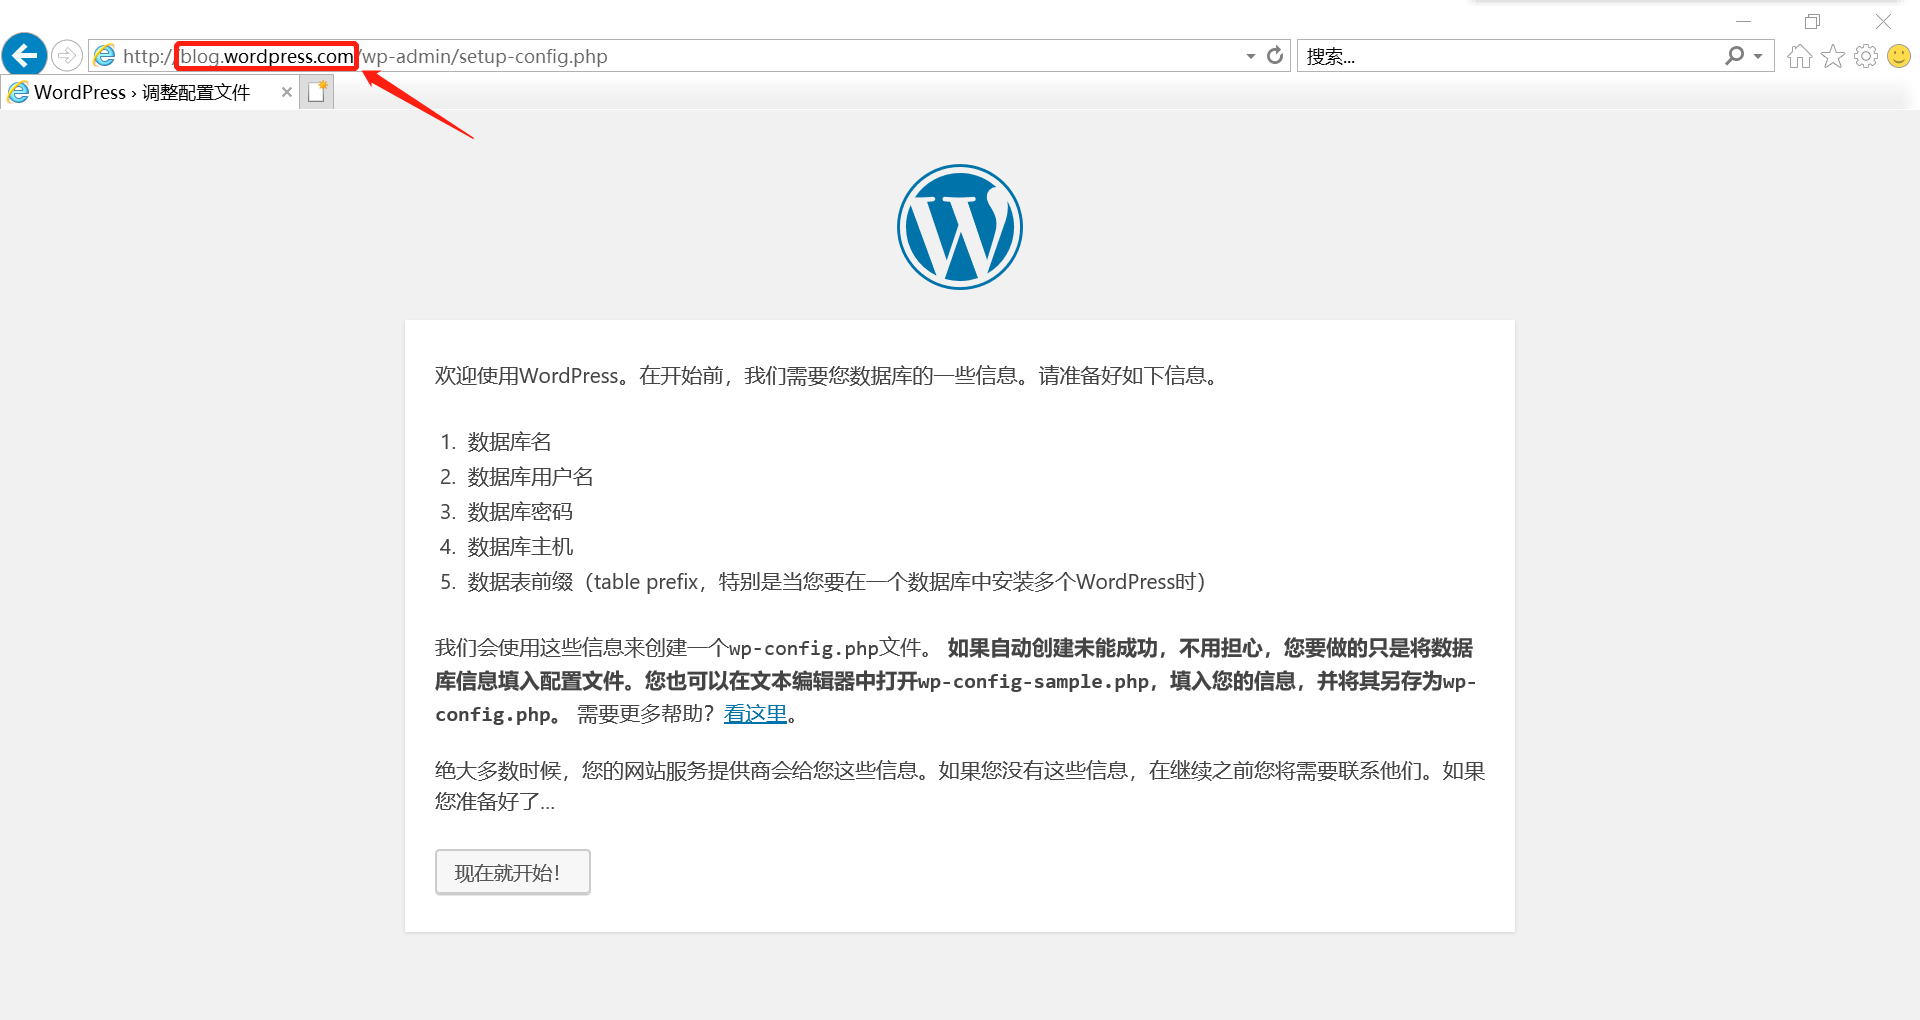
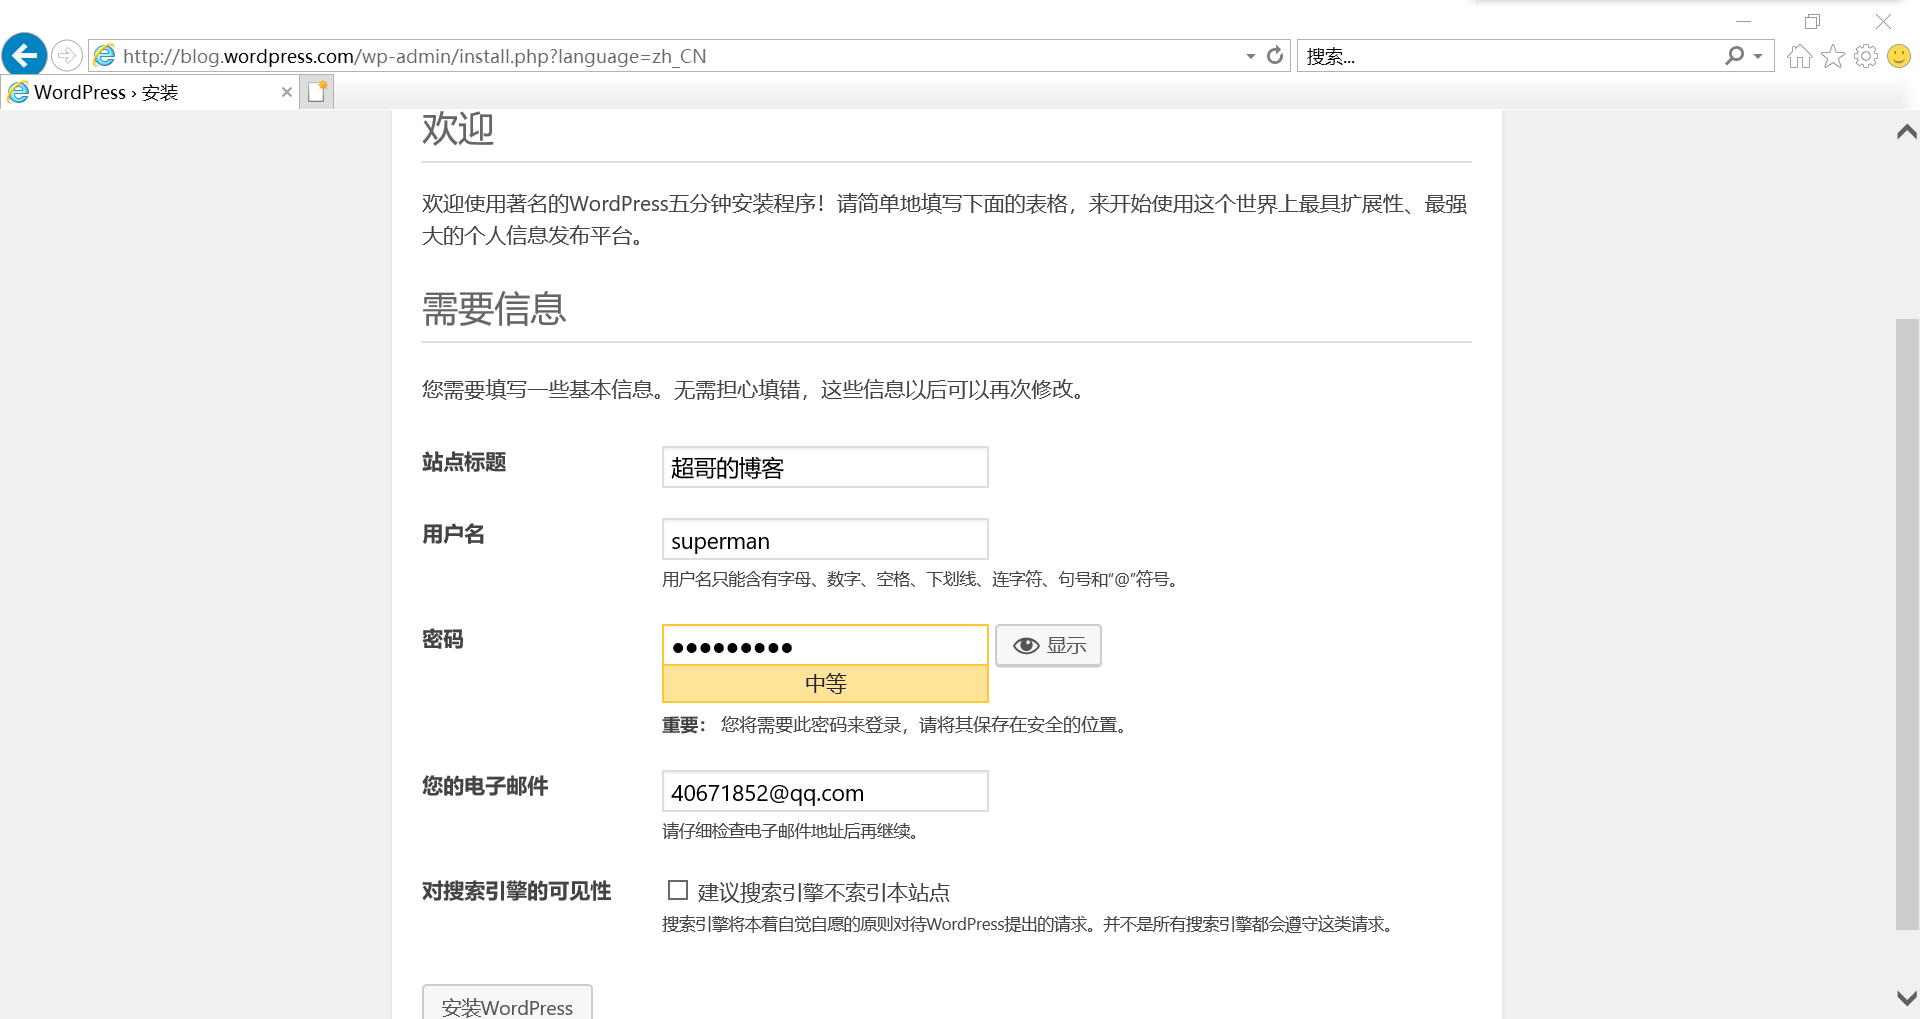
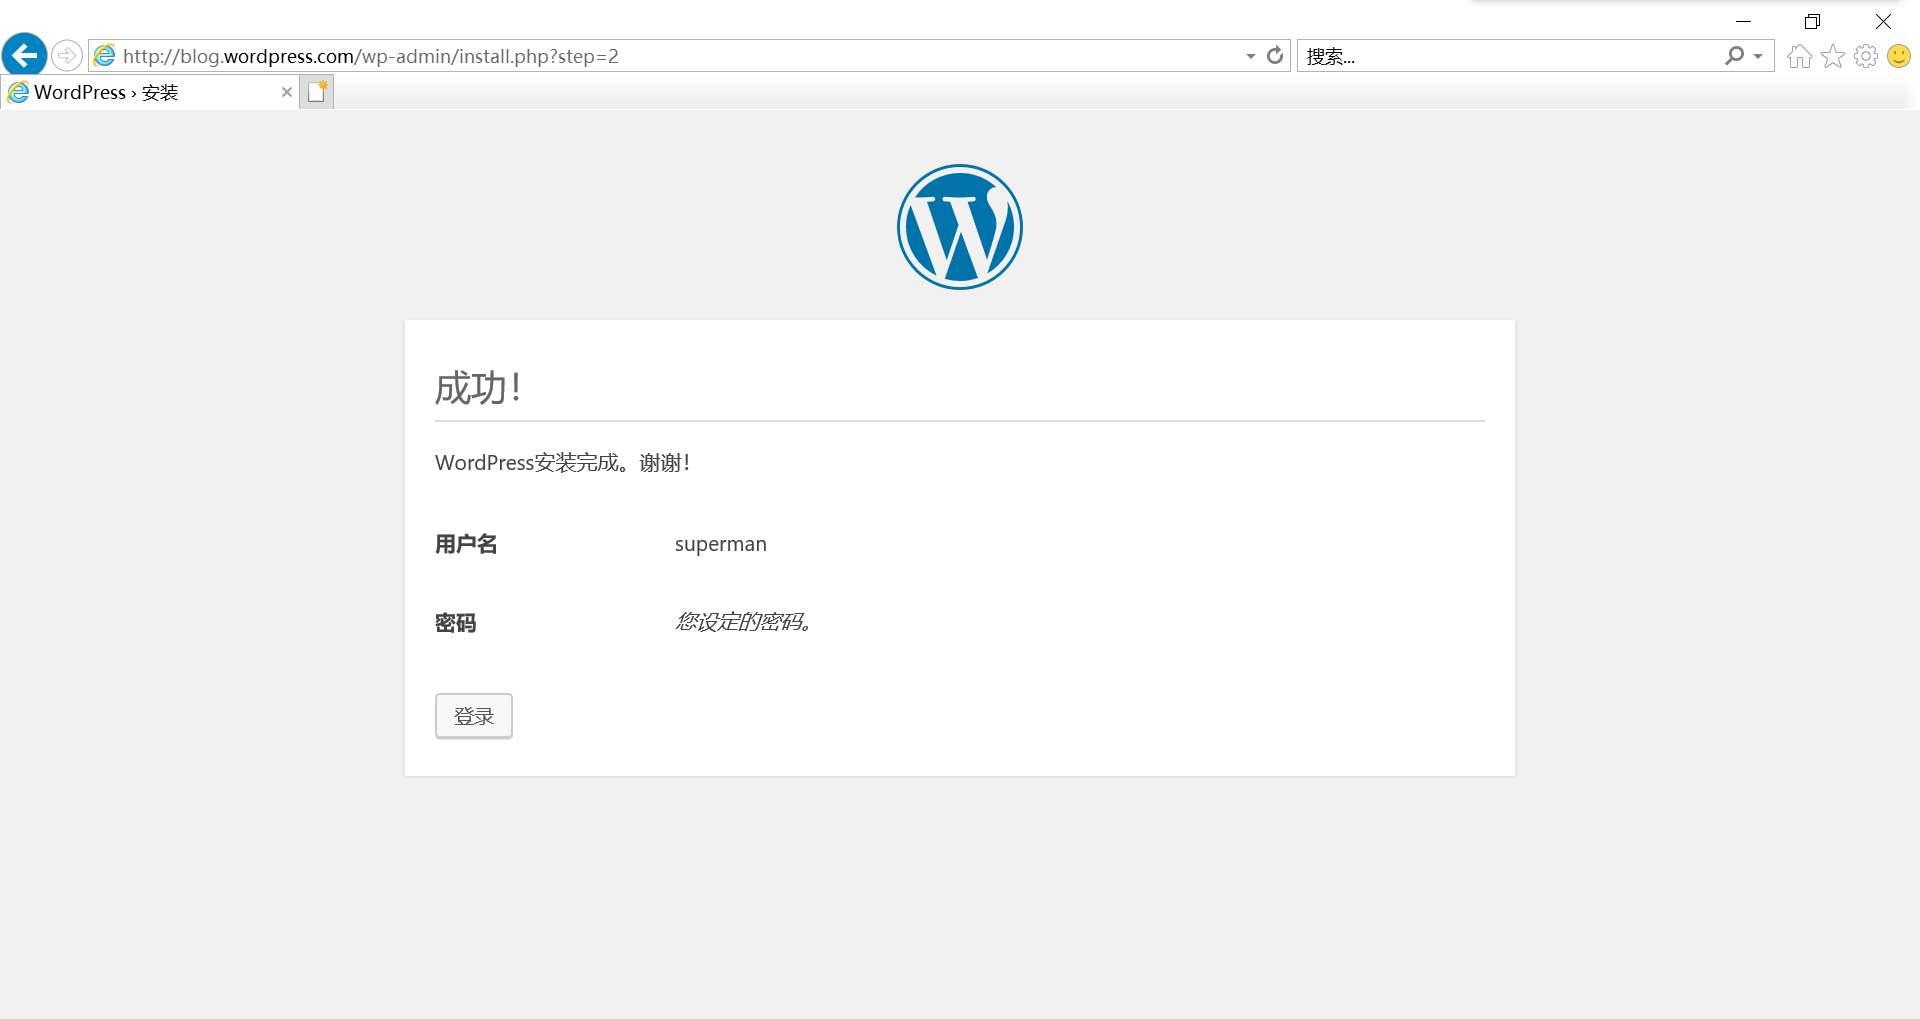
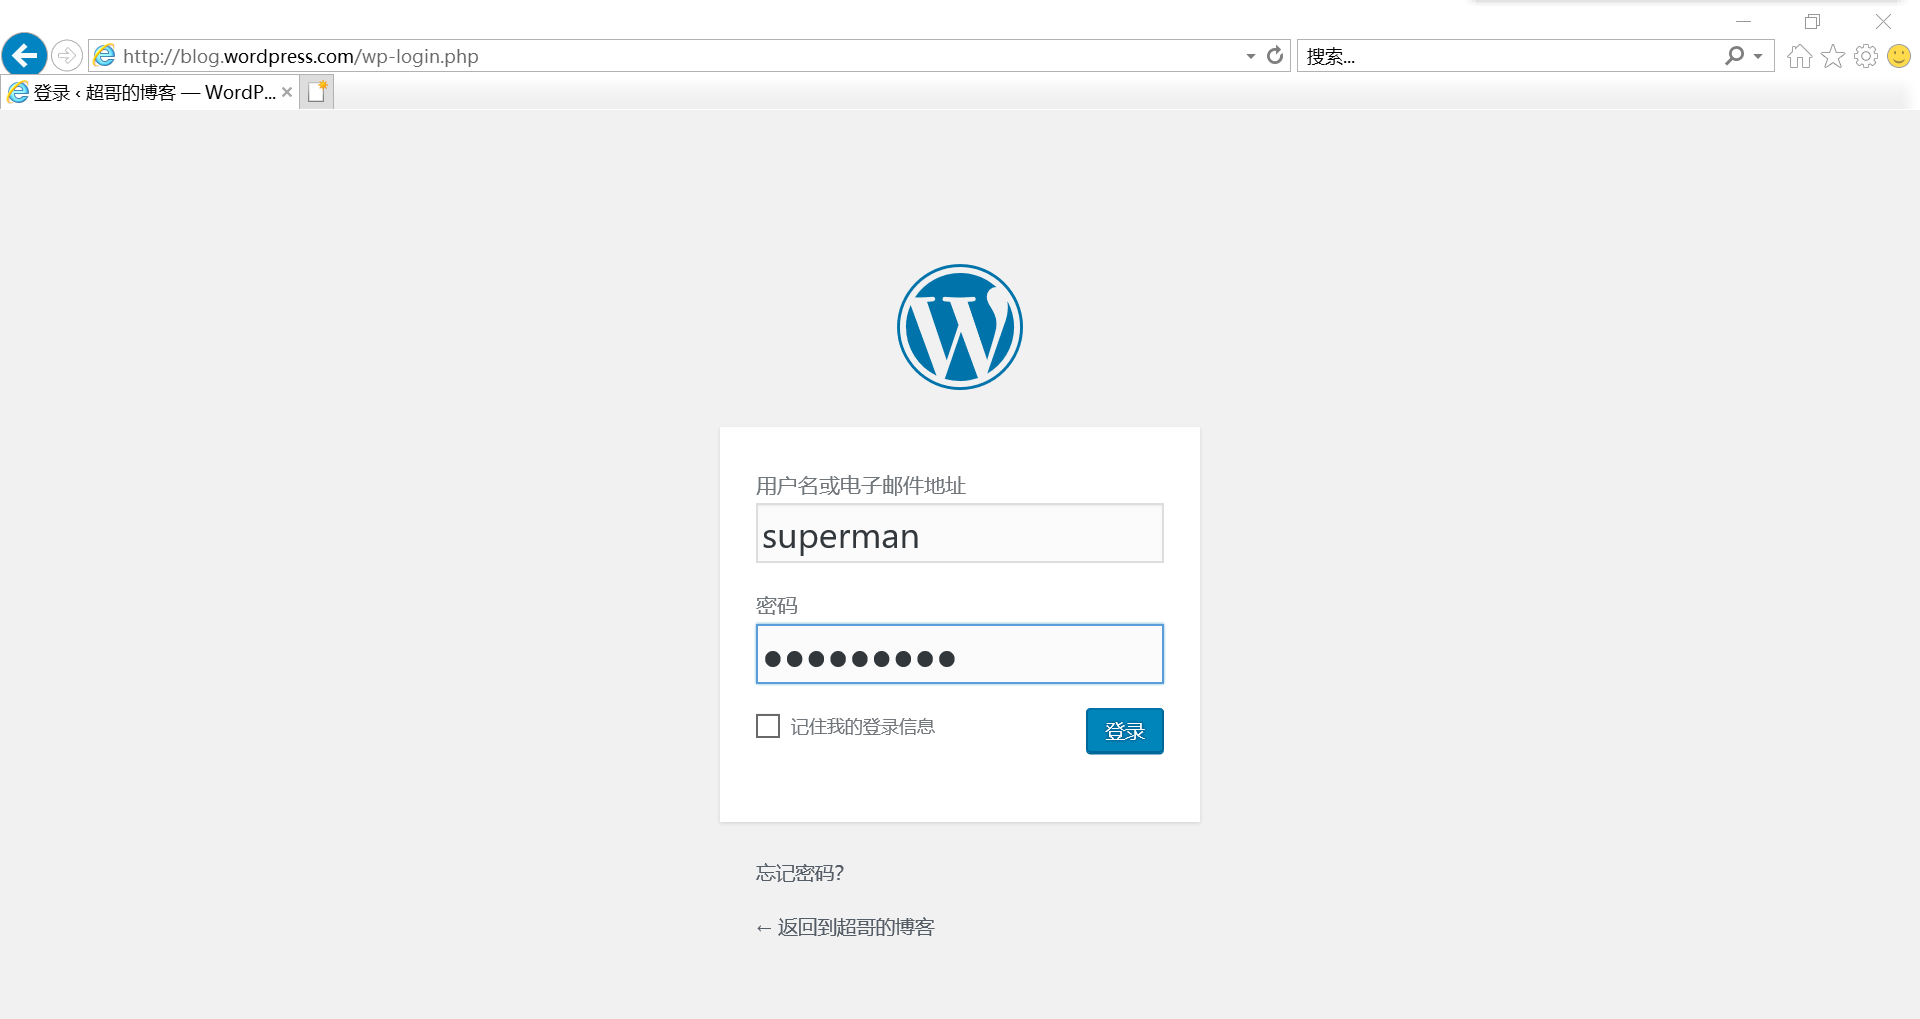
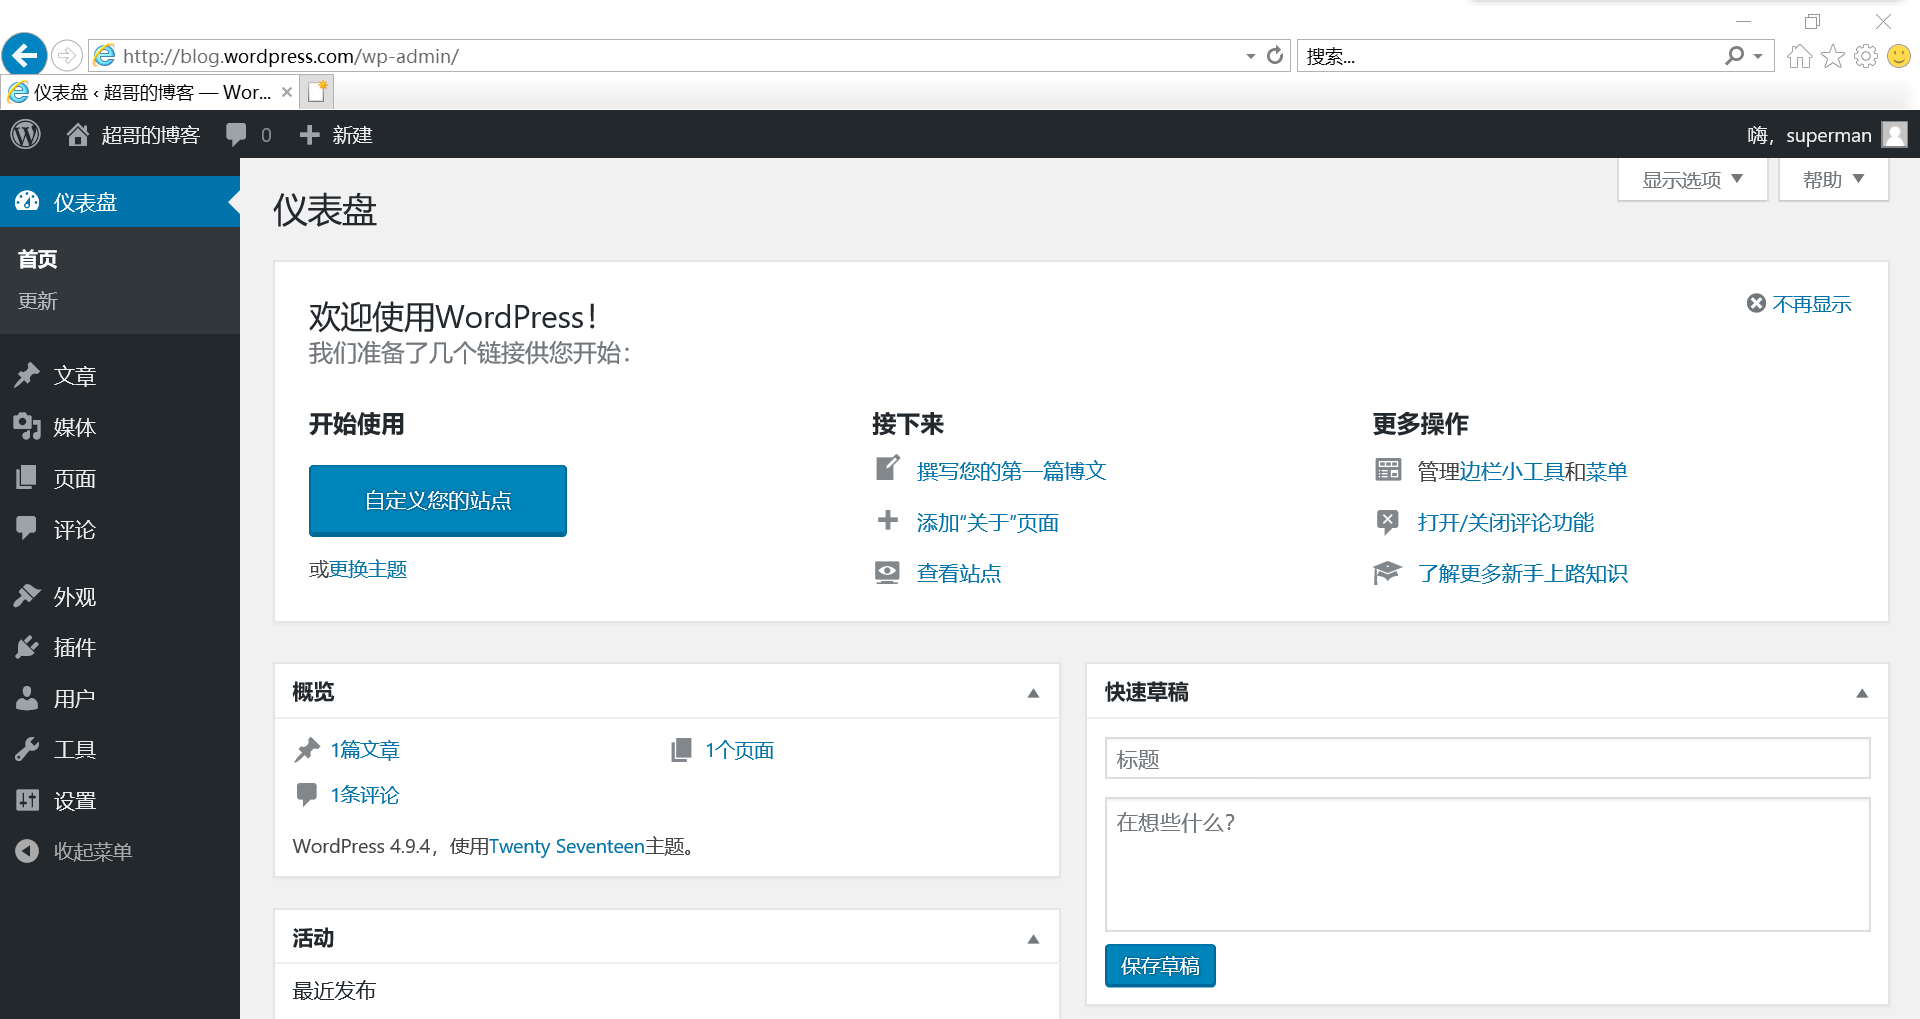
#### 4.4. 访问wordpress网站
在物理机(C:\Windows\System32\drivers\etc\hosts)做好hosts解析`192.168.48.181 blog.wordpress.com`
### 5. 部署discuz网站
#### 5.1 上传discuz网站代码
[root@node01 src]# rz
rz waiting to receive.
Starting zmodem transfer. Press Ctrl+C to cancel.
Transferring Discuz_X3.4_SC_UTF8.zip...
100% 11523 KB 11523 KB/sec 00:00:01 0 Errors
[root@node01 src]#
[root@node01 src]# unzip Discuz_X3.4_SC_UTF8.zip -d /usr/local/nginx/html/discuz
[root@node01 src]# chown -R nginx:nginx /usr/local/nginx/html/discuz/
[root@node01 src]#
#### 5.2 创建discuz虚拟主机配置文件
[root@node01 src]# vi /usr/local/nginx/conf/vhost/bbs.discuz.com.conf
server {
listen 80;
server_name bbs.discuz.com;
#charset koi8-r;
access_log logs/discuz.access.log main;
location / {
root html/discuz/;
index index.php index.html index.htm;
}
#error_page 404 /404.html;
    #
    error_page   500 502 503 504  /50x.html;
    location = /50x.html {
            root   html;
    }

    location ~ \.php$ {
        root           html/discuz/upload;
        fastcgi_pass   127.0.0.1:9000;
        fastcgi_index  index.php;
        fastcgi_param  SCRIPT_FILENAME  $document_root$fastcgi_script_name;
             include        fastcgi_params;
    }
}
#### 5.3. 创建discuz数据库
[root@node01 src]# mysql
Welcome to the MySQL monitor. Commands end with ; or \g.
Your MySQL connection id is 35
Server version: 5.7.30 MySQL Community Server (GPL)
Copyright (c) 2000, 2020, Oracle and/or its affiliates. All rights reserved.
Oracle is a registered trademark of Oracle Corporation and/or its
affiliates. Other names may be trademarks of their respective
owners.
Type ‘help;‘ or ‘\h‘ for help. Type ‘\c‘ to clear the current input statement.
mysql> create database discuz charset utf8;
Query OK, 1 row affected (0.00 sec)
mysql>
mysql> grant all on discuz.* to "discuz"@"localhost" identified by "123456";
Query OK, 0 rows affected, 1 warning (0.00 sec)
mysql> flush privileges;
Query OK, 0 rows affected (0.00 sec)
mysql>
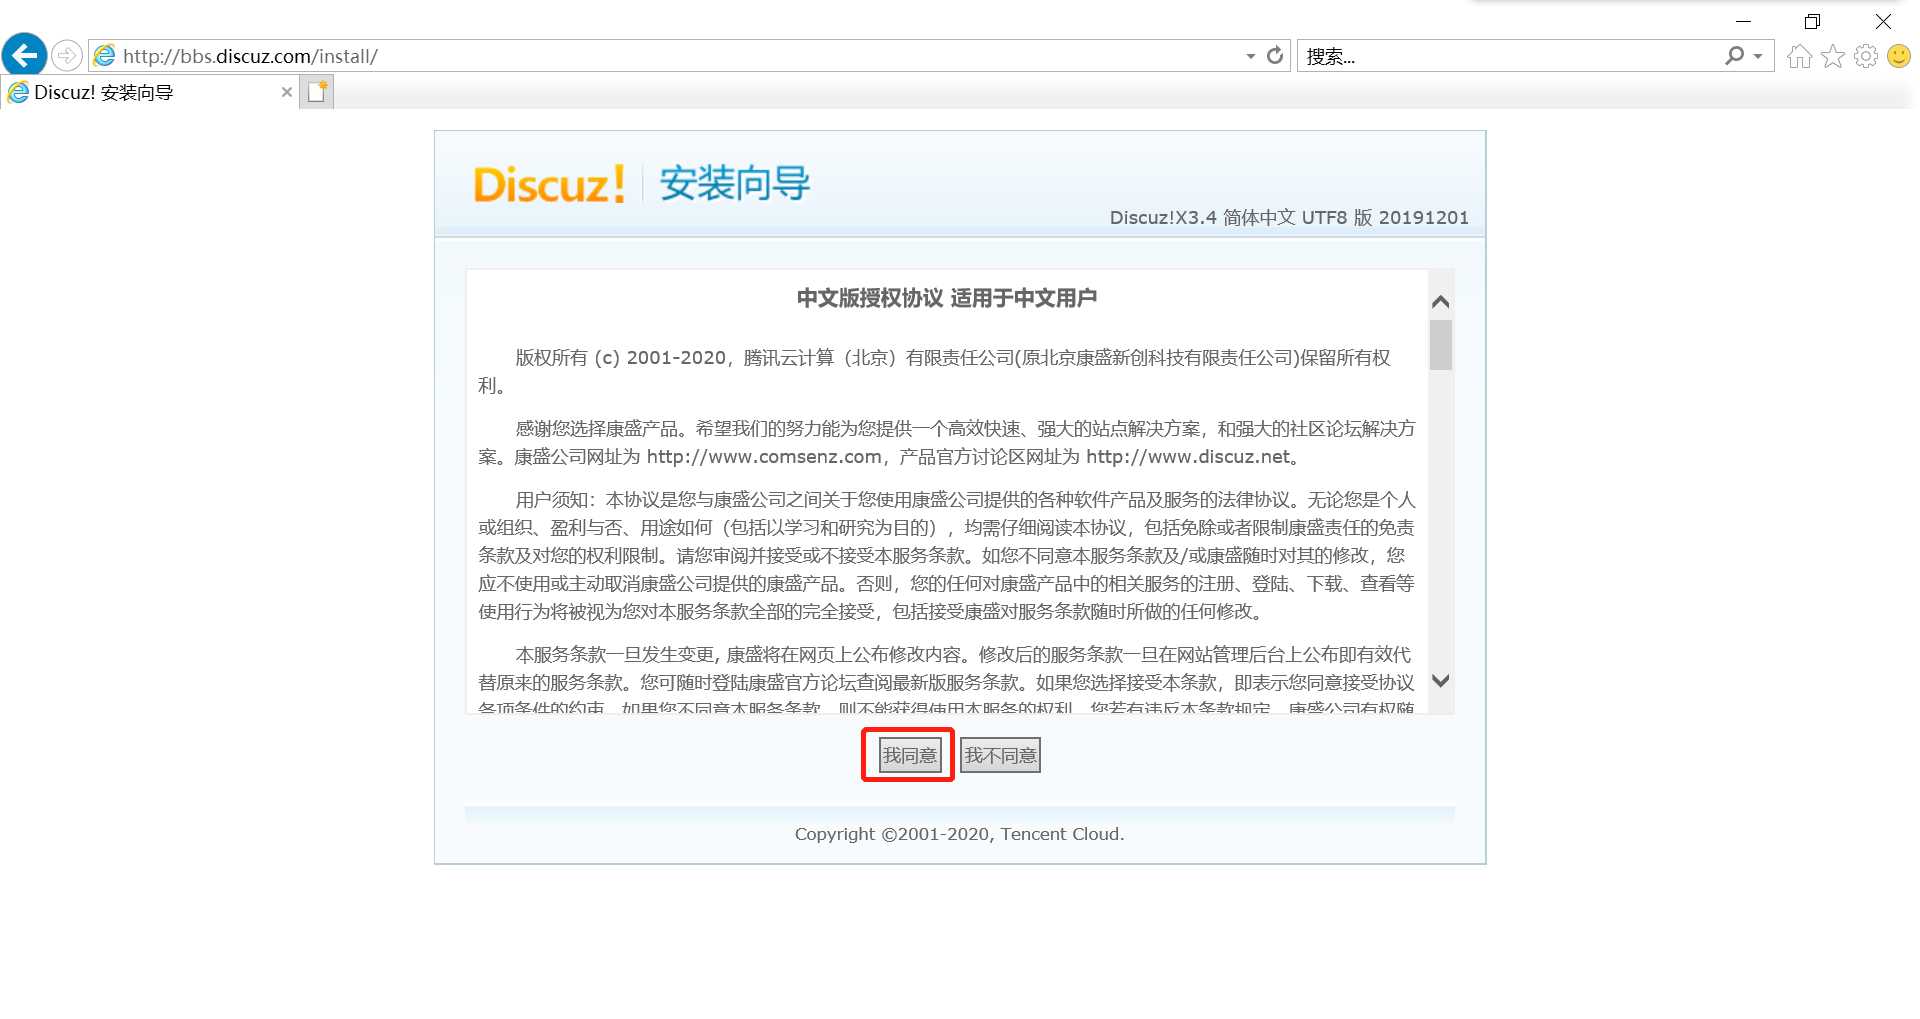
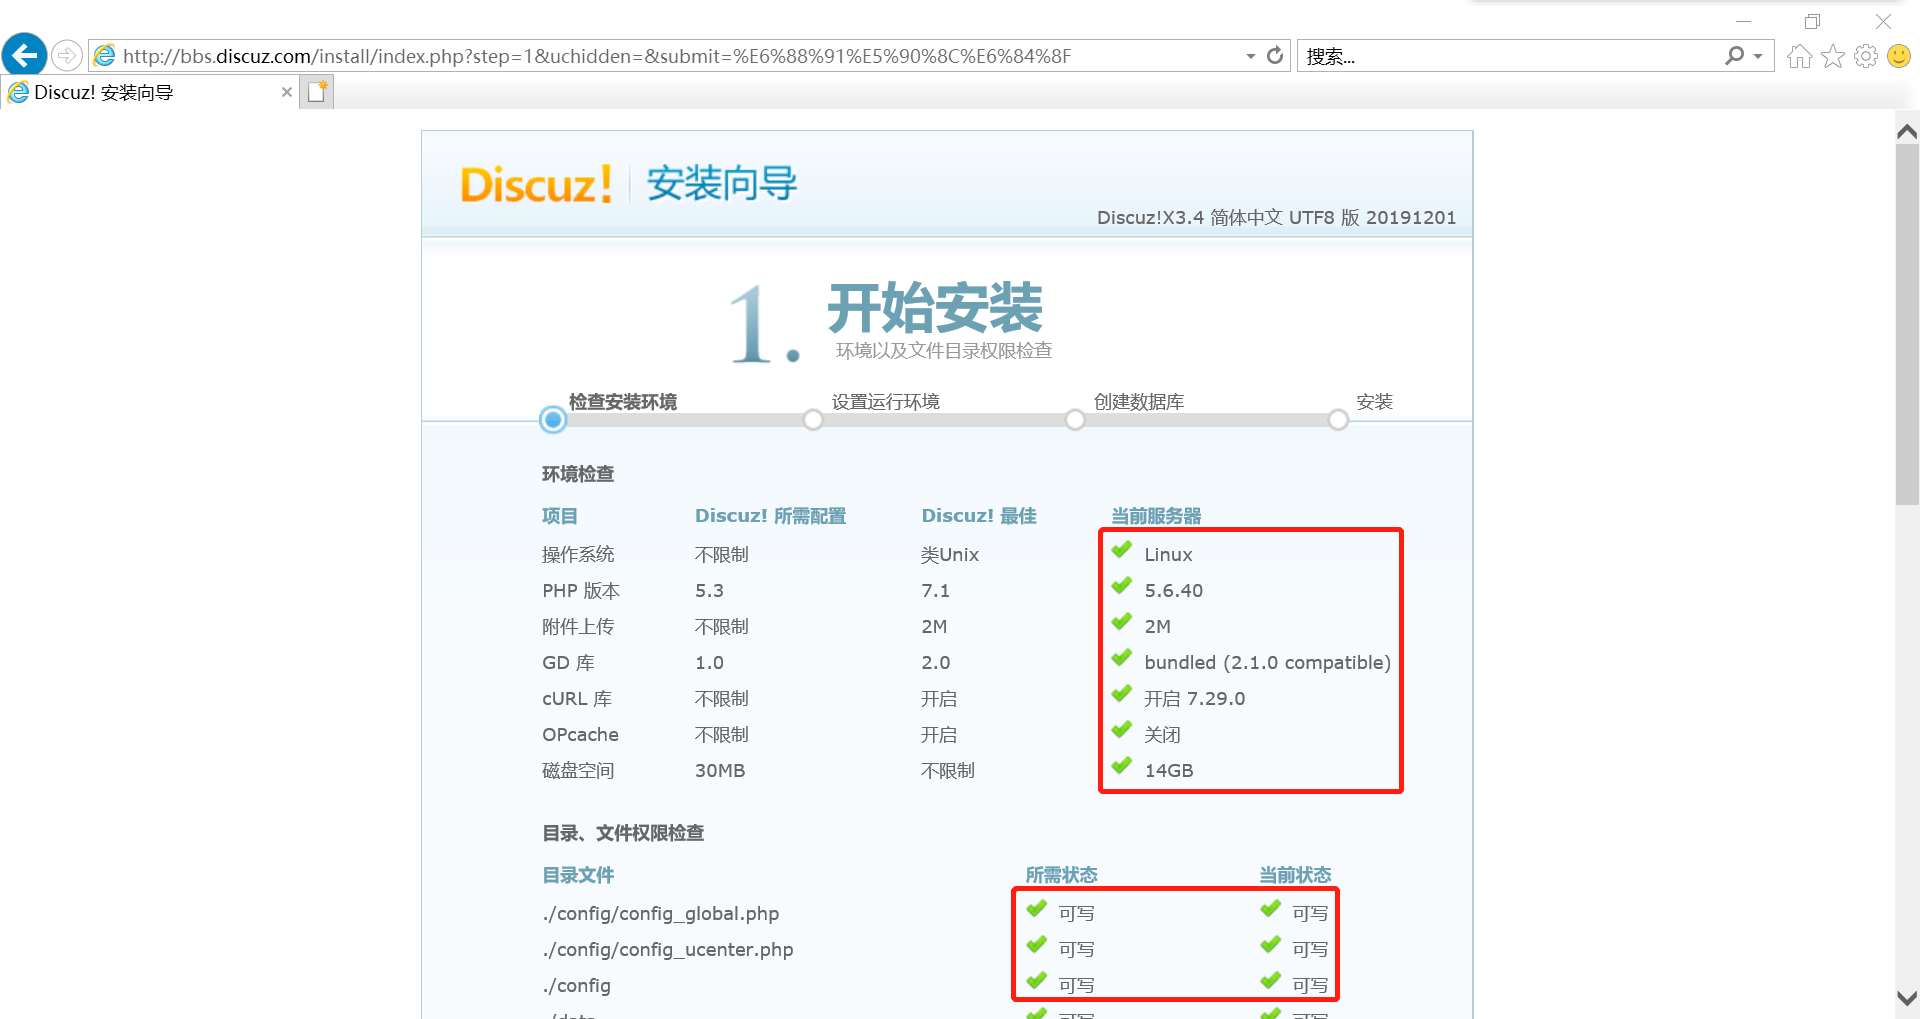
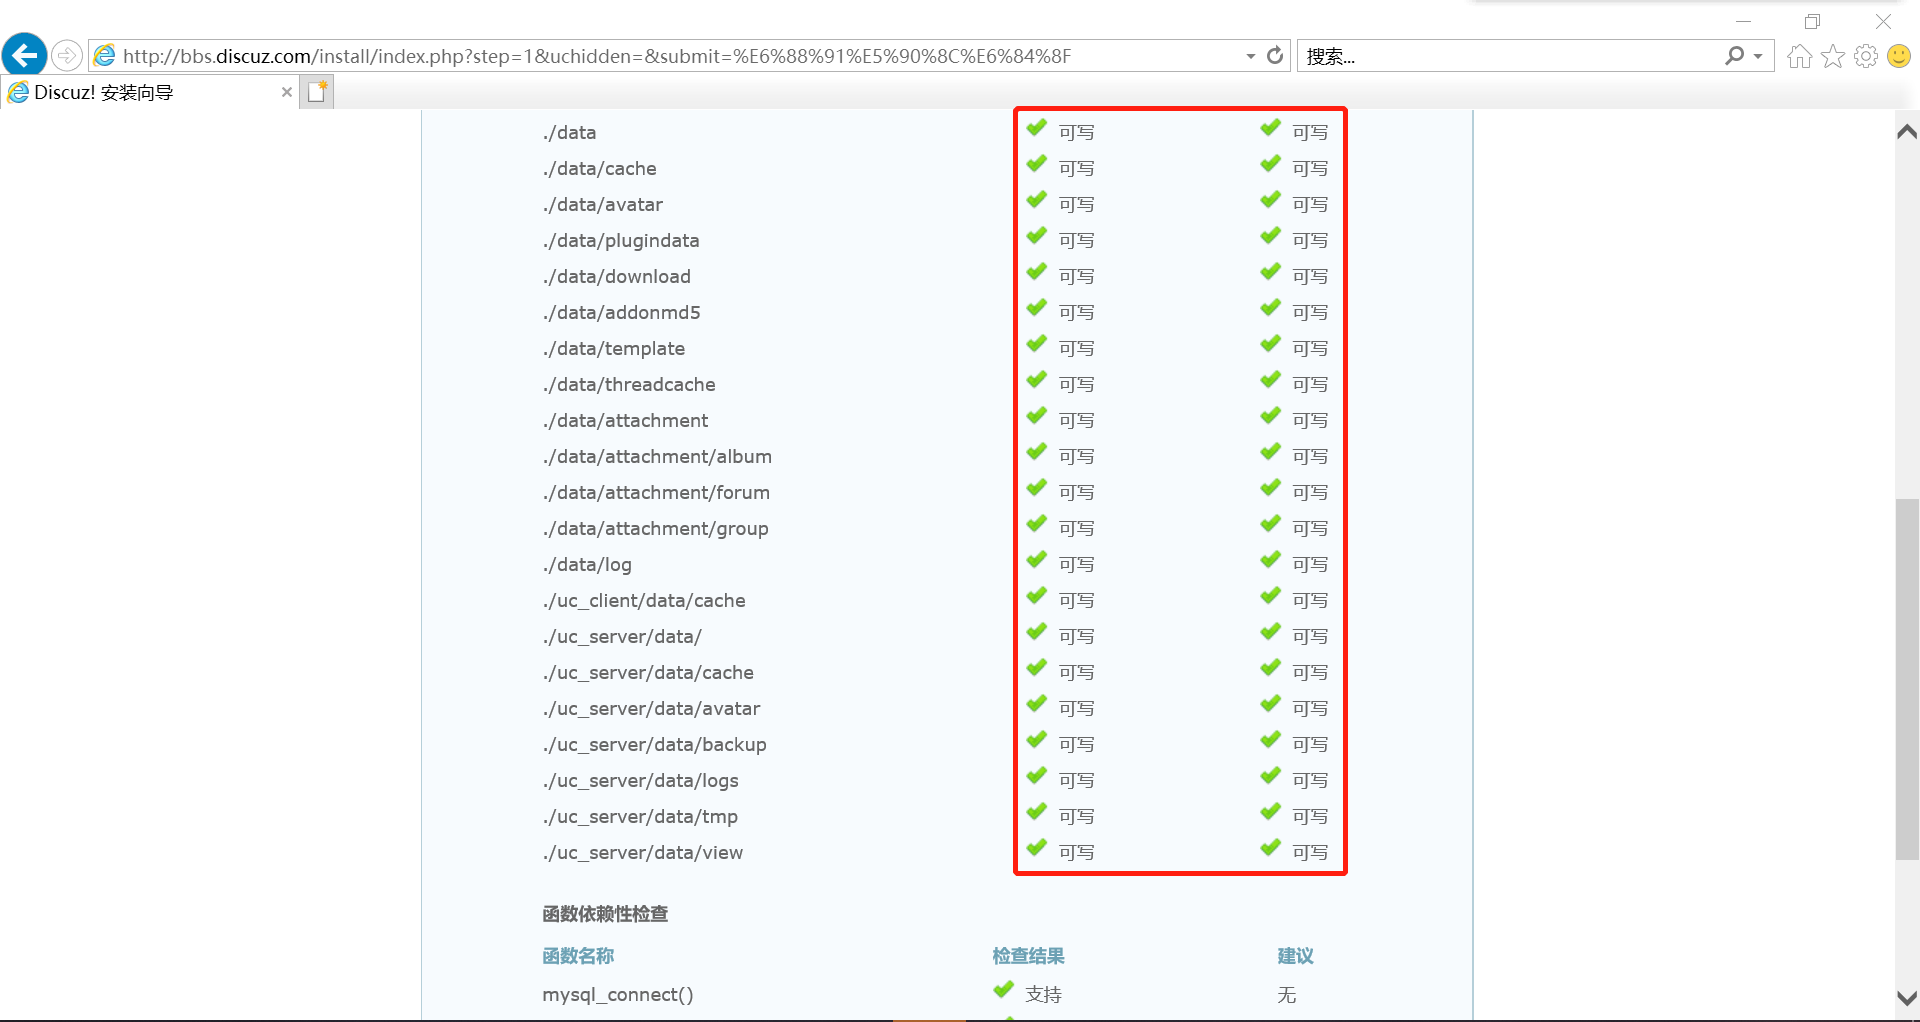
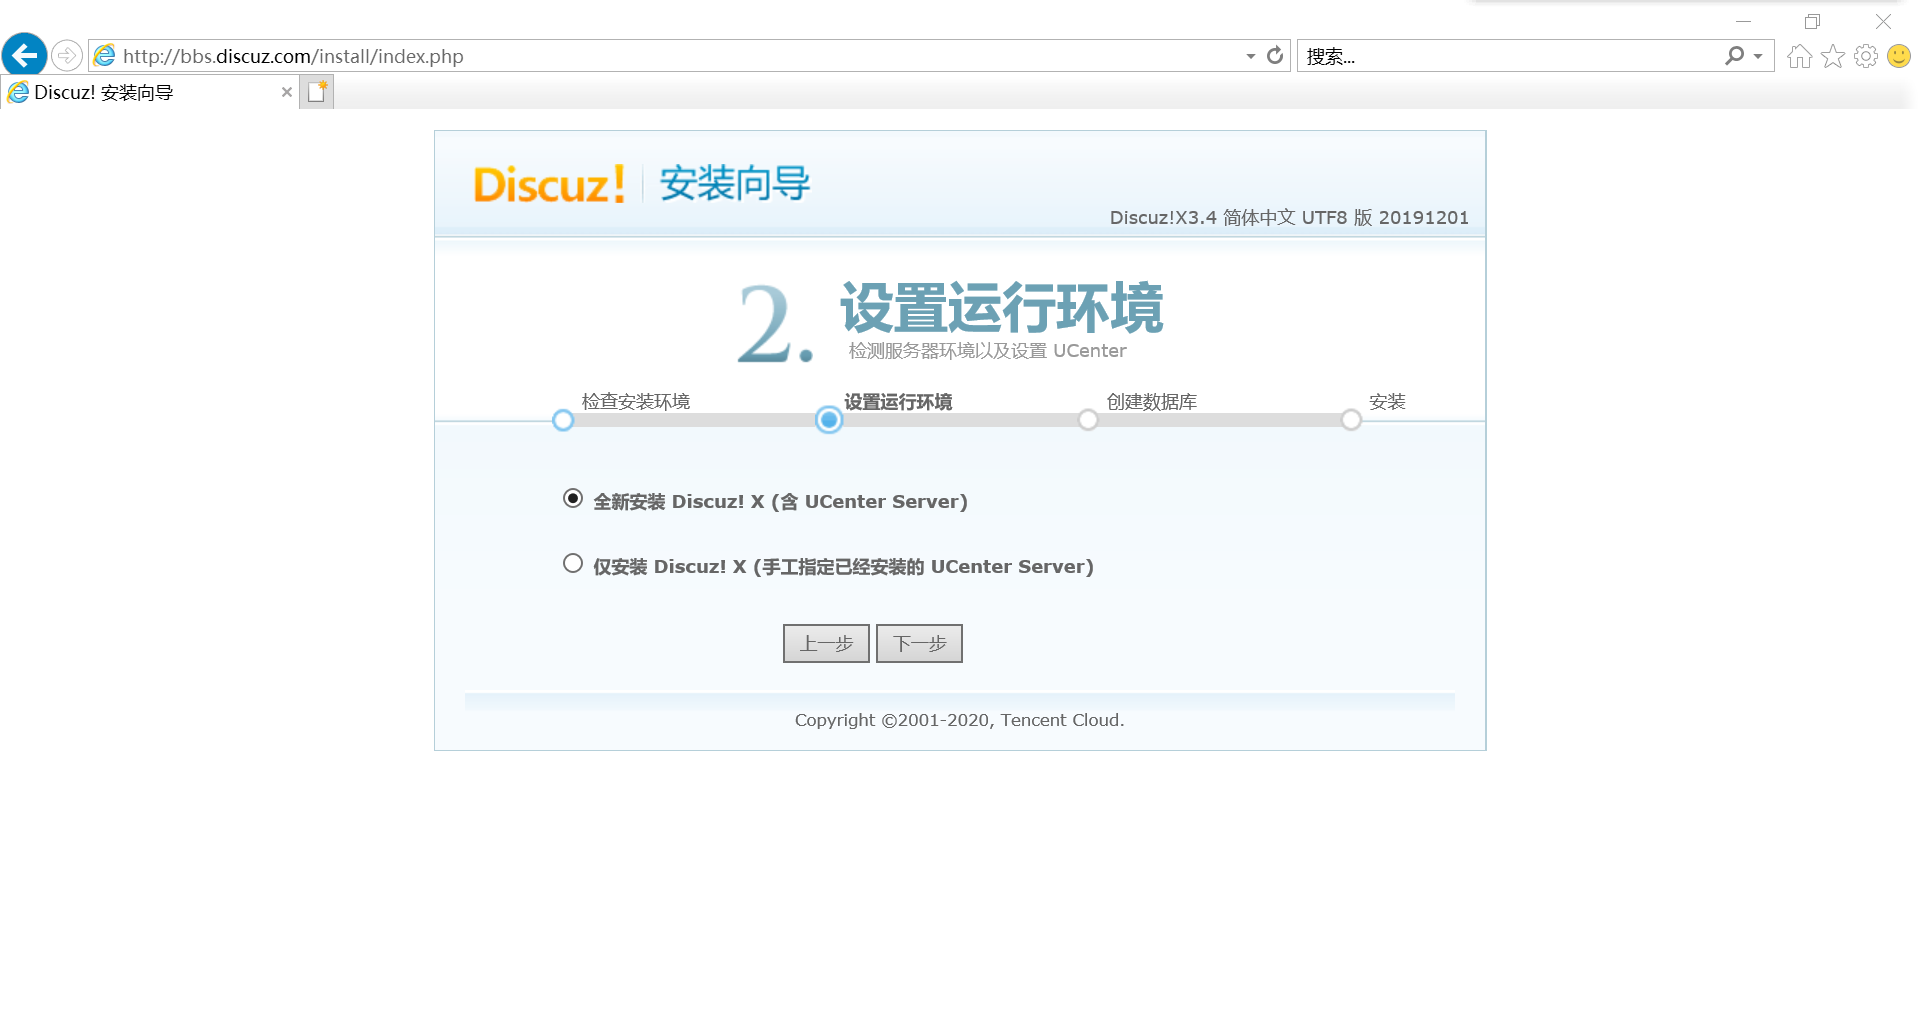
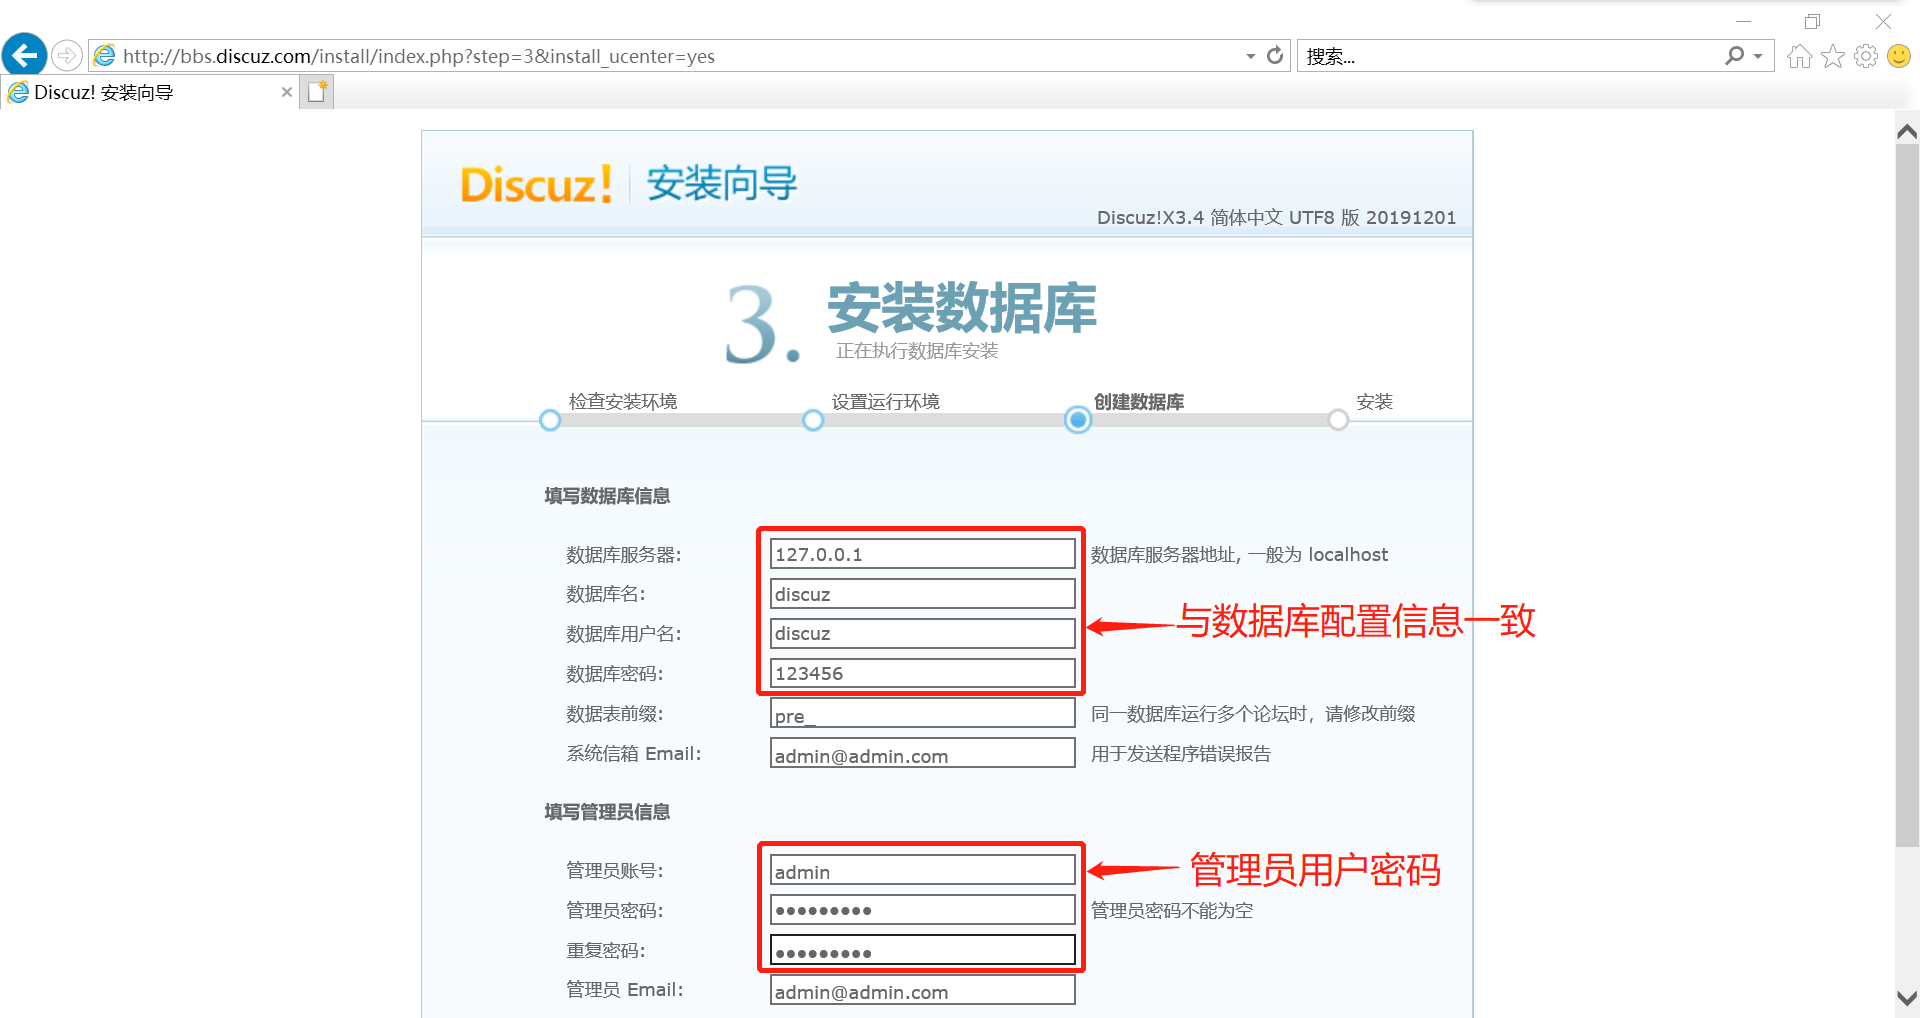
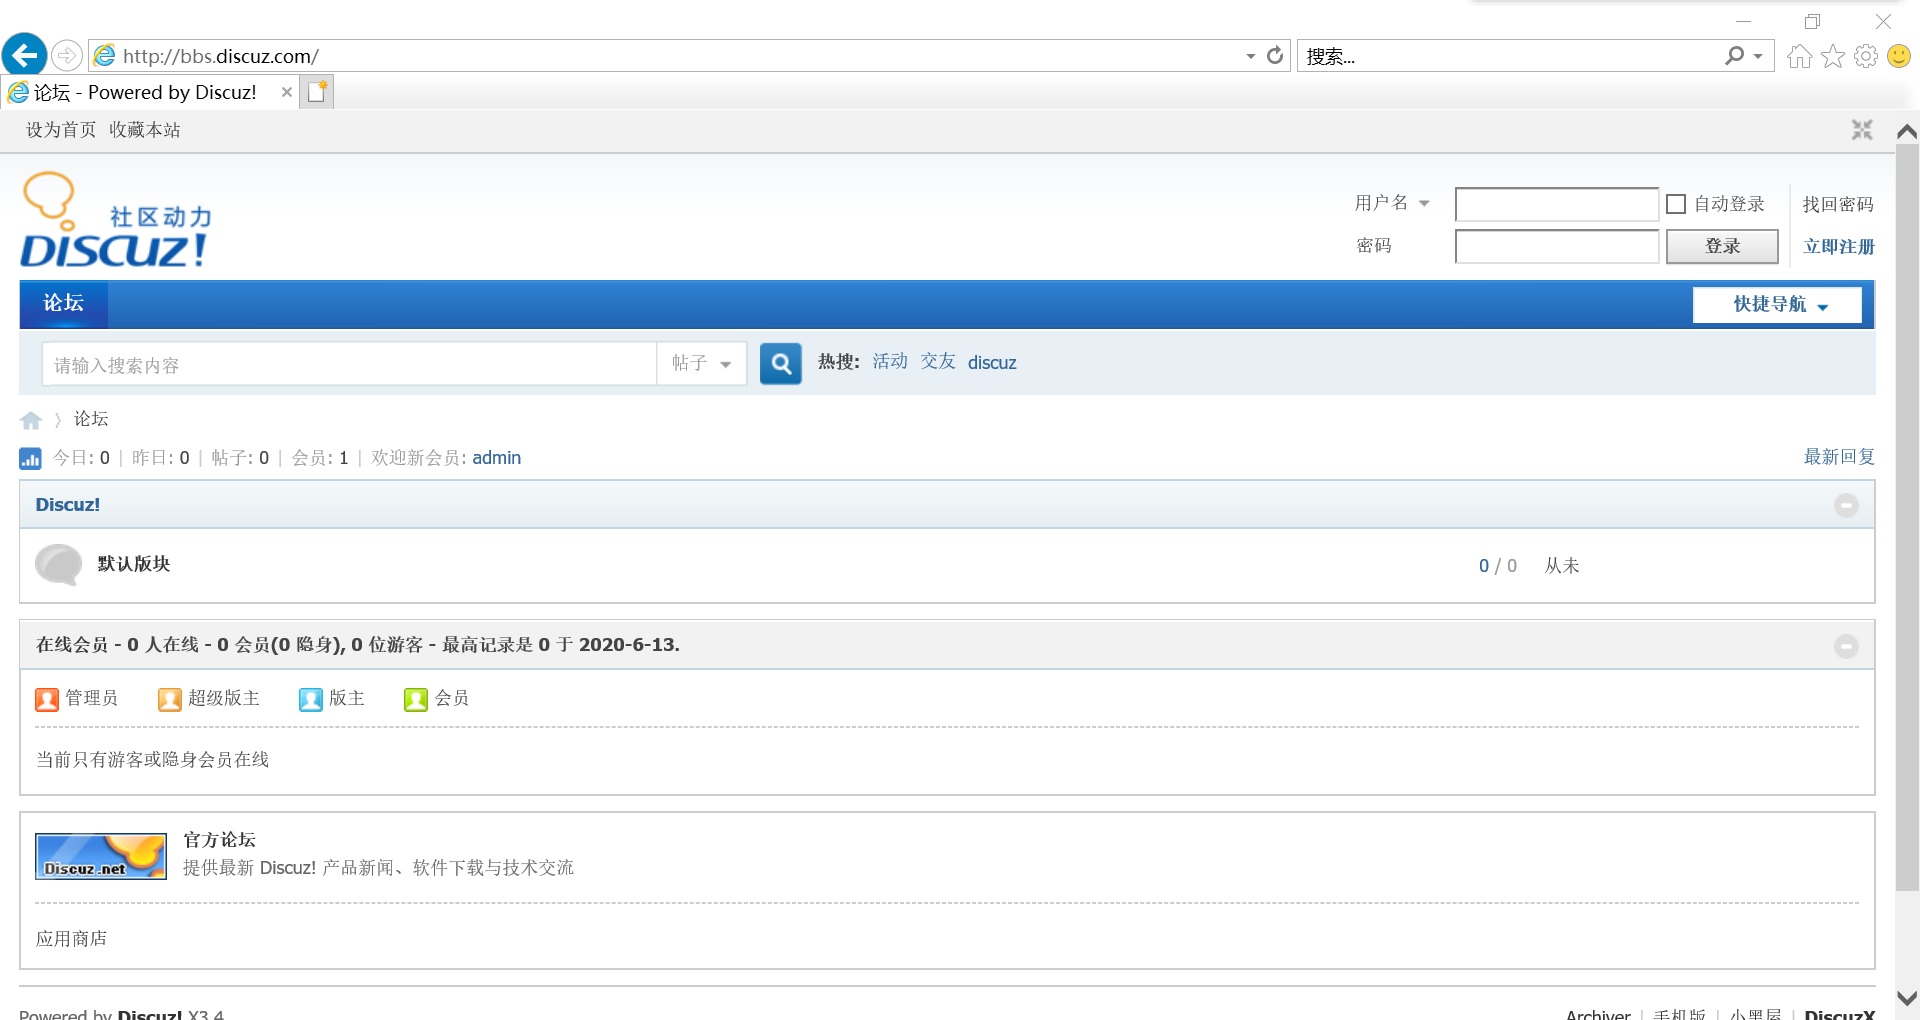
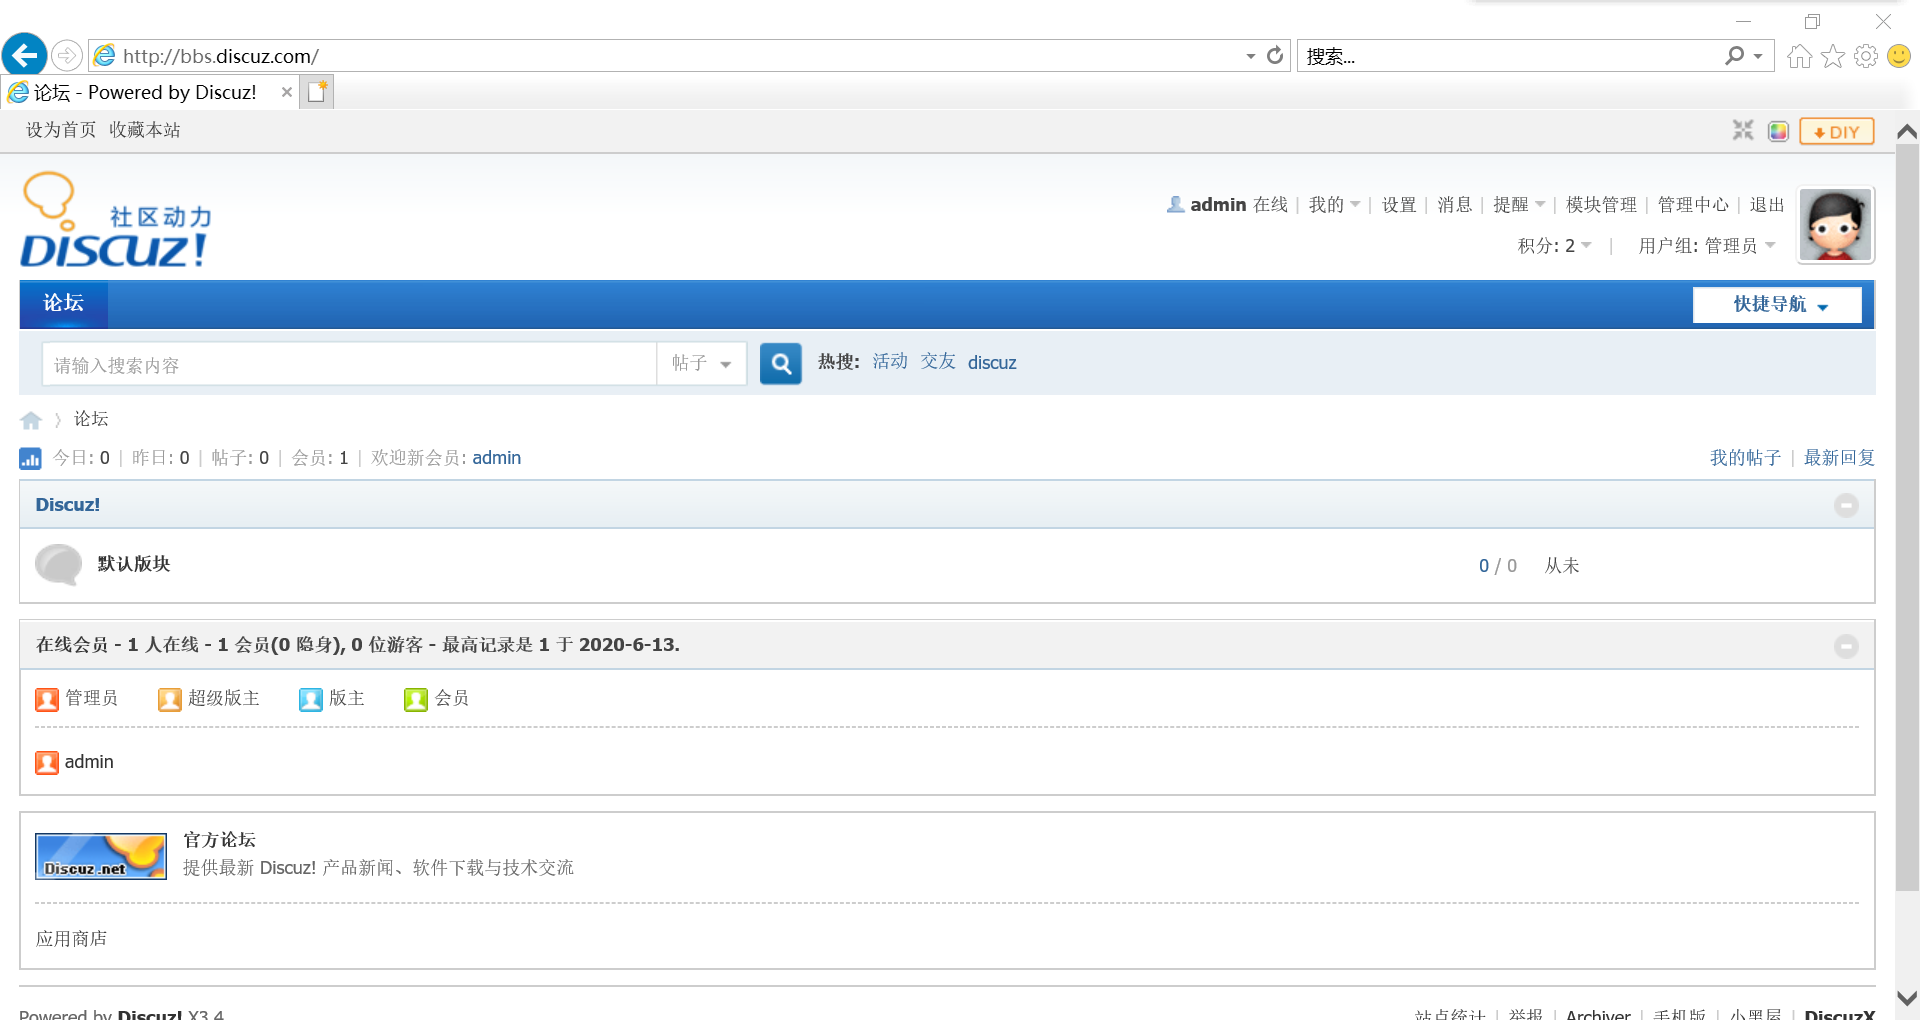
#### 5.4 访问discuz网站
在物理机(C:\Windows\System32\drivers\etc\hosts)做好hosts解析`192.168.48.181 bbs.discuz.com`


企业实战LNMP高性能服务器_wordpress、discuz双网站部署
标签:autoconf download remove emd 多进程 ima types c++ and
原文地址:https://blog.51cto.com/237826/2504461