标签:开始 bind vmw mod The tab 协议 ast 管理员
部署redis集群注意:master和slave不能是同一台服务器的两个端口
环境:
三台服务器:A、B、C
6379:master
6380:slave
A:IP:192.168.100.11,port:6379、6380
B:IP:192.168.100.12,port:6379、6380
C:IP:192.168.100.11,port:6379、6380编译安装
#安装redis依赖的环境包
[root@localhost soft]# yum -y install gcc gcc-c++ bzip2
[root@localhost soft]# tar -jxvf jemalloc-5.2.0.tar.bz2
[root@localhost soft]# cd jemalloc-5.2.0
[root@localhost jemalloc-5.2.0]# ./configure --prefix=/usr/local/jemalloc
[root@localhost jemalloc-5.2.0]# make -j 2 && make install

#编译安装redis并设置软连接
[root@localhost soft]# tar -zxvf redis-5.0.5.tar.gz
[root@localhost soft]# cd redis-5.0.5
[root@localhost redis-5.0.5]# make MALLOC=jemalloc
[root@localhost redis-5.0.5]# make PREFIX=/data/tools/redis-5.0.5 install
[root@localhost redis-5.0.5]# mkdir /data/tools/redis-5.0.5/conf
[root@localhost redis-5.0.5]# cp redis.conf /data/tools/redis-5.0.5/conf/redis_6379.conf
[root@localhost ~]# ln -sv /data/tools/redis-5.0.5 /data/tools/redis
‘/data/tools/redis’ -> ‘/data/tools/redis-5.0.5’
[root@localhost ~]# ln -sv /data/tools/redis/bin/redis-* /usr/bin/
‘/usr/bin/redis-benchmark’ -> ‘/data/tools/redis/bin/redis-benchmark’
‘/usr/bin/redis-check-aof’ -> ‘/data/tools/redis/bin/redis-check-aof’
‘/usr/bin/redis-check-rdb’ -> ‘/data/tools/redis/bin/redis-check-rdb’
‘/usr/bin/redis-cli’ -> ‘/data/tools/redis/bin/redis-cli’
‘/usr/bin/redis-sentinel’ -> ‘/data/tools/redis/bin/redis-sentinel’
‘/usr/bin/redis-server’ -> ‘/data/tools/redis/bin/redis-server’
redis_6379.conf、redis_6380.conf配置(两份配置,除了端口其他都一样)
#redis_6379.conf
bind 0.0.0.0
daemonize yes
pidfile /data/tools/redis/run/redis_6379.pid
logfile "/data/tools/redis/logs/redis_6379.log"
stop-writes-on-bgsave-error no
dbfilename redis6379_dump.rdb
dir /data/tools/redis/data/
requirepass 123456
#REPLICATION
masterauth 123456
maxmemory 1G
#CLUSTER
cluster-enabled yes
cluster-config-file /data/tools/redis/conf/nodes-6379.conf
cluster-node-timeout 15000
cluster-replica-validity-factor 10
cluster-migration-barrier 1
cluster-require-full-coverage yes
添加服务自启动
#创建redis启动用户
[root@localhost ~]# groupadd  -g 1000 redis && useradd -u 1000 -g 1000 redis -s /sbin/nologin
[root@localhost ~]# mkdir -pv /data/tools/redis/{conf,logs,data,run}
mkdir: created directory ‘/data/tools/redis/logs’
mkdir: created directory ‘/data/tools/redis/data’
mkdir: created directory ‘/data/tools/redis/run’
[root@localhost ~]# chown redis.redis -R  /data/tools/redis/

#添加服务自启动redis6379.service、redis6380.service(除了配置文件名字不一样,其他一样)
[root@localhost ~]# cat /usr/lib/systemd/system/redis6379.service
Description=Redis persistent key-value database
After=network.target
After=network-online.target
Wants=network-online.target

[Service]
ExecStart = /data/tools/redis/bin/redis-server /data/tools/redis/conf/redis_6379.conf --supervised systemd
ExecReload = /bin/kill -s HUP $MAINPID
ExecStop = /bin/kill -s QUIT $MAINPID
Type = notify
User = redis
Group = redis
RuntimeDirectory = redis
RuntimeDirectoryMode = 0755

[Install]
WantedBy=multi-user.target

#设置开机启动并启动服务,每台服务器启动6379和6380端口
[root@localhost ~]# systemctl daemon-reload
[root@localhost ~]# systemctl enable --now redis6379
Created symlink from /etc/systemd/system/multi-user.target.wants/redis.service to /usr/lib/systemd/system/redis.service.
验证服务
#6379、6380为客户端服务端口
#16379、16380为服务端服务端口
[root@localhost ~]# ss -tln
State      Recv-Q Send-Q                                      Local Address:Port                                                     Peer Address:Port
LISTEN     0      128                                                     *:6379                                                                *:*
LISTEN     0      128                                                     *:6380                                                                *:*
LISTEN     0      128                                                     *:22                                                                  *:*
LISTEN     0      128                                                     *:16379                                                               *:*
LISTEN     0      128                                                     *:16380                                                               *:*
LISTEN     0      128                                                    :::22                                                                 :::*
创建集群
[root@localhost ~]# redis-cli -a 123456 --cluster create 192.168.100.11:6379 192.168.100.11:6380 192.168.100.12:6379 192.168.100.12:6380 192.168.100.13:6379 192.168.100.13:6380  --cluster-replicas 1
Warning: Using a password with ‘-a‘ or ‘-u‘ option on the command line interface may not be safe.
>>> Performing hash slots allocation on 6 nodes...
Master[0] -> Slots 0 - 5460
Master[1] -> Slots 5461 - 10922
Master[2] -> Slots 10923 - 16383
Adding replica 192.168.100.12:6380 to 192.168.100.11:6379
Adding replica 192.168.100.13:6380 to 192.168.100.12:6379
Adding replica 192.168.100.11:6380 to 192.168.100.13:6379
M: 6ea21fa0bd64dc75c065e7d0da7c8c3bbdfbb200 192.168.100.11:6379
   slots:[0-5460] (5461 slots) master
S: 047b0910f7268161e25199ac1e797a5ea1fe1e59 192.168.100.11:6380
   replicates 5894c491e89d893ba90deb85b282dc008d4e16c6
M: 1962b458826fef76e3b92a06e94dd82e4285854a 192.168.100.12:6379
   slots:[5461-10922] (5462 slots) master
S: 9be6ef428dda8b0fef89e2bb7bdee4de56cb8296 192.168.100.12:6380
   replicates 6ea21fa0bd64dc75c065e7d0da7c8c3bbdfbb200
M: 5894c491e89d893ba90deb85b282dc008d4e16c6 192.168.100.13:6379
   slots:[10923-16383] (5461 slots) master
S: 60bae29c47b0265fbf0f873b593aee62b7d4e215 192.168.100.13:6380
   replicates 1962b458826fef76e3b92a06e94dd82e4285854a
Can I set the above configuration? (type ‘yes‘ to accept): yes
>>> Nodes configuration updated
>>> Assign a different config epoch to each node
>>> Sending CLUSTER MEET messages to join the cluster
Waiting for the cluster to join
...
>>> Performing Cluster Check (using node 192.168.100.11:6379)
M: 6ea21fa0bd64dc75c065e7d0da7c8c3bbdfbb200 192.168.100.11:6379
   slots:[0-5460] (5461 slots) master
   1 additional replica(s)
S: 047b0910f7268161e25199ac1e797a5ea1fe1e59 192.168.100.11:6380
   slots: (0 slots) slave
   replicates 5894c491e89d893ba90deb85b282dc008d4e16c6
S: 60bae29c47b0265fbf0f873b593aee62b7d4e215 192.168.100.13:6380
   slots: (0 slots) slave
   replicates 1962b458826fef76e3b92a06e94dd82e4285854a
M: 1962b458826fef76e3b92a06e94dd82e4285854a 192.168.100.12:6379
   slots:[5461-10922] (5462 slots) master
   1 additional replica(s)
M: 5894c491e89d893ba90deb85b282dc008d4e16c6 192.168.100.13:6379
   slots:[10923-16383] (5461 slots) master
   1 additional replica(s)
S: 9be6ef428dda8b0fef89e2bb7bdee4de56cb8296 192.168.100.12:6380
   slots: (0 slots) slave
   replicates 6ea21fa0bd64dc75c065e7d0da7c8c3bbdfbb200
[OK] All nodes agree about slots configuration.
>>> Check for open slots...
>>> Check slots coverage...
[OK] All 16384 slots covered.
检查集群
[root@localhost ~]# redis-cli --cluster info 192.168.100.11:6379 -a 123456
Warning: Using a password with ‘-a‘ or ‘-u‘ option on the command line interface may not be safe.
192.168.100.11:6379 (6ea21fa0...) -> 0 keys | 5461 slots | 1 slaves.
192.168.100.12:6379 (1962b458...) -> 0 keys | 5462 slots | 1 slaves.
192.168.100.13:6379 (5894c491...) -> 0 keys | 5461 slots | 1 slaves.
[OK] 0 keys in 3 masters.
0.00 keys per slot on average.

[root@localhost ~]# redis-cli --cluster check 192.168.100.11:6379 -a 123456
Warning: Using a password with ‘-a‘ or ‘-u‘ option on the command line interface may not be safe.
192.168.100.11:6379 (6ea21fa0...) -> 0 keys | 5461 slots | 1 slaves.
192.168.100.12:6379 (1962b458...) -> 0 keys | 5462 slots | 1 slaves.
192.168.100.13:6379 (5894c491...) -> 0 keys | 5461 slots | 1 slaves.
[OK] 0 keys in 3 masters.
0.00 keys per slot on average.
>>> Performing Cluster Check (using node 192.168.100.11:6379)
M: 6ea21fa0bd64dc75c065e7d0da7c8c3bbdfbb200 192.168.100.11:6379
   slots:[0-5460] (5461 slots) master
   1 additional replica(s)
S: 60bae29c47b0265fbf0f873b593aee62b7d4e215 192.168.100.13:6380
   slots: (0 slots) slave
   replicates 1962b458826fef76e3b92a06e94dd82e4285854a
S: 047b0910f7268161e25199ac1e797a5ea1fe1e59 192.168.100.11:6380
   slots: (0 slots) slave
   replicates 5894c491e89d893ba90deb85b282dc008d4e16c6
M: 1962b458826fef76e3b92a06e94dd82e4285854a 192.168.100.12:6379
   slots:[5461-10922] (5462 slots) master
   1 additional replica(s)
S: 9be6ef428dda8b0fef89e2bb7bdee4de56cb8296 192.168.100.12:6380
   slots: (0 slots) slave
   replicates 6ea21fa0bd64dc75c065e7d0da7c8c3bbdfbb200
M: 5894c491e89d893ba90deb85b282dc008d4e16c6 192.168.100.13:6379
   slots:[10923-16383] (5461 slots) master
   1 additional replica(s)
[OK] All nodes agree about slots configuration.
>>> Check for open slots...
>>> Check slots coverage...
[OK] All 16384 slots covered.
可以看到,至此redis的cluster创建完成。
通过yum 安装与气动
yum -y install memcached

#cat /etc/sysconfig/memcached
PORT="11211" #监听端口
PORT="memcached" #气动用户
MAXCONN="1024" 最大连接数
CACHESIZE="1024" #最大使用内存
OPTIONS="" 其他选项

#气动
systemctl start memcached

#验证服务
[root@localhost ~]# ps -ef|grep memcached
memcach+  10767      1  0 13:22 ?        00:00:00 /usr/bin/memcached -u memcached -p 11211 -m 64 -c 1024
root      10775   9419  0 13:22 pts/0    00:00:00 grep --color=auto memcached
[root@localhost ~]# netstat -tunlpa|grep memcached
tcp        0      0 0.0.0.0:11211           0.0.0.0:*               LISTEN      10767/memcached
tcp6       0      0 :::11211                :::*                    LISTEN      10767/memcached
udp        0      0 0.0.0.0:11211           0.0.0.0:*                           10767/memcached
udp6       0      0 :::11211                :::*                                10767/memcached

#部署repcached实现双主
[root@localhost ~]# yum -y install lievent libevent-devel
[root@localhost ~]# mkdir -p /data/soft
[root@localhost ~]# cd /data/soft/
[root@localhost soft]# tar -zxvf memcached-1.2.8-repcached-2.2.1.tar.gz
[root@localhost memcached-1.2.8-repcached-2.2.1]# ./configure --prefix=/data/tools/repcached --enable-replication

#报错
[root@localhost memcached-1.2.8-repcached-2.2.1]# make && make install
make  all-recursive
make[1]: Entering directory `/data/soft/memcached-1.2.8-repcached-2.2.1‘
Making all in doc
make[2]: Entering directory `/data/soft/memcached-1.2.8-repcached-2.2.1/doc‘
make[2]: Nothing to be done for `all‘.
make[2]: Leaving directory `/data/soft/memcached-1.2.8-repcached-2.2.1/doc‘
make[2]: Entering directory `/data/soft/memcached-1.2.8-repcached-2.2.1‘
gcc -DHAVE_CONFIG_H -I.  -DNDEBUG   -g -O2 -MT memcached-memcached.o -MD -MP -MF .deps/memcached-memcached.Tpo -c -o memcached-memcached.o `test -f ‘memcached.c‘ || echo ‘./‘`memcached.c
memcached.c: In function ‘add_iov’:
memcached.c:697:30: error: ‘IOV_MAX’ undeclared (first use in this function)
         if (m->msg_iovlen == IOV_MAX ||
                              ^
memcached.c:697:30: note: each undeclared identifier is reported only once for each function it appears in
make[2]: *** [memcached-memcached.o] Error 1
make[2]: Leaving directory `/data/soft/memcached-1.2.8-repcached-2.2.1‘
make[1]: *** [all-recursive] Error 1
make[1]: Leaving directory `/data/soft/memcached-1.2.8-repcached-2.2.1‘
make: *** [all] Error 2
#解决,删除57和60行这个
[root@localhost memcached-1.2.8-repcached-2.2.1]# vim memcached.c
#if defined(__FreeBSD__) || defined(__APPLE__)
#endif

#验证是否可执行,-x为对方主的ip地址,-X为数据库同步端口
#server1操作
[root@localhost ~]# /data/tools/repcached/bin/memcached -d -m 11211 -u root -c 2048 -x 192.168.100.12 -X 16000
[root@localhost ~]# ss -tln
State       Recv-Q Send-Q                                      Local Address:Port                                                     Peer Address:Port
LISTEN      0      128                                                     *:11211                                                               *:*
LISTEN      0      128                                                     *:6379                                                                *:*
LISTEN      0      128                                                     *:6380                                                                *:*
LISTEN      0      128                                                     *:22                                                                  *:*
LISTEN      0      128                                                     *:16379                                                               *:*
LISTEN      0      128                                                     *:16380                                                               *:*
LISTEN      0      128                                                     *:16000                                                               *:*
LISTEN      0      128                                                    :::11211                                                              :::*
LISTEN      0      128                                                    :::22                                                                 :::*

#server2操作
[root@localhost ~]# /data/tools/repcached/bin/memcached -d -m 11211 -u root -c 2048 -x 192.168.100.11 -X 16000
[root@localhost ~]# ss -tln
State       Recv-Q Send-Q                                      Local Address:Port                                                     Peer Address:Port
LISTEN      0      128                                                     *:11211                                                               *:*
LISTEN      0      128                                                     *:6379                                                                *:*
LISTEN      0      128                                                     *:6380                                                                *:*
LISTEN      0      128                                                     *:22                                                                  *:*
LISTEN      0      128                                                     *:16379                                                               *:*
LISTEN      0      128                                                     *:16380                                                               *:*
LISTEN      0      128                                                     *:16000                                                               *:*
LISTEN      0      128                                                    :::11211                                                              :::*
LISTEN      0      128                                                    :::22

#验证
#server1操作,连接server2的服务器
[root@localhost ~]# yum -y install telnet
[root@localhost ~]# telnet 192.168.100.11 11211
Trying 192.168.100.11...
Connected to 192.168.100.11.
Escape character is ‘^]‘.
set name 0 0 4
jack
STORED
stored
ERROR
get name
VALUE name 0 4
jack
END
quit

#server1上查看数据是否同步
[root@localhost ~]# telnet 192.168.100.11 11211
Trying 192.168.100.11...
Connected to 192.168.100.11.
Escape character is ‘^]‘.
get name
END
set name 0 0 4
jack
STORED
get name
VALUE name 0 4
jack
END
quit
Connection closed by foreign host.
[root@localhost ~]# telnet 192.168.100.12 11211
Trying 192.168.100.12...
Connected to 192.168.100.12.
Escape character is ‘^]‘.
get name
VALUE name 0 4
jack
END
quit
Connection closed by foreign host.
可以看到memcached高可用正常
基于vmware workstation虚拟机运行vmware esxi,安装两台esxi服务器,IP地址分为是192.168.126.128/129
稍后指定操作系统

选择esxi版本(因为我们装的是7.0没有,所以就选择了6.x)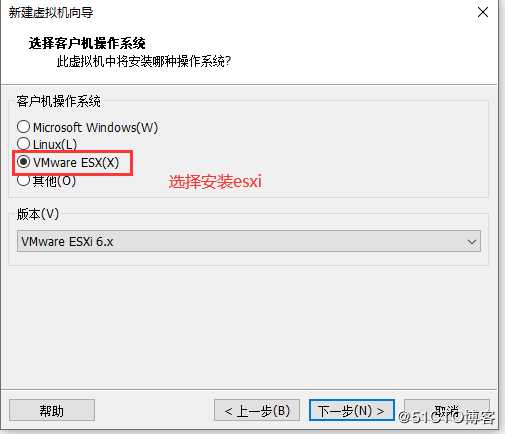
选择保存的位置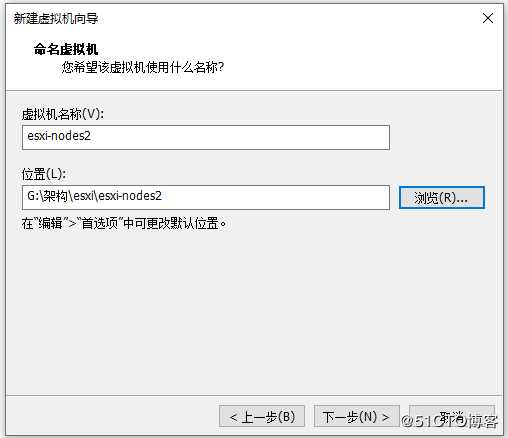
选择磁盘容量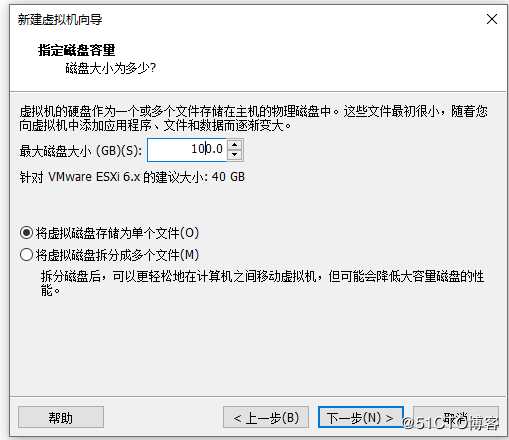
自定义硬件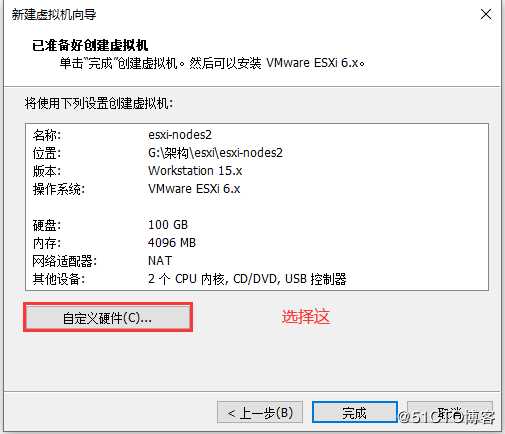
配置内存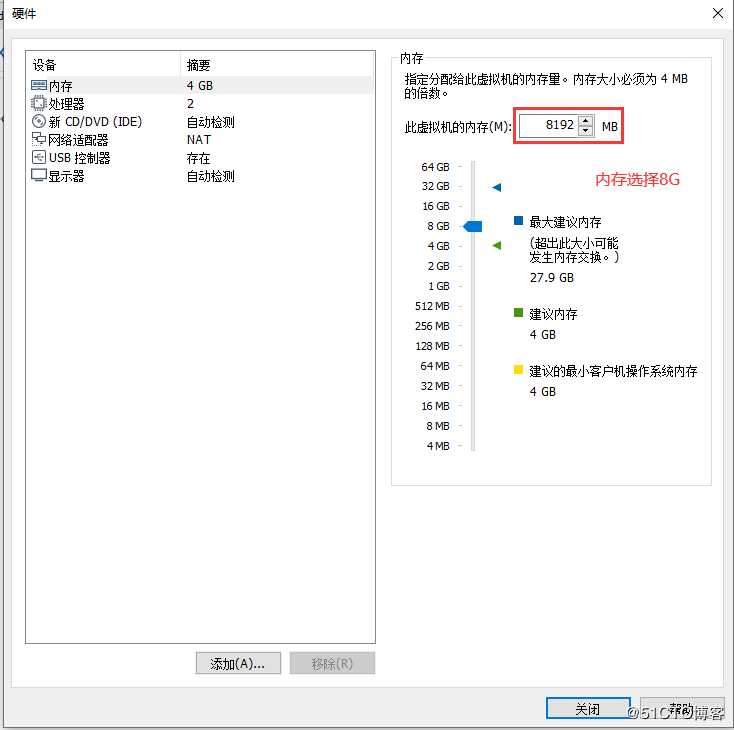
配置处理器数量,开启虚拟化(不开启后期会报错)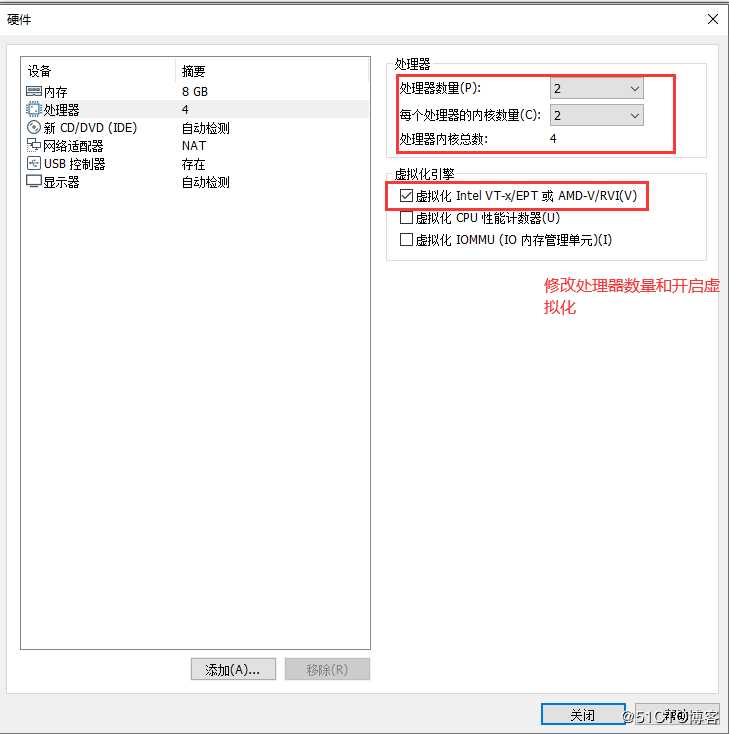
选择镜像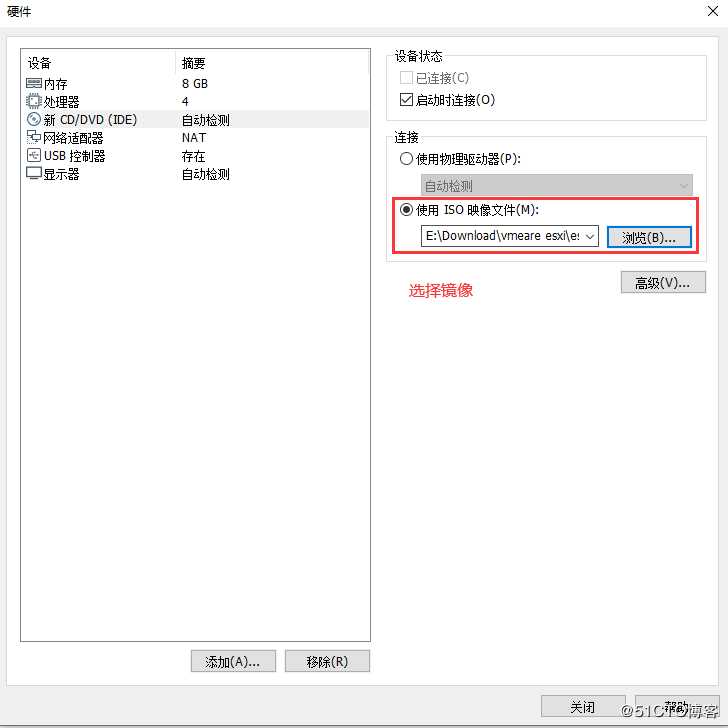
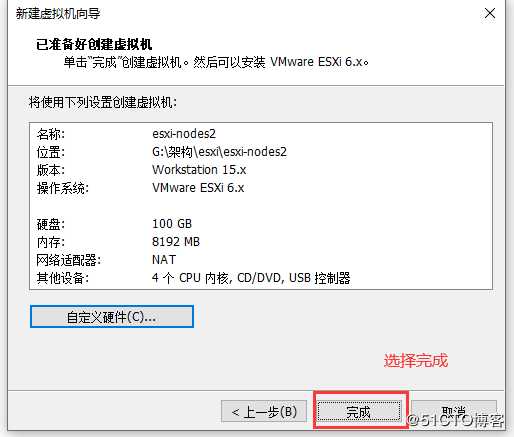
开始安装esxi节点
加载内核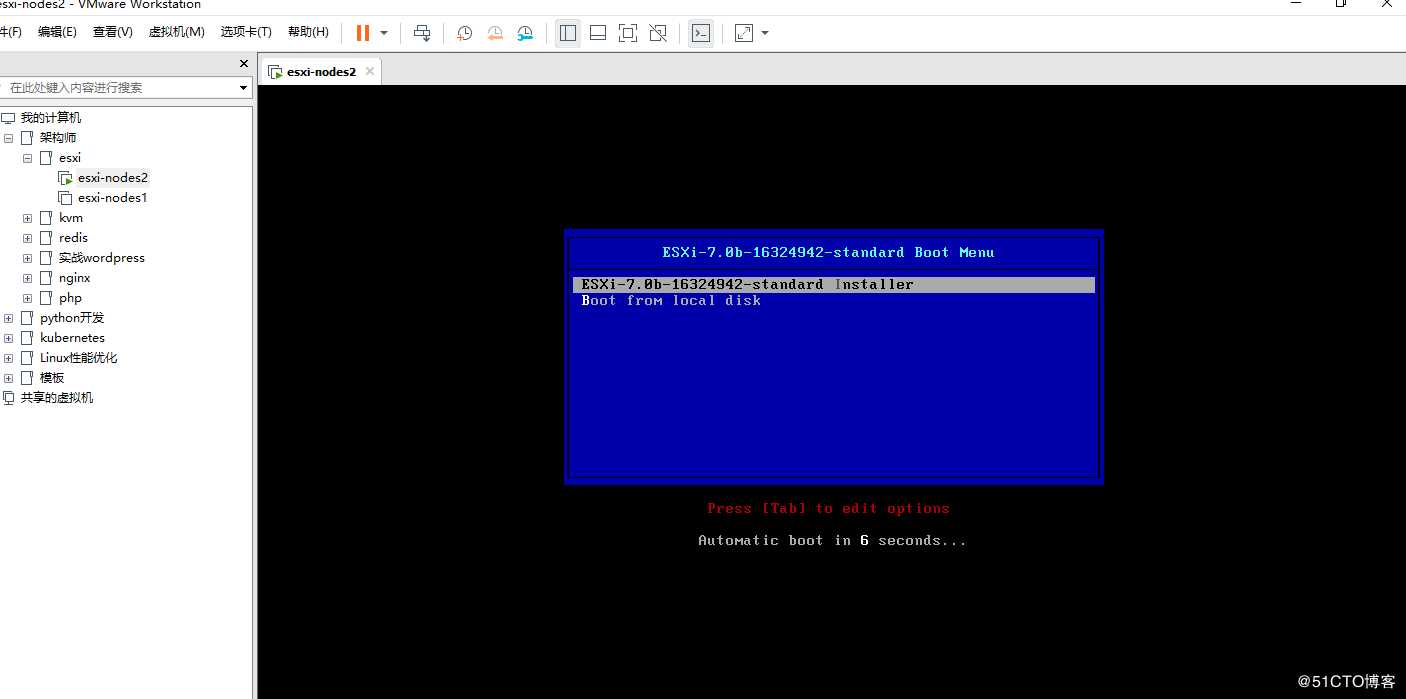
加载驱动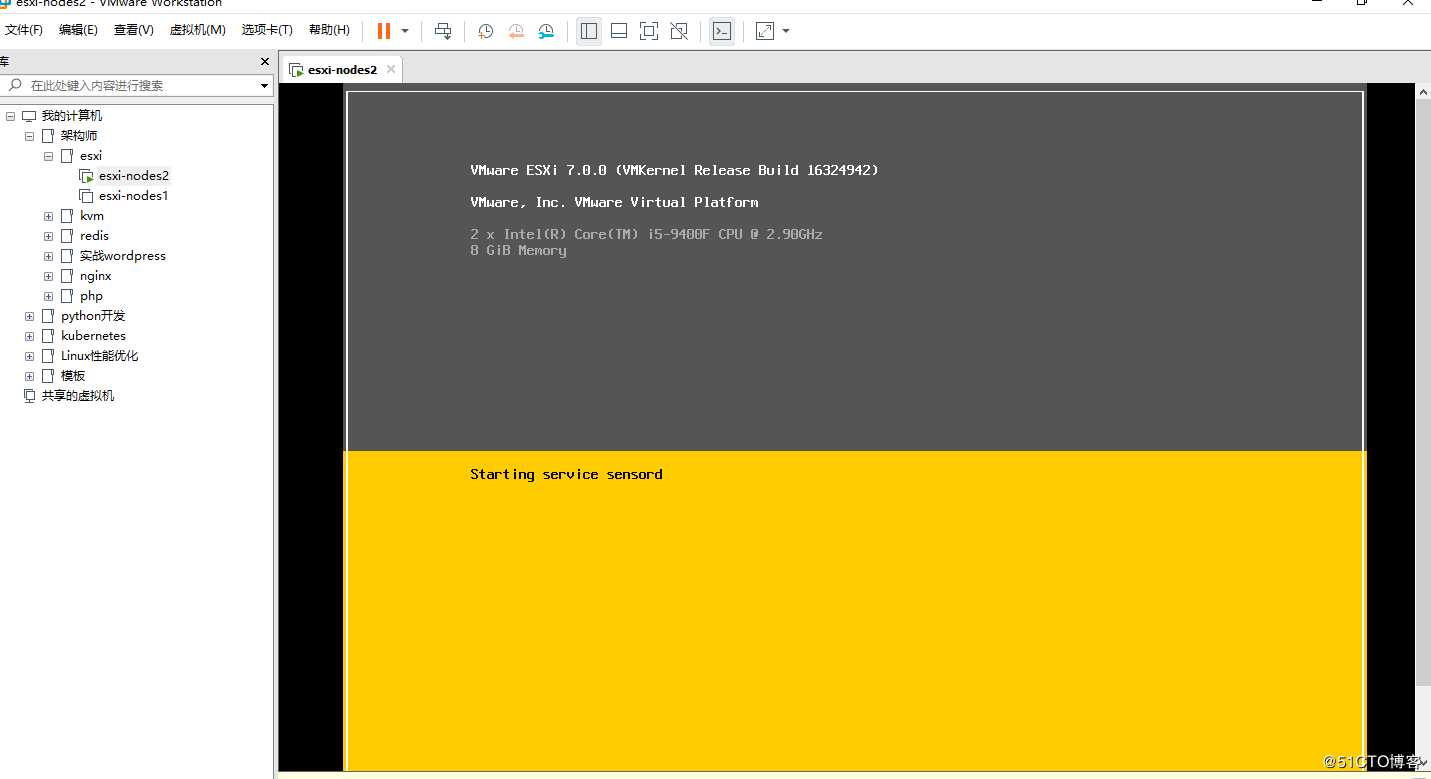
确认安装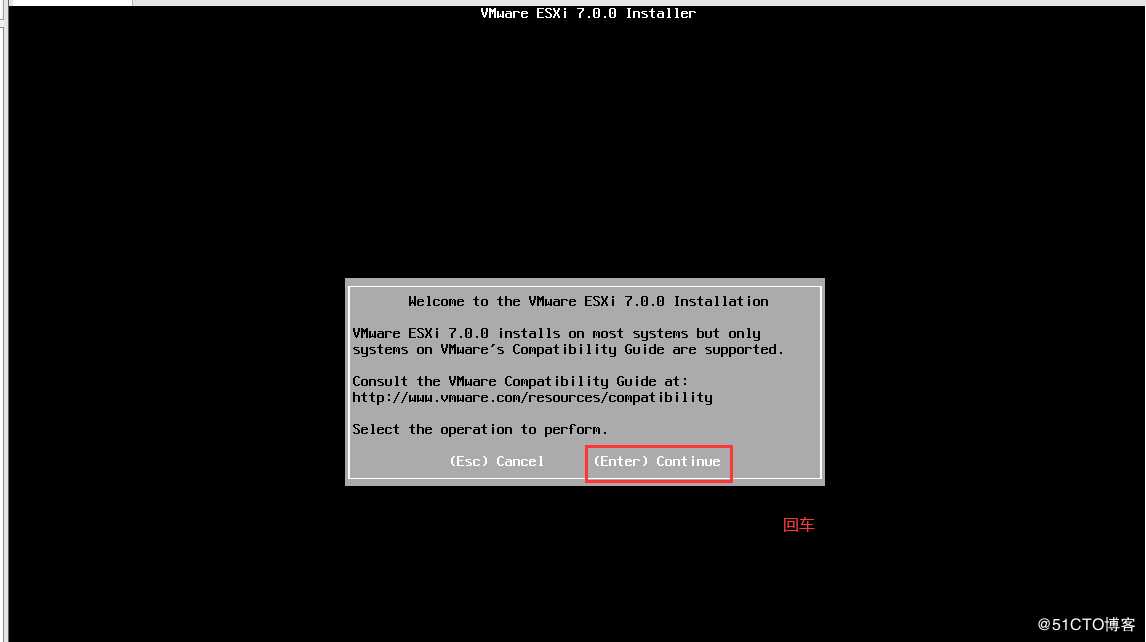
同意协议,按F11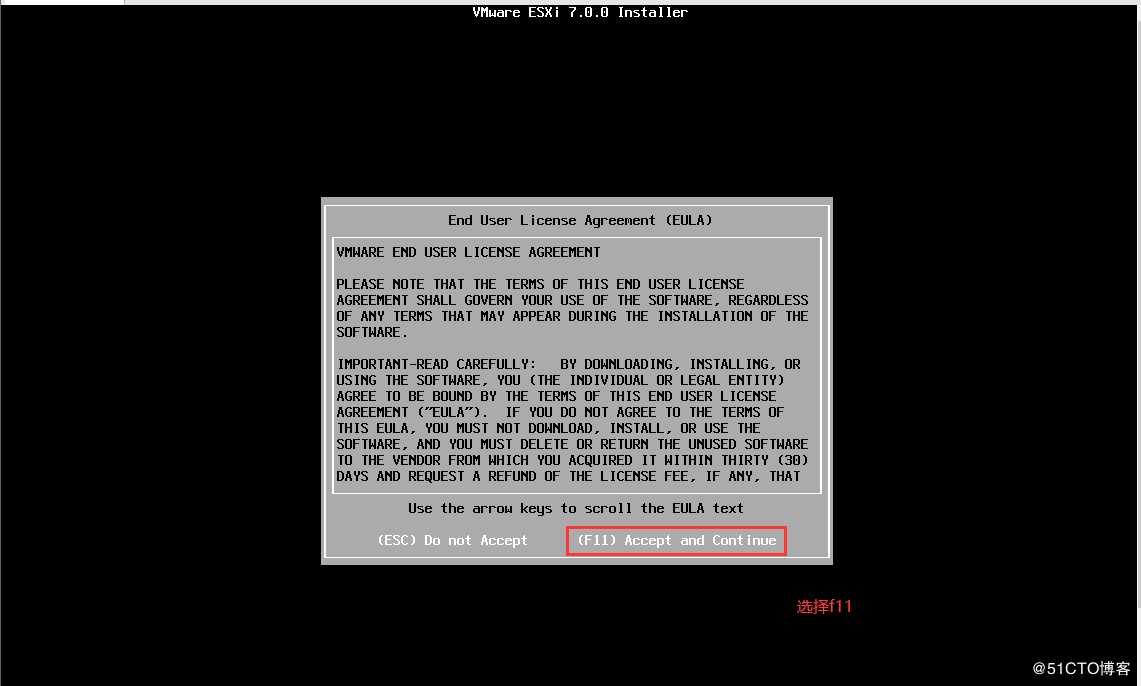
扫描可用硬盘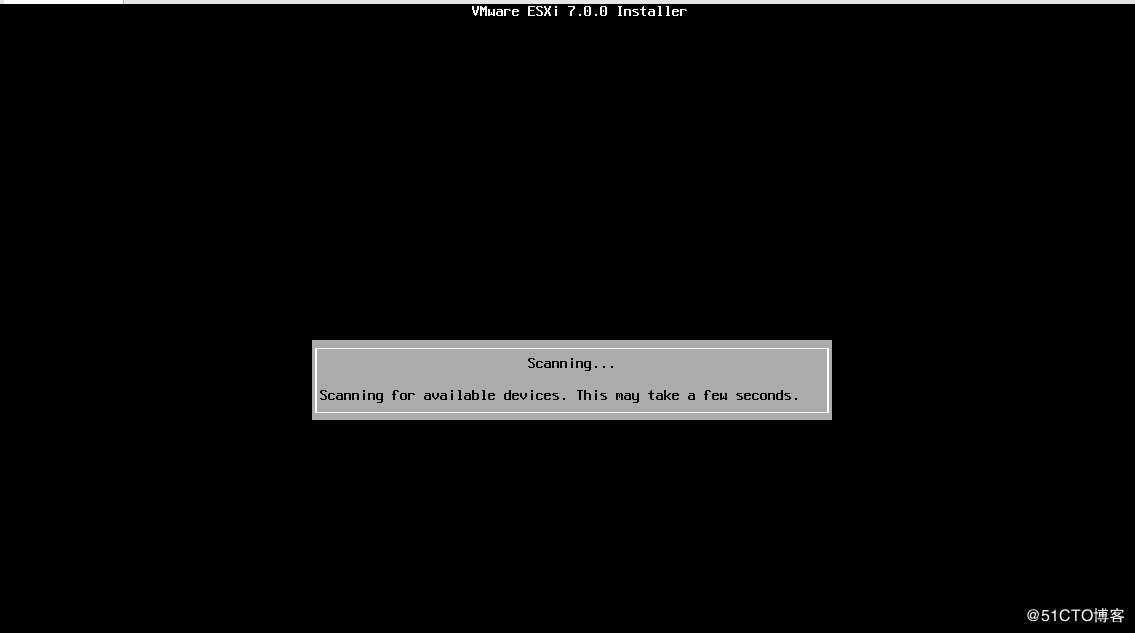
选择硬盘并安装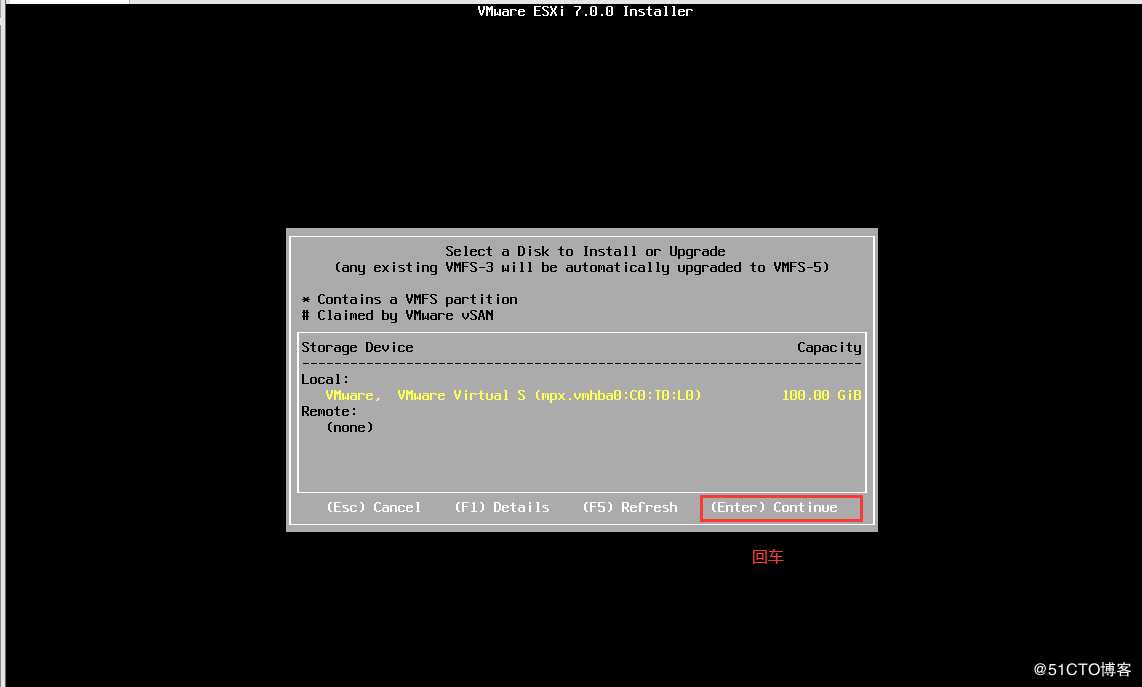
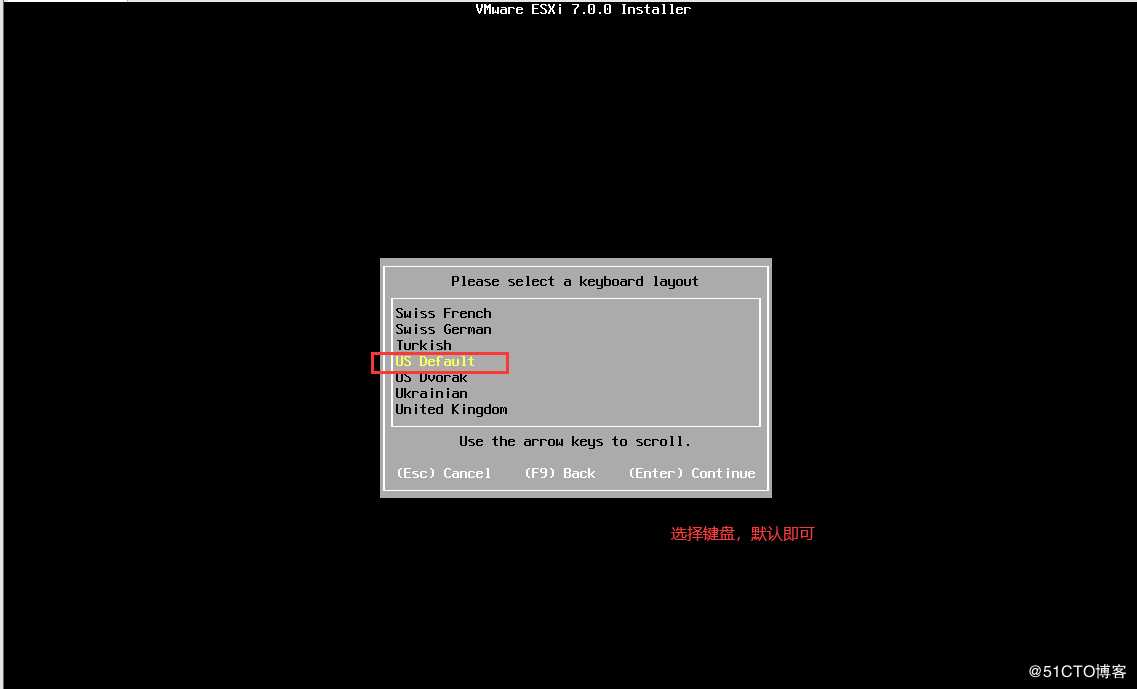
设置管理员密码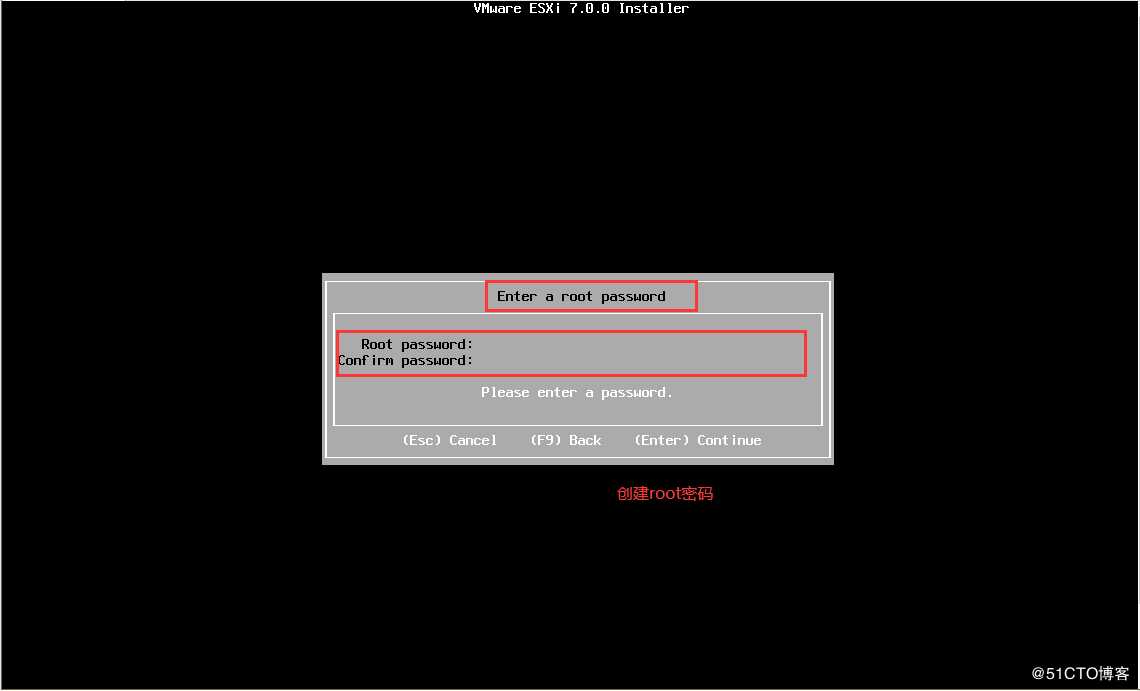
开始安装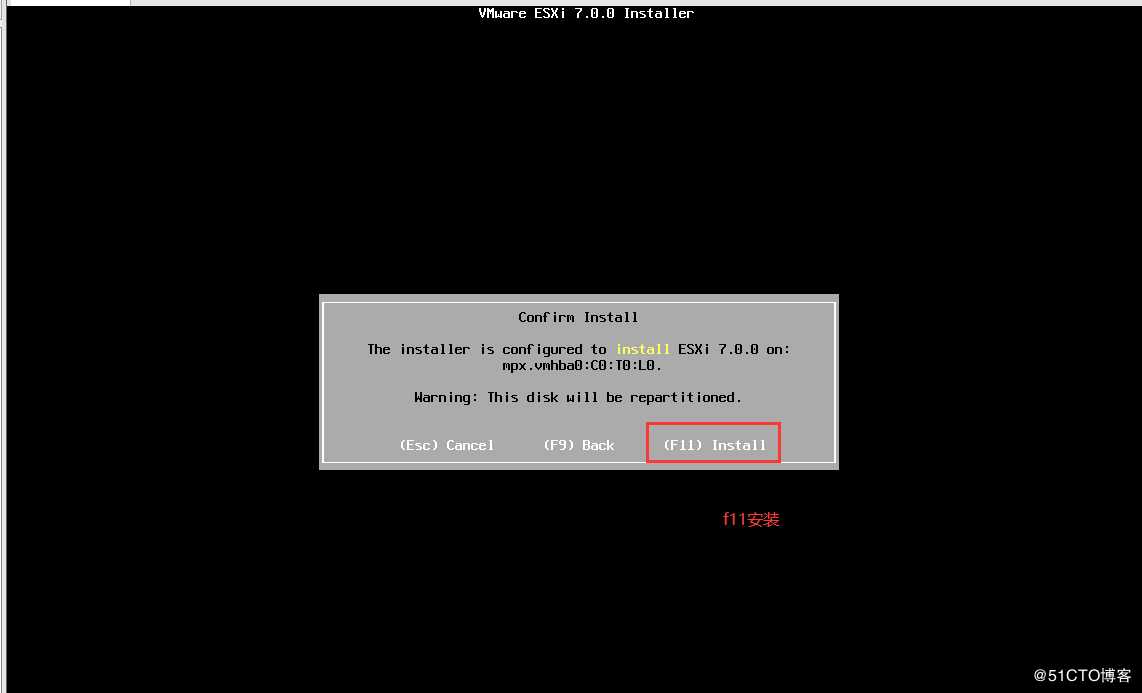
安装过程中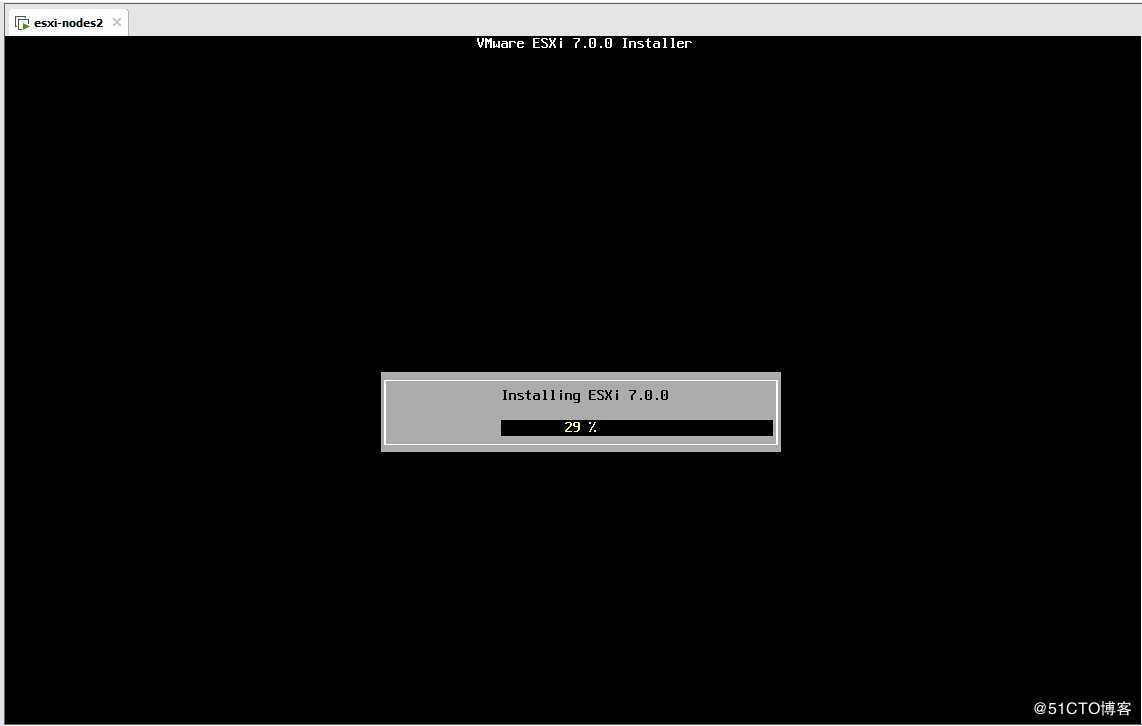
安装完成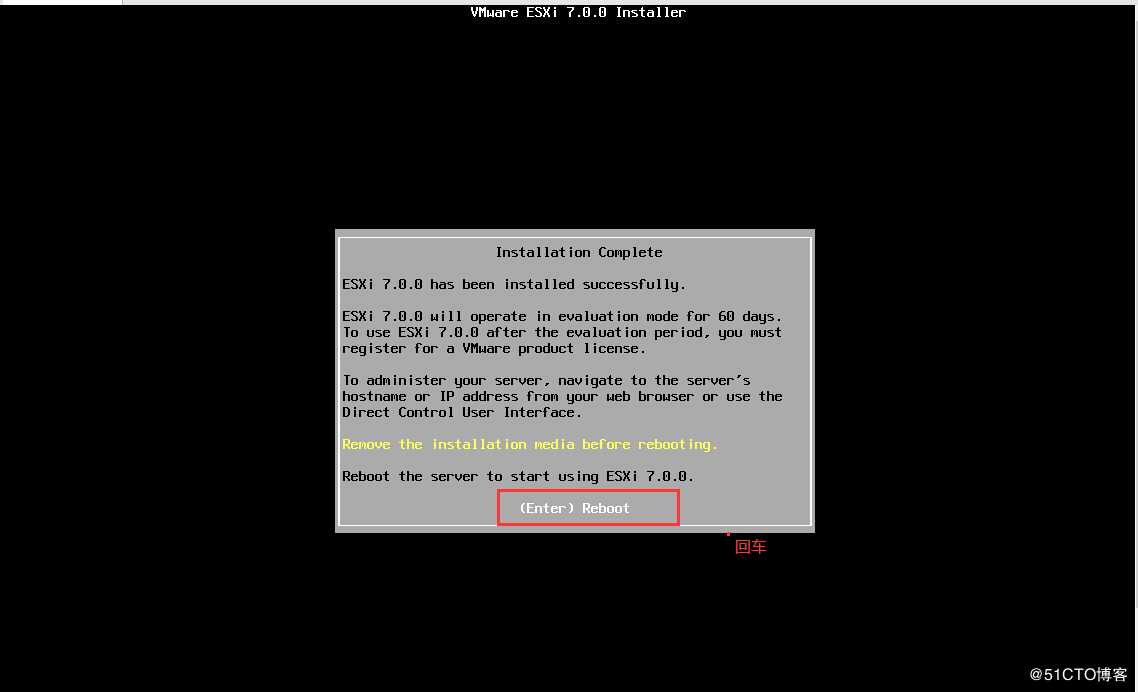
配置IP地址:将服务器配置为静态IP地址,当前为DHCP获取的IP地址。
配置界面进程登录,按F2进行登录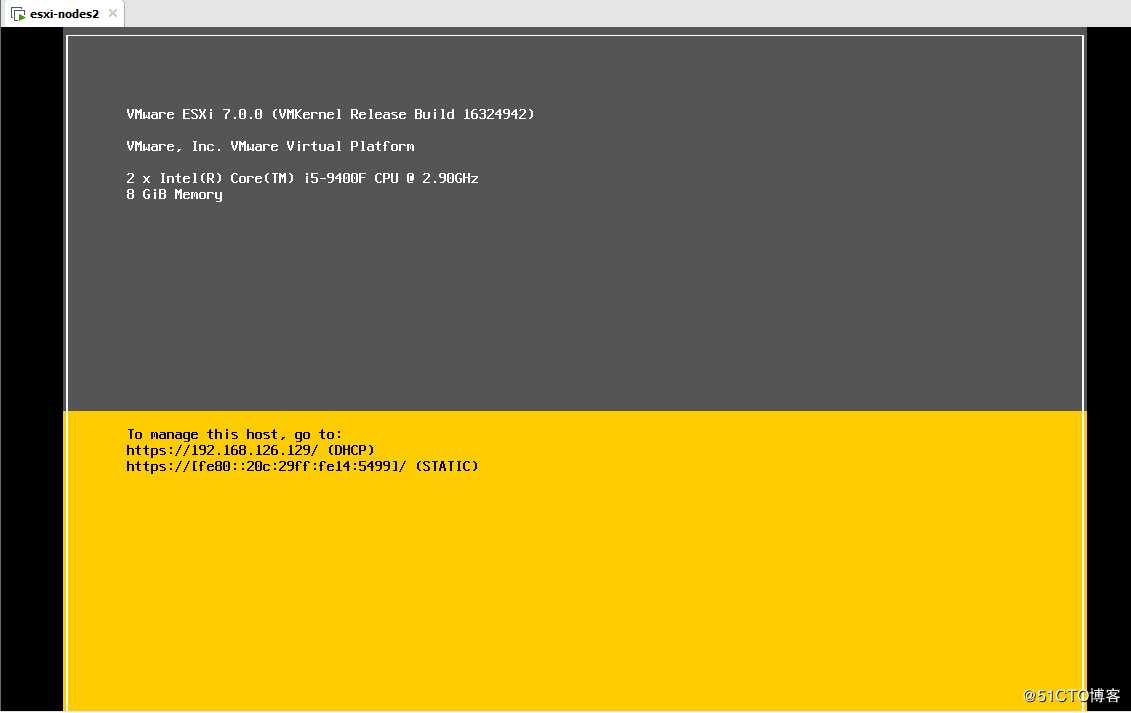
登录服务器
输入安装过程中管理员密码,管理员账号为root,密码为安装过程中设置的密码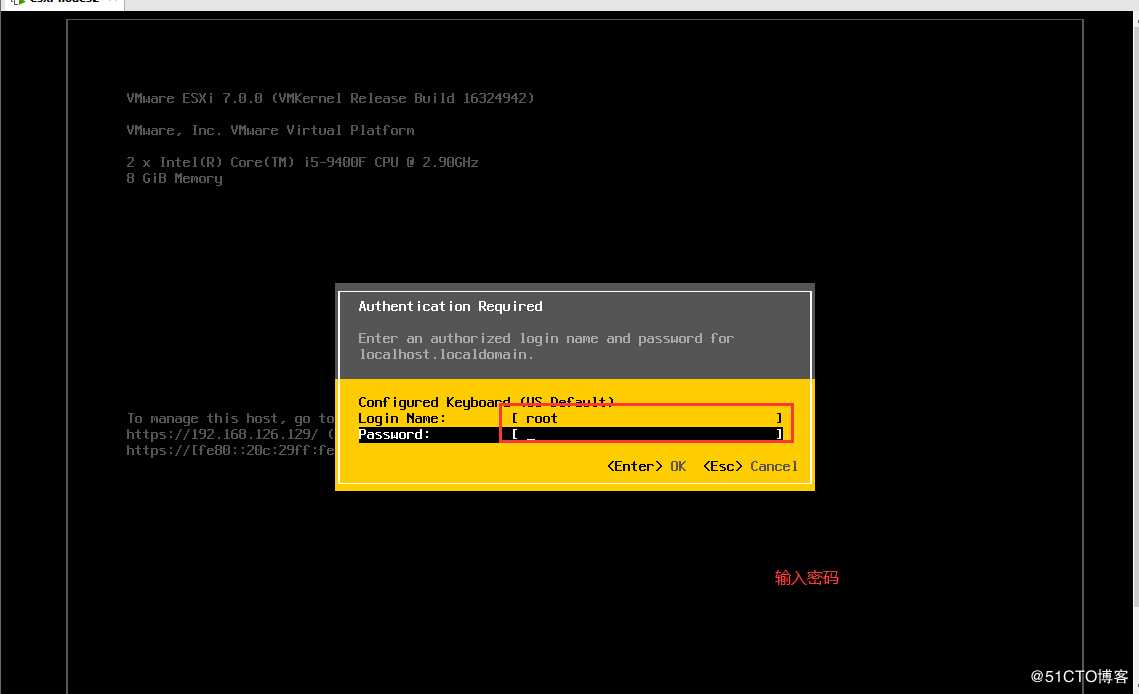
配置静态IP地址:
当前为DHCP获取的IP地址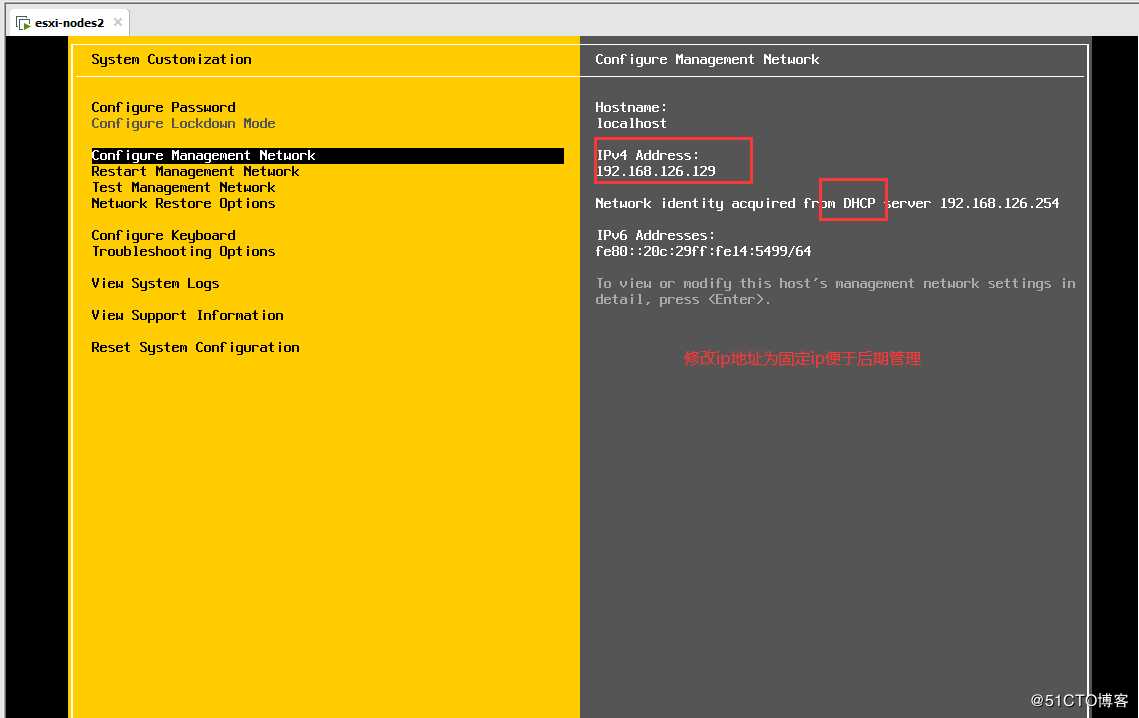
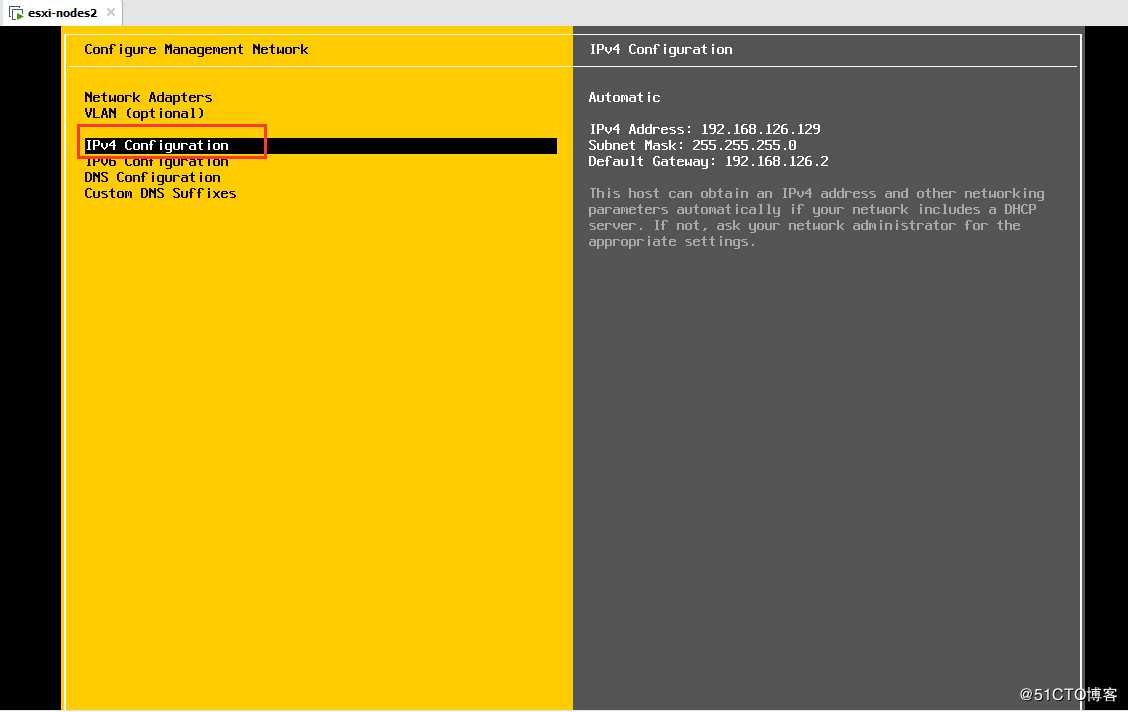
更改IP地址为静态IP地址、配置DNS并重启网络服务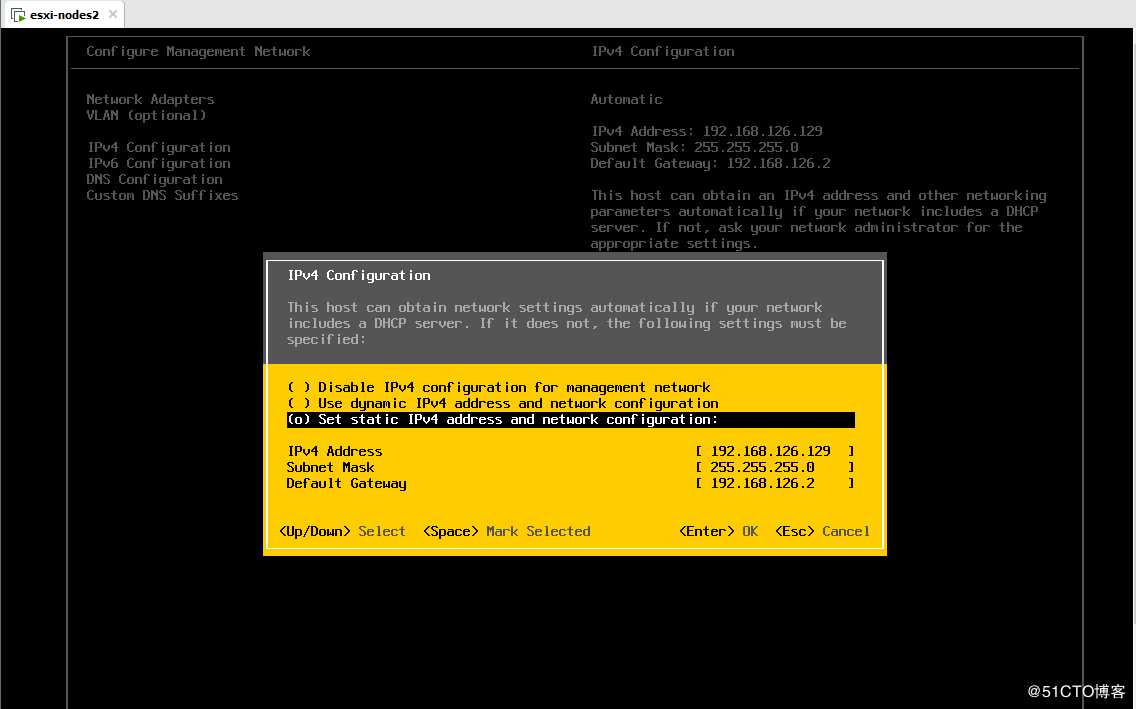
输入Y保存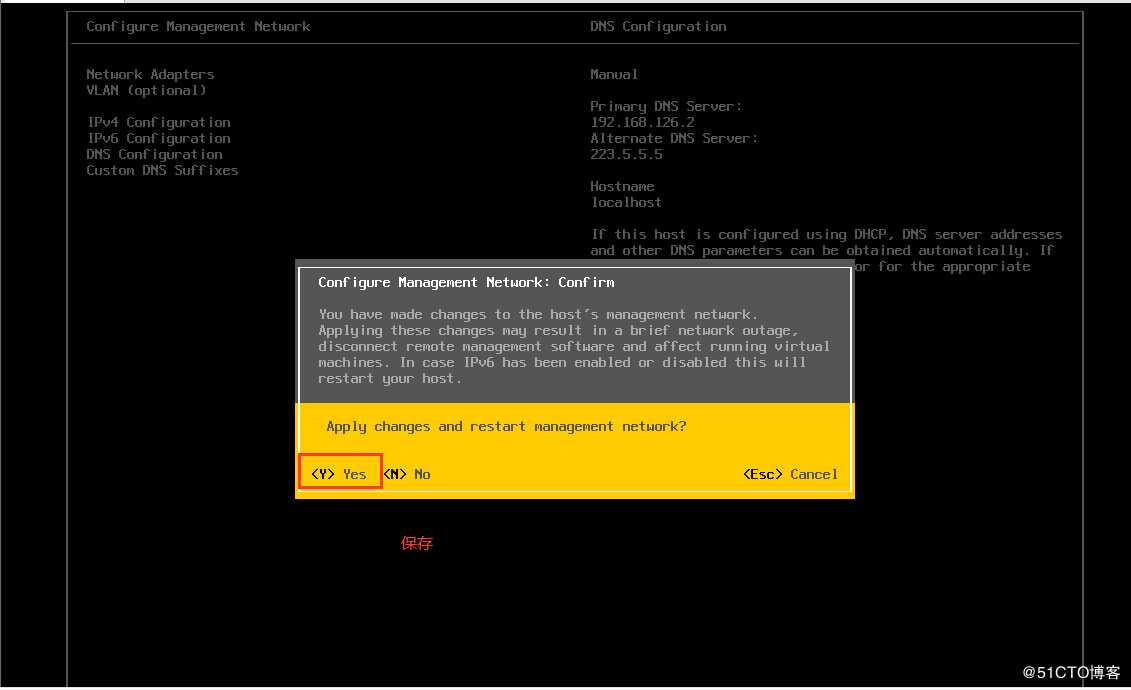
至此vmware esxi安装和配置基本完成。
redis集群、memcached高可用、vmware esxi
标签:开始 bind vmw mod The tab 协议 ast 管理员
原文地址:https://blog.51cto.com/546700/2508835