标签:input 项目 inpu utils 没有 patch 转换 ram 配置
新建项目,使用dao层模拟数据库
利用thymeleaf引擎模板语法实现首页功能
引入依赖
xmlns:th="http://www.thymeleaf.org"
<!DOCTYPE html>
<html lang="en" xmlns:th="http://www.thymeleaf.org">
<head>
    <meta charset="UTF-8">
    <title>Login</title>
    <link rel="stylesheet" type="text/css" th:href="@{/css/login.css}"/>
</head>
<body>
<div id="login">
    <h1>登录</h1>
    <form>
        <input type="text" required="required" placeholder="用户名" name="u"></input>
        <input type="password" required="required" placeholder="密码" name="p"></input>
        <button class="but" type="submit">请登录</button>
    </form>
</div>
</body>
</html>
1.将idea设置为UTF-8编码,否者会乱码
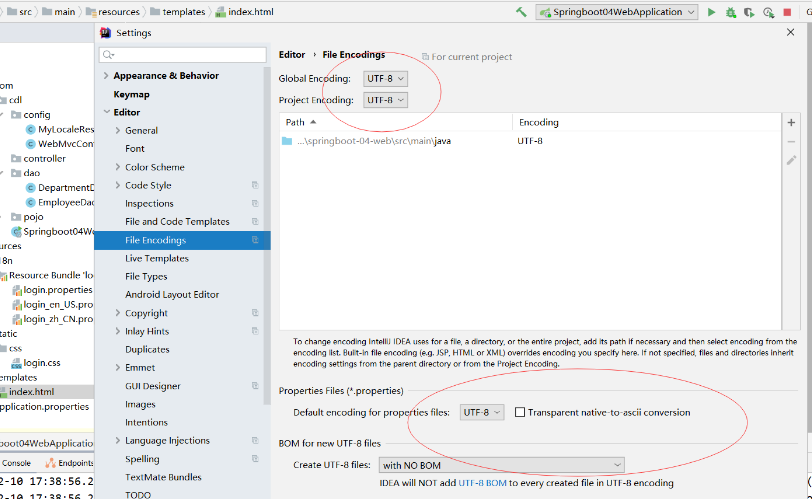
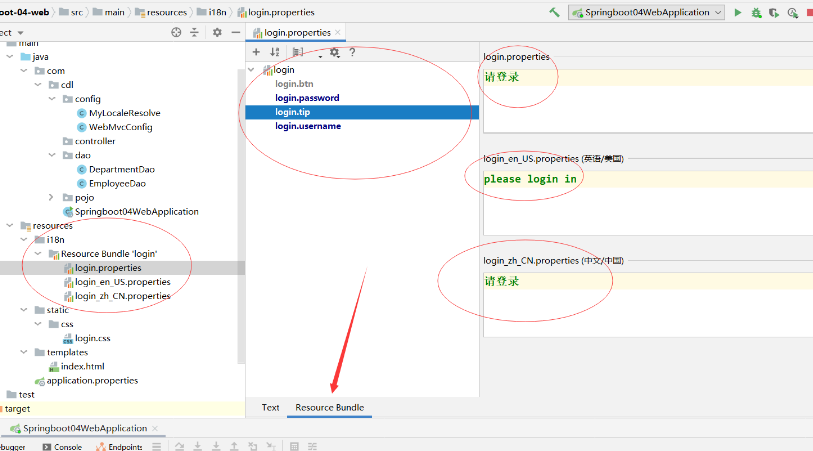
2.新建i18n(internationalization的缩写,例如k8s,kubernetes)文件夹,然后在i18n文件夹下新建国际化文件夹,并赋值
3.编写配置类,实现LocaleResolver接口,用于国际化语法转换
public class MyLocaleResolve implements LocaleResolver {
    @Override
    public Locale resolveLocale(HttpServletRequest httpServletRequest) {
        //获取前端传过来的参数
        String langusge = httpServletRequest.getParameter("l");
        //获取本地默认区域信息,如果没有就是用默认的
        Locale locale = Locale.getDefault();
        if (!StringUtils.isEmpty(langusge)){
            //截取字符串:zh_CN,s[0]获取语言代码,s[1]获取国家代码
            String[] s = langusge.split("_");
            //根据传过来的参数值渲染界面
            locale = new Locale(s[0],s[1]);
        }
        return locale;
    }

    @Override
    public void setLocale(HttpServletRequest httpServletRequest, HttpServletResponse httpServletResponse, Locale locale) {

    }
}
4.在WebMvcConfig配置类中将国际化配置注册到springboot中
//注册国家化bean语法转换
    @Bean
    public LocaleResolver localeResolver() {
        return new MyLocaleResolve();
    }
5.编写前端页面,结合thymeleaf
<!DOCTYPE html>
<html lang="en" xmlns:th="http://www.thymeleaf.org">
<head>
<meta charset="UTF-8">
<title>Login</title>
<link rel="stylesheet" type="text/css" th:href="@{/css/login.css}"/>
</head>
<body>
<div id="login">
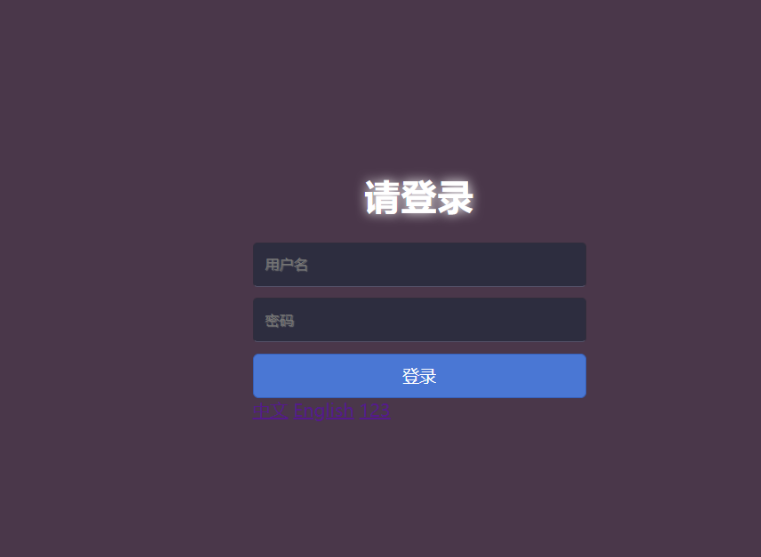
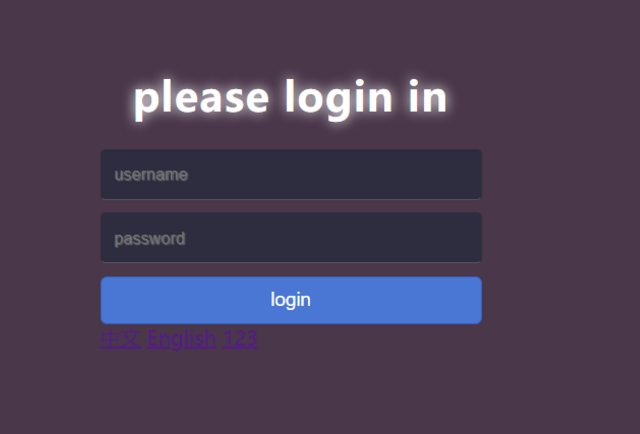
<h1>[[#{login.tip}]]</h1>
<form>
<input type="text" required="required" th:placeholder="#{login.username}" name="u"></input>
<input type="password" required="required" th:placeholder="#{login.password}" name="p"></input>
<button class="but" type="submit">[[#{login.btn}]]</button>
</form>
<a th:href="@{/(l=‘zh_CN‘)}">中文</a>
<a th:href="@{/(l=‘en_US‘)}">English</a>
<a href="">123</a>
</div>
</body>
</html>
@Controller
public class LoginController {

    @RequestMapping("user/login")
    public String login(String username, String password, Model model){
        if(username.equals("cdl") && password.equals("123456")){
            return "redirect:/main.html";
        }else{
            model.addAttribute("msg","用户名或密码错误");
            return "index";
        }
    }
}
在请求跳转页面,使用/main.html重定向到dashboard页面,实现url隐藏账号密码
registry.addViewController("/main.html").setViewName("dashboard");
新建文件,利用session判断用户是否登录
/**
 * @Author CDL
 * @Date 2020/12/11 10:12
 * @Desc 拦截器
 * @Version 1.0.
 */
public class LoginHandlerInterceptor implements HandlerInterceptor {
    @Override
    public boolean preHandle(HttpServletRequest request, HttpServletResponse response, Object handler) throws Exception {
        //登录成功之后,应该拥有session,如果没有登录成功,说明没有session
        Object loginUser = request.getSession().getAttribute("loginUser");
        if(loginUser == null){
            request.setAttribute("msg","没有权限");
            request.getRequestDispatcher("/index.html").forward(request,response);
            //返回true登录成功,返回false登陆失败
            return false;
        }else {
            return true;
        }
    }
}
在登陆成功时候,设置session
session.setAttribute("loginUser",username);
在配置文件中注册,并放过不需要拦截的文件即可
 //注册拦截器
    @Override
    public void addInterceptors(InterceptorRegistry registry) {
        registry.addInterceptor(new LoginHandlerInterceptor()).excludePathPatterns("/index.html","/",
                "/user/login","/css/*","/js/*","/lib/*");
    }
九大作用域https://blog.csdn.net/qq_26869339/article/details/82747996
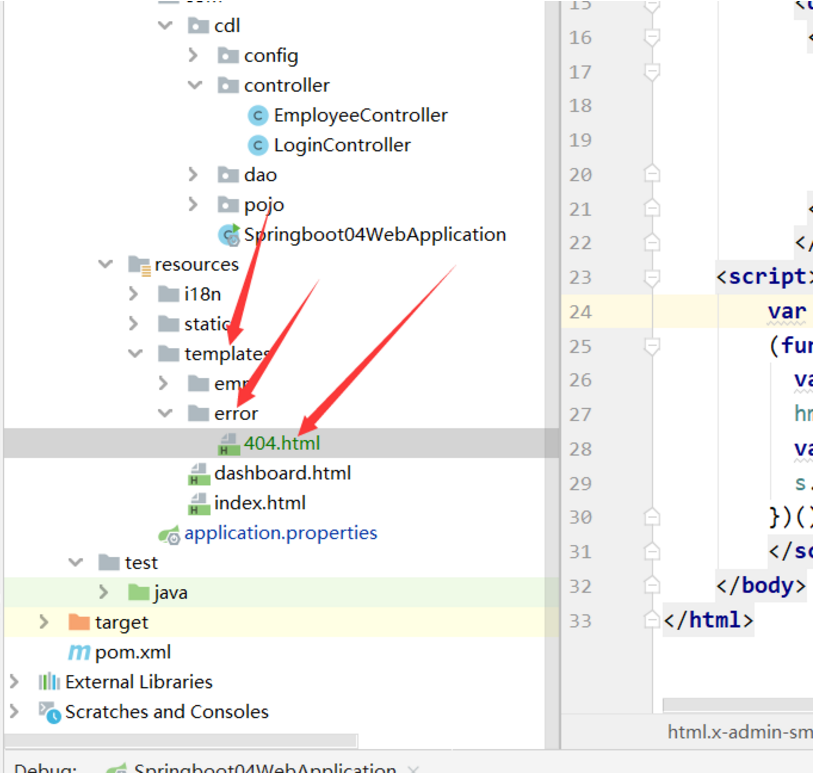
springboot处理404非常简单:只需要在templates文件夹下新建一个error文件夹,然后在error文件夹下新建404.html的文件即可,不需要其他任何操作
标签:input 项目 inpu utils 没有 patch 转换 ram 配置
原文地址:https://www.cnblogs.com/cdlszl/p/14192105.html