标签:info tor lin ring not included list option lib
|
IP地址 |
主机名 |
节点 |
|
172.16.51.29 |
mall |
单节点服务器 |
使用VMWare Workstation软件安装CentOS 7.2操作系统,镜像使用提供的CentOS-7-x86_64-DVD-1511.iso,最小化安装CentOS 7.2系统,YUM源使用提供的本地gpmall-repo包(在项目3-软件包/商城系统-单节点中),安装基础环境。
修改主机名命令如下所示:
[root@localhost ~]# hostnamectl set-hostname mall
[root@mall ~]# hostnamectl
Static hostname: mall
Icon name: computer-vm
Chassis: vm
Machine ID: dae72fe0cc064eb0b7797f25bfaf69df
Boot ID: af0da0209e864a9badd064fcc9ad7b0e
Virtualization: kvm
Operating System: CentOS Linux 7 (Core)
CPE OS Name: cpe:/o:centos:centos:7
Kernel: Linux 3.10.0-229.el7.x86_64
Architecture: x86_64
修改/etc/hosts配置文件如下:
[root@mall ~]# cat /etc/hosts
127.0.0.1 localhost localhost.localdomain localhost4 localhost4.localdomain4
::1 localhost localhost.localdomain localhost6 localhost6.localdomain6
172.16.51.29 mall
将提供的packages包上传到服务器的/root目录下,并配置本地local.repo文件,具体代码如下所示。(若使用的是VMware安装的CentOS 7.2系统,自带的CentOS.repo文件不要移除。若使用的是OpenStack中的centos7.2qcow2镜像需要将自带的CentOS.repo文件移除。)
|
[root@mall ~]# cat /etc/yum.repos.d/local.repo [mall] name=mall baseurl=file:///root/gpmall-repo gpgcheck=0 enabled=1 |
安装基础服务,包括Java JDK环境、数据库、Redis、Nginx等,安装基础服务的命令具体如下。
|
[root@mall ~]# yum install -y java-1.8.0-openjdk java-1.8.0-openjdk-devel ... [root@mall ~]# java -version openjdk version "1.8.0_222" OpenJDK Runtime Environment (build 1.8.0_222-b10) OpenJDK 64-Bit Server VM (build 25.222-b10, mixed mode) |
|
[root@mall ~]# yum install redis -y |
|
[root@mall ~]# yum install elasticsearch -y |
|
[root@mall ~]# yum install nginx -y |
|
[root@mall ~]# yum install mariadb mariadb-server -y |
将提供的zookeeper-3.4.14.tar.gz上传至云主机的/opt内,解压压缩包命令如下:
[root@mall ~]# tar -zxvf zookeeper-3.4.14.tar.gz
进入到zookeeper-3.4.14/conf目录下,将zoo_sample.cfg文件重命名为zoo.cfg,命令如下:
[root@mall conf]# mv zoo_sample.cfg zoo.cfg
进入到zookeeper-3.4.14/bin目录下,启动ZooKeeper服务,命令如下:
[root@mall bin]# ./zkServer.sh start
ZooKeeper JMX enabled by default
Using config: /root/zookeeper-3.4.14/bin/../conf/zoo.cfg
Starting zookeeper ... STARTED
查看ZooKeeper状态,命令如下:
[root@mall bin]# ./zkServer.sh status
ZooKeeper JMX enabled by default
Using config: /root/zookeeper-3.4.14/bin/../conf/zoo.cfg
Mode: standalone
将提供的kafka_2.11-1.1.1.tgz包上传到云主机的/opt目录下,解压该压缩包,命令如下:
tar -zxvf kafka_2.11-1.1.1.tgz
进入到kafka_2.11-1.1.1/bin目录下,启动Kafka服务,命令如下:
[root@mall bin]# ./kafka-server-start.sh -daemon ../config/server.properties
使用jps或者netstat –ntpl命令查看Kafka是否成功启动,命令如下:
[root@mall bin]# jps
6039 Kafka
1722 QuorumPeerMain
6126 Jps
[root@mall bin]# netstat -ntpl
Active Internet connections (only servers)
Proto Recv-Q Send-Q Local Address Foreign Address State PID/Program name
tcp 0 0 0.0.0.0:22 0.0.0.0:* LISTEN 1008/sshd
tcp 0 0 127.0.0.1:25 0.0.0.0:* LISTEN 887/master
tcp6 0 0 :::9092 :::* LISTEN 6039/java
tcp6 0 0 :::46949 :::* LISTEN 6039/java
tcp6 0 0 :::2181 :::* LISTEN 1722/java
tcp6 0 0 :::48677 :::* LISTEN 1722/java
tcp6 0 0 :::22 :::* LISTEN 1008/sshd
tcp6 0 0 ::1:25 :::* LISTEN 887/master
运行结果查看到Kafka服务和9092端口,说明Kafka服务已启动。
修改数据库配置文件并启动MariaDB数据库,设置root用户密码为123456,并创建gpmall数据库,将提供的gpmall.sql导入。
修改/etc/my.cnf文件,添加字段如下所示:
#
# This group is read both both by the client and the server
# use it for options that affect everything
#
[client-server]
#
# include all files from the config directory
#
!includedir /etc/my.cnf.d
[mysqld]
init_connect=‘SET collation_connection = utf8_unicode_ci‘
init_connect=‘SET NAMES utf8‘
character-set-server=utf8
collation-server=utf8_unicode_ci
skip-character-set-client-handshake
启动数据库命令如下。
|
[root@mall ~]# systemctl start mariadb |
设置root用户的密码为123456并登录。
|
[root@mall ~]# mysql_secure_installation /usr/bin/mysql_secure_installation: line 379: find_mysql_client: command not found NOTE: RUNNING ALL PARTS OF THIS SCRIPT IS RECOMMENDED FOR ALL MariaDB SERVERS IN PRODUCTION USE! PLEASE READ EACH STEP CAREFULLY! In order to log into MariaDB to secure it, we‘ll need the current password for the root user. If you‘ve just installed MariaDB, and you haven‘t set the root password yet, the password will be blank, so you should just press enter here. Enter current password for root (enter for none): #默认按回车 OK, successfully used password, moving on... Setting the root password ensures that nobody can log into the MariaDB root user without the proper authorisation. Set root password? [Y/n] y New password: #输入数据库root密码123456 Re-enter new password: #重复输入密码123456 Password updated successfully! Reloading privilege tables.. ... Success! By default, a MariaDB installation has an anonymous user, allowing anyone to log into MariaDB without having to have a user account created for them. This is intended only for testing, and to make the installation go a bit smoother. You should remove them before moving into a production environment. Remove anonymous users? [Y/n] y ... Success! Normally, root should only be allowed to connect from ‘localhost‘. This ensures that someone cannot guess at the root password from the network. Disallow root login remotely? [Y/n] n ... skipping. By default, MariaDB comes with a database named ‘test‘ that anyone can access. This is also intended only for testing, and should be removed before moving into a production environment. Remove test database and access to it? [Y/n] y - Dropping test database... ... Success! - Removing privileges on test database... ... Success! Reloading the privilege tables will ensure that all changes made so far will take effect immediately. Reload privilege tables now? [Y/n] y ... Success! Cleaning up... All done! If you‘ve completed all of the above steps, your MariaDB installation should now be secure. Thanks for using MariaDB! [root@mall ~]# mysql -uroot –p123456 Welcome to the MariaDB monitor. Commands end with ; or \g. Your MariaDB connection id is 9 Server version: 10.3.18-MariaDB MariaDB Server
Copyright (c) 2000, 2018, Oracle, MariaDB Corporation Ab and others.
Type ‘help;‘ or ‘\h‘ for help. Type ‘\c‘ to clear the current input statement.
MariaDB [(none)]> |
设置root用户的权限,命令如下:
MariaDB [(none)]> grant all privileges on *.* to root@localhost identified by ‘123456‘ with grant option;
Query OK, 0 rows affected (0.001 sec)
MariaDB [(none)]> grant all privileges on *.* to root@"%" identified by ‘123456‘ with grant option;
Query OK, 0 rows affected (0.001 sec)
将gpmall.sql文件上传至云主机的/root目录下。创建数据库gpmall并导入gpmall.sql文件。
|
MariaDB [(none)]> create database gpmall; Query OK, 1 row affected (0.00 sec) MariaDB [(none)]> use gpmall; MariaDB [mall]> source /root/gpmall.sql |
退出数据库并设置开机自启。
|
MariaDB [mall]> Ctrl-C -- exit! Aborted [root@mall ~]# systemctl enable mariadb Created symlink from /etc/systemd/system/multi-user.target.wants/mariadb.service to /usr/lib/systemd/system/mariadb.service. |
修改Redis配置文件,编辑/etc/redis.conf文件。
将bind 127.0.0.1这一行注释掉;将protected-mode yes 改为 protected-mode no。
启动Redis服务命令如下。
|
[root@mall ~]# systemctl start redis [root@mall ~]# systemctl enable redis Created symlink from /etc/systemd/system/multi-user.target.wants/redis.service to /usr/lib/systemd/system/redis.service. |
配置Elasticsearch服务命令如下:
[root@mall ~]# vi /etc/elasticsearch/elasticsearch.yml
在文件最上面加入3条语句如下:
http.cors.enabled: true
http.cors.allow-origin: "*"
http.cors.allow-credentials: true
将如下4条语句前的注释符去掉,并修改network.host的IP为本机IP。
cluster.name: my-application
node.name: node-1
network.host: 172.16.51.29
http.port: 9200
最后修改完之后保存退出。然后启动Elasticsearch并设置开机自启,命令如下。
|
[root@mall ~]# systemctl start elasticsearch [root@mall ~]# systemctl enable elasticsearch Created symlink from /etc/systemd/system/multi-user.target.wants/elasticsearch.service to /usr/lib/systemd/system/elasticsearch.service. |
启动Nginx服务命令如下。
|
[root@mall ~]# systemctl start nginx [root@mall ~]# systemctl enable nginx Created symlink from /etc/systemd/system/multi-user.target.wants/nginx.service to /usr/lib/systemd/system/nginx.service. |
|
IP地址 |
主机名 |
节点 |
|
172.16.51.29 |
mall |
单节点服务器 |
使用提供gpmall-shopping-0.0.1-SNAPSHOT.jar、gpmall-user-0.0.1-SNAPSHOT.jar、shopping-provider-0.0.1-SNAPSHOT.jar、user-provider-0.0.1-SNAPSHOT.jar 、dist这5个包部署应用系统,其中4个jar包为后端服务包,dist为前端包。(在项目3-软件包\商城系统-单节点\gpmall项目包-单机下)
修改/etc/hosts文件,修改项目全局配置文件如下(红框标注的IP地址应修改为本机IP,原有的172.16.51.29 mall映射删除):
[root@mall ~]# cat /etc/hosts
127.0.0.1 localhost localhost.localdomain localhost4 localhost4.localdomain4
::1 localhost localhost.localdomain localhost6 localhost6.localdomain6
172.16.51.29 mall
172.16.51.29 kafka.mall
172.16.51.29 mysql.mall
172.16.51.29 redis.mall
172.16.51.29 zookeeper.mall
将dist目录上传至服务器的/root目录下。接着将dist目录下的文件,复制到Nginx默认项目路径(首先清空默认项目路径下的文件)。
|
[root@mall ~]# rm -rf /usr/share/nginx/html/* [root@mall ~]# cp -rvf dist/* /usr/share/nginx/html/ |
修改Nginx配置文件/etc/nginx/conf.d/default.conf,添加映射如下所示(红框部分):
[root@mall ~]# vi /etc/nginx/conf.d/default.conf
server {
listen 80;
server_name localhost;
#charset koi8-r;
#access_log /var/log/nginx/host.access.log main;
location / {
root /usr/share/nginx/html;
index index.html index.htm;
}
location /user {
proxy_pass http://127.0.0.1:8082;
}
location /shopping {
proxy_pass http://127.0.0.1:8081;
}
location /cashier {
proxy_pass http://127.0.0.1:8083;
}
#error_page 404 /404.html;
重启Nginx服务,命令如下:
[root@mall ~]# systemctl restart nginx
到此,前端部署完毕。
将提供的4个jar包上传到服务器的/root目录下,并启动,启动命令如下:
|
[root@mall gpmall]# nohup java -jar shopping-provider-0.0.1-SNAPSHOT.jar & [1] 6432 [root@mall gpmall]# nohup: ignoring input and appending output to ‘nohup.out’
[root@mall gpmall]# nohup java -jar user-provider-0.0.1-SNAPSHOT.jar & [2] 6475 [root@mall gpmall]# nohup: ignoring input and appending output to ‘nohup.out’
[root@mall gpmall]# nohup java -jar gpmall-shopping-0.0.1-SNAPSHOT.jar & [3] 6523 [root@mall gpmall]# nohup: ignoring input and appending output to ‘nohup.out’
[root@mall gpmall]# nohup java -jar gpmall-user-0.0.1-SNAPSHOT.jar & [4] 6563 [root@mall gpmall]# nohup: ignoring input and appending output to ‘nohup.out’ |
按照顺序运行4个jar包后,至此后端服务部署完毕。
打开浏览器,在地址栏中输入http://172.16.51.29,访问界面。

单击右上角“头像”,进行登录操作,使用用户名/密码为test/test进行登录。

图3-18-2 登录界面
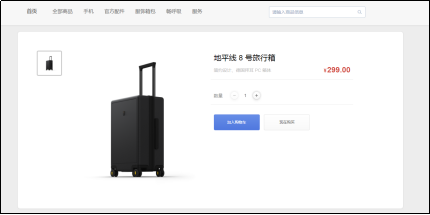
登录后,可进行购买商品操作,单击首页“地平线8号”旅行箱图片。

图3-18-3 商品页面
进入购买界面,单击“现在购买”按钮,进行购买商品操作
单击“现在购买”按钮,

至此,单机部署应用系统完成。
标签:info tor lin ring not included list option lib
原文地址:https://www.cnblogs.com/8362k/p/14715464.html