标签:tca 布局 jar包 protected create request info ide package
1、首先在AndroidManifest.xml文件中添加internet申请
<uses-permission android:name="android.permission.INTERNET"/>
2、然后在build.gradle文件中添加相应的依赖(添加后点击下载,后台就会自动下载相应的jar包)
implementation ‘com.squareup.okhttp3:okhttp:4.4.0‘
3、准备工作就为,现在就编写布局文件acyivity_main.xml
<?xml version="1.0" encoding="utf-8"?>
<LinearLayout xmlns:android="http://schemas.android.com/apk/res/android"
    xmlns:app="http://schemas.android.com/apk/res-auto"
    xmlns:tools="http://schemas.android.com/tools"
    android:layout_width="match_parent"
    android:layout_height="match_parent"
    android:orientation="vertical"
    tools:context=".MainActivity">

    <Button
        android:id="@+id/btn_request"
        android:text="Star"
        android:layout_width="match_parent"
        android:layout_height="wrap_content"/>
    <TextView
        android:id="@+id/text_result"
        android:layout_width="match_parent"
        android:layout_height="wrap_content"/>

</LinearLayout>
4、主活动MainActivity.java文件
package cn.itcast.okhttpdemo;

import androidx.appcompat.app.AppCompatActivity;

import android.os.Bundle;
import android.view.View;
import android.widget.Button;
import android.widget.TextView;

import java.io.IOException;

import okhttp3.OkHttpClient;
import okhttp3.Request;
import okhttp3.Response;

public class MainActivity extends AppCompatActivity {
private Button btn_request;
private TextView text_result;
    @Override
    protected void onCreate(Bundle savedInstanceState) {
        super.onCreate(savedInstanceState);
        setContentView(R.layout.activity_main);
        btn_request=findViewById(R.id.btn_request);
        text_result=findViewById(R.id.text_result);

        btn_request.setOnClickListener(new View.OnClickListener() {
            @Override
            public void onClick(View v) {
                new Thread(new Runnable() {
                    @Override
                    public void run() {
                        OkHttpClient client=new OkHttpClient();
                        Request request=new Request.Builder()
                                .url("https://api.caiyunapp.com/v2/place?query=广安&token=BNBRvBveaD2VfHVI&lang=zh_CN")
                                .build();
                        try {
                            Response response=client.newCall(request).execute();

                            String result=response.body().string();
                            shwoResult(result);
                        } catch (IOException e) {
                            e.printStackTrace();
                        }
                    }
                }).start();
            }
        });
    }
    private void shwoResult(final String result){
        runOnUiThread(new Runnable() {
            @Override
            public void run() {
                text_result.setText(result);
            }
        });
    }
}
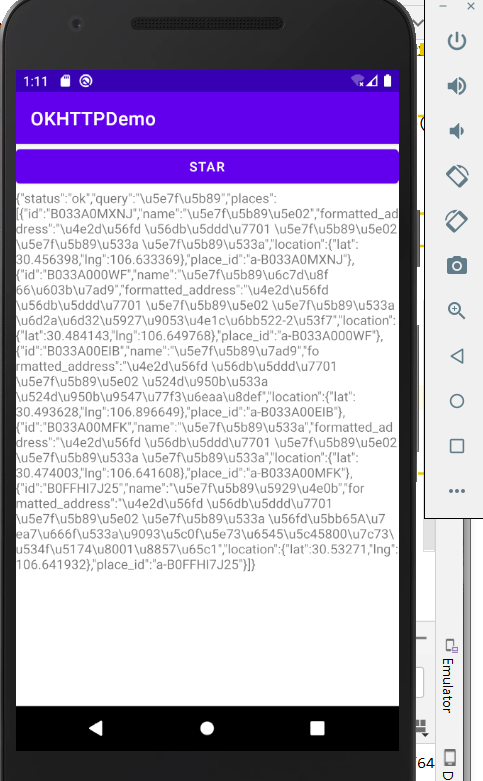
好了,这就是okhttp申请的相应流程,最后显示效果图如下,点击按钮就会出现以下内容
标签:tca 布局 jar包 protected create request info ide package
原文地址:https://www.cnblogs.com/tangxiansen/p/14863977.html