标签:
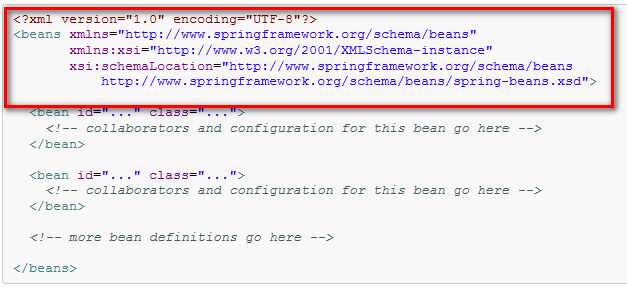
<?xml version="1.0" encoding="UTF-8"?>
<beans xmlns="http://www.springframework.org/schema/beans"
xmlns:xsi="http://www.w3.org/2001/XMLSchema-instance"
xsi:schemaLocation="http://www.springframework.org/schema/beans
           http://www.springframework.org/schema/beans/spring-beans.xsd">

<bean id="user" class="domain.User">
<property name="name" value="fei"/>
</bean>

</beans>
public class User {
 private String name;
 public String getName() {
  return name;
 }
 public void setName(String name) {
  this.name = name;
 }
 public User(String name) {
  this.name = name;
 }
 public User() {
 }
 public void sayName(){
  System.out.println(name);
 }
}
@RunWith(SpringJUnit4ClassRunner.class)//使用spring的测试框架
@ContextConfiguration("classpath:applicationContext.xml")//加载spring配置文件 ,加载放在其他文件夹中的配置文件:/config/applicationContext.xml
public class SpringTest {

 @Autowired
 private User user;

 @Test
 public void test1(){
  user.sayName();
 }

}
方式二:通过classpathxmlapplicationcontext加载spring配置文件来实现ApplicationContext
public class SpringTest02 {

 private static ApplicationContext ctx;
 static {
  ctx = new ClassPathXmlApplicationContext("classpath:config/applicationContext.xml");
 }

 @Test
 public void test1() {
  ctx.getBean("user",User.class).sayName();
 }
}
标签:
原文地址:http://www.cnblogs.com/godlikefei/p/4304357.html