标签:
1. 第一个Page页使用
新建PageDemo解决方案,默认wpf应用程序
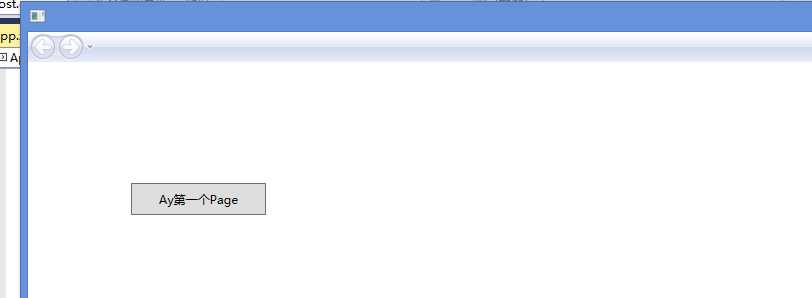
右键项目新建页,然后指定App.xaml的默认启动窗口,为Page1.xaml,F5运行项目
2.关于NavigationWindow不推荐使用,所以不讲解了,创建对象,指定Content为一个Page页,然后Show()
3.Page类
讲解几个可能跟Window不一样的属性
ShowsNavigationUI="False" 不显示导航栏,默认显示
新建Window1.xaml窗口,放入Frame,去掉默认的Width和Height
<Window x:Class="PageDemo.Window1"
        xmlns="http://schemas.microsoft.com/winfx/2006/xaml/presentation"
        xmlns:x="http://schemas.microsoft.com/winfx/2006/xaml"
        Title="Window1">
    <Grid>
        <Frame Source="Page1.xaml"/>
    </Grid>
</Window>
Page1.xaml
<Page x:Class="PageDemo.Page1"
      xmlns="http://schemas.microsoft.com/winfx/2006/xaml/presentation"
      xmlns:x="http://schemas.microsoft.com/winfx/2006/xaml"
      xmlns:mc="http://schemas.openxmlformats.org/markup-compatibility/2006"
      xmlns:d="http://schemas.microsoft.com/expression/blend/2008"
      mc:Ignorable="d"
      d:DesignHeight="300" d:DesignWidth="300"
      ShowsNavigationUI="False"
    Title="Page1">

    <Grid>
        <Button Content="Ay第一个Page" HorizontalAlignment="Left" Margin="103,121,0,0" VerticalAlignment="Top" Width="135" Height="32"/>

    </Grid>
</Page>
接下来我们在Page中设置宿主的宽度和高度
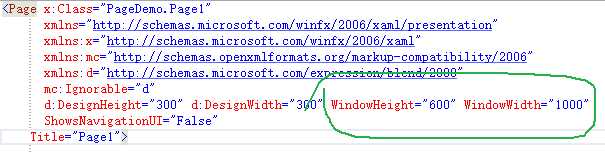
调整App.xaml启动窗口为Window1.xaml,运行时候发现宿主宽高改变了,变成了Page1指定的宽高
关于KeepAlive表示跳转到其他Page时候,本页是否保持存活,比如page1有文本框,跳到page2时候,然后返回上一页,如果该页的KeepAlive为true,则文字还在,不然就是每次新new的一样
NavigationService返回对NavigationService对象的引用,可通过代码使用该对象将用户导航到另一个页面。
无Hide和Show方法,要显示Page,只有通过导航。
3.1 导航时候,Hyperlink方式
新建一个包含一个文本框的Page2.xaml
然后在Page1中写到
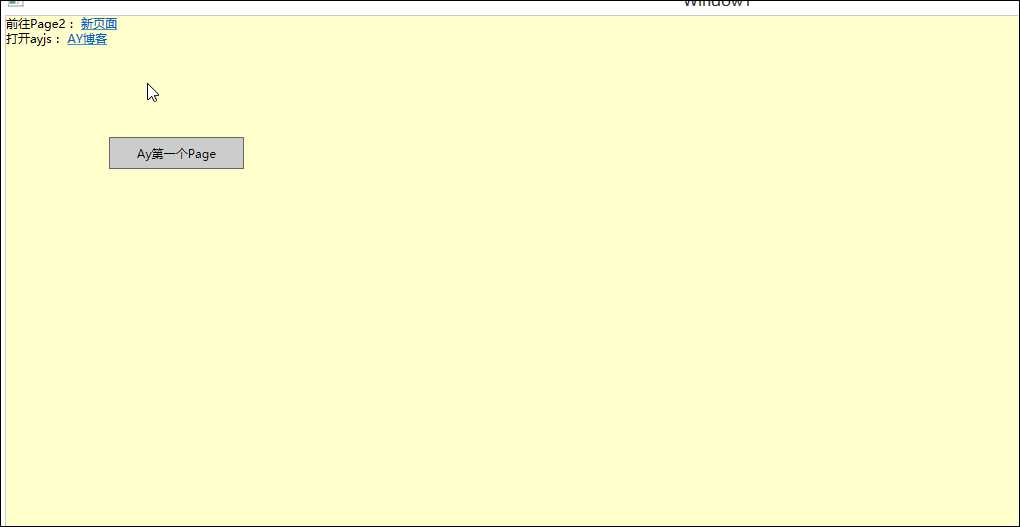
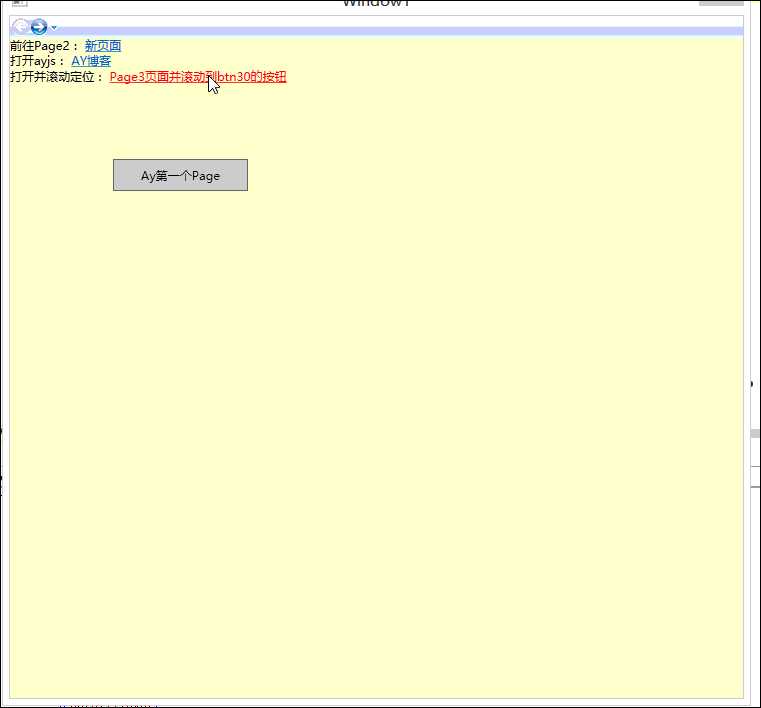
<Page x:Class="PageDemo.Page1"
      xmlns="http://schemas.microsoft.com/winfx/2006/xaml/presentation"
      xmlns:x="http://schemas.microsoft.com/winfx/2006/xaml"
      xmlns:mc="http://schemas.openxmlformats.org/markup-compatibility/2006"
      xmlns:d="http://schemas.microsoft.com/expression/blend/2008"
      mc:Ignorable="d"
      d:DesignHeight="300" Background="AntiqueWhite" d:DesignWidth="300" WindowHeight="600" WindowWidth="1000"
      ShowsNavigationUI="False"
    Title="Page1">

    <Grid>
        <Button Content="Ay第一个Page" HorizontalAlignment="Left" Margin="103,121,0,0" VerticalAlignment="Top" Width="135" Height="32"/>
        <StackPanel>
            <TextBlock>
            前往Page2:
            <Hyperlink NavigateUri="Page2.xaml">新页面</Hyperlink>
            </TextBlock>
            <TextBlock>
            打开ayjs:
            <Hyperlink NavigateUri="http://www.ayjs.net">AY博客</Hyperlink>
            </TextBlock>
        </StackPanel>

    </Grid>
</Page>
效果:
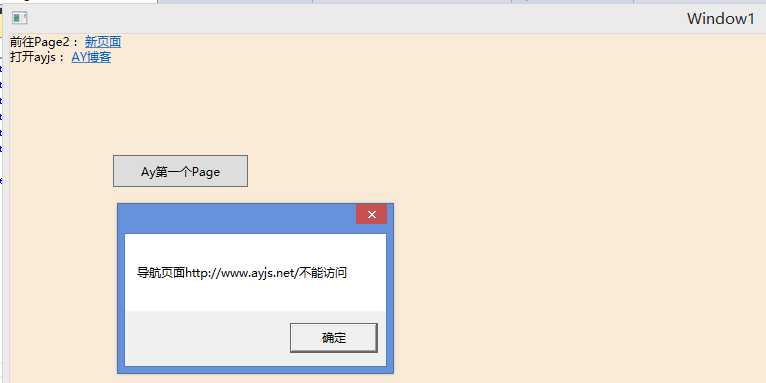
网站打开时候可能报错,比如未联网打开时候,我们打开App.xaml对应的App.xaml.cs文件,重写OnNavigationFailed方法

public partial class App : Application
    {
        protected override void OnNavigationFailed(System.Windows.Navigation.NavigationFailedEventArgs e)
        {
            if (e.Exception is System.Net.WebException) {
                MessageBox.Show("导航页面" + e.Uri.ToString() + "不能访问");
                e.Handled = true;
            }
            base.OnNavigationFailed(e);
        }
    }
断开网络,运行项目,点击网页
打开Page时候根据Name滚动到视野,新建Page3.xaml
<Page x:Class="PageDemo.Page3"
      xmlns="http://schemas.microsoft.com/winfx/2006/xaml/presentation"
      xmlns:x="http://schemas.microsoft.com/winfx/2006/xaml"
      xmlns:mc="http://schemas.openxmlformats.org/markup-compatibility/2006"
      xmlns:d="http://schemas.microsoft.com/expression/blend/2008"
      mc:Ignorable="d"
      d:DesignHeight="500" d:DesignWidth="300"
    Title="Page3">

        <ScrollViewer Height="500">
            <StackPanel x:Name="sp">

            </StackPanel>
        </ScrollViewer>

</Page>
后台
using System;
using System.Collections.Generic;
using System.Linq;
using System.Text;
using System.Threading.Tasks;
using System.Windows;
using System.Windows.Controls;
using System.Windows.Data;
using System.Windows.Documents;
using System.Windows.Input;
using System.Windows.Media;
using System.Windows.Media.Imaging;
using System.Windows.Navigation;
using System.Windows.Shapes;

namespace PageDemo
{
    /// <summary>
    /// Page3.xaml 的交互逻辑
    /// </summary>
    public partial class Page3 : Page
    {
        public Page3()
        {
            InitializeComponent();

            for (int i = 0; i < 100; i++)
            {
                Button btn = new Button();
                btn.Width = 200;
                btn.Height=30;
                btn.Name="btn" + i;
                btn.Content="btn" + i;
                sp.Children.Add(btn);
            }
        }
    }
}
重点讲解Frame的用法
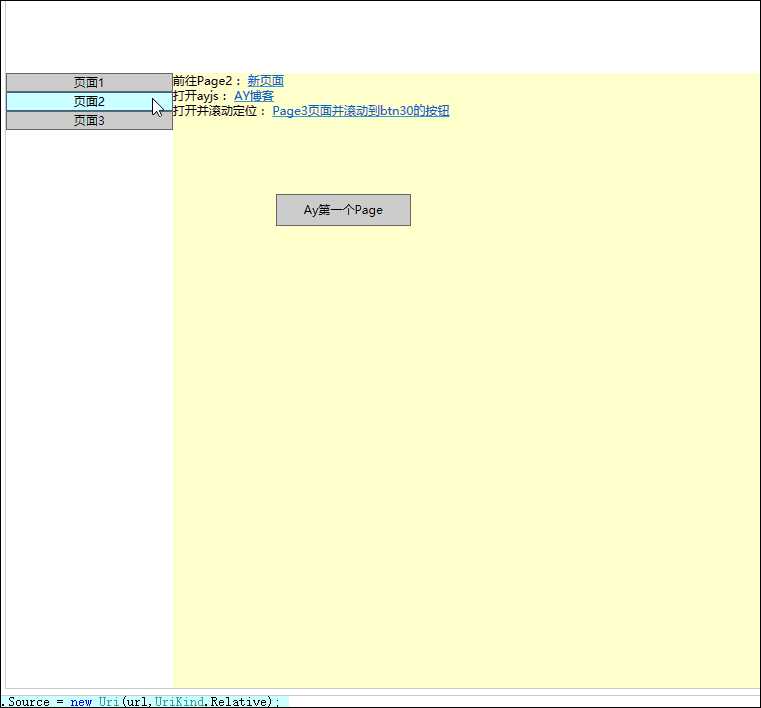
DEMO3,禁用右侧Frame的导航栏,左侧一列按钮,点击一下,右侧Frame调到对应的Page去
前台xaml
<Window x:Class="PageDemo.Window1"
        xmlns="http://schemas.microsoft.com/winfx/2006/xaml/presentation"
        xmlns:x="http://schemas.microsoft.com/winfx/2006/xaml"
        Title="Window1" >
    <Grid>
        <Grid.RowDefinitions>
            <RowDefinition Height="13*"/>
            <RowDefinition Height="71*"/>
        </Grid.RowDefinitions>
        <Grid.ColumnDefinitions>
            <ColumnDefinition Width="89*"/>
            <ColumnDefinition Width="671*"/>
        </Grid.ColumnDefinitions>
        <Frame x:Name="frameMain" Source="Page1.xaml" Grid.Column="1" Grid.Row="1" VerticalAlignment="Stretch" HorizontalAlignment="Stretch"
               NavigationUIVisibility="Hidden"
               />
        <StackPanel Grid.Column="0" HorizontalAlignment="Stretch"  VerticalAlignment="Stretch" Grid.Row="1" x:Name="sp">
            <Button Content="页面1" Tag="Page1.xaml"/>
            <Button Content="页面2" Tag="Page2.xaml"/>
            <Button Content="页面3" Tag="Page3.xaml"/>
        </StackPanel>
    </Grid>
</Window>
后台添加按钮事件
using System;
using System.Collections.Generic;
using System.Linq;
using System.Text;
using System.Threading.Tasks;
using System.Windows;
using System.Windows.Controls;
using System.Windows.Data;
using System.Windows.Documents;
using System.Windows.Input;
using System.Windows.Media;
using System.Windows.Media.Imaging;
using System.Windows.Shapes;

namespace PageDemo
{
    /// <summary>
    /// Window1.xaml 的交互逻辑
    /// </summary>
    public partial class Window1 : Window
    {
        public Window1()
        {
            InitializeComponent();
            foreach (var item in sp.Children)
            {
                Button b = item as Button;
                if (b != null) {
                    b.Click += Button_Click;
                }
            }
        }

        private void Button_Click(object sender, RoutedEventArgs e)
        {
            Button b = sender as Button;
            if (b != null)
            {
                string url = b.Tag.ToString();
                frameMain.Source = new Uri(url,UriKind.Relative);
            }
        }
    }
}
效果图:
OK。不推荐NavigationWindow,所以不讲解那种方式。
关于多层嵌套的Page,如果遇到导航不符合自己的想法,可以尝试 JournalOwnership="OwnsJournal",NavigationUIVisibility="Hidden",我不太会模拟这个场景遇到这个问题再说吧
4.WPF导航机制(aaronyang个人理解)
wpf的Page页面KeepAlive默认为false,对于某些特定控件,当页面导航到其他页面,然后前进或者后退到自己的页面时候,保存了例如TextBox.Text,CheckBox的IsSelected属性ListBox的SelectedIndex部分细节,所以返回来时候,这些特殊属性的值被恢复。但是Page不是所有的细节都保存了,例如后台设置背景颜色,当导航到其他页面,然后再后退或者前进回来,颜色被恢复了。如果想保持状态,可以设置KeepAlive为true即可。但是此时内存开销就会大了。如果想保留更多值,普通属性是不行的,我们可以创建对应Page的依赖属性来保存一些值的细节。
5.导航服务
虽然我们使用Hyperlink,或者后台设置了Frame.Source属性也可以实现导航,但是最强大的还是WPF导航服务。NavigationService这个还没用到,不讲解了,感觉比较难,然后就是自定义保存页面状态的需求。
6.返回页的值,类似window的模态框
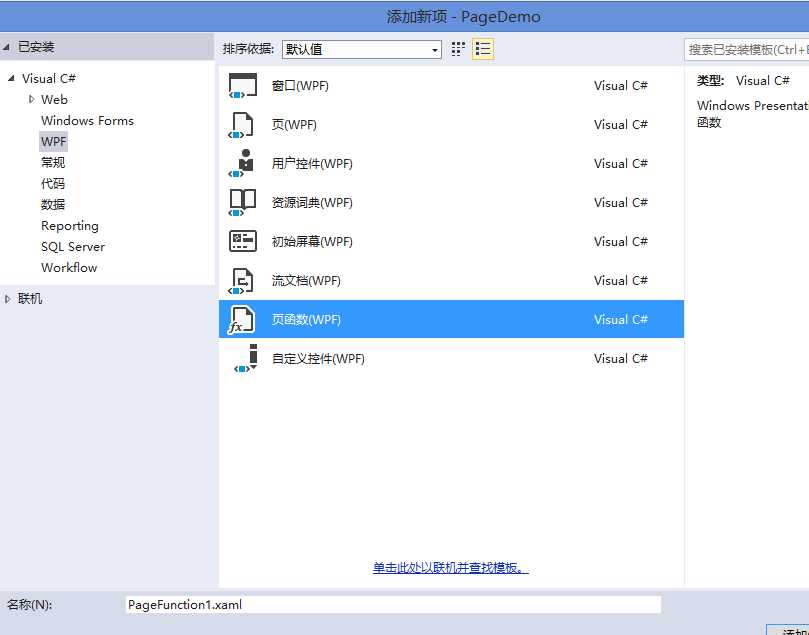
新建一个页函数
这个泛型类,设置返回的类型为 x:TypeArguments="sys:String"为 x:TypeArguments="要反回的类型",你自定义的需要加入前缀,例如 x:TypeArguments="local:AyBlog"
在页函数中,我们加入一个listbox用来选择一个对象ayblog返回,添加确定和关闭按钮,并添加事件
  private void PageFunction_Loaded(object sender, RoutedEventArgs e)
        {
            AyBlog a = new AyBlog();
            a.BlogName = "hello";
            a.Time = DateTime.Now.AddDays(-1);
            AyBlog a1 = new AyBlog();
            a1.BlogName = "hello world";
            a1.Time = DateTime.Now;
            List<AyBlog> al = new List<AyBlog> { a, a1 };
            lb1.ItemsSource = al;
        }

        private void btnok_Click(object sender, RoutedEventArgs e)
        {
            AyBlog a = lb1.SelectedItem as AyBlog;
            if (a != null) {
                OnReturn(new ReturnEventArgs<AyBlog>(a));
            }

        }

        private void btnClose_Click(object sender, RoutedEventArgs e)
        {
            OnReturn(null);
        }
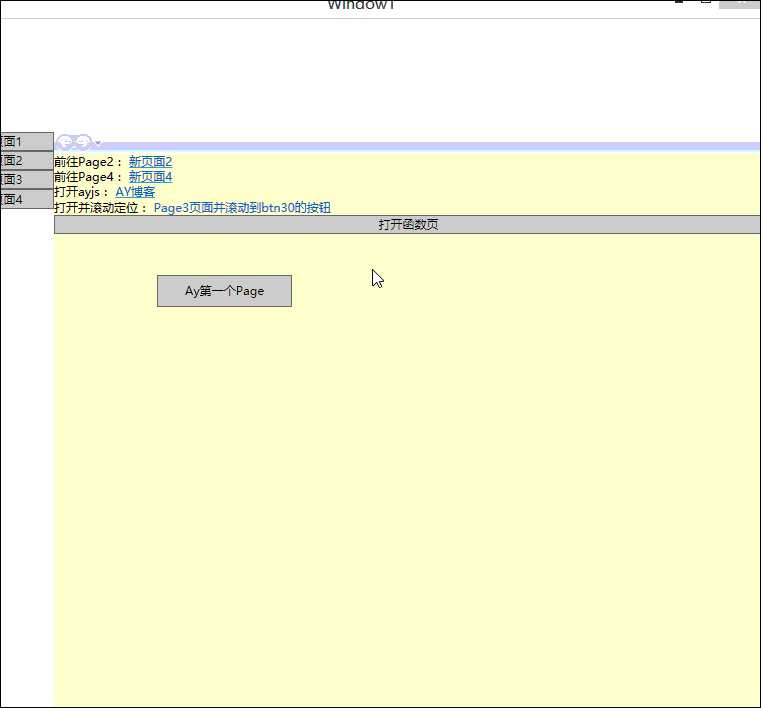
我们使用OnReturn方法返回数据,我们在Page1页面里面加上个按钮,用来弹出这个页函数,添加按钮的单击事件
后台单击事件如下
   private void Button_Click_1(object sender, RoutedEventArgs e)
        {
            PageFunction1 p = new PageFunction1();
            p.Return += p_Return;
            this.NavigationService.Navigate(p);
        }

        void p_Return(object sender, System.Windows.Navigation.ReturnEventArgs<AyBlog> e)
        {
            AyBlog re = e.Result;
            MessageBox.Show(re.BlogName + re.Time.ToShortDateString());
        }
using System;
using System.Collections.Generic;
using System.Linq;
using System.Text;
using System.Threading.Tasks;

namespace PageDemo
{
    public class AyBlog
    {
        public string BlogName { get; set; }
        public DateTime Time { get; set; }

        public override string ToString()
        {
            return BlogName+Time.ToShortDateString();
        }
    }
}
效果如下:
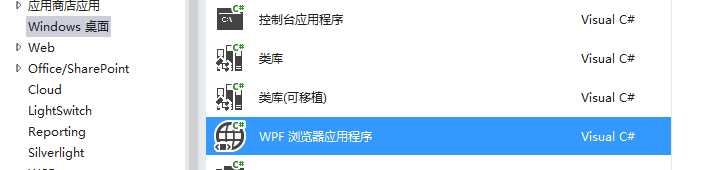
7. XAML浏览器程序 XBAP,目前只支持ie和火狐
入门吧,简单了解下,新建 WpfBrowserApplication1
然后我们修改Page1.xaml代码
<Page x:Class="WpfBrowserApplication1.Page1"
      xmlns="http://schemas.microsoft.com/winfx/2006/xaml/presentation"
      xmlns:x="http://schemas.microsoft.com/winfx/2006/xaml"
      xmlns:mc="http://schemas.openxmlformats.org/markup-compatibility/2006"
      xmlns:d="http://schemas.microsoft.com/expression/blend/2008"
      mc:Ignorable="d"
      d:DesignHeight="600" d:DesignWidth="1000"
      Title="Page1">
    <Page.Background>
        <LinearGradientBrush EndPoint="0.5,1" StartPoint="0.5,0">
            <GradientStop Color="Black" Offset="0"/>
            <GradientStop Color="#FF35A7B9" Offset="1"/>
        </LinearGradientBrush>
    </Page.Background>
    <Grid>
        <Grid.RowDefinitions>
            <RowDefinition Height="53*"/>
            <RowDefinition Height="247*"/>
        </Grid.RowDefinitions>
        <Button  Content="aaronyang测试xbap" Margin="239,26,497,466" RenderTransformOrigin="0.5,0.5" Grid.RowSpan="2">
            <Button.RenderTransform>
                <TransformGroup>
                    <ScaleTransform/>
                    <SkewTransform AngleX="20" AngleY="10"/>
                    <RotateTransform/>
                    <TranslateTransform/>
                </TransformGroup>
            </Button.RenderTransform>
        </Button>
        <TextBox HorizontalAlignment="Left" Height="23" Margin="85,66,0,0" TextWrapping="Wrap" Text="www.ayjs.net" VerticalAlignment="Top" Width="120">
            <TextBox.Foreground>
                <LinearGradientBrush EndPoint="0.5,1" StartPoint="0.5,0">
                    <GradientStop Color="#FFB6E41B" Offset="0"/>
                    <GradientStop Color="#FFDE2222" Offset="1"/>
                    <GradientStop Color="#FFAC4040" Offset="0.706"/>
                </LinearGradientBrush>
            </TextBox.Foreground>
        </TextBox>
    </Grid>
</Page>
生成项目,进入debug文件夹,使用ie浏览器打开XBAP文件
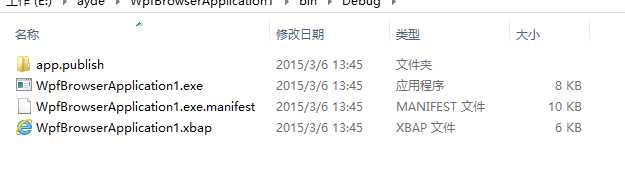
右键浏览器打开xbap就行了,表示遇到很多问题。
算了,不折腾这个了,具体MSDN参考
=============潇洒的版权线==========www.ayjs.net===== Aaronyang ========= AY =========== 安徽 六安 杨洋 ========== 未经允许不许转载 =========
-------------------小小的推荐,作者的肯定,读者的支持。推不推荐不重要,重要的是希望大家能把WPF推广出去,别让这么好的技术消失了,求求了,让我们为WPF技术做一份贡献。------
[Aaronyang] 写给自己的WPF4.5 笔记17[Page实现页面导航]
标签:
原文地址:http://www.cnblogs.com/AaronYang/p/4317846.html