标签:
It can be tedious to type out all the boilerplate needed to get the DOM and states in React to synchronize. Luckily, React provides a version of the toolkit with a selection of available addons. This lesson is going to dig into ReactLink, and how this addon can give you two-way binding.
<!doctype html>
<html lang="en">
<head>
<meta charset="UTF-8">
<title>React Lesson 15: dynamically create componenets</title>
<script src="https://cdnjs.cloudflare.com/ajax/libs/react/0.12.2/react.js"></script>
<script src="https://cdnjs.cloudflare.com/ajax/libs/react/0.12.2/JSXTransformer.js"></script>
<style>
body {
margin: 25px;
}
</style>
</head>
<body>
<div id="panel"></div>
<script type="text/jsx">
/** @jsx React.DOM */
var App = React.createClass({
getInitialState:function(){
return {
name: ‘‘,
email: ‘‘
}
},
update: function () {
this.setState({
name: this.refs.name.getDOMNode().value,
email: this.refs.email.getDOMNode().value
})
},
render:function(){
return (
<form>
<div>
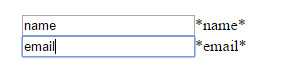
<input type="text" ref="name" onChange={this.update} placeholder="Name"/>
<label>*{this.state.name}*</label>
</div>
<div>
<input type="text" ref="email" onChange={this.update} placeholder="Email"/>
<label>*{this.state.email}*</label>
</div>
</form>
);
}
});
React.render(<App />, document.getElementById(‘panel‘));
</script>
</body>
</html>
Use addon: ReactLink
1. include the script:
script src="https://fb.me/react-with-addons-0.13.3.js"></script>
2. Add mixin:
mixins: [React.addons.LinkedStateMixin],
3. Use valueLink={this.linkState(‘name‘)} instead of ‘ref‘ and ‘onChange‘:
<input valueLink={this.linkState(‘name‘)} type="text" placeholder="Name" />
Code:
<!doctype html>
<html lang="en">
<head>
    <meta charset="UTF-8">
    <title>React Lesson 15: dynamically create componenets</title>
    <script src="https://fb.me/react-with-addons-0.13.3.js"></script>
    <script src="https://cdnjs.cloudflare.com/ajax/libs/react/0.13.3/JSXTransformer.js"></script>
    <style>
        body {
            margin: 25px;
        }
    </style>
</head>
<body>
<div id="panel"></div>
<script type="text/jsx">
    /** @jsx React.DOM */

    var App = React.createClass({
        mixins: [React.addons.LinkedStateMixin],
        getInitialState:function(){
            return {
                name: ‘‘,
                email: ‘‘
            }
        },
        render:function(){
            return (
                <form>
                    <div>
                        <input valueLink={this.linkState(‘name‘)} type="text" placeholder="Name" />
                        <label>*{this.state.name}*</label>
                    </div>
                    <div>
                        <input valueLink={this.linkState(‘email‘)} type="text" placeholder="Email" />
                        <label>*{this.state.email}*</label>
                    </div>
                </form>
            );
        }

    });

    React.render(<App />, document.getElementById(‘panel‘));
</script>
</body>
</html>
[React] React Fundamentals: with-addons - ReactLink
标签:
原文地址:http://www.cnblogs.com/Answer1215/p/4779346.html