标签:
图片的延迟加载,是 APP 里常用的一种技术,图片产生会生成一张预览图,等到原图下载完成后,再替换掉。 如下面二张图所示。实现起来,虽然不是很难,但要把它封装好,也不大容易。在这里主要讲解一下 ChiTuStore 项目中是如何封装。

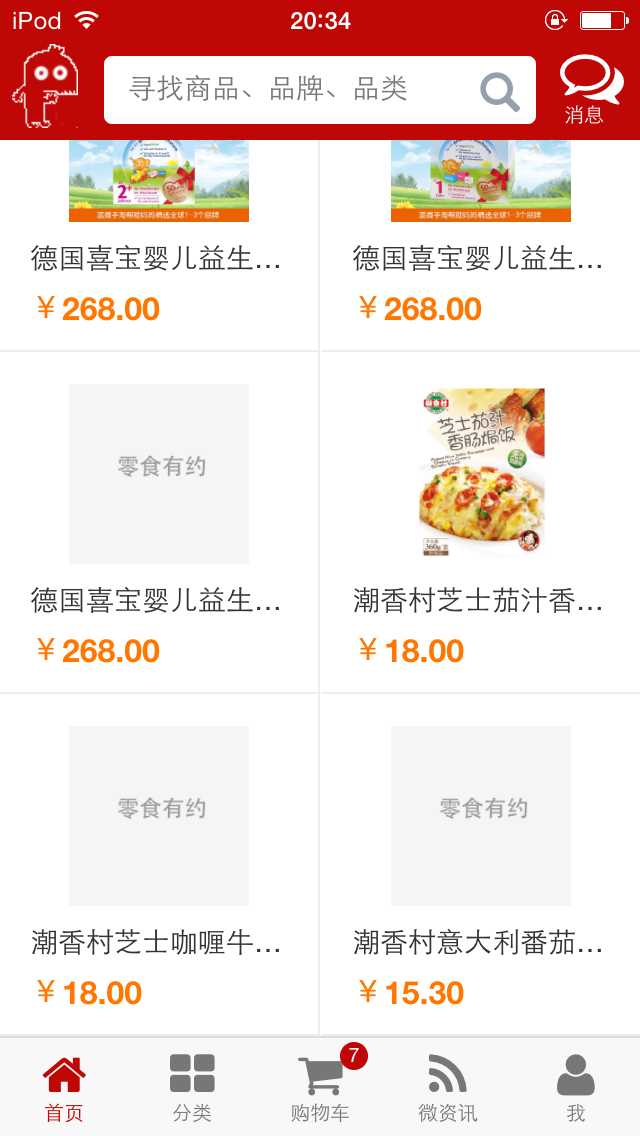
我们打开 App/Module/Home/Index.html 文件,可以找到下面一段代码,这段代码是用来对首页产品列表进行绑定的,我要关注的是 <img data-bind="attr:{src:ImagePath}" class="img-responsive-70"> 。
这段话用来对图片进行绑定的。
    <div data-bind="foreach:homeProducts,visible:ko.unwrap(homeProducts).length > 0" class="row products" style="margin:0px;">
        <div class="col-xs-6 text-center item">
            <a data-bind="attr:{href:‘#Home_Product_‘+ProductId}" href="product.html">
                <img data-bind="attr:{src:ImagePath}" class="img-responsive-70">
                <div class="bottom">
                    <div class="interception" data-bind="html:Name"></div>
                    <div>
                        <div class="price pull-left" data-bind="money:Price"></div>
                        <promotion-label params="value:PromotionLabel" class="pull-right"></promotion-label>
                    </div>
                </div>
            </a>
        </div>
    </div>
因为图片的绑定,是使用 ko 的 attr 绑定来呈现的,我们需要对其重写。来实现我们预览图的生成,原图的下载及替换。打开 App/Core/ko.ext.ts 文件,这个文件是用来对 ko 进行扩展的。、
我们可以在文件中找到下面的代码,这代码代码就是用来重写 ko attr 绑定的。
var _attr = ko.bindingHandlers.attr;
ko.bindingHandlers.attr = (function () {
    return {
        ‘update‘: function (element, valueAccessor, allBindings) {
            if (element.tagName == ‘IMG‘) {var value = ko.utils.unwrapObservable(valueAccessor()) || {};
                ko.utils[‘objectForEach‘](value, function (attrName, attrValue) {
                    var src = ko.unwrap(attrValue);
                    if (attrName != ‘src‘ || !src)
                        return true;

                    //==========================================================
                    // 说明:替换图片路径
                    var match = src.match(/_\d+_\d+/);
                    if (match && match.length > 0) {
                        var arr = match[0].split(‘_‘);
                        var img_width = new Number(arr[1]).valueOf();
                        var img_height = new Number(arr[2]).valueOf();

                        $(element).attr(‘width‘, img_width + ‘px‘);
                        $(element).attr(‘height‘, img_height + ‘px‘);

                        var src_replace
                        src_replace = getPreviewImage(img_width, img_height);

                        valueAccessor = $.proxy(function () {
                            var obj = ko.utils.unwrapObservable(this._source());
                            var src = ko.unwrap(obj.src);
                            obj.src = this._src;

                            var img_node = this._element;
                            var image = new Image();
                            image.onload = function () {
                                img_node.src = this.src;
                            }
                            image.src = getImageUrl(src);

                            return obj;

                        }, { _source: valueAccessor, _src: src_replace, _element: element });
                    }
                    else {
                        value.src = src;
                        valueAccessor = $.proxy(function () {
                            return this._value;
                        }, { _value: value });
                    }
                });
            }
            return _attr.update(element, valueAccessor, allBindings);
        }
    }
})();
我们先来看第一句:
var _attr = ko.bindingHandlers.attr;
这句话是把 ko 原来的 attr 绑定赋值到 _attr 上,因为我们还需要用到它原来的 attr 绑定。
我们继续看,这段代码是说,我们只需要处理 IMG 元素就好了,其它,还是按原来处理吧,看,_attr (就是原来的处理函数)用到了吧。
 if (element.tagName == ‘IMG‘) {
      // 处理图片,代码已省略掉
}
return _attr.update(element, valueAccessor, allBindings);
这段话可能有点难懂。要生预览图,需要图片文件的名称有个规定,例如:17838fdb3e704178938cfb1a73556798_360_360.jpeg,其中的 360_360 分别是图片的宽和高,也就是说,我们必须知道图片的宽高才能生成预览图,如果不清楚,是无法生成的。下面代码中的正规表达,就是用来判断这个的,文件名符合规定的,才生成预览图,否则按常规的来处理。
var match = src.match(/_\d+_\d+/);
if (match && match.length > 0) {
//.....
}else{
  value.src = src;
   valueAccessor = $.proxy(function () {
     return this._value;
   }, { _value: value });
}
我们在代码中可以找到 getPreviewImage 函数,下面我们看看这个函数。这里又用到了 canvas。也就是说,如果浏览器不支持 canvas ,是无法生成预览图的。代码并不难理解,就不一一细说了。
function getPreviewImage(img_width, img_height) {

    var scale = (img_height / img_width).toFixed(2);
    var img_name = ‘img_log‘ + scale;
    var img_src = localStorage.getItem(img_name);
    if (img_src)
        return img_src;

    var MAX_WIDTH = 320;
    var width = MAX_WIDTH;
    var height = width * new Number(scale).valueOf();

    var canvas = document.createElement(‘canvas‘);
    canvas.width = width; //img_width;
    canvas.height = height; //img_height;

    var ctx = canvas.getContext(‘2d‘);
    ctx.fillStyle = ‘whitesmoke‘;
    ctx.fillRect(0, 0, canvas.width, canvas.height);

    // 设置字体
    ctx.font = "Bold 40px Arial";
    // 设置对齐方式
    ctx.textAlign = "left";
    // 设置填充颜色
    ctx.fillStyle = "#999";
    // 设置字体内容,以及在画布上的位置
    ctx.fillText(site.config.storeName, canvas.width / 2 - 75, canvas.height / 2);

    img_src = canvas.toDataURL(‘image/png‘);
    localStorage.setItem(img_name, img_src);
    return img_src;
}
虽然实现了预览图的生成,但是,还不足够好,因为还有一个很重要的功能是没有实现,就是只显示可见区域的图片。另外:有朋友可能会问,咱服务器上的图片名称不符合这里的规范,咋办?让你们服务端的同事改呗。^_^
当然,如果你有更好的办法,也可以告诉我。
标签:
原文地址:http://www.cnblogs.com/ansiboy/p/5055337.html