标签:android style blog http color java 使用 io
在Android的学习中,学会使用自定义的View是一必须会的事情。
在最近的一个项目中主要用了两种方式来自定义View。
1.让控件继承RelativeLayout,LinearLayout等之类的布局。
所以我自己写了一个继承RelativeLayout的例子
首先:
bottomview.xml
<?xml version="1.0" encoding="utf-8"?>
<LinearLayout xmlns:android="http://schemas.android.com/apk/res/android"
    android:layout_width="match_parent"
    android:layout_height="match_parent"
    android:orientation="horizontal"
    android:gravity="center" >
    <LinearLayout
        android:id="@+id/layout1"
        android:layout_width="wrap_content"
        android:layout_height="wrap_content"
        android:layout_weight="1"
        android:gravity="center" >
		<ImageView
			android:id="@+id/image1"
        	android:layout_width="32dp"
        	android:layout_height="32dp"
        	android:background="@drawable/smiley" />
    </LinearLayout>
    <LinearLayout
        android:id="@+id/layout2"
        android:layout_width="wrap_content"
        android:layout_height="wrap_content"
        android:layout_weight="1"
        android:gravity="center" >
		<ImageView
		    android:id="@+id/image2"
        	android:layout_width="32dp"
        	android:layout_height="32dp"
        	android:background="@drawable/smiley_sad" />
    </LinearLayout>
    <LinearLayout
        android:id="@+id/layout3"
        android:layout_width="wrap_content"
        android:layout_height="wrap_content"
        android:layout_weight="1"
        android:gravity="center" >
    	<ImageView
    	    android:id="@+id/image3"
        	android:layout_width="32dp"
        	android:layout_height="32dp"
        	android:background="@drawable/smiley_sad_blue" />
    </LinearLayout>
    <LinearLayout
        android:id="@+id/layout4"
        android:layout_width="wrap_content"
        android:layout_height="wrap_content"
        android:layout_weight="1"
        android:gravity="center" >
		<ImageView
		    android:id="@+id/image4"
        	android:layout_width="32dp"
        	android:layout_height="32dp"
        	android:background="@drawable/smiley_blue" />
    </LinearLayout>

</LinearLayout>
对应的BottomView.java
public class BottomView extends LinearLayout {

	private Context context;
	private LinearLayout mLayout;
	private LinearLayout layout1;
	private LinearLayout layout2;
	private LinearLayout layout3;
	private LinearLayout layout4;
	private ImageView image1;
	private ImageView image2;
	private ImageView image3;
	private ImageView image4;
	public BottomView(Context context) {
		super(context);
		// TODO Auto-generated constructor stub
		this.context = context;
	}

	public BottomView(Context context, AttributeSet attrs) {
		super(context, attrs);
		// TODO Auto-generated constructor stub
		this.context = context;
		initView();
	}

	public void initView(){
		LayoutInflater inflater = (LayoutInflater) context.getSystemService(Context.LAYOUT_INFLATER_SERVICE);
		inflater.inflate(R.layout.bottomview, this);
		layout1 = (LinearLayout) this.findViewById(R.id.layout1);
		layout2 = (LinearLayout) this.findViewById(R.id.layout2);
		layout3 = (LinearLayout) this.findViewById(R.id.layout3);
		layout4 = (LinearLayout) this.findViewById(R.id.layout4);
		image1 = (ImageView) this.findViewById(R.id.image1);
		image2 = (ImageView) this.findViewById(R.id.image2);
		image3 = (ImageView) this.findViewById(R.id.image3);
		image4 = (ImageView) this.findViewById(R.id.image4);
	}
}
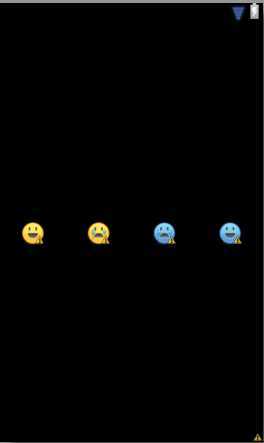
这样就生成了一个控件,如下图:
然后在其他的xml文件里面就可以引用BottomView这个控件了。
例如:
bottomview_activity.xml
<?xml version="1.0" encoding="utf-8"?>
<LinearLayout xmlns:android="http://schemas.android.com/apk/res/android"
    android:layout_width="match_parent"
    android:layout_height="match_parent"
    android:orientation="vertical"
    android:background="#FFFFFF" >
    <com.zf.layout.BottomView
        android:layout_width="fill_parent"
        android:layout_height="32dp"
        android:layout_gravity="center" />

</LinearLayout>
2.让控件继承View,ImageView等之类的控件。
我感觉继承View之类的控件然后重写其onDraw()方法显得更加的专业。
工作中时常需要自定义一个圆形的ImageView,所以我也自己写了一个圆形的视图。
首先写了一个方法可以得到一个圆形的图片。
private static Bitmap getCroppedBitmap(Bitmap bmp, int radius)
    {

        Matrix m = matrix;
        Paint p = imagePaint;
        Paint p2 = borderPaint;     // 画边框
        m.reset();
        p.reset();
        // 裁剪一个矩阵出来
        float aspectRatio = (float)bmp.getWidth() / (float)bmp.getHeight();
        float scale = 1;
        if(aspectRatio >=1)
        {
            scale = (float)radius/(float)bmp.getHeight();
        }
        else
        {
            scale = (float)radius/(float)bmp.getWidth();
        }
        m.setScale(scale, scale);

        Bitmap output = Bitmap.createBitmap(radius, radius, Config.ARGB_8888);
        Canvas canvas = new Canvas(output);
        p.setAntiAlias(true);
        p.setFilterBitmap(true);
        p.setDither(true);
        canvas.drawARGB(0, 0, 0, 0);
        p.setColor(Color.WHITE);

//
//        // 画边框
//        p2.setStyle(Paint.Style.STROKE);
//        p2.setAntiAlias(true);
//        p2.setColor(Color.RED);
//        p2.setStrokeWidth(5);
//        canvas.drawCircle(radius/2,  radius/2, radius / 2 , p2);

        canvas.drawCircle(radius/2,  radius/2, radius / 2 , p);
        p.setXfermode(new PorterDuffXfermode(Mode.SRC_IN));
        canvas.drawBitmap(bmp, m, p);
//
//        p2.setXfermode(new PorterDuffXfermode(Mode.SRC_IN));
//        canvas.drawBitmap(bmp, m, p2);
        return output;
    }
这个RoundImage有自己的半径以及自己的背景图片。
所以需要自己做一些事情。
在values里面写一个attrs.xml文件(本例子中取名叫RoundImage,有两个属性分别为src(图片背景)和radius(圆形半径))
<?xml version="1.0" encoding="utf-8"?>
<resources>
    <declare-styleable name="RoundImage">
	    <attr name="src" format="reference" ></attr>
	    <attr name="radius" format="dimension|reference"></attr>
	</declare-styleable>
</resources>
写完以后在R.java中就会自动的生成一些代码。
控件RoundImage.java的完整代码
import java.io.InputStream;

import com.zf.example.R;

import android.content.Context;
import android.content.res.Resources;
import android.content.res.TypedArray;
import android.graphics.Bitmap;
import android.graphics.BitmapFactory;
import android.graphics.BitmapShader;
import android.graphics.Canvas;
import android.graphics.Color;
import android.graphics.Matrix;
import android.graphics.Paint;
import android.graphics.PorterDuffXfermode;
import android.graphics.Shader;
import android.graphics.Bitmap.Config;
import android.graphics.PorterDuff.Mode;
import android.graphics.drawable.BitmapDrawable;
import android.graphics.drawable.Drawable;
import android.util.AttributeSet;
import android.util.Log;
import android.widget.ImageView;


/*
 *  自定义一个RoundImage,用于显示客户的图像
 *  主要的不同是图像是圆的
 *
 * */
public class RoundImage extends ImageView {

	private static Paint imagePaint = new Paint();    // 头像的画笔
	private static Paint borderPaint = new Paint();   // 边框的画笔
	private static Matrix matrix = new Matrix();      // 矩阵,可以用来当画布
//	private int imageRadius;          		   		  // 圆头像的半径
//	private int borderRadius;  		  		          // 外边的边界半径
//	private Bitmap mbitmap;                           // 头像
//	private BitmapShader mbitmapShader;               // 渲染器,画一个带有渲染效果的图
	private int radius;
	public RoundImage(Context context) {
		super(context);
		// TODO Auto-generated constructor stub
	}

	public RoundImage(Context context, AttributeSet attrs) {
		this(context, attrs, 0);
	}

	public RoundImage(Context context, AttributeSet attrs, int defStyle) {
		super(context, attrs, defStyle);
		// TODO Auto-generated constructor stub
		TypedArray a = context.obtainStyledAttributes(attrs, R.styleable.RoundImage, defStyle, 0);
		this.radius = a.getDimensionPixelSize(R.styleable.RoundImage_radius, 0);
		Log.d("zhangfan","radius = " + radius);
        if (a.hasValue(R.styleable.RoundImage_src))
        {
            Drawable d = a.getDrawable(R.styleable.RoundImage_src);
            if (d instanceof BitmapDrawable)
            {
                BitmapDrawable dd = (BitmapDrawable) a.getDrawable(R.styleable.RoundImage_src);
                Bitmap bmp = getCroppedBitmap(dd.getBitmap(), radius);
                setImageBitmap(bmp);
            }
        }

		a.recycle();
	}

	@Override
	public void setImageDrawable(Drawable drawable) {
		// TODO Auto-generated method stub
		BitmapDrawable dd = (BitmapDrawable) drawable;
		Bitmap bmp = getCroppedBitmap(dd.getBitmap(), this.radius);
        BitmapDrawable s = new BitmapDrawable(getResources(),bmp);
        super.setImageDrawable(s);
	}

	public void setImageBitmap(Bitmap bmp, int width, int radius){
		if (bmp == null)
            return;
        super.setImageBitmap(getCroppedBitmap(bmp, radius));
	}

	public void setImageBitmap(Bitmap bm) {
		setImageBitmap(bm, bm.getWidth(), this.radius);
	}

	public void setImageResource(int resId) {
		this.setImageBitmap(BitmapFactory.decodeResource(getResources(), resId));
	}

	private static Bitmap getCroppedBitmap(Bitmap bmp, int radius)
    {

        Matrix m = matrix;
        Paint p = imagePaint;
        Paint p2 = borderPaint;     // 画边框
        m.reset();
        p.reset();
        // 裁剪一个矩阵出来
        float aspectRatio = (float)bmp.getWidth() / (float)bmp.getHeight();
        float scale = 1;
        if(aspectRatio >=1)
        {
            scale = (float)radius/(float)bmp.getHeight();
        }
        else
        {
            scale = (float)radius/(float)bmp.getWidth();
        }
        m.setScale(scale, scale);

        Bitmap output = Bitmap.createBitmap(radius, radius, Config.ARGB_8888);
        Canvas canvas = new Canvas(output);
        p.setAntiAlias(true);
        p.setFilterBitmap(true);
        p.setDither(true);
        canvas.drawARGB(0, 0, 0, 0);
        p.setColor(Color.WHITE);

//
//        // 画边框
//        p2.setStyle(Paint.Style.STROKE);
//        p2.setAntiAlias(true);
//        p2.setColor(Color.RED);
//        p2.setStrokeWidth(5);
//        canvas.drawCircle(radius/2,  radius/2, radius / 2 , p2);

        canvas.drawCircle(radius/2,  radius/2, radius / 2 , p);
        p.setXfermode(new PorterDuffXfermode(Mode.SRC_IN));
        canvas.drawBitmap(bmp, m, p);
//
//        p2.setXfermode(new PorterDuffXfermode(Mode.SRC_IN));
//        canvas.drawBitmap(bmp, m, p2);
        return output;
    }

}


/*
@Override
protected void onDraw(Canvas canvas) {
	// TODO Auto-generated method stub
	// 可以自己任意画
	super.onDraw(canvas);

//	Resources r = this.getContext().getResources();
//	InputStream is = r.openRawResource(R.drawable.app_bg);
//	BitmapDrawable  bmpDraw = new BitmapDrawable(is);
//	Bitmap bmp = bmpDraw.getBitmap();
//	Canvas canvas = new Canvas(bmp);

	// 画头像
	imagePaint.setColor(Color.GRAY);   //颜色
	imagePaint.setStyle(Paint.Style.STROKE);
	imagePaint.setStrokeWidth(1);
	//imagePaint.setShader(mbitmapShader);
	// 画边框
	borderPaint.setStyle(Paint.Style.STROKE);
    borderPaint.setAntiAlias(true);
    borderPaint.setColor(Color.RED);
    borderPaint.setStrokeWidth(5);

    canvas.drawCircle( getWidth()/2, getHeight()/2, 50, imagePaint);
    canvas.drawCircle( getWidth()/2, getHeight()/2, 50, borderPaint);
    //this.draw(canvas);
}
*/
然后现在就可以在其他的地方使用这个控件了。
自己写的一个例子roundimageview.xml
<?xml version="1.0" encoding="utf-8"?>
<LinearLayout xmlns:android="http://schemas.android.com/apk/res/android"
    android:layout_width="match_parent"
    android:layout_height="match_parent"
    android:orientation="vertical" >
    <com.zf.view.RoundImage
        xmlns:riv="http://schemas.android.com/apk/res-auto"
        android:id="@+id/imageView"
        android:layout_width="138dp"
        android:layout_height="138dp"
        riv:radius="138dp"
        riv:src="@drawable/demo" />

</LinearLayout>
效果图如下:

最后的一点问题,为什么写这些控件的时候一定需要实现带两个参数或者三个参数的构造函数。还不是很明白,知道的麻烦告诉下。
标签:android style blog http color java 使用 io
原文地址:http://www.cnblogs.com/egos-ants/p/3888056.html