标签:
最近一直在忙项目,也在不断的面试,每次问道这个自定义控件,好多人云里雾绕的,今天就这个机会,简单做个完全自定义控件的入门吧。上一篇讲了继承已有控件的过程,发现我们只是简答的在封装的布局里操作,并没有重写onDraw,onMeasure,onLayout这些方法。其实继承控件这种形式基本能满足我们大部分的功能,但对于现有控件无法满足的怎么办,那就让我们重写上述三个方法,自己写特定需求的控件。完全自定义控件一般有两种,一种继承View,一种继承Viewgroup。根据view树结构,我们知道Viewgroup可以包含view,也可以包含viewgroup。View也可以包含Viewgroup。不能一看到Viewgroup,望文生义。今天先以一个简单的例子,来打开完全自定义之门。
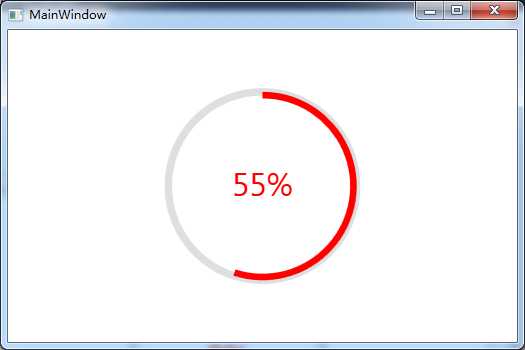
经常在项目中遇到进度条的问题,比如圆形进度条,显示百分比进度等。请看代码。
1.分析:
从图中我们看到,分三个部分:大圆,红色的进度,中间的文字。而圆形还有一定的宽度,颜色,进度显示也有颜色,文字有颜色,同时还有大小等细节。
2.实现思路:
刚才说到字体大小等细节,这些可以作为属性,绘制大圆,文字,进度等可以在onDraw里重绘(画圆用到drawCircle,绘制文字用到drawText,进度用到drawArc),自定义view就完全自己来嘛。
3.额外的细节(添加监听等):
上述绘制完view暂时还是精致的,想动起来,需要不断的更新进度,不断刷新重绘view。这时候就用到了invalidate()或postinvalidate();当invalidate()方法调用时会重新调用onDraw() 方法。当进度达到100%时,还要有个回调,执行完毕等。针对其他的自定义我们可能还要重新onTouchEvent,onSroll等触摸,滑动等,这样才算是一个完整的控件。
好了,基本的思路都告诉大家了。以后无外乎就这几个思路。重要的还是把自己掌握的技能融会贯通,多练。下面就看实现代码吧:
(1)values里的attrs代码
<resources>
    <declare-styleable name="CircleView">
        <attr name="roundColor" format="color"/>
        <attr name="roundProgressColor" format="color"/>
        <attr name="roundWidth" format="dimension"></attr>
        <attr name="textColor" format="color" />
        <attr name="textSize" format="dimension" />
        <attr name="max" format="integer"></attr>
        <attr name="textIsDisplayable" format="boolean"></attr>
        <attr name="style">
            <enum name="STROKE" value="0"></enum>
            <enum name="FILL" value="1"></enum>
        </attr>
    </declare-styleable>
</resources>
(2)自定义控件核心代码

  1 public class CircleView extends View  {
  2
  3     private int mCirlceViewColor;
  4     private int mCirlceViweProgressColor;
  5     private  int mProgress;
  6     private float mTextSize;
  7     private int mTextColor;
  8     private  int mStyle;
  9     private  float mRoudWidth;
 10     private  int  max;
 11     private Paint mPaint ;
 12
 13     private  static final int STROKE = 0;
 14     private  static final int FILL = 1;
 15
 16     public CircleView(Context context) {
 17         this(context, null);
 18     }
 19
 20     public CircleView(Context context, AttributeSet attrs) {
 21         this(context, attrs, 0);
 22     }
 23
 24     public CircleView(Context context, AttributeSet attrs, int defStyleAttr) {
 25         super(context, attrs, defStyleAttr);
 26         mPaint = new Paint();
 27
 28         TypedArray array = context.obtainStyledAttributes(attrs, R.styleable.CircleView);
 29         mCirlceViewColor = array.getColor(R.styleable.CircleView_roundColor, Color.BLACK);
 30         mCirlceViweProgressColor = array.getColor(R.styleable.CircleView_roundProgressColor,Color.RED);
 31         mTextColor = array.getColor(R.styleable.CircleView_textColor,Color.BLUE);
 32         mTextSize = array.getDimension(R.styleable.CircleView_textSize,40);
 33         mRoudWidth = array.getDimension(R.styleable.CircleView_roundWidth,6);
 34         max = array.getInteger(R.styleable.CircleView_max,100);
 35         mStyle = array.getInt(R.styleable.CircleView_style, 0);
 36
 37         array.recycle();
 38     }
 39
 40     @Override
 41     protected void onDraw(Canvas canvas) {
 42         super.onDraw(canvas);
 43
 44         /**
 45          * 先画圆,直接使用draw Circle
 46          * Draw the specified circle using the specified paint. If radius is <= 0,
 47          * then nothing will be drawn. The circle will be filled or framed based
 48          * on the Style in the paint.
 49          *
 50           public void drawCircle(float cx, float cy, float radius, @NonNull Paint paint)
 51          * @param cx     The x-coordinate of the center of the cirle to be drawn
 52          * @param cy     The y-coordinate of the center of the cirle to be drawn
 53          * @param radius The radius of the cirle to be drawn
 54          * @param paint  The paint used to draw the circle
 55          */
 56
 57         int cx = getWidth()/2;
 58
 59         int radius =(int) (cx -mRoudWidth/2);//设置圆环的半径
 60         mPaint.setColor(mCirlceViewColor); //设置圆环的颜色
 61         mPaint.setStyle(Paint.Style.STROKE); //设置空心
 62         mPaint.setStrokeWidth(mRoudWidth); //设置圆环的宽度
 63         mPaint.setAntiAlias(true);  //消除锯齿
 64         canvas.drawCircle(cx,cx,radius,mPaint);
 65
 66
 67         /**
 68          * 有了外层的圆,现在绘制圆内的文字.使用drawText
 69
 70          * Draw the text, with origin at (x,y), using the specified paint. The
 71          * origin is interpreted based on the Align setting in the paint.
 72          *
 73          public void drawText(@NonNull String text, float x, float y, @NonNull Paint paint)
 74          * @param text  The text to be drawn
 75          * @param x     The x-coordinate of the origin of the text being drawn
 76          * @param y     The y-coordinate of the baseline of the text being drawn
 77          * @param paint The paint used for the text (e.g. color, size, style)
 78          */
 79
 80         mPaint.setStrokeWidth(0);
 81         mPaint.setColor(mTextColor);
 82         mPaint.setTextSize(mTextSize);
 83         int percent = (int)(((float)mProgress/(float) max) *100);
 84         float textWidth  = mPaint.measureText (percent+"%");
 85         canvas.drawText(percent+"%",cx-textWidth/2,cx+mTextSize/2,mPaint);
 86
 87         /**
 88          * 画圆弧 ,画圆环的进度
 89          */
 90
 91         mPaint.setStrokeWidth(mRoudWidth); //设置圆环的宽度
 92         mPaint.setColor(mCirlceViweProgressColor);  //设置进度的颜色
 93         RectF oval = new RectF(cx - radius, cx - radius, cx
 94                 + radius, cx + radius);  //用于定义的圆弧的形状和大小的界限
 95
 96         switch (mStyle) {
 97             case STROKE:{
 98                 mPaint.setStyle(Paint.Style.STROKE);
 99                 canvas.drawArc(oval, 0, 360 * mProgress / max, false, mPaint);  //根据进度画圆弧
100                 break;
101             }
102             case FILL:{
103                 mPaint.setStyle(Paint.Style.FILL_AND_STROKE);
104                 if(mProgress !=0)
105                     canvas.drawArc(oval, 0, 360 * mProgress / max, true, mPaint);  //根据进度画圆弧
106                 break;
107             }
108         }
109     }
110
111     public  void  setProgress(int progress){
112         this.mProgress = progress;
113     }
114
115     private  int getProgress(){
116         return this.mProgress;
117
118
119     }
120
121     private  void setMax(int max){
122         this.max = max;
123     }
124     private  int getMax(){
125         return  max;
126     }
说明几个点:
a.public void drawCircle(float cx, float cy, float radius, @NonNull Paint paint)的几个参数
cx和cy是圆心坐标,这个圆心坐标是相对当前绘制的圆心大小的,x和y,而不是屏幕左上角的。
radius是半径,paint是当前的所持有的画笔。
b.public void drawText(@NonNull String text, float x, float y, @NonNull Paint paint)
x:是文本内容最开始绘制的位置。在此view中可以看出应该是(中心点的x-文字宽度的/2)
y是基线的值。在view中应该是中心点的y+文字大小/2.
(3)监听事件的添加如下
上述只是个初步重写view的大致过程,实际项目中更复杂的自定义,设计的内容会则会更加庞大,比如滑动效果,比如事件分发,比如点击事件等等。接下来就从view 的基本知识点讲起,逐步完成一个复杂的自定义view。敬请期待,当然我的博客都比较简单,旨在给大家提供一个思路。后续我会把我的心得转成代码形式放到github上,希望能帮到大家。
标签:
原文地址:http://www.cnblogs.com/javawing-android/p/5660506.html
