标签:
接上篇继续进行Masonry 的学习。
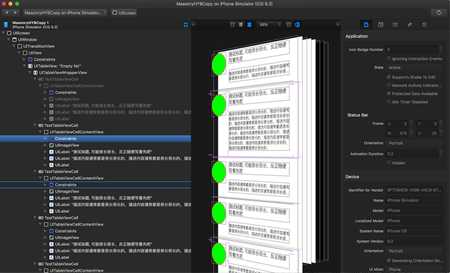
(12)tableViewCell 布局
 1 #import "TableViewController.h"
 2 #import "TestTableViewCell.h"
 3
 4 @interface TableViewController ()<UITableViewDelegate, UITableViewDataSource>
 5
 6 @property(nonatomic, strong) UITableView *tableView;
 7 @property(nonatomic, strong) NSMutableArray *dataSource;
 8
 9 @end
10
11 @implementation TableViewController
12
13 - (void)viewDidLoad {
14     [super viewDidLoad];
15     // Do any additional setup after loading the view.
16
17     self.tableView = [[UITableView alloc] init];
18     self.tableView.separatorStyle = UITableViewCellSeparatorStyleNone;
19     self.tableView.delegate = self;
20     self.tableView.dataSource = self;
21     [self.view addSubview:self.tableView];
22     [self.tableView mas_makeConstraints:^(MASConstraintMaker *make) {
23         make.edges.mas_equalTo(self.view);
24     }];
25
26     for (NSUInteger i = 0; i < 10; ++i) {
27         TestModel *model = [[TestModel alloc] init];
28         model.title = @"测试标题, 可能很长很长,反正随便写着先吧";
29         model.desc = @"描述内容通常都是很长很长的,描述内容通常都是很长很长的,描述内容通常都是很长很长的,描述内容通常都是很长很长的,描述内容通常都是很长很长的,描述内容通常都是很长很长的,描述内容通常都是很长很长的,描述内容通常都是很长很长的,描述内容通常都是很长很长的,描述内容通常都是很长很长的,描述内容通常都是很长很长的,";
30         [self.dataSource addObject:model];
31     }
32     [self.tableView reloadData];
33 }
34
35 - (NSMutableArray *)dataSource {
36     if (_dataSource == nil) {
37         _dataSource = [[NSMutableArray alloc] init];
38     }
39     return _dataSource;
40 }
41
42 #pragma mark - UITableViewDataSource
43 - (NSInteger)tableView:(UITableView *)tableView numberOfRowsInSection:(NSInteger)section {
44     return self.dataSource.count;
45 }
46
47 - (UITableViewCell *)tableView:(UITableView *)tableView cellForRowAtIndexPath:(NSIndexPath *)indexPath {
48     static NSString *cellIdentifier = @"CellIdentifier";
49     TestTableViewCell *cell = [tableView dequeueReusableCellWithIdentifier:cellIdentifier];
50     if (!cell) {
51         cell = [[TestTableViewCell alloc] initWithStyle:UITableViewCellStyleDefault reuseIdentifier:cellIdentifier];
52     }
53     cell.indexPath = indexPath;
54     cell.block = ^(NSIndexPath *path) {
55         [tableView reloadRowsAtIndexPaths:@[path] withRowAnimation:UITableViewRowAnimationFade];
56     };
57     TestModel *model = [self.dataSource objectAtIndex:indexPath.row];
58     [cell configCellWithModel:model];
59     return cell;
60 }
61
62 - (CGFloat)tableView:(UITableView *)tableView heightForRowAtIndexPath:(NSIndexPath *)indexPath {
63     TestModel *model = [self.dataSource objectAtIndex:indexPath.row];
64     return [TestTableViewCell heightWithModel:model];
65 }
66 - (void)didReceiveMemoryWarning {
67     [super didReceiveMemoryWarning];
68     // Dispose of any resources that can be recreated.
69 }
70
71 /*
72 #pragma mark - Navigation
73
74 // In a storyboard-based application, you will often want to do a little preparation before navigation
75 - (void)prepareForSegue:(UIStoryboardSegue *)segue sender:(id)sender {
76     // Get the new view controller using [segue destinationViewController].
77     // Pass the selected object to the new view controller.
78 }
79 */
80
81 @end
我们来看看这个计算行高的代码,看起来是不是很像配置数据的代理方法呢?
1 - (CGFloat)tableView:(UITableView *)tableView heightForRowAtIndexPath:(NSIndexPath *)indexPath {
2     TestModel *model = [self.dataSource objectAtIndex:indexPath.row];
3     return [TestTableViewCell heightWithModel:model];
4 }
我们看看TestCell的声明,提供了一个计算行高的类方法:
 1 #import <UIKit/UIKit.h>
 2
 3 @interface TestModel : NSObject
 4
 5 @property(nonatomic, copy) NSString *title;
 6 @property(nonatomic, copy) NSString *desc;
 7 @property(nonatomic, assign) BOOL isExpanded;
 8
 9 @end
10
11 typedef void (^TestBlock)(NSIndexPath *indexPath);
12
13 @interface TestTableViewCell : UITableViewCell
14
15 @property(nonatomic, strong) UILabel *titleLabel;
16 @property(nonatomic, strong) UILabel *descLabel;
17 @property(nonatomic, strong) NSIndexPath *indexPath;
18
19 @property(nonatomic, copy) TestBlock block;
20
21 - (void)configCellWithModel:(TestModel *)model;
22 + (CGFloat)heightWithModel:(TestModel *)model;
23
24 @end
我们看一下计算行高的实现:
1 + (CGFloat)heightWithModel:(TestModel *)model {
2     TestTableViewCell *cell = [[TestTableViewCell alloc] initWithStyle:UITableViewCellStyleDefault reuseIdentifier:@""];
3     [cell configCellWithModel:model];
4     [cell layoutIfNeeded];
5     CGRect frame = cell.descLabel.frame;
6     return frame.origin.y + frame.size.height + 20;
7 }
我们只是创建了一个cell然后配置数据,然后调用layoutIfNeeded更新约束,以便获取到frame。当我们获取到以后,我们就可以计算出最后的cell真正的高度了。
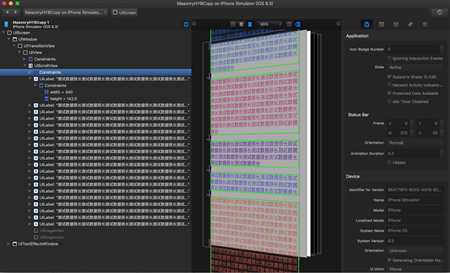
(13)ScrollView循环布局
 1 #import "ScrollViewController.h"
 2
 3 @interface ScrollViewController ()
 4
 5 @property (nonatomic, strong) UIScrollView *scrollView;
 6
 7 @end
 8
 9 @implementation ScrollViewController
10
11 - (void)viewDidLoad {
12   [super viewDidLoad];
13
14   self.scrollView = [[UIScrollView alloc] init];
15   self.scrollView.pagingEnabled = NO;
16   [self.view addSubview:self.scrollView];
17   self.scrollView.backgroundColor = [UIColor lightGrayColor];
18
19   CGFloat screenWidth = [UIScreen mainScreen].bounds.size.width;
20   UILabel *lastLabel = nil;
21   for (NSUInteger i = 0; i < 20; ++i) {
22     UILabel *label = [[UILabel alloc] init];
23     label.numberOfLines = 0;
24     label.layer.borderColor = [UIColor greenColor].CGColor;
25     label.layer.borderWidth = 2.0;
26     label.text = [self randomText];
27
28     // We must preferredMaxLayoutWidth property for adapting to iOS6.0
29     label.preferredMaxLayoutWidth = screenWidth - 30;
30     label.textAlignment = NSTextAlignmentLeft;
31     label.textColor = [self randomColor];
32     [self.scrollView addSubview:label];
33
34     [label mas_makeConstraints:^(MASConstraintMaker *make) {
35       make.left.mas_equalTo(15);
36       make.right.mas_equalTo(self.view).offset(-15);
37
38       if (lastLabel) {
39         make.top.mas_equalTo(lastLabel.mas_bottom).offset(20);
40       } else {
41         make.top.mas_equalTo(self.scrollView).offset(20);
42       }
43     }];
44
45     lastLabel = label;
46   }
47
48   [self.scrollView mas_makeConstraints:^(MASConstraintMaker *make) {
49     make.edges.mas_equalTo(self.view);
50
51     // 让scrollview的contentSize随着内容的增多而变化
52     make.bottom.mas_equalTo(lastLabel.mas_bottom).offset(20);
53   }];
54 }
55
56 - (UIColor *)randomColor {
57   CGFloat hue = ( arc4random() % 256 / 256.0 );  //  0.0 to 1.0
58   CGFloat saturation = ( arc4random() % 128 / 256.0 ) + 0.5;  //  0.5 to 1.0, away from white
59   CGFloat brightness = ( arc4random() % 128 / 256.0 ) + 0.5;  //  0.5 to 1.0, away from black
60   return [UIColor colorWithHue:hue saturation:saturation brightness:brightness alpha:1];
61 }
62
63 - (NSString *)randomText {
64   CGFloat length = arc4random() % 50 + 5;
65
66   NSMutableString *str = [[NSMutableString alloc] init];
67   for (NSUInteger i = 0; i < length; ++i) {
68     [str appendString:@"测试数据很长,"];
69   }
70
71   return str;
72 }
73
74 @end
对于循环创建,我们需要记录下一个视图所依赖的控件,这里使用了lastLabel来记录。
我们要想让scrollview的contentSize随内容的变化而变化,那么就我们一定要添加注意添加约束:
1
2     [self.scrollView mas_makeConstraints:^(MASConstraintMaker *make) {
3         make.edges.mas_equalTo(self.view);
4
5         // 让scrollView 的contentSize 随着内容的增多而变化
6         make.bottom.mas_equalTo(lastLabel.mas_bottom).offset(20);
7     }];
对于scrollview和tableview,我们不能使用bottom来计算其高,因为这个属性对于scrollview和tableview来说,不用用来计算高度的,而是用于计算contentSize.height的。我们要想随内容而变化,以便可滚动查看,就必须设置bottom约束。
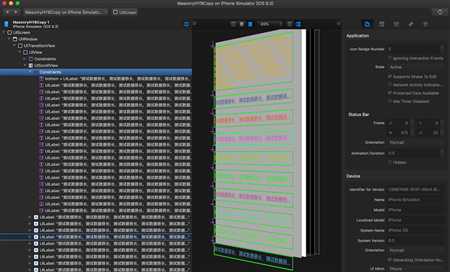
(14)复杂ScrollerView 布局
  1 #import "ScrollViewComplexController.h"
  2
  3 @interface ScrollViewComplexController ()
  4
  5 @property (nonatomic, strong) UIScrollView *scrollView;
  6 @property (nonatomic, strong) NSMutableArray *expandStates;
  7
  8 @end
  9
 10 @implementation ScrollViewComplexController
 11
 12 - (void)viewDidLoad {
 13   [super viewDidLoad];
 14
 15   self.scrollView = [[UIScrollView alloc] init];
 16   self.scrollView.pagingEnabled = NO;
 17   [self.view addSubview:self.scrollView];
 18   self.scrollView.backgroundColor = [UIColor lightGrayColor];
 19
 20   CGFloat screenWidth = [UIScreen mainScreen].bounds.size.width;
 21   UILabel *lastLabel = nil;
 22   for (NSUInteger i = 0; i < 10; ++i) {
 23     UILabel *label = [[UILabel alloc] init];
 24     label.numberOfLines = 0;
 25     label.layer.borderColor = [UIColor greenColor].CGColor;
 26     label.layer.borderWidth = 2.0;
 27     label.text = [self randomText];
 28     label.userInteractionEnabled = YES;
 29     UITapGestureRecognizer *tap = [[UITapGestureRecognizer alloc] initWithTarget:self action:@selector(onTap:)];
 30     [label addGestureRecognizer:tap];
 31
 32     // We must preferredMaxLayoutWidth property for adapting to iOS6.0
 33     label.preferredMaxLayoutWidth = screenWidth - 30; // iOS 6 的用法
 34     label.textAlignment = NSTextAlignmentLeft;
 35     label.textColor = [self randomColor];
 36     [self.scrollView addSubview:label];
 37
 38     [label mas_makeConstraints:^(MASConstraintMaker *make) {
 39       make.left.mas_equalTo(15);
 40       make.right.mas_equalTo(self.view).offset(-15);
 41
 42       if (lastLabel) {
 43         make.top.mas_equalTo(lastLabel.mas_bottom).offset(20);
 44       } else {
 45         make.top.mas_equalTo(self.scrollView).offset(20);
 46       }
 47
 48       make.height.mas_equalTo(40);
 49     }];
 50
 51     lastLabel = label;
 52
 53     [self.expandStates addObject:[@[label, @(NO)] mutableCopy]];
 54   }
 55
 56   [self.scrollView mas_makeConstraints:^(MASConstraintMaker *make) {
 57     make.edges.mas_equalTo(self.view);
 58
 59     // 让scrollview的contentSize随着内容的增多而变化
 60     make.bottom.mas_equalTo(lastLabel.mas_bottom).offset(20);
 61   }];
 62 }
 63
 64 - (NSMutableArray *)expandStates {
 65   if (_expandStates == nil) {
 66     _expandStates = [[NSMutableArray alloc] init];
 67   }
 68
 69   return _expandStates;
 70 }
 71
 72 - (UIColor *)randomColor {
 73   CGFloat hue = ( arc4random() % 256 / 256.0 );  //  0.0 to 1.0
 74   CGFloat saturation = ( arc4random() % 128 / 256.0 ) + 0.5;  //  0.5 to 1.0, away from white
 75   CGFloat brightness = ( arc4random() % 128 / 256.0 ) + 0.5;  //  0.5 to 1.0, away from black
 76   return [UIColor colorWithHue:hue saturation:saturation brightness:brightness alpha:1];
 77 }
 78
 79 - (NSString *)randomText {
 80   CGFloat length = arc4random() % 150 + 5;
 81
 82   NSMutableString *str = [[NSMutableString alloc] init];
 83   for (NSUInteger i = 0; i < length; ++i) {
 84     [str appendString:@"测试数据很长,"];
 85   }
 86
 87   return str;
 88 }
 89
 90 - (void)onTap:(UITapGestureRecognizer *)sender {
 91   UIView *tapView = sender.view;
 92
 93   NSUInteger index = 0;
 94   for (NSMutableArray *array in self.expandStates) {
 95     UILabel *view = [array firstObject];
 96
 97     if (view == tapView) {
 98       NSNumber *state = [array lastObject];
 99
100       // 当前是展开状态的话,就收缩
101       if ([state boolValue] == YES) {
102         [view mas_updateConstraints:^(MASConstraintMaker *make) {
103           make.height.mas_equalTo(40);
104         }];
105       } else {
106         UIView *preView = nil;
107         UIView *nextView = nil;
108
109         if (index - 1 < self.expandStates.count && index >= 1) {
110           preView = [[self.expandStates objectAtIndex:index - 1] firstObject];
111         }
112
113         if (index + 1 < self.expandStates.count) {
114            nextView = [[self.expandStates objectAtIndex:index + 1] firstObject];
115         }
116
117         [view mas_remakeConstraints:^(MASConstraintMaker *make) {
118           if (preView) {
119             make.top.mas_equalTo(preView.mas_bottom).offset(20);
120           } else {
121             make.top.mas_equalTo(20);
122           }
123
124           make.left.mas_equalTo(15);
125           make.right.mas_equalTo(self.view).offset(-15);
126         }];
127
128         if (nextView) {
129           [nextView mas_updateConstraints:^(MASConstraintMaker *make) {
130             make.top.mas_equalTo(view.mas_bottom).offset(20);
131           }];
132         }
133       }
134
135       [array replaceObjectAtIndex:1 withObject:@(!state.boolValue)];
136
137       [self.view setNeedsUpdateConstraints];
138       [self.view updateConstraintsIfNeeded];
139
140       [UIView animateWithDuration:0.35 animations:^{
141         [self.view layoutIfNeeded];
142       } completion:^(BOOL finished) {
143
144       }];
145       break;
146     }
147
148     index++;
149   }
150 }
151
152 @end
当我们要收起的时候,只是简单地设置其高度的约束为40,但是当我们要展开时,实现起来就相对麻烦了。因为我们需要重新添加约束,要重新给所点击的视图添加约束,就需要知道前一个依赖视图和后一个依赖视图的约束,以便将相关联的都更新约束。
当我们更新所点击的视图时,我们通过判断是否有前一个依赖视图来设置顶部约束:
1                     if (preView) {
2                         make.top.mas_equalTo(preView.mas_bottom).offset(20);
3                     } else {
4                         make.top.mas_equalTo(20);
5                     }
除了这个之外,我们也需要更新后一个视图的约束,因为我们对所点击的视图调用了mas_remakeConstraints方法,就会移除其之前所添加的所有约束,所以我们必须重新将后者对当前点击的视图的依赖重新添加上去:
1                 if (nextView) {
2                     [nextView mas_updateConstraints:^(MASConstraintMaker *make) {
3                         make.top.mas_equalTo(view.mas_bottom).offset(20);
4                     }];
5                 }
(15)scrollView 实战场景
  1 #import "HeaderFooterViewController.h"
  2
  3 @interface HeaderFooterViewController ()
  4
  5 @property(nonatomic, strong) UIScrollView *scrollView;
  6 @property(nonatomic, strong) UITableView *tableView;
  7
  8 @end
  9
 10 @implementation HeaderFooterViewController
 11
 12 - (void)viewDidLoad {
 13     [super viewDidLoad];
 14     // Do any additional setup after loading the view.
 15     [self configTableView];
 16 }
 17
 18 - (void)configScrollView {
 19     self.scrollView = [[UIScrollView alloc] init];
 20     [self.view addSubview:self.scrollView];
 21     [self.scrollView mas_makeConstraints:^(MASConstraintMaker *make) {
 22         make.edges.mas_equalTo(self.view);
 23     }];
 24
 25     UIView *headerView = [[UIView alloc] init];
 26     [self.scrollView addSubview:headerView];
 27
 28     UIImageView *imgView = [[UIImageView alloc] init];
 29     [headerView addSubview:imgView];
 30     imgView.backgroundColor = [UIColor greenColor];
 31     imgView.layer.cornerRadius = 50;
 32     imgView.layer.masksToBounds = YES;
 33     imgView.layer.borderWidth = 0.5;
 34     imgView.layer.borderColor = [UIColor redColor].CGColor;
 35
 36     CGFloat screenWidth = [UIScreen mainScreen].bounds.size.width;
 37
 38     UILabel *tipLabel = [[UILabel alloc] init];
 39     tipLabel.text = @"这里是提示信息,通常会比较长,可能会超过两行。为了适配6.0,我们需要指定preferredMaxLayoutWidth,但是要注意,此属性一旦设置,不是只在6.0上生效,任意版本的系统的都有作用,因此此值设置得一定要准备,否则计算结果会不正确。我们一定要注意,不能给tableview的tableHeaderView和tableFooterView添加约束,在6.0及其以下版本上会crash,其它版本没有";
 40     tipLabel.textAlignment = NSTextAlignmentCenter;
 41     tipLabel.textColor = [UIColor blackColor];
 42     tipLabel.backgroundColor = [UIColor clearColor];
 43     tipLabel.numberOfLines = 0;
 44     tipLabel.preferredMaxLayoutWidth = screenWidth - 30;
 45     [headerView addSubview:tipLabel];
 46
 47     UIButton *button = [UIButton buttonWithType:UIButtonTypeCustom];
 48     [button setTitle:@"show Detail" forState:UIControlStateNormal];
 49     [button setTitleColor: [UIColor whiteColor] forState:UIControlStateNormal];
 50     [button setBackgroundColor:[UIColor blueColor]];
 51     button.layer.cornerRadius = 6;
 52     button.clipsToBounds = YES;
 53     button.layer.masksToBounds = YES;
 54
 55     [headerView  addSubview:button];
 56
 57     [headerView mas_makeConstraints:^(MASConstraintMaker *make) {
 58         make.left.top.mas_equalTo(0);
 59         make.width.mas_equalTo(self.view);
 60         make.bottom.mas_equalTo(button.mas_bottom).offset(60).priorityLow();
 61         make.height.greaterThanOrEqualTo(self.view);
 62     }];
 63
 64     [imgView mas_makeConstraints:^(MASConstraintMaker *make) {
 65         make.top.mas_equalTo(80);
 66         make.centerX.mas_equalTo(headerView);
 67         make.width.height.mas_equalTo(100);
 68     }];
 69
 70     [tipLabel mas_makeConstraints:^(MASConstraintMaker *make) {
 71         make.left.mas_equalTo(15);
 72         make.right.mas_equalTo(-15);
 73         make.top.mas_equalTo(imgView.mas_bottom).offset(40);
 74     }];
 75
 76     [button mas_makeConstraints:^(MASConstraintMaker *make) {
 77         make.top.mas_greaterThanOrEqualTo(tipLabel.mas_bottom).offset(80);
 78         make.left.mas_equalTo(15);
 79         make.right.mas_equalTo(-15);
 80         make.height.mas_equalTo(45);
 81     }];
 82
 83     [self.scrollView mas_makeConstraints:^(MASConstraintMaker *make) {
 84         make.bottom.mas_equalTo(button.mas_bottom).offset(80).priorityLow();
 85         make.bottom.mas_greaterThanOrEqualTo(self.view);
 86     }];
 87 }
 88
 89 - (void)configTableView {
 90     if (self.tableView != nil) {
 91         return;
 92     }
 93     self.tableView = [[UITableView alloc] init];
 94     [self.view addSubview:self.tableView];
 95     [self.tableView mas_makeConstraints:^(MASConstraintMaker *make) {
 96         make.edges.mas_equalTo(self.view);
 97     }];
 98
 99     NSArray *array = [self headerViewWithHeight:self.view.frame.size.height addToView:self.view];
100     UIView *headerView = [array firstObject];
101     [headerView layoutIfNeeded];
102     UIButton *button = [array lastObject];
103     CGFloat h = button.frame.size.height + button.frame.origin.y + 40;
104     h = h < self.view.frame.size.height ? self.view.frame.size.height : h;
105
106     [headerView removeFromSuperview];
107     [self headerViewWithHeight:h addToView:nil];
108 }
109
110 - (NSArray *)headerViewWithHeight:(CGFloat)height addToView:(UIView *)toView {
111     // 注意, 绝对不能给tableHeaderView 直接添加约束, 必闪退
112     UIView *headerView = [[UIView alloc] initWithFrame:CGRectMake(0, 0, self.view.frame.size.width, height)];
113
114     if (toView) {
115         [toView addSubview:headerView];
116     } else {
117         self.tableView.tableHeaderView = headerView;
118     }
119
120     UIImageView *imgView = [[UIImageView alloc] init];
121     [headerView addSubview:imgView];
122     imgView.backgroundColor = [UIColor greenColor];
123     imgView.layer.cornerRadius = 50;
124     imgView.layer.masksToBounds = YES;
125     imgView.layer.borderWidth = 0.5;
126     imgView.layer.borderColor = [UIColor redColor].CGColor;
127
128     CGFloat screentWidth = [UIScreen mainScreen].bounds.size.width;
129
130     UILabel *tipLabel = [[UILabel alloc] init];
131     tipLabel.text = @"这里是提示信息,通常会比较长,可能会超过两行。为了适配6.0,我们需要指定preferredMaxLayoutWidth,但是要注意,此属性一旦设置,不是只在6.0上生效,任意版本的系统的都有作用,因此此值设置得一定要准备,否则计算结果会不正确。我们一定要注意,不能给tableview的tableHeaderView和tableFooterView添加约束,在6.0及其以下版本上会crash,其它版本没有";
132     tipLabel.textAlignment = NSTextAlignmentCenter;
133     tipLabel.textColor = [UIColor blackColor];
134     tipLabel.backgroundColor = [UIColor clearColor];
135     tipLabel.numberOfLines = 0;
136     tipLabel.preferredMaxLayoutWidth = screentWidth - 30;
137     [headerView addSubview:tipLabel];
138
139     UIButton *button = [UIButton buttonWithType:UIButtonTypeCustom];
140     [button setTitle:@"Show detail" forState:UIControlStateNormal];
141     [button setTitleColor:[UIColor whiteColor] forState:UIControlStateNormal];
142     [button setBackgroundColor:[UIColor blueColor]];
143     button.layer.cornerRadius = 6;
144     button.clipsToBounds = YES;
145     button.layer.masksToBounds = YES;
146
147     [headerView addSubview:button];
148
149     [imgView mas_makeConstraints:^(MASConstraintMaker *make) {
150         make.top.mas_equalTo(80);
151         make.centerX.mas_equalTo(headerView);
152         make.width.height.mas_equalTo(100);
153     }];
154
155     [tipLabel mas_makeConstraints:^(MASConstraintMaker *make) {
156         make.left.mas_equalTo(self.view).offset(15);
157         make.right.mas_equalTo(self.view).offset(-15);
158         make.top.mas_equalTo(imgView.mas_bottom).offset(40);
159     }];
160
161     [button mas_makeConstraints:^(MASConstraintMaker *make) {
162         make.top.mas_greaterThanOrEqualTo(tipLabel.mas_bottom).offset(80);
163         make.left.mas_equalTo(tipLabel);
164         make.right.mas_equalTo(tipLabel);
165         make.height.mas_equalTo(45);
166     }];
167
168     return @[headerView, button];
169 }
170 - (void)didReceiveMemoryWarning {
171     [super didReceiveMemoryWarning];
172     // Dispose of any resources that can be recreated.
173 }
174
175 /*
176 #pragma mark - Navigation
177
178 // In a storyboard-based application, you will often want to do a little preparation before navigation
179 - (void)prepareForSegue:(UIStoryboardSegue *)segue sender:(id)sender {
180     // Get the new view controller using [segue destinationViewController].
181     // Pass the selected object to the new view controller.
182 }
183 */
184
185 @end
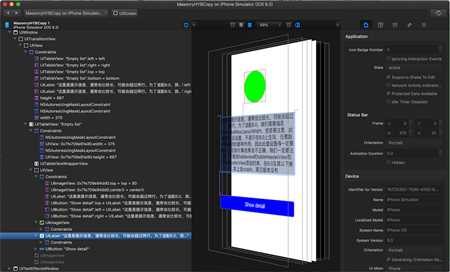
这里只是说说如何设置约束以保证按钮的位置始终是有一定距离的:
1 make.bottom.mas_equalTo(button.mas_bottom).offset(80).priorityLow(); 2 3 4 5 make.bottom.mas_greaterThanOrEqualTo(self.view);
我们设置了scrollview的bottom为button的底部+80个像素,但是其优先级为最低。然后又设置了scrollview的bottom要大于或者等于self.view,也就是说contentSize.height至少为屏高。
温馨提示:对于UILabel,如果需要兼容到iOS6.0,一定要设置preferredMaxLayoutWidth属性值,并且其值一定要与约束所生成的宽一样,否则就会出现显示不完全的问题。
Masonry 使用注意:
简要
自动布局最重要的是约束:UI元素间关系的数学表达式。约束包括尺寸、由优先级和阈值管理的相对位置。它们是添加剂,可能导致约束冲突 、约束不足造成布局无法确定 。这两种情况都会产生异常。
setNeedsLayout:告知页面需要更新,但是不会立刻开始更新。执行后会立刻调用layoutSubviews。layoutIfNeeded:告知页面布局立刻更新。所以一般都会和setNeedsLayout一起使用。如果希望立刻生成新的frame需要调用此方法,利用这点一般布局动画可以在更新布局后直接使用这个方法让动画生效。layoutSubviews:系统重写布局setNeedsUpdateConstraints:告知需要更新约束,但是不会立刻开始updateConstraintsIfNeeded:告知立刻更新约束updateConstraints:系统更新约束
参考链接:Masonry介绍与使用实践(快速上手Autolayout) Masonry使用心得 Masonry的简单使用 IOS自适应前段库-Masonry的使用 iOS_autoLayout_Masonry Masonry自动布局详解一:基本用法Masonry自动布局详解二:动画更新约束 Masonry自动布局详解三:remake约束 Masonry自动布局详解四:整体动画更新约束 Masonry自动布局详解五:比例(multipliedBy) Masonry自动布局详解六:tableviewCell布局 Masonry自动布局详解七:ScrollView循环布局 Masonry自动布局详解八:复杂ScrollView布局 Masonry自动布局详解九:scrollview实战场
Coding源码学习第四部分(Masonry介绍与使用(三))
标签:
原文地址:http://www.cnblogs.com/chmhml/p/5745382.html