标签:open std png version mod orm complete examples should
安装这个插件因为一些错误的操作费了不少时间,把过程记录下,以后需要安装时避免浪费时间。
一些准备工作:
1.首先安装vim:
1 sudo apt-get install vim-gtk
2.安装完成后,查看vim对python的支持
1 vim --version | grep python

发现是有对Python3的支持而没有对Python2的支持。
如果需要换成对python2的支持的话,可以安装py2包:
1 sudo apt-get install vim-nox-py2
安装完成后,再查看一下,可以发现现在换成对Python2的支持了。
![]()
如果需要的切换的话可以输入命令:
1 sudo update-alternatives --config vim

输入编号切换就可以了。
3.安装官方文档上说的,安装CMake和python-dev。
1 sudo apt-get install build-essential cmake
2 sudo apt-get install python-dev python3-dev
安装YouCompleteMe
1.首先安装vim的扩展管理器Vundle,利用Vundle来安装YCM。
1 git clone https://github.com/gmarik/Vundle.vim.git ~/.vim/bundle/Vundle.vim
安装完成后,可以安装Vundle的官方文档来配置.vimrc文件。
set nocompatible              " be iMproved, required
filetype off                  " required

" set the runtime path to include Vundle and initialize
set rtp+=~/.vim/bundle/Vundle.vim
call vundle#begin()
" alternatively, pass a path where Vundle should install plugins
"call vundle#begin(‘~/some/path/here‘)

" let Vundle manage Vundle, required
Plugin ‘VundleVim/Vundle.vim‘

" The following are examples of different formats supported.
" Keep Plugin commands between vundle#begin/end.

" All of your Plugins must be added before the following line
call vundle#end()            " required
filetype plugin indent on    " required
" To ignore plugin indent changes, instead use:
"filetype plugin on
然后使用:PluginInstall命令 就可以开始用Vundle进行管理了。
添加begin/end之间添加PluginInstall ‘Valloric/YouCompleteMe‘,保存后,再执行命令:PluginInstall就可以开始安装YouCompleteMe了。
但是我在下载的时候经常就卡住不动了,需要等很长时间。
所以建议先直接下载在~/.vim/bundle/下。
1 git clone https://github.com/gmarik/vundle.git ~/.vim/bundle/vundle
2 git clone https://github.com/Valloric/YouCompleteMe.git ~/.vim/bundle/YouCompleteMe
3 cd ~/.vim/bundle/YouCompleteMe
4 git submodule update --init --recursive
这样下载完成后,再添加PluginInstall ‘Valloric/YouCompleteMe‘,保存后,再执行命令:PluginInstall就可以瞬间完成了。
下载完成后,可以选择想要支持什么语言,如果需要添加C系语言支持,可以执行命令:
1 cd ~/.vim/bundle/YouCompleteMe
2 ./install.py --clang-completer
此时会自动下载Clang进行按照,不过执行的过程中等待时间较长,因此可以自己先下载安装Clang。
1 sudo apt-get install Clang
然后再使用系统--system-libclang
1 ./install.py --clang-completer --system-libclang
如果所有都需要,可以执行以下命令:
1 cd ~/.vim/bundle/YouCompleteMe
2 ./install.py --all
要注意的是,必须保证xbuild, go, tsserver, node, npm, and cargo这些工具包都已经安装了。
配置YCM
安装完成后,还需要对YCM进行配置。在官方文档中写有
YCM looks for a .ycm_extra_conf.py file in the directory of the opened file or in any directory above it in the hierarchy (recursively); when the file is found, it is loaded (only once!) as a Python module.
在~/.vim/bundle/YouCompleteMe/third_party/ycmd/cpp/ycm/下可以找到.ycm_extra_conf.py这个文件,可以每次使用时把其复制到当前目录下,也可以在~/.vimrc中进行配置。
1 let g:ycm_global_ycm_extra_conf = ‘~/.vim/bundle/YouCompleteMe/third_party/ycmd/cpp/ycm/.ycm_extra_conf.py’       "配置全局路径
2 let g:ycm_confirm_extra_conf=0   "每次直接加载该文件,不提示是否要加载
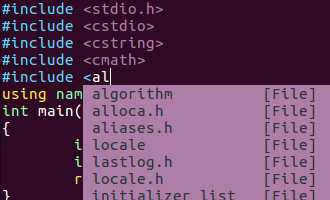
同时要补全语言,要对.ycm_extra_conf.py进行修改:
在flags下添加
1 ‘-isystem‘,
2 ‘/usr/include‘,
3 ‘-isystem‘,
4 ‘usr/include/c++/5.4.0‘
5 ‘-isystem‘,
6 ‘usr/include/x86_64-linux-gnu/c++‘,
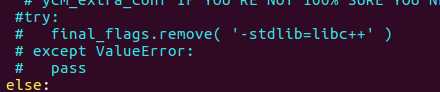
并注释掉这一段:
1 try:
2      final_flags.remove( ‘-stdlib-libc++‘ )
3 except ValueError:
4      pass
其他配置及~/.vimrc中的配置可根据个人喜好。
到这里YCM就可以使用了,
Ubuntu16.04 为vim安装YouCompleteMe插件
标签:open std png version mod orm complete examples should
原文地址:http://www.cnblogs.com/titicia/p/6031566.html