标签:class import 是你 use root failed let png 构建
装了Intellij,就是装了Gradle。
新建一个Gradle项目。然后下面这个页面要勾选上面两项:
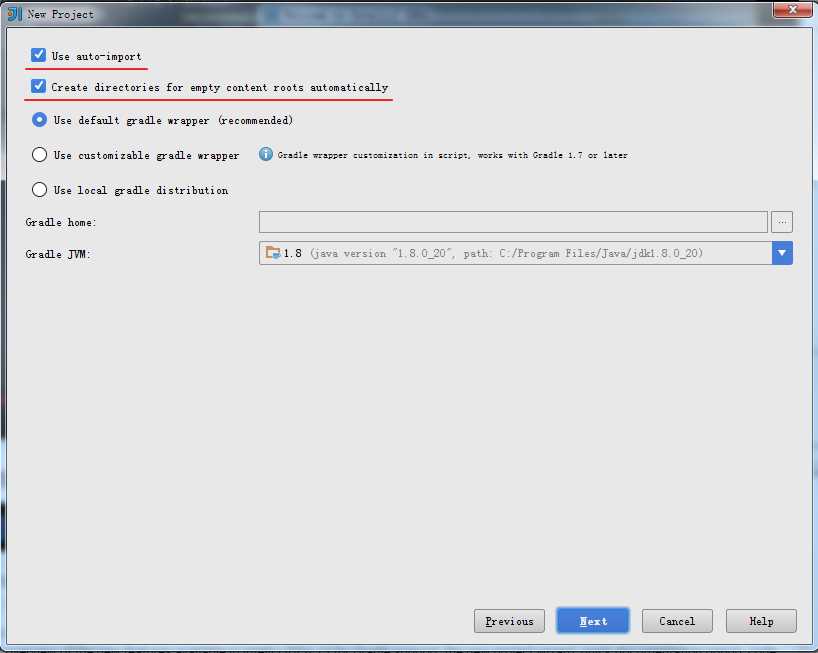
Use auto-import和Create directories for empty content roots automatically这两个选项勾上。
新建项目中的各个目录和文件:
build.gradle配置:
group ‘com.async.client‘
version ‘1.0-SNAPSHOT‘

apply plugin: ‘java‘

sourceCompatibility = 1.8

repositories {
    mavenLocal()
    mavenCentral()
}

tasks.withType(JavaCompile) {
    options.encoding = "UTF-8"
}

dependencies {
    compile group: ‘org.apache.httpcomponents‘, name:‘httpasyncclient‘, version:‘4.1.1‘
    testCompile group: ‘junit‘, name: ‘junit‘, version: ‘4.11‘
}
加上mavenLocal()这句话之后,Gradle会尝试先从本地Maven缓存中获取jar包,这样会更快一些。
dependencies则是各种依赖包了,compile表示编译时依赖,而testCompile表示执行单元测试时的编译的依赖。
task.withType()这段表示使用UTF-8编码,为了避免编译的问题,我们全部使用UTF-8编码即可。
Gradle项目窗口右键项目名,“Synchronizing ...”。
国外的maven实在太慢了,在gradle里面配置如下:
repositories {
    // maven库
    def cn = "http://maven.aliyun.com/nexus/content/groups/public/"
    def abroad = "http://central.maven.org/maven2/"
    // 先从url中下载jar若没有找到,则在artifactUrls中寻找
    maven {
        url cn
        artifactUrls abroad
    }
}
然后发现两个repositories重复了,所以去掉原来的,最后文件内容如下:
group ‘com.async‘
version ‘1.0-SNAPSHOT‘

apply plugin: ‘java‘

sourceCompatibility = 1.8

repositories {
    // maven库
    def cn = "http://maven.aliyun.com/nexus/content/groups/public/"
    def abroad = "http://central.maven.org/maven2/"
    // 先从url中下载jar若没有找到,则在artifactUrls中寻找
    maven {
        url cn
        artifactUrls abroad
    }
}

dependencies {
    compile group: ‘org.apache.httpcomponents‘, name:‘httpasyncclient‘, version:‘4.1.1‘
    testCompile group: ‘junit‘, name: ‘junit‘, version: ‘4.11‘
}
使用菜单 View-> Tools View -> Gradle 调出Gradle的配置界面。
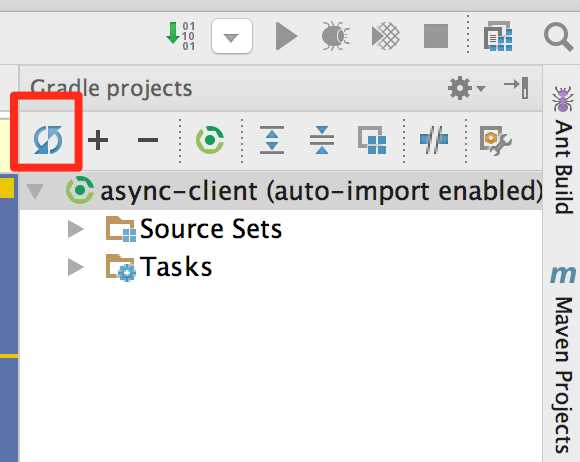
点上面这个按钮,就可以重新加载依赖。用国内的repository的确快很多。
现在包都下载好了,开始写程序。
其中,用到了CountDownLatch,一个同步辅助类,在完成一组正在其他线程中执行的操作之前,它允许一个或多个线程一直等待。
另外注意到HttpAsyncClients的用法和JS里面的异步调用很相似。
package com.async;

import org.apache.http.HttpResponse;
import org.apache.http.client.methods.HttpGet;
import org.apache.http.concurrent.FutureCallback;
import org.apache.http.impl.nio.client.CloseableHttpAsyncClient;
import org.apache.http.impl.nio.client.HttpAsyncClients;
import org.apache.http.util.EntityUtils;

import java.io.IOException;
import java.util.concurrent.CountDownLatch;

/**
 * Created by baidu on 16/11/26.
 */
public class AsyncClient {
    public static void main(String[] argv) {
        CloseableHttpAsyncClient httpAsyncClient = HttpAsyncClients.createDefault();
        httpAsyncClient.start();

        final CountDownLatch latch = new CountDownLatch(1);
        final HttpGet httpGet = new HttpGet("https://www.alipay.com/");

        System.out.println("Caller thread id: " + Thread.currentThread().getId());
        httpAsyncClient.execute(httpGet, new FutureCallback<HttpResponse>() {
            @Override
            public void completed(HttpResponse result) {
                latch.countDown();
                System.out.println("Callback thread id: " + Thread.currentThread().getId());
                System.out.println(httpGet.getRequestLine() + "->" + result.getStatusLine());
                String content = null;
                try {
                    content = EntityUtils.toString(result.getEntity(), "UTF-8");
                    System.out.println("Response content is: " + content);
                } catch (IOException e) {
                    e.printStackTrace();
                }

            }

            @Override
            public void failed(Exception ex) {
                latch.countDown();
                System.out.println("Callback thread id: " + Thread.currentThread().getId());
                System.out.println(httpGet.getRequestLine() + "->" + ex);
            }

            @Override
            public void cancelled() {
                latch.countDown();
                System.out.println("Callback thread id: " + Thread.currentThread().getId());
                System.out.println(httpGet.getRequestLine() + "->" + "cancelled");
            }
        });

        try {
            latch.await();
        } catch (InterruptedException e) {
            e.printStackTrace();
        }

        try {
            httpAsyncClient.close();
        } catch (IOException e) {
            e.printStackTrace();
        }

    }
}
运行得到结果:
Caller thread id: 1
Callback thread id: 12
GET https://www.alipay.com/ HTTP/1.1->HTTP/1.1 200 OK
Response content is:
<!-- FD:83:homeproxy/home/startup.vm:START --><!-- FD:83:homeproxy/home/startup.vm:634:startup.schema:startup-头部页面描述:START --><!DOCTYPE html>
<html lang="en">
......
稍作封装就可以实现如“getJson()”这样的方法。
也许你还注意到了,这个HttpClient跟同步的版本一样,直接支持https,但如果网站的证书是自签的,默认还是不行的,解决方法当然有,但代码有些麻烦,我觉得还不如直接买张证书来得简单,如果网站是你管的话。
Gradle项目学习 & HttpAsyncClient学习 & CountDownLatch学习
标签:class import 是你 use root failed let png 构建
原文地址:http://www.cnblogs.com/charlesblc/p/6104896.html