标签:route 开发 路由 page ast class top 用户 node.js
Vue2.0推荐开发环境:
homebrew:Mac系统下的包管理器
node.js: javascript运行环境
npm: Node.js下的包管理器
webpack: Vue组件都是通过.vue等自定义组件无法被用户端的各种浏览器解析,需要翻译和打包成js文件
vue-cli: 用来生成模版的Vue工程,其实就是封装了类似的脚手架
安装环境:
#安装brew
/usr/bin/ruby -e "$(curl -fsSL https://raw.githubusercontent.com/Homebrew/install/master/install)"
#安装node.js
brew install node
#安装webpack
npm install webpack -g
#安装vue脚手架
npm install vue-cli -g
#进入文件目录
cd 目录
# 创建模版项目
npm init webpack 项目名称
#进入项目下面
npm install
#启动项目
npm run dev
建了一个demo,目录如下:
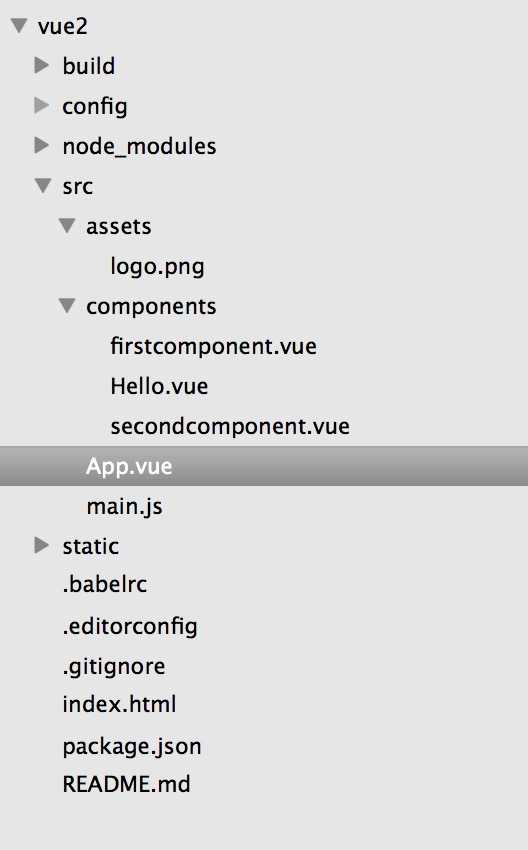
app.vue内容:
<template>
  <div id="app">
    <img src="./assets/logo.png">
    <h1>{{ msg }}</h1>
    <ul>
      <li><router-link to="/first">点击跳转到第一个页面</router-link></li>
      <li><router-link to="/second">点击跳转到第二个页面</router-link></li>
    </ul>
    <router-view class="view"></router-view>
  </div>
</template>

<script>

export default {
  name: ‘app‘,
  data () {
    return {
      msg: ‘Hello Vue!!!‘
    }
  }
}
</script>

<style>
#app {
  font-family: ‘Avenir‘, Helvetica, Arial, sans-serif;
  -webkit-font-smoothing: antialiased;
  -moz-osx-font-smoothing: grayscale;
  text-align: center;
  color: #2c3e50;
  margin-top: 60px;
}
</style>
在component中新建两个文件:firstcomponent和secondcomponent两个组件分别为跳转的两个页面
firstcomponent.vue:
<template>
    <div id="firstcomponent">
        <h2>First Page!!!!</h2>
        <a>written by {{ author }}</a>
    </div>
</template>

<script>
    export default {
        data () {
            return {
                author: "微信公众号 jinkey-love"
            }
        }
    }
</script>

<style>
    h2{color: red;}
</style>

secondcomponent.vue:
<template>
    <div id="secondcomponent">
        <h2>Second Page!!!!!</h2>
        <a>written by {{ author }}</a>
        <p> 感谢 <a href="https://github.com/showonne">showonne</a>大神的技术指导</p>
    </div>
</template>

<script>
    export default {
        data () {
            return {
                author: "微信公众号 jinkey-love"
            }
        }
    }
</script>

<style>
    h2{color: green;}
</style>
main.js
import Vue from ‘vue‘
import App from ‘./App‘

import VueRouter from‘vue-router‘
import VueResource from ‘vue-resource‘

// 开启debug模式
Vue.config.degbug = true;

Vue.use(VueRouter);
Vue.use(VueResource);

// 定义组件
import firstcomponent from ‘./components/firstcomponent‘
import secondcomponent from ‘./components/secondcomponent‘

// 创建一个路由器实例子
const router = new VueRouter({
    mode: ‘history‘,
    base: __dirname,
    routes: [
        {
            path: ‘/first‘,
            component: firstcomponent
        },
        {
            path: ‘/second‘,
            component: secondcomponent
        }
    ]
})

const app = new Vue({
    router: router,
    render: h => h(App)
}).$mount(‘#app‘)

// /* eslint-disable no-new */
// new Vue({
//   el: ‘#app‘,
//   template: ‘<App/>‘,
//   components: { App }
// })
以上是一个简单demo,小伙伴们动手试试吧!
标签:route 开发 路由 page ast class top 用户 node.js
原文地址:http://www.cnblogs.com/ccMelissa/p/6114176.html