标签:自己的 tool foreach his new getx raw fill 画线
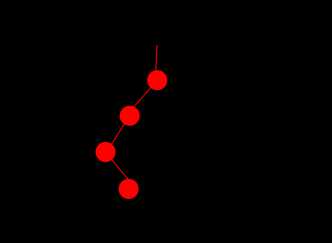
上一课我学习了相对于鼠标为目标点的弹性运动,这次就学习了如何以上一个球为目标点的弹性运动,这次的函数比较复杂,首先分成了如下几个函数,首先定义了一个球的model,之后添加了4个球,在加载中调用了动画事件,之后在动画事件里面加载了画线的事件,画完线之后才开始画球,而且专门用了一个函数来计算,也就是完全分开了层次,以免自己的逻辑思维混乱,这是一种编程的良好思维,分区处理内容,这样有效避免了代码重用,也增加了代码可读性。
还是像以前一样,代码如下:
var canvas = document.getElementById("canvas");
var cxt=canvas.getContext("2d");
var moves={x:0,y:0}
var balles=[];
var spring=0.03;
var g=6;
var force=0.85
var friction=0.1;
function Ball(x,y,radius,speed){
this.x=x;
this.y=y;
this.radius=radius;
this.vx=0;
this.vy=0;
this.speed=speed;
}
function move(event){
moves.x=event.point.x;
moves.y=event.point.y;
}
function down(event){}
function up(event){}
function animation(){
cxt.clearRect(0,0,canvas.width,canvas.height);
balles.forEach(draw);
requestAnimationFrame(animation);
}
function draw(ball,i){
// console.log(ball);
cxt.beginPath();
cxt.moveTo(ball.x,ball.y);
if(i!=0)
{
var b=balles[i-1];
}
else
{
var b={x:moves.x,y:moves.y}
}
cxt.lineTo(b.x,b.y);
cxt.strokeStyle="red";
cxt.stroke();
cxt.closePath();
if(i==0)
ballDraw(ball,moves.x,moves.y);
else
ballDraw(ball,balles[i-1].x,balles[i-1].y);
}
function ballDraw(ball,targetX,targetY){
cxt.beginPath();
var dx=targetX-ball.x;
var dy=targetY-ball.y;
var vx=dx*spring;
var vy=dy*spring;
ball.speed.x+=vx;
ball.speed.y+=vy;
ball.speed.x*=force;
ball.speed.y*=force;
ball.x+=ball.speed.x;
ball.y+=ball.speed.y+g;
cxt.arc(ball.x,ball.y,ball.radius,0,Math.PI*2,true);
cxt.fillStyle="red";
cxt.fill();
cxt.closePath();
}
window.onload=function(){
for(var i=0;i<4;i++)
{
balles.push(new Ball(20,i*50,10,{x:0,y:0}));
}
animation();
tool.MT(canvas,move,down,up);
}
标签:自己的 tool foreach his new getx raw fill 画线
原文地址:http://www.cnblogs.com/MyZsy/p/6121111.html