标签:auth 禁用 nagios 技术分享 x86_64 nagios安装 mem indent html
Nagios的功能是监控服务和主机,但是他自身并不包括这部分功能,所有的监控、检测功能都是通过各种插件来完成的。
启动Nagios后,它会周期性的自动调用插件去检测服务器状态,同时Nagios会维持一个队列,所有插件返回来的状态信息都进入队列,Nagios每次都从队首开始读取信息,并进行处理后,把状态结果通过web显示出来。
Nagios提供了许多插件,利用这些插件可以方便的监控很多服务状态。安装完成后,在nagios主目录下的/libexec里放有nagios自带的可以使用的所有插件,如,check_disk是检查磁盘空间的插件,check_load是检查CPU负载的,等等。每一个插件可以通过运行./check_xxx –h 来查看其使用方法和功能。
Nagios可以识别4种状态返回信息,即 0(OK)表示状态正常/绿色、1(WARNING)表示出现警告/黄色、2(CRITICAL)表示出现非常严重的错误/红色、3(UNKNOWN)表示未知错误/深黄色。Nagios根据插件返回来的值,来判断监控对象的状态,并通过web显示出来,以供管理员及时发现故障。
四种监控状态

再说报警功能,如果监控系统发现问题不能报警那就没有意义了,所以报警也是nagios很重要的功能之一。但是,同样的,Nagios 自身也没有报警部分的代码,甚至没有插件,而是交给用户或者其他相关开源项目组去完成的。
Nagios 安装,是指基本平台,也就是Nagios软件包的安装。它是监控体系的框架,也是所有监控的基础。
知道Nagios 是如何通过插件来管理服务器对象后,现在开始研究它是如何管理远端服务器对象的。Nagios 系统提供了一个插件NRPE。Nagios 通过周期性的运行它来获得远端服务器的各种状态信息。它们之间的关系如下图所示:

Nagios 通过NRPE 来远端管理服务
1. Nagios 执行安装在它里面的check_nrpe 插件,并告诉check_nrpe 去检测哪些服务。
2. 通过SSL,check_nrpe 连接远端机子上的NRPE daemon
3. NRPE 运行本地的各种插件去检测本地的服务和状态(check_disk,..etc)
4. 最后,NRPE 把检测的结果传给主机端的check_nrpe,check_nrpe 再把结果送到Nagios状态队列中。
5. Nagios 依次读取队列中的信息,再把结果显示出来。
|
Host Name |
OS |
IP |
Software |
|
Nagios-Server |
CentOS 6.5 |
192.168.44.100 |
LAMP、Nagios、nagios-plugins、nrpe |
|
Nagios-Linux |
CentOS 6.5 |
192.168.44.200 |
nagios-plugins、nrpe、 |
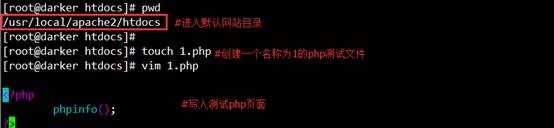
注意:先安装MySQL和Apache,后安装PHP,因为PHP配置编译的时候需要指定mysql路径和apache路径。
需要用到软件:
http-2.2.4.tar.gz
mysql-5.6.22-linux-glibc2.5-x86_64.tar.gz
php-5.3.27.tar.gz

先查看Linux是64位,就上传64的源码包。

[root@darker src]# cd httpd-2.2.4
[root@darker httpd-2.2.4]#./configure \
--prefix=/usr/local/apache2 \
--with-included-apr \
--enable-so \
--enable-deflate=shared \
--enable-expires=shared \
--enable-rewrite=shared \
--with-pcre
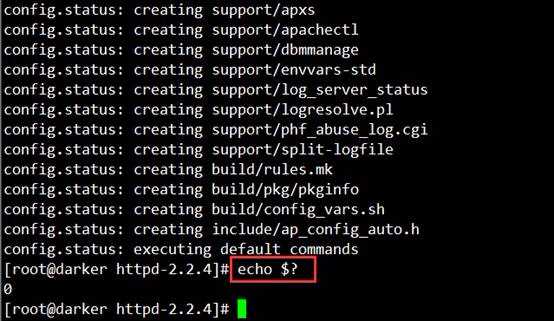
使用 echo $? 如果返回0代表没有问题 如果返回1代表安装错误
![]()

错误:error: mod_deflate has been requested but can not be built due to prerequisite failures
解决:yum -y install zlib-devel
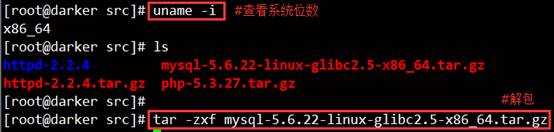
![]()
mv mysql-5.6.22-linux-glibc2.5-x86_64 /usr/local/mysql
useradd -s /sbin/nologin -M mysql
cd /usr/local/mysql/
![]()
mkdir -p /data/mysql
chown -R mysql.mysql /data/mysql/
![]()
./scripts/mysql_install_db --user=mysql --datadir=/data/mysql/

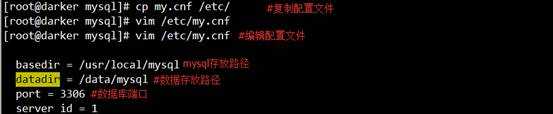
basedir = /usr/local/mysql
datadir = /data/mysql
port = 3007
server_id = 1
![]()
cp support-files/mysql.server /etc/init.d/mysqld
chmod 755 /etc/init.d/mysqld
![]()
basedir=/usr/local/mysql
datadir=/data/mysql
![]()
chkconfig --add mysqld
chkconfig mysqld on

service mysqld start
![]()
ln -s /usr/local/mysql/bin/mysql /usr/bin/
error while loading shared libraries: libaio.so.1
解决:yum -y install libaio
错误:Starting MySQL.The server quit without updating PID file (/[FAILED]ql/darker.pid).
InnoDB: mmap(137363456 bytes) failed; errno 12
[ERROR] InnoDB: Cannot allocate memory for the buffer pool
[ERROR] Plugin ‘InnoDB‘ init function returned error.
[ERROR] Plugin ‘InnoDB‘ registration as a STORAGE ENGINE failed.
[ERROR] Unknown/unsupported storage engine: InnoDB
[ERROR] Aborting
解决:innodb_buffer_pool_size = 8M
将innodb修改为8M 由于服务器内存过小导致
![]()
cd /usr/local/src/
tar -zxf php-5.3.27.tar.gz
cd php-5.3.27
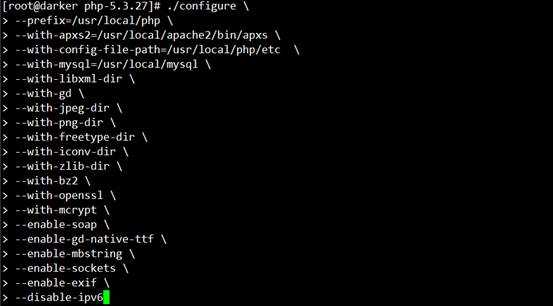
[root@darker php-5.3.27]# ./configure \
--prefix=/usr/local/php \
--with-apxs2=/usr/local/apache2/bin/apxs \
--with-config-file-path=/usr/local/php/etc \
--with-mysql=/usr/local/mysql \
--with-libxml-dir \
--with-gd \
--with-jpeg-dir \
--with-png-dir \
--with-freetype-dir \
--with-iconv-dir \
--with-zlib-dir \
--with-bz2 \
--with-openssl \
--with-mcrypt \
--enable-soap \
--enable-gd-native-ttf \
--enable-mbstring \
--enable-sockets \
--enable-exif \
--disable-ipv6
echo $?
![]()
make
![]()
echo $?
![]()
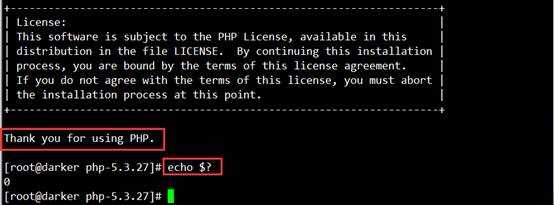
make install
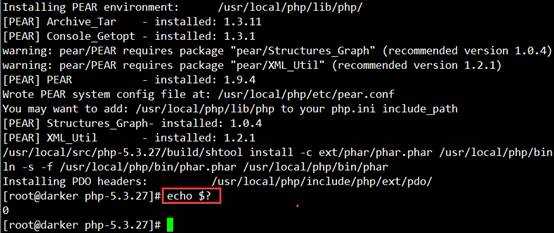
echo $?
![]()
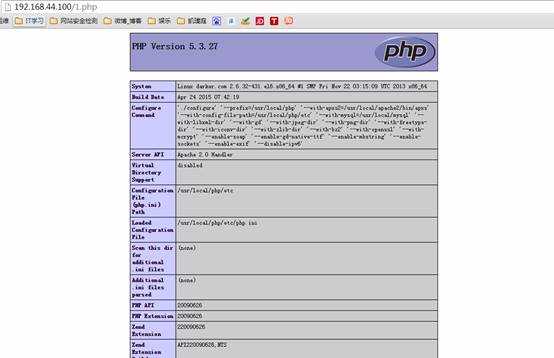
cp php.ini-production /usr/local/php/etc/php.ini
错误:configure: error: xml2-config not found. Please check your libxml2 installation.
解决:yum -y install libxml2-devel
错误:configure: error: Cannot find OpenSSL‘s <evp.h>
解决:yum install -y openssl openssl-devel
错误:configure: error: Please reinstall the BZip2 distribution
解决:yum install -y bzip2 bzip2-devel
错误:configure: error: jpeglib.h not found.
解决:yum install -y libjpeg-devel
错误:configure: error: png.h not found.
解决:yum install -y libpng libpng-devel
错误:configure: error:freetype.h not found.
解决:yum install -y freetype freetype-devel
错误:configure: error: mcrypt.h not found. Please reinstall libmcrypt.
解决:rpm -ivh http://www.lishiming.net/data/attachment/forum/month_1211/epel-release-6-7.noarch.rpm
yum install -y libmcrypt-devel
错误:make: *** [ext/fileinfo/libmagic/apprentice.lo] Error 1
这是由于内存小于1G所导致. 在./configure加上选项:
解决:--disable-fileinfo
错误:Disable fileinfo support 禁用 fileinfo
需重新编译
错误:make: *** [libphp5.la] Error 1
解决:yum -y install libtool libtool-ltdl-devel
安装完后直接make
![]()
vim /usr/local/apache2/conf/httpd.conf

AddType application/x-httpd-php .php
![]()
DirectoryIndex index.php index.html index.htm
![]()
ServerName localhost:80
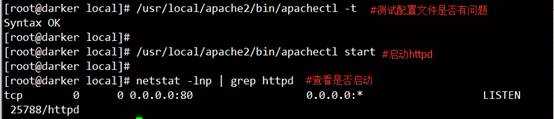
/usr/local/apache2/bin/apachectl -t 测试配置文件
/usr/local/apache2/bin/apachectl start 启动httpd
需要用到软件:
nagios-4.0.8.tar.gz
nagios-plugins-2.0.3.tar.gz
nrpe-2.15.tar.gz
yum install -y gcc glibc glibc-common gd gd-devel xinetd openssl-devel
安装nagios需要这个基础支持套件
useradd -s /sbin/nologin nagios 创建nagios用户,但不允许登陆
mkdir /usr/local/nagios 创建nagios目录
chown -R nagios.nagios /usr/local/nagios 给目录赋予属主或者属组
cd /usr/local/src 进入源码包
tar -xf nagios-4.0.8.tar.gz 解压
cd nagios-4.0.8 进入目录
./configure --prefix=/usr/local/nagios/ \
--with-nagios-user=nagios \
--with-nagios-group=nagios
make all 编译所有
make install 编译安装
make install-init 把nagios做成一个运行脚本,使nagios开机启动
make install-commandmode 把配置文件样例复制到nagios的安装目录
make install-config 给外部命令访问nagios配置文件的权限
chkconfig --add nagios 将nagios添加到系统服务
chkconfig --level 35 nagios on 设置3 5 开启
切换目录到安装路径(这里是/usr/local/nagios),看是否存在etc、bin、sbin、share、var 这五个目录,如果存在则可以表明程序被正确的安装到系统了。
Nagios 各个目录用途说明如下:
|
bin |
Nagios 可执行程序所在目录 |
|
etc |
Nagios 配置文件所在目录 |
|
sbin |
Nagios CGI 文件所在目录,也就是执行外部命令所需文件所在的目录 |
|
share |
Nagios网页文件所在的目录 |
|
libexec |
Nagios 外部插件所在目录 |
|
var |
Nagios 日志文件、lock 等文件所在的目录 |
|
var/archives |
Nagios 日志自动归档目录 |
|
var/rw |
用来存放外部命令文件的目录 |
cd /usr/local/src 进入源码包目录
tar -zxf nagios-plugins-2.0.3.tar.gz 解压plugins
cd nagios-plugins-2.0.3 进入plugins目录
./configure--prefix=/usr/local/nagios \
--with-nagios-user=nagios \
--with-nagios-group=nagios \
--with-mysql=/usr/local/mysql
make 编译
make install 编译安装
/usr/local/nagios/libexex/ 下是否有很多 check文件
有成功,无就重新安装
错误:./check_mysql: error while loading shared libraries: libmysqlclient.so.18
解决:ln -s /usr/local/mysql/lib/libmysqlclient.so.18 /usr/lib64/libmysqlclient.so.18
usermod -G nagios apache
把apache加入到nagios组,便于在通过web操作nagios时能够具有足够的权限
vim /usr/local/apache2/conf/httpd.conf 修改配置文件
添加配置信息
ScriptAlias /nagios/cgi-bin "/usr/local/nagios/sbin"
<Directory "/usr/local/nagios/sbin">
AuthType Basic
Options ExecCGI
AllowOverride None
Order allow,deny
Allow from all
AuthName "Nagios Access"
AuthUserFile /usr/local/nagios/etc/htpasswd
Require valid-user
</Directory>
Alias /nagios "/usr/local/nagios/share"
<Directory "/usr/local/nagios/share">
AuthType Basic
Options None
AllowOverride None
Order allow,deny
Allow from all
AuthName "nagios Access"
AuthUserFile /usr/local/nagios/etc/htpasswd
Require valid-user
</Directory>
/usr/local/apache2/bin/htpasswd -c /usr/local/nagios/etc/htpasswd nagiosadmin
提示输入密码:darker
确认密码:darker
yum install httpd yum安装Apache
安装 Nagios的web 配置文件到 Apache的conf.d目(/etc/httpd/conf.d):
在Nagios源码安装包里 make install-webconf
htpasswd -c /usr/local/nagios/etc/htpasswd.users nagiosadmin
创建访问Nagios Web页面的用户名和密码
在启动前先检测一下Apache
/usr/local/apache2/bin/apachectl -t 验证配置文件是否有错误
/usr/local/apache2/bin/apachectl graceful 重新加载修改后配置文件
在启动前先检测一下nagios
/usr/local/nagios/bin/nagios -v /usr/local/nagios/etc/nagios.cfg
如果最后显示如下,则说明配置没有问题了。
Total Warnings: 0
Total Errors: 0
service nagios start 启动nagios
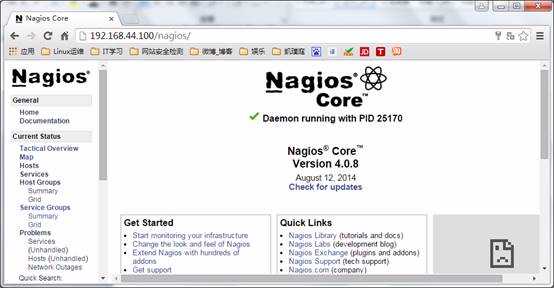
用户名:nagiosadmin
密码:darker
标签:auth 禁用 nagios 技术分享 x86_64 nagios安装 mem indent html
原文地址:http://www.cnblogs.com/xuliangwei/p/6337920.html