标签:lis ges 最简 ott 移除 form 1.5 enter animation
这里是官方文档:http://cn.vuejs.org/v2/guide/transitions.html
一、开始
结构如上一篇文章,我们在movie.vue中来写我们的第一个小过渡效果:
在movie.vue写入:
<template>
    <div id="movie">
        <button @click="showMenu" class="btn">{{text}}</button>
        <transition name="move">
            <div class="menu" v-show="show">
                <div class="inner inner-1">1</div>
            </div>
        </transition>
    </div>
</template>
<script>
    export default {
        data() {
            return {
                show: false
            };
        },
        methods: {
            showMenu() {
                this.show = !this.show;
            }
        },
        computed: {
            text() {
                return this.show ? ‘收‘ : ‘开‘;
            }
        }
    };
</script>
<style>
#movie{
    margin-top:10px;
}
.btn{
    position: fixed;
    top:60px;
    left:50%;
    z-index:10;
    width:50px;
    height:50px;
    line-height:50px;
    border-radius: 50%;
    border:none;
    outline:none;
    color:#fff;
    font-size:18px;
    background:orange;
}
.inner-1{
    display: inline-block;
    position:absolute;
    width:30px;
    height:30px;
    line-height:30px;
    border-radius:50%;
    background: red;
    text-align:center;
    color:#fff;
    transition:all 0.4s;
    left:-50px;
    top:20px;
}
.menu{
    position:fixed;
    top:60px;
    left:50%;
    width:50px;
    height:50px;
    border-radius:50%;
    transition:all 0.7s linear;
}
/*上面主要都是样式代码*/
.move-enter-active > .inner-1{
    transform: translate3d(0,0,0);
}
.move-enter > .inner-1,
.move-leave-active >.inner-1{
    transition-timing-function: ease-in-out ;
    transform:translate3d(60px,0,0) ;
}
</style>
再点开movie.vue,可以看到一个最简单的过渡效果:
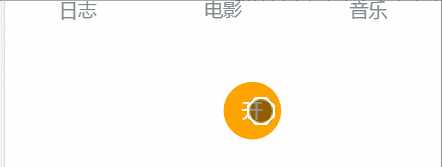
这里,我把enter和leave-active理解为起始状态,而enter-active理解为最终状态(这个过渡效果类似CSS3的animation)
其实也可以直接用CSS3的animation,只需要做如下修改
<template>
    <div id="movie">
        <div id="example-2">
            <button @click="showMenu" class="btn">{{text}}</button>
            <transition name="bounce">
                <p style="padding-left:50px" v-if="show">Look at me!</p>
</transition>
</div>
</div>
</template>
<script>
    export default {
        data() {
            return {
                show: false
            };
        },
        methods: {
            showMenu() {
                this.show = !this.show;
            }
        },
        computed: {
            text() {
                return this.show ? ‘逝‘ : ‘现‘;
            }
        }
    };
</script>
<style>
#movie{
    margin-top:10px;
}
.btn{
    position: fixed;
    top:60px;
    left:50%;
    z-index:10;
    width:50px;
    height:50px;
    line-height:50px;
    border-radius: 50%;
    border:none;
    outline:none;
    color:#fff;
    font-size:18px;
    background:orange;
}
.bounce-enter-active {
  animation: bounce-in 2s;
}
.bounce-leave-active {
  animation: bounce-out 2s;
}
@keyframes bounce-in {
  0% {
    transform: scale(0);
  }
  50% {
    transform: scale(1.5);
  }
  100% {
    transform: scale(1);
  }
}
@keyframes bounce-out {
  0% {
    transform: scale(1);
  }
  50% {
    transform: scale(1.5);
  }
  100% {
    transform: scale(0);
  }
}

</style>
运行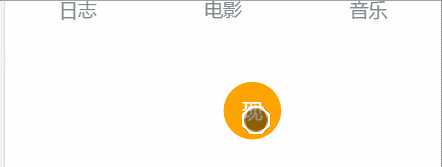
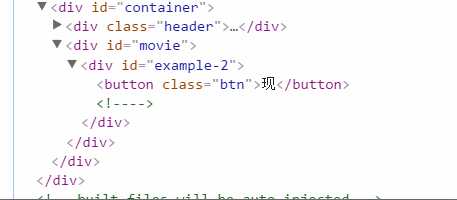
其实就vue帮你加了个class又帮你移除了
二、钩子函数的使用
钩子函数其实就是一个监听状态的手段,并执行相应的处理,每一个变化阶段的动作由一个函数决定
这里我们再修改下movie.vue
<template>
    <div id="movie">
        <div class="radio">
            <input type="radio" id="one" value="v-a" v-model="view">
            <label for="one">A</label>
            <input type="radio" id="two" value="v-b" v-model="view">
            <label for="two">B</label>
        </div>
        <div class="show">
            <transition name="component-fade" mode="out-in">
                <component v-bind:is="view"></component>
            </transition>
        </div>
    </div>
</template>
<script>
    export default {
        data() {
            return {
                view: ‘v-a‘,
                picked: ‘one‘
            };
        },
        components: {
            ‘v-a‘: {
                template: ‘<div>Component A</div>‘
            },
            ‘v-b‘: {
                template: ‘<div>Component B</div>‘
            }
        }
    };
</script>
<style>
#movie{
    margin-top:25px;
    width:100%;
    height:200px;
    display:flex;
    flex-direction: column;
    align-items: center;
}
.component-fade-enter-active .conpoment-fade-leave-active{
    opacity: 1;
    transition: all 0.5s ease;
}
.component-fade-enter, .component-fade-leave-active {
  opacity: 0;
}
</style>
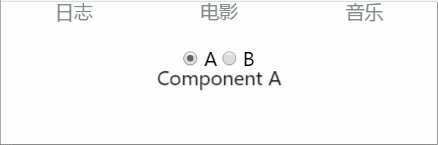
这样我们就可以在选择的数据变化时实现简单的过渡:
四、表单过渡(transition-group)
其实这个transition-group相当于给每一个元素添加一个transition,但需要指定唯一的标识key,看下代码:
<template>
    <div id="movie">
        <div id="list-demo" class="demo">
            <button v-on:click="add">Add</button>
            <transition-group name="list" tag="ul">
              // key值为item
                <li v-for="(item,index) in items" :key="item" class="list-item" @click="deleteShow(index)">{{ item.text }}
              // 给删除按钮再加个动画
                    <transition name="move">
                        <button class="deleteButton" v-show="item.show" @click="deleteItem(index)">删除</button>
                    </transition>
                </li>
            </transition-group>
        </div>
    </div>
</template>
看上面的代码,其实就是和普通的transition是差不多的,只需理解为给每一个元素添加一个transition就行了,再看看样式代码:<style>
#movie{
    margin-top:25px;
    width:100%;
    height:200px;
    display:flex;
    flex-direction: column;
    justify-content: flex-start;
    align-items: center;
    position:relative;
}
button{
    left:50%;
    margin-left:-50px;
    position:relative;
}
.deleteButton {
    position:absolute;
    width:50px;
    height:30px;
    bottom:0;
    left:300px;
}
.list-item {
  position:relative;
  display: inline-block;
  width:300px;
  height:30px;
  margin:5px 40px;
  background:lightgrey;
  transition: all 0.5s linear;
}
/*进入的初始状态*/
.list-enter, .list-leave-active {
    opacity:0;
    transform: translateX(-300px);
}
/*列表平滑过渡*/
/*离开的状态*/

 .list-leave-active {
     transform: translateX(-300px);
     position:absolute
}
.move-enter,.move-leave-active{
    transform: translate3d(50px,0,0);
    opacity: 0;
}
.move-enter-active,.move-leave-active{
    opacity: 1;
    transition: all 0.2s linear;
}
</style>
看下结果,实现了一个最简单<transition-group>:

最主要的是理解经历的状态以及状态的变化,添加相应的样式,就可以做出想要的效果了
标签:lis ges 最简 ott 移除 form 1.5 enter animation
原文地址:http://www.cnblogs.com/lastnigtic/p/6497671.html