标签:pre expected hub swa enables dem 参考 ndt awk


Introduction
When you are working, you have browsed information that is not relevant to your work, haven’t you?
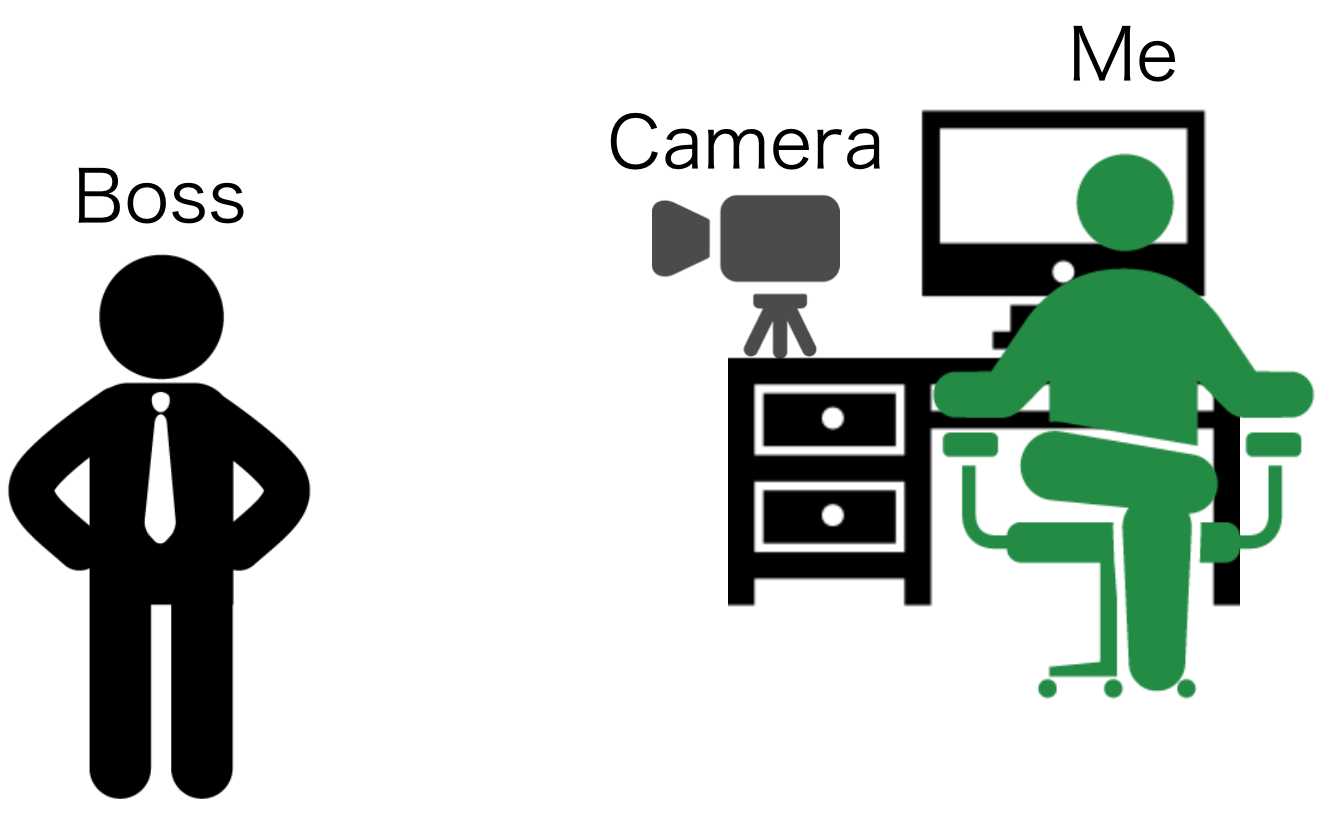
I feel awkward when my boss is creeping behind. Of course, I can switch the screen in a hurry, but such behavior is suspicious, and sometimes I don’t notice him. So, in order to switch the screen without being suspected, I create a system that automatically recognizes that he is approaching to me and hides the screen.
Specifically, Keras is used to implement neural network for learning his face, a web camera is used to recognize that he is approaching, and switching the screen.
Mission
The mission is to switch the screen automatically when my boss is approaching to me.
The situation is as follows:
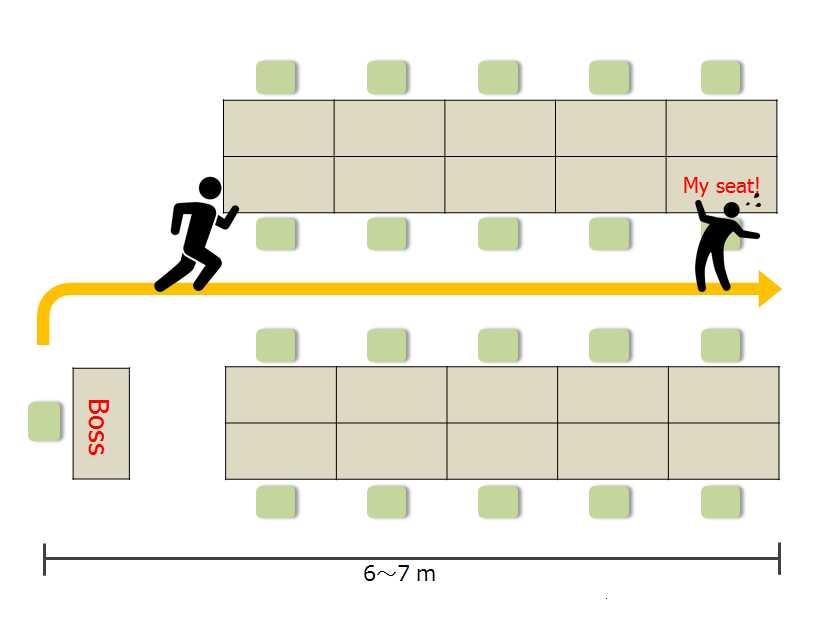
It is about 6 or 7 meters from his seat to my seat. He reaches my seat in 4 or 5 seconds after he leaves his seat. Therefore, it is necessary to hide the screen during this time. There’s not much time!
Strategy
Maybe you have various strategies, but my strategy is following.
First, let the computer learn the face of the boss with deep learning. Then, set up a web camera at my desk and switch the screen when the web camera captures his face. It’s a perfect strategy. Let’s call this wonderful system Boss Sensor.
System Architecture
The simple system architecture of the Boss Sensor is as follows.
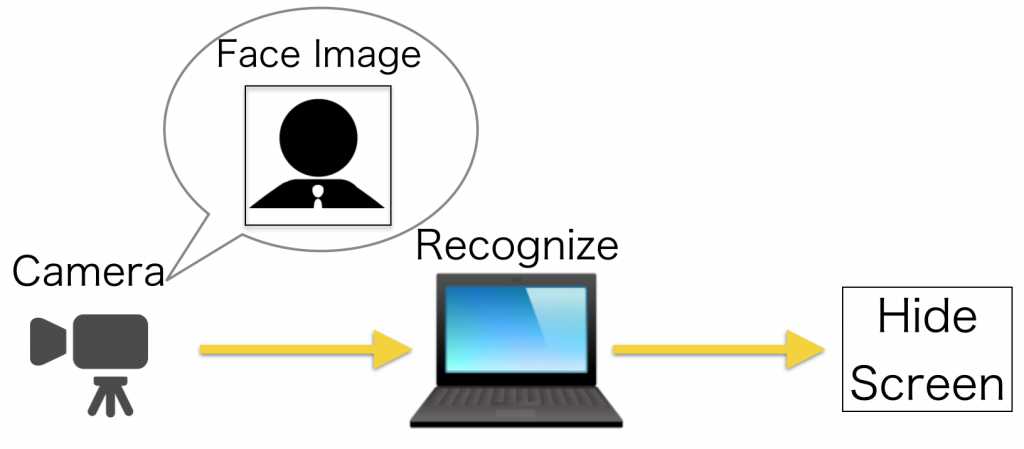
Web camera take an image in real time.
Learned model detect and recognize face for the taken image.
If the recognition result is my boss, switch screen.
The following techniques are required to do above:
Taking face image
Recognizing face image
Switching screen
Let’s verify one by one, then integrate at the end.
Taking Face Image
First of all, taking face image with webcam.
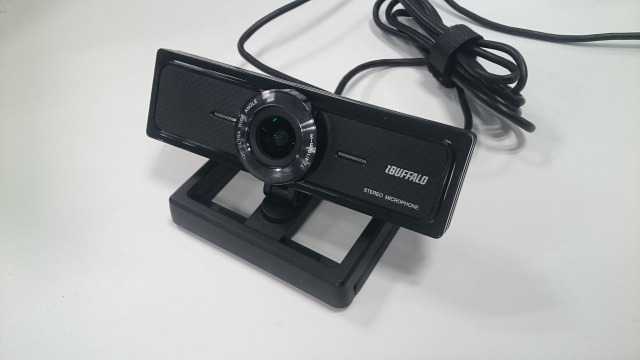
This time, I used BUFFALO BSW20KM11BK as webcam.
You can also take image from the camera with the included software, but it is better to be able to take from the program because of considering the processing afterwards. Also, since face recognition is done in the subsequent processing, it is necessary to cut out only the face image. So, I use Python and OpenCV to take face image. Here’s the code for that:
I was able to acquire a more clearly face image than I expected.

Recognizing Boss Face
Next, we use machine learning so that the computer can recognize the face of the boss.
We need the following three steps:
Collecting images
Preprocessing images
Building Machine Learning Model
Let’s take a look at these one by one.
Collecting Images
First of all, I need to collect a large number of images for learning. As a collection method, I used the following:
Google image search
Image collection on Facebook
Taking video
Initially, I collected images from Web search and Facebook, but enough images did not gather. So, I took video using a video camera and decomposed video into a large number of images.
Preprocessing Images
Well, I got a lot of images with faces, but the learning model can not be learned as it is. This is because the part not related to the face occupies a considerable part of the image. So we cut out only the face image.
I mainly used ImageMagick for extraction. You can get only face images by cutting out with ImageMagick.
A large number of face images gathered as follows:
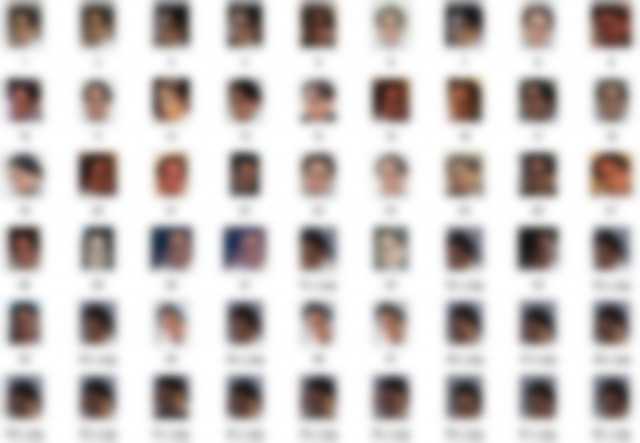
Perhaps I am the one who possesses the face image of the most boss in the world. I must have it more than his parents.
Now I’m ready for learning.
Building Machine Learning Model
Keras is used to build convolutional neural network(CNN) and CNN is trained. TensorFlow is used for Keras’s back end. If you only recognize the face, you can call the Web API for image recognition like Computer Vision API in Cognitive Services, but this time I decided to make it by myself considering real time nature.
The network has the following architecture. Keras is convenient because it can output the architecture easily.
____________________________________________________________________________________________________
Layer (type)                     Output Shape          Param #     Connected to
====================================================================================================
convolution2d_1 (Convolution2D)  (None, 32, 64, 64)    896         convolution2d_input_1[0][0]
____________________________________________________________________________________________________
activation_1 (Activation)        (None, 32, 64, 64)    0           convolution2d_1[0][0]
____________________________________________________________________________________________________
convolution2d_2 (Convolution2D)  (None, 32, 62, 62)    9248        activation_1[0][0]
____________________________________________________________________________________________________
activation_2 (Activation)        (None, 32, 62, 62)    0           convolution2d_2[0][0]
____________________________________________________________________________________________________
maxpooling2d_1 (MaxPooling2D)    (None, 32, 31, 31)    0           activation_2[0][0]
____________________________________________________________________________________________________
dropout_1 (Dropout)              (None, 32, 31, 31)    0           maxpooling2d_1[0][0]
____________________________________________________________________________________________________
convolution2d_3 (Convolution2D)  (None, 64, 31, 31)    18496       dropout_1[0][0]
____________________________________________________________________________________________________
activation_3 (Activation)        (None, 64, 31, 31)    0           convolution2d_3[0][0]
____________________________________________________________________________________________________
convolution2d_4 (Convolution2D)  (None, 64, 29, 29)    36928       activation_3[0][0]
____________________________________________________________________________________________________
activation_4 (Activation)        (None, 64, 29, 29)    0           convolution2d_4[0][0]
____________________________________________________________________________________________________
maxpooling2d_2 (MaxPooling2D)    (None, 64, 14, 14)    0           activation_4[0][0]
____________________________________________________________________________________________________
dropout_2 (Dropout)              (None, 64, 14, 14)    0           maxpooling2d_2[0][0]
____________________________________________________________________________________________________
flatten_1 (Flatten)              (None, 12544)         0           dropout_2[0][0]
____________________________________________________________________________________________________
dense_1 (Dense)                  (None, 512)           6423040     flatten_1[0][0]
____________________________________________________________________________________________________
activation_5 (Activation)        (None, 512)           0           dense_1[0][0]
____________________________________________________________________________________________________
dropout_3 (Dropout)              (None, 512)           0           activation_5[0][0]
____________________________________________________________________________________________________
dense_2 (Dense)                  (None, 2)             1026        dropout_3[0][0]
____________________________________________________________________________________________________
activation_6 (Activation)        (None, 2)             0           dense_2[0][0]
====================================================================================================
Total params: 6489634
The code is here:
So far, I can recognize the boss when he appears on the camera.
Now, when learned model recognize the face of the boss, I need to change the screen. In this time, let’s display the image to pretend to work.
I am a programmer so I prepared the following image.
I only display this image.
Since I want to display the image in full screen, I use PyQt. Here’s the code for that:
Now, everything is ready.
Once we integrate the technologies we have verified, we are done. I actually tried it.
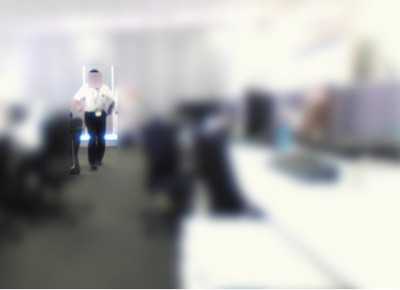
“My boss left his seat and he was approaching to my seat.”
“OpenCV has detected the face and input the image into the learned model.”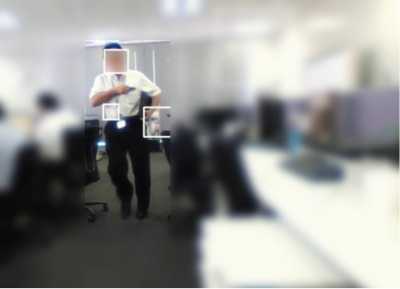
“The screen has switched by recognizing him! ヽ(‘ ∇‘ )ノ ???”
You can download Boss Sensor from following link:
Your star encourage me m(_ _)m
In this time, I combined the real-time image acquisition from Web camera with face recognition using Keras to recognize my boss and hide the screen.
Currently, I detect the face with OpenCV, but since the accuracy of face detection in OpenCV seems not good, I’d like to try using Dlib to improve the accuracy. Also I would like to use my own trained face detection model.
Since the recognition accuracy of the image acquired from the Web camera is not good, I would like to improve it.
If you like this article, please retweet or share.↓
http://ahogrammer.com/2016/11/15/deep-learning-enables-you-to-hide-screen-when-your-boss-is-approaching/
Deep Learning Enables You to Hide Screen when Your Boss is Approaching
标签:pre expected hub swa enables dem 参考 ndt awk
原文地址:http://www.cnblogs.com/softidea/p/6822607.html